

Today I'm excited to share with you a tutorial for my
Cutie Pie Flowers:)
The flower part is made using the
leftover circles that we trimmed
from our pie blocks!

If you are
just tuning in...the
just ended a few weeks ago.

We used

along with the

To make these
Pie Blocks for the quilt.

We trimmed out a circle
from the center like this...

So that our
Pie Blocks would be
ready to fill with
the different fruits made with the

We ended up with these
cute mini pie leftovers
and I promised that
I would make
something with them.
We all love leftover pie...
Today is part one
of that tutorial:)
YaY!

Grab your stack of
Mini Pie's and
let's get started!

***NOTE***
This project takes 13 blocks.
I have 13 mini pies
because I made an extra
Sweetie Pie Block
and made it into a
pillow for my kitchen:)
I know a lot of you
have done the same thing too...
because I saw them on
Instagram:)
If you just made the
required 12 pies for the
Sweetie Pie Quilt
and want to have 13 too...
you can whip up
an extra using your
leftover pie slices
just like we did!

We will be using the
C-14 Sew Simple Shape
from the
to make the flower tops:)

Cut your
6 1/2" square.
Cut one for each flower:)
Trace around your Sew Simple Shape...

And then take it one step further
by drawing lines out from
all four center marks like this.
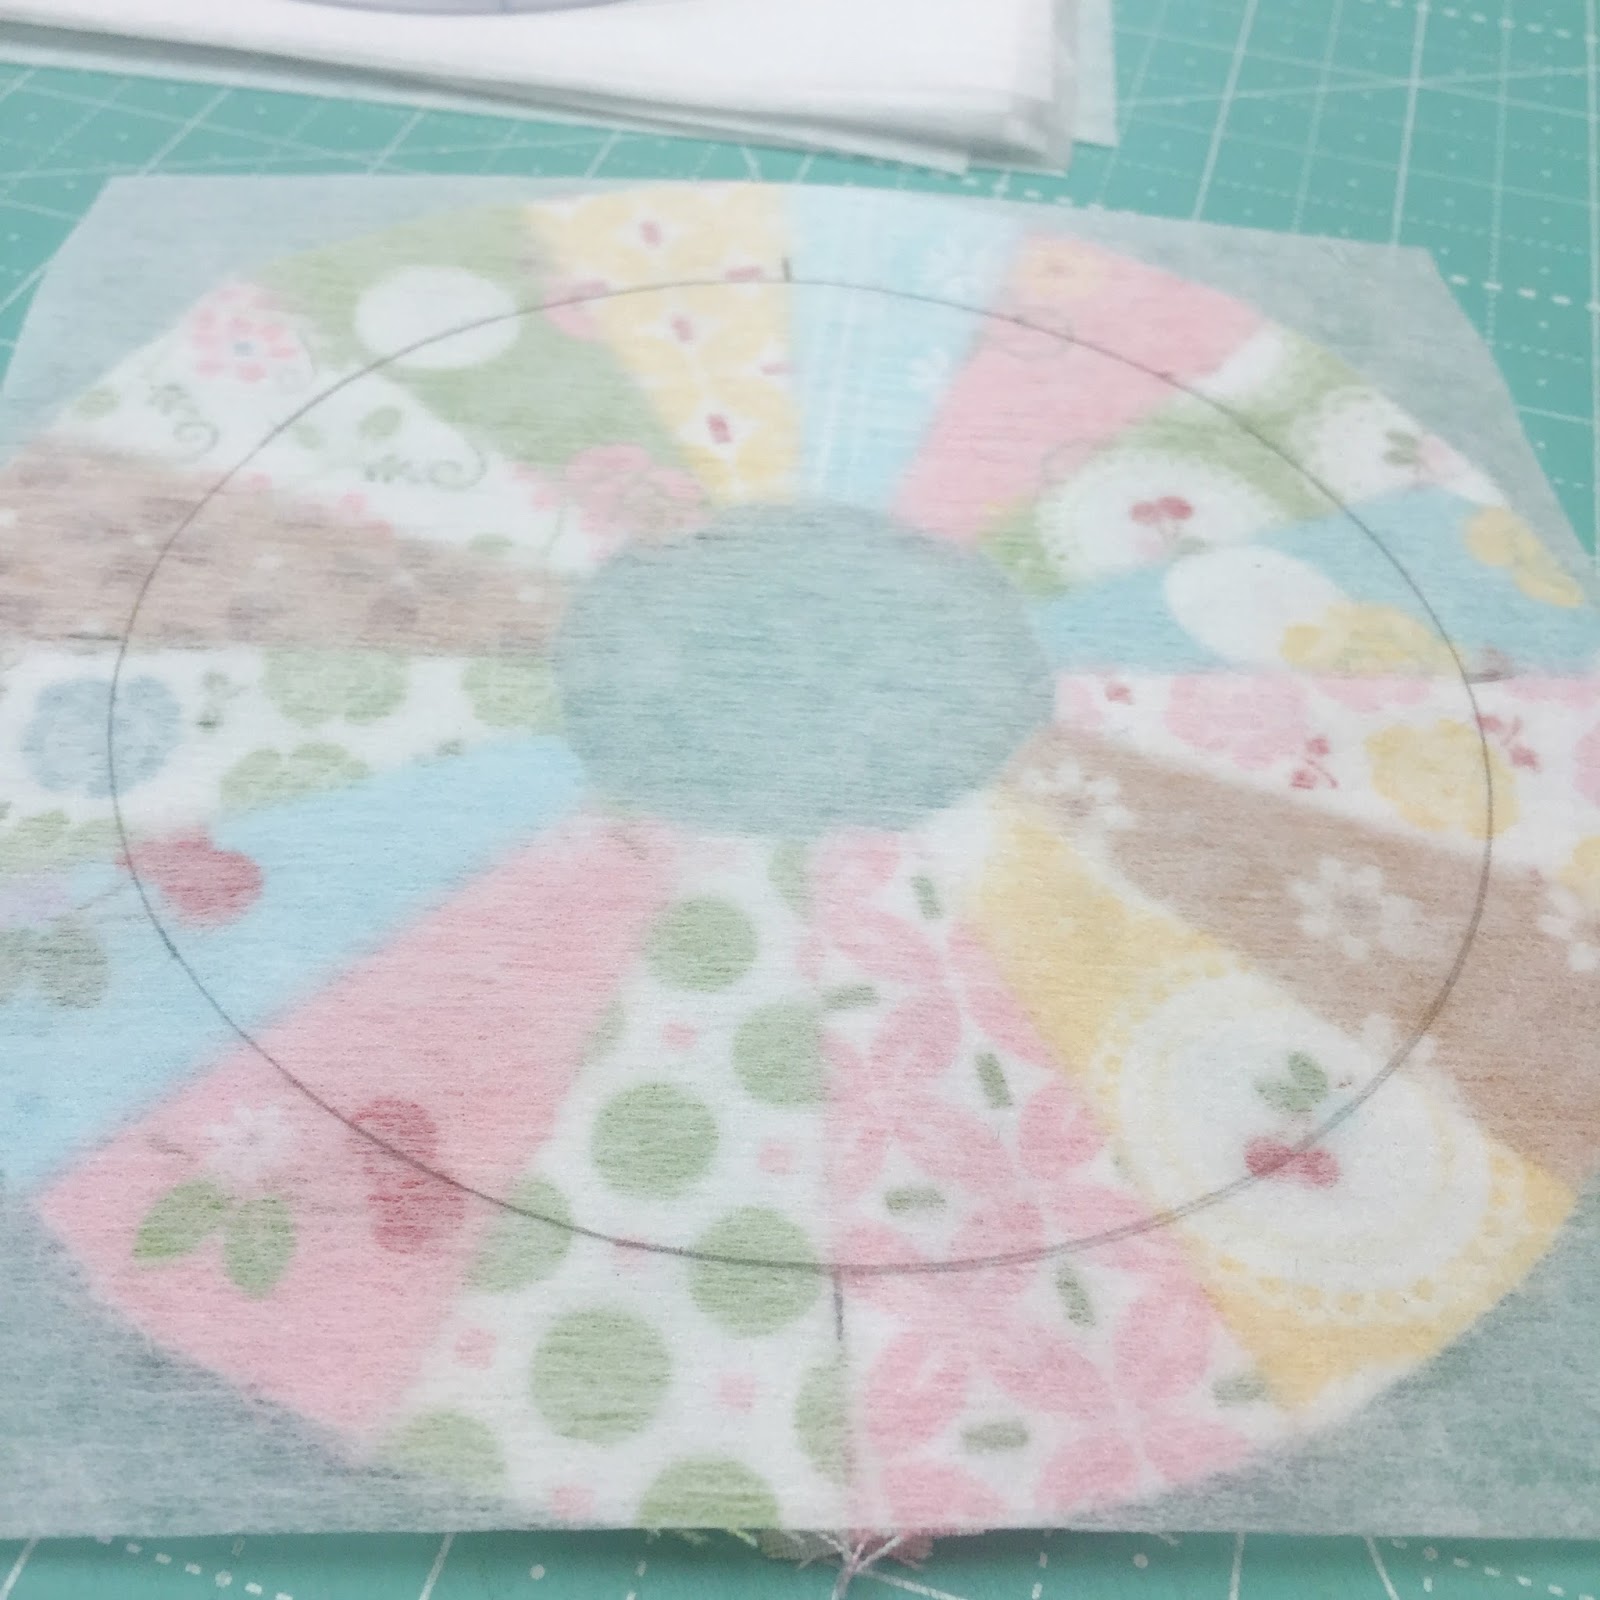
Those marked lines will
come in handy when
placed onto the seams of your
Mini Pie block
so that your circle
is exactly centered like this.
Pin into place...

And stitch directly
onto your marked lines.

Stitch all the way around and
overstitch about an inch past where you started.

Trim an approximate 1/4" seam allowance.

And turn your flower top
right side out
through the opening
that is already there!
Be gentle so that you
don't pull out your seams.

Shape until it's a
nice smooth circle...
then press:)

Like this.

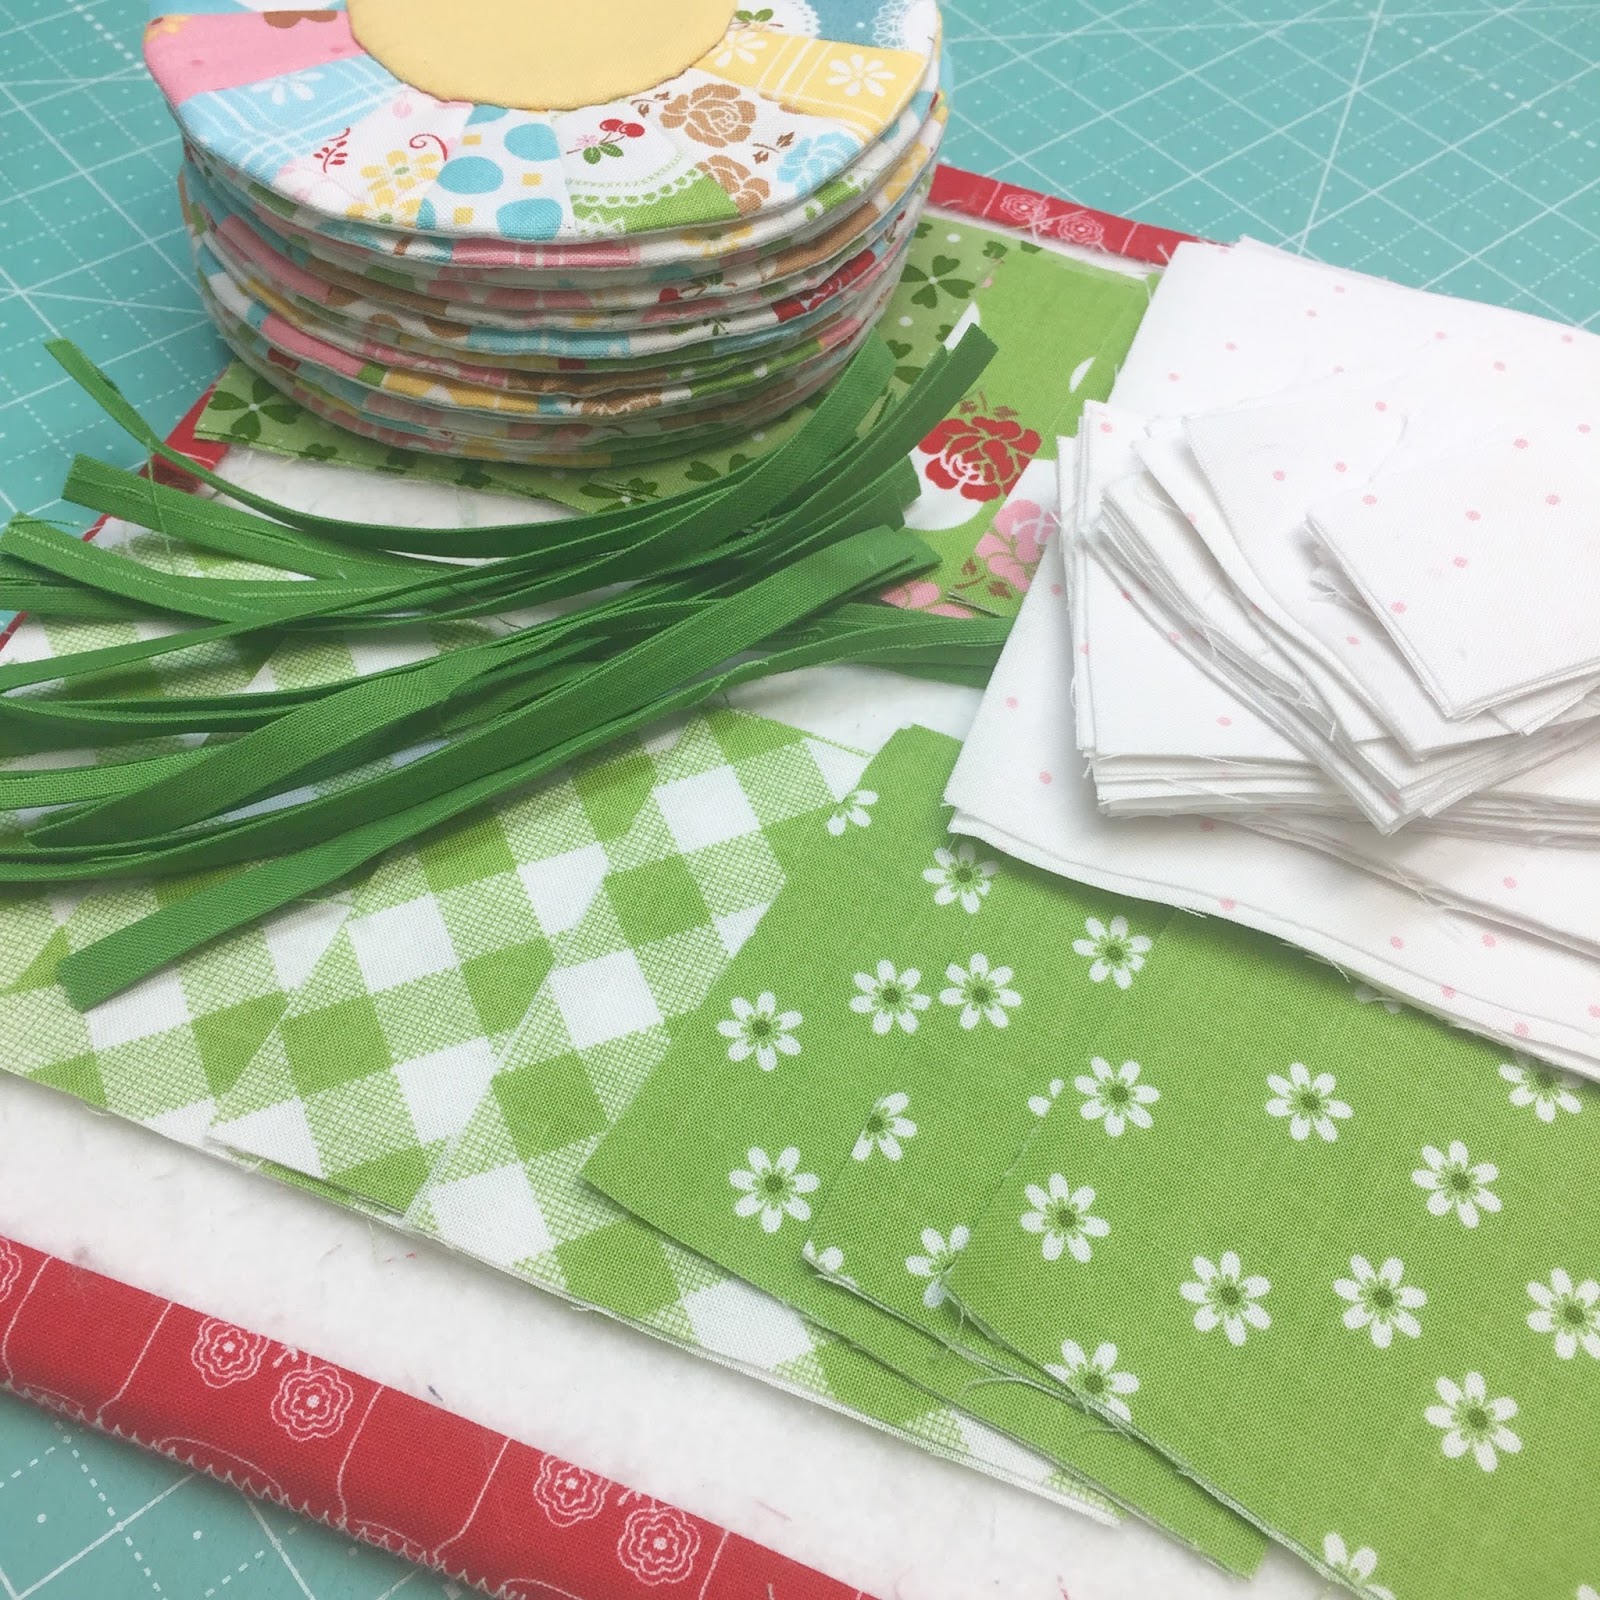
Repeat until you have all 13:)

Now for the centers.
The C-3 template will work
but it's a little tight ...

So I used the A-2 Circle from my
set because it's just a little larger.

Cut your
Sew-In Interfacing
3" x 3" square for these...

And your solid fabric
squares the same size.

Trace and sew!

Press...

and trim:)

Cut an X in the interfacing...

Turn...shape and press.

I used my ruler to make sure
that the circle was
centered before appliquéing.
The edge of the circle
should be 1 1/4" from
the edge of the flower...

All the way around.

I used the
to appliqué the centers
onto my flowers.
Pin or glue baste...

To prepare for applique!

You can appliqué by
hand or by machine...
either way it's easy peasy!

When your flower centers
are appliqued...
take a cute picture and post it on
so that we can all see it!
Use the hashtag
#CutiePieFlowerBlock

I decided to use this
pink pin dots
background print
from my
Sew Cherry 2 collection:)
I used about a yard.

Cutting for all 13 blocks:
13 - 5 1/2" squares
13 - 3 1/2" squares
26 - 2 1/2" x 3 1/2" rectangles
26 - 2 1/2" squares
26 - 1 1/2" squares

Now for the leaves!
Each leaf is cut 3 1/2" square
but you will need to cut them
in matching sets of two.
Cut 13 sets:)

For the stems I used a
1/4" bias tape maker
and prepared the stems just like
I showed you a while back.
to see that tutorial.
Cut the fabric strips 5/8" wide
before running them
through the bias tape maker:)

You will need 13 stems
that measure 6" long:)
YaY!
Now let's
get started on the blocks:)

First up is the leaves.
You will also need the
2 1/2" and 1 1/2"
background squares.

Sew an easy corner triangle
onto one corner of each leaf.
If you use the
you won't have to
mark the squares!

Now sew a 1 1/2"
easy corner triangle
onto the opposite corners.

Press to set the seams...
and then
trim an approximate
1/4" seam allowance.

Press the seams toward the triangles.

YaY!
You're leaves are completed:)
Now let's sew a block!

Step one...

Step two...

Step three...

Step four...easy peasy!
Your block should measure
8 1/2" square at this point:)

Draw a line diagonally
from corner to corner
on the 3 1/2" square.
You will use this as a
placement guide for your stem.

Pin or glue baste
the stems for appliqué.
I like to use this
glue made by the amazing
Sue Daley!
if you need some:)

When you pin or baste the flower...
place it just above the
top of the leaves like this.

Make sure that one
of the pie slices are
centered over the stem like this:)

Glue or pin the
remaining 12 blocks...

And applique!
Again...
you can appliqué
by hand or by machine.
"You're the boss
of you're own quilt!"

Five finished...
8 more to go!

#CutiePieFlowerBlock
I hope you love how these
turned out as much as I do:)
This week I'll be
putting them together
in a fun quilt...
and that tutorial
will be coming up
next Monday so stay tuned!
xx
Lori

11 comments:
Just darling! I fell way behind on the Sweetie Pie sew along but the goodness news is that I have all the fabric, simple shapes and pie ruler... So I am set to go! This little project gives me two cute quilts for the price of one!
Love these Lori!! You are so creative - love how you put these together!
MERCI MERCI
Your tutorial is FANTASTIQUE. Very clear not complicated. You have done for all of us a beautiful work. Now, time an patience and let's get to work.
Merci
Montréal-Yolande
Well those are just as cute as can be. Great tutorial!
You make the cutest things
Oh I just love this!! I am making the Sew Cherry quilt for one of two twin beds in my spare room. I was trying to figure out a quilt for the other bed using the same fabrics but now.....Voila!! It is perfect! Thank you!!
This is just fantastic.Great tutorial.Thanks!
Thank u for teaching us it's lovely
So cute. Thank you for the great tutorial.
I just looked thru your tutorial and want to congratulate you on a job VERY well done. It is done so well, and if only I could find the time to make one? It would be on the top of my 'to do' list. Thank you for making this so amazing.
Judi M
Knox, IN
Trish B.well done Lori ! You installation are easy to follow , and thanks for adding the pictures they are very helpful
Post a Comment