

"CROSS STITCH BLOCKS"

"Three, Four and Five QUILT BLOCKS"

Welcome to week six of the
"MY HAPPY PLACE"
Sew Along!
Join me here each week
when I will be doing tutorials
on the blocks for the quilt.
I will be posting each Monday
right here on my blog
and you can follow my tutorials
any time during the week that
is convenient for you.

For this sew along...
We are making the
My Happy Place Quilt
74" x 88"
I've been sew excited to begin...
This is going to be fun!!

The quilt is made with my newest fabric
collection called STITCH...


I am having a lot of fun
with all of the prints in the kit
and I hope that you are as well:)

As all of my
Sew Simple Shapes Sew Alongs go...
We are using the shapes
for the pattern of this quilt
and of course the Sew Along Guide and my tutorials each week.
The set of shapes that we are
using for this quilt are called
MY HAPPY PLACE
I have already posted the
post which details all of the supplies
for the sew along and how it works.
I have also given the link there
for the free PDF Download
of the Sew Along Guide
to read that post.

As per the sew along guide
cutting instructions...hopefully
you were able to have
everything for this weeks blocks
all cut and ready to go.
This weeks tutorials
are here on my blog...

However I already did the tutorial
for block four on my YouTube Channel
And while you are sewing
Quilt Blocks Three and Five
You will probably want to refer
back to my YouTube Tutorial
as well for some of the segments that
are the same and for a refresher
on exactly how I piece my blocks..
to watch it again if needed:)
Take note that just like blocks
One, Two and Four...
Quilt Blocks Three and Five
will measure 8 1/2" UNFINISHED
and will measure 8" square
once they are sewn into your quilt.
Okie Dokie...
now let's get started!

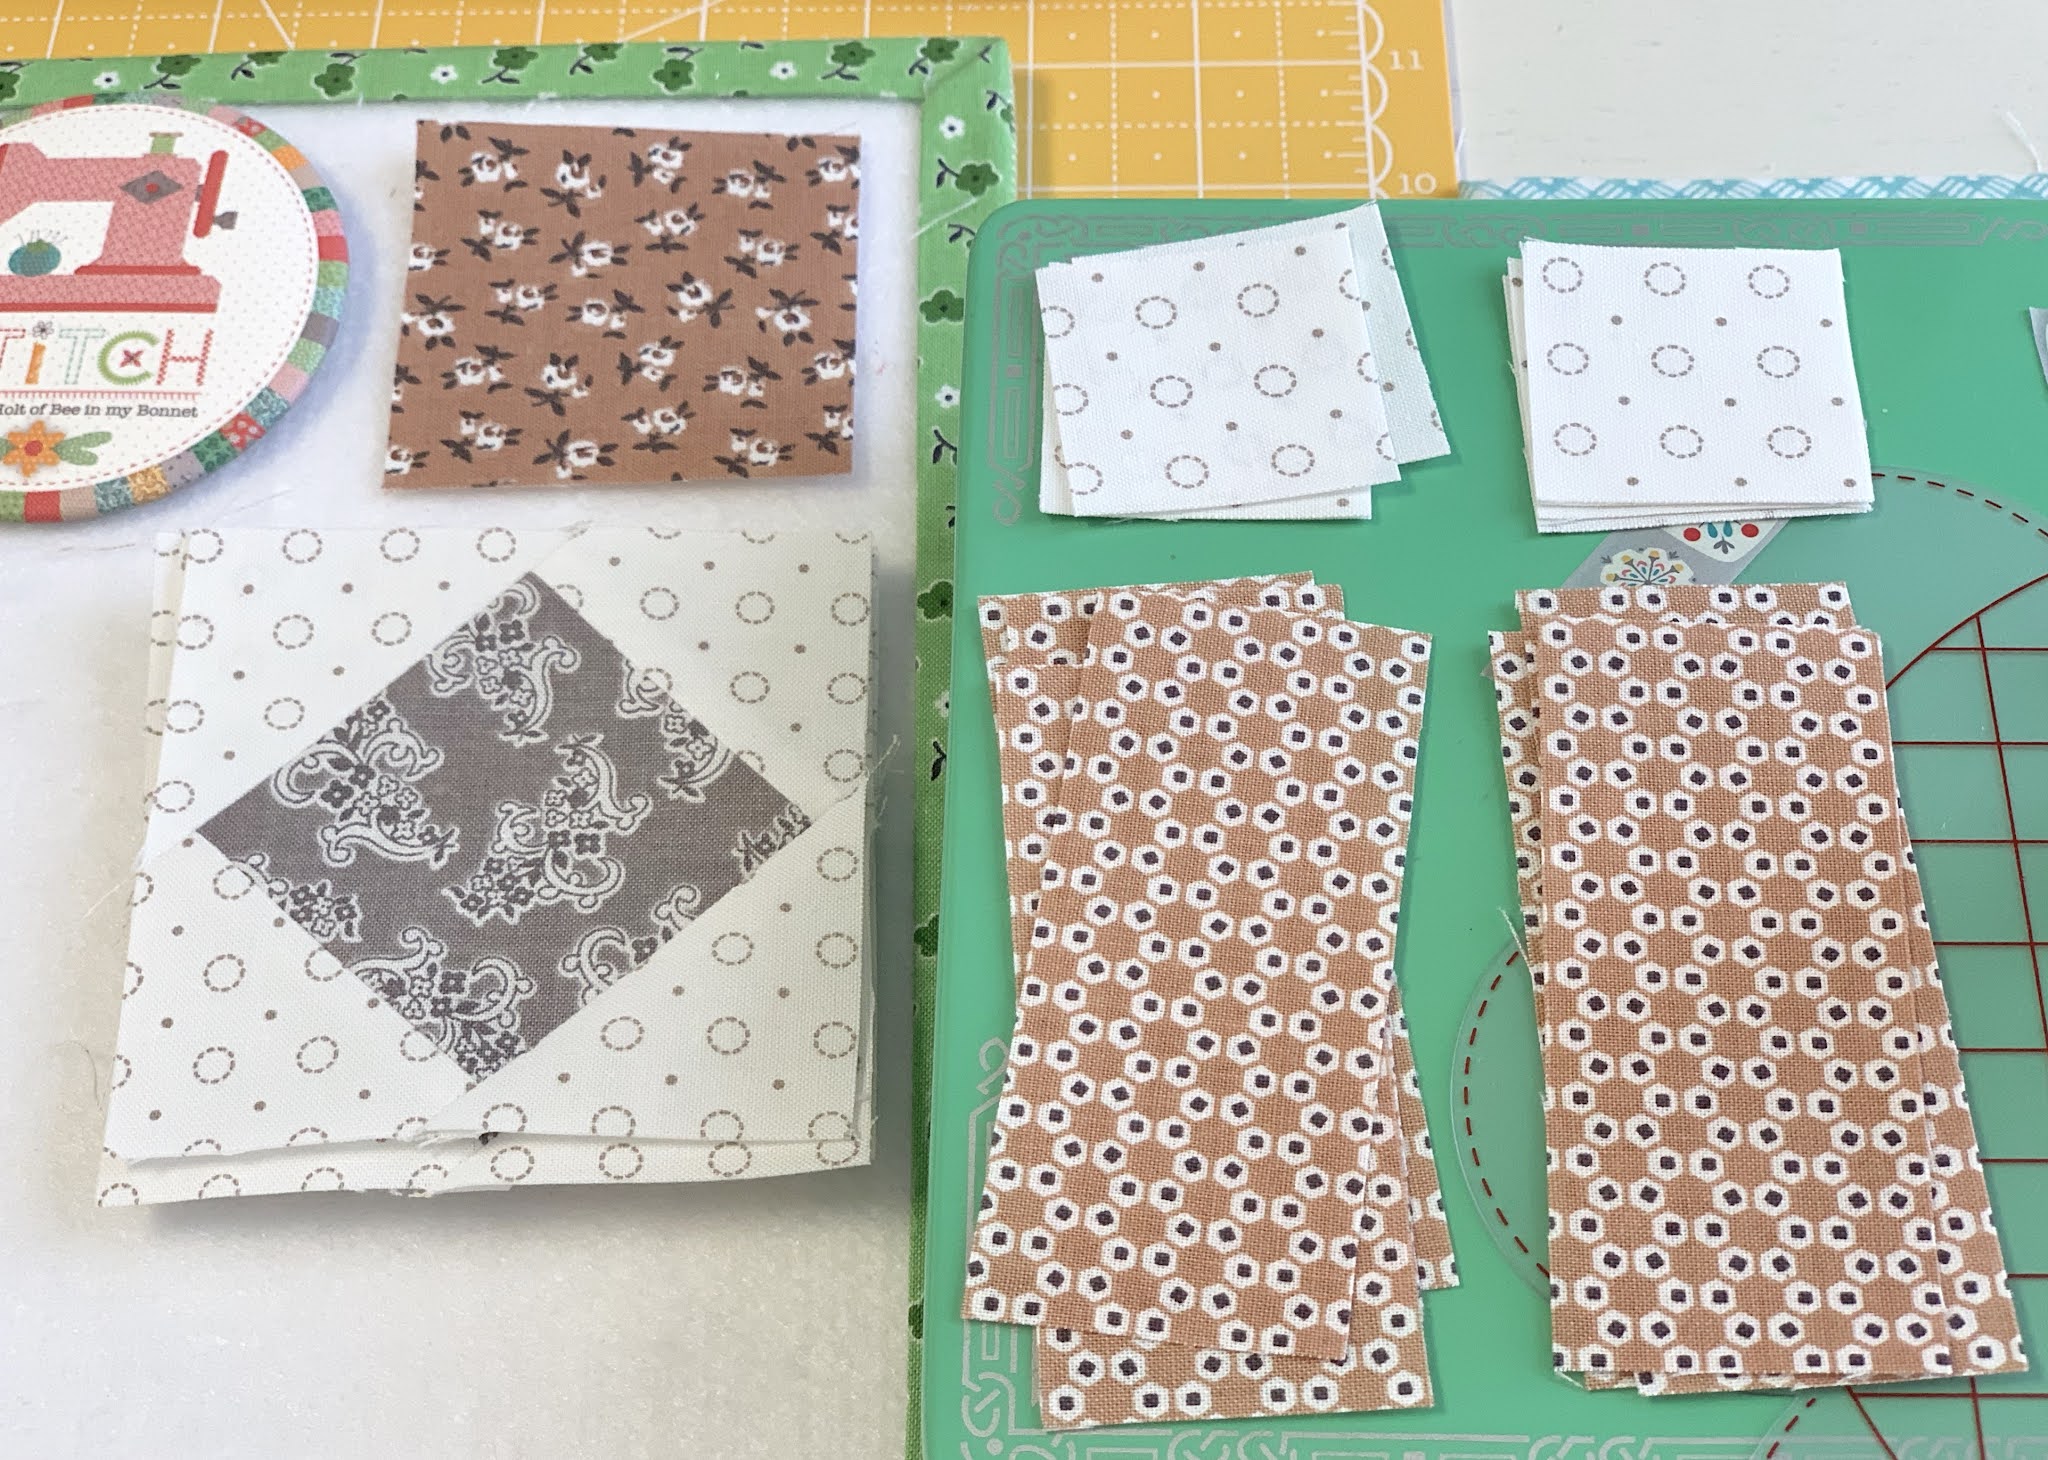
Here are all of the pieces for
block 3 at my sewing machine:)

First step is to make
4 square in a squares
just like I showed you in the
video for blocks one and two:)
Each one should measure
3 1/2" square and
I pressed my seams open.
Now add the easy corner triangles
onto the top of the 8 strips.
Take note to split them into
two sets of four and sew
them in opposite directions.


Trim...

And press open.

Lay everything out on your design board
and sew them together ...

Like this!
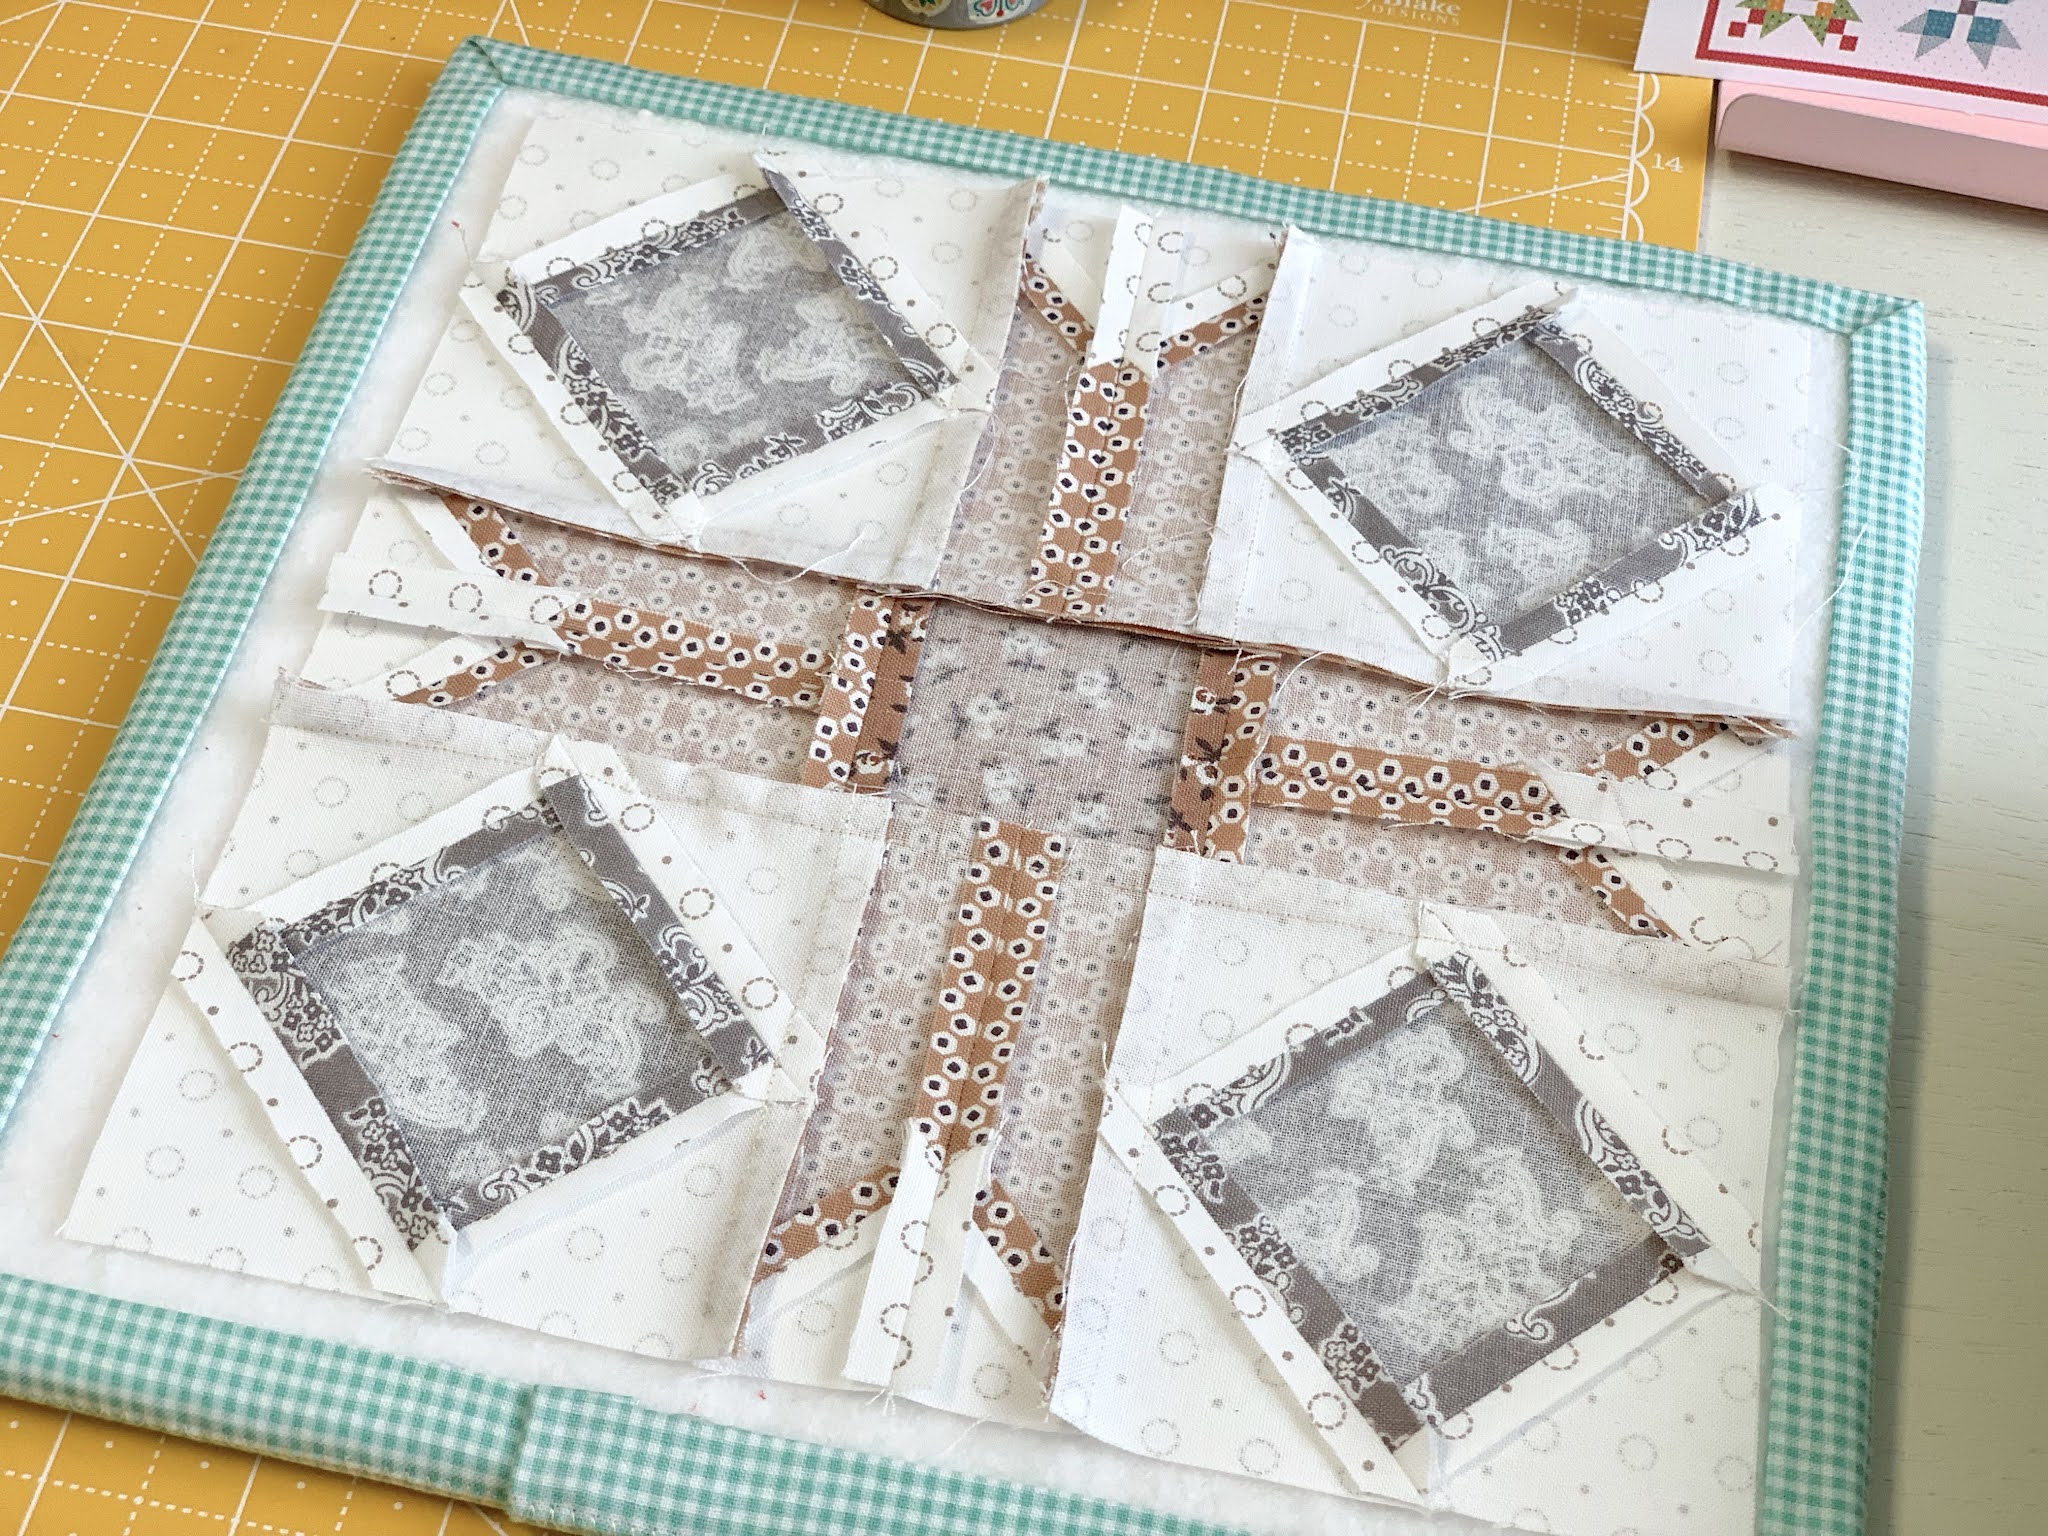
Back of my block:)

STITCH QUILT BLOCK THREE

Let's move onto Block Five

Start by making
4 - Four patch segments like this.
I pressed my seams open.

Now add 2 easy corner triangles
onto each four patch...


Like this!
I pressed towards
the triangles on these:)

Lay them out like a 9-patch

And sew them together.

Back of my block:)


Sew Simple Shapes
for the Cross Stitch Block
you will need:
1 - L1
1 - L2
You will of course need to
have your fabrics cut
per the sew along guide
and
You will need a 3/4"x 21"
strip cut for finished
3/8" straight bias strip
and
remember to use the gray
1/4" straight bias strip
that we had leftover.
You will need to
have your background cut:
14" x 14"
and you will trim it to
12 1/2" x 12 1/2"
AFTER
it is appliquéd:)

The 2 shapes needed for this block
are too large for binder pocket
so I showed you how to make a pocket
out of my new
STITCH Crafting Paper
in the video tutorial
for my Sewing Machine Block.
Easy Peasy...cute...handy and fun!!

I'm excited to let you know that
both the STITCH and MY HAPPY PLACE
Crafting Paper Pads
have arrived and are/have shipped
to your favorite quilt shop.
YaY!
Let the fun with these begin!
I'll be showing you
how I use my papers and
the clip art in the back:)
I am especially excited to use
it with my new
2022 Bee in my Bonnet Planner
which has also just arrived!

Okay let's get started
with the Cross Stitch Block...
and speaking of Cross Stitch
I thought this was the perfect time
to show you this fabric print
that I designed to match my
STITCH collection.
It's called Big Stitch and
It's a fun print with lots of possibilities!
And also...
one idea is if you do not know how to
cross stitch or are nervous about
doing it for this block ...
you could easily grab some of this print
and use it in the appliquéd hoop
instead of our cross stitch block.

The cross stitch chart for the flower
is in the sew along guide
as well as all of the colors.
I used three strands of my Aurifloss
and of course my embroidery needles:)

I put my fabric in an 8" hoop
and a Q-Snap would work too!

Each "X" on this fabric represents
one square on the chart in the guide...

And you will know which color
to use because of the colored chart.
It reminds me of the
pre-printed cross stitches
that I learned to stitch on
when I was a girl!

Simply do one X at a time...

Until you are finished:)
Take Note that...
Just like when cross stitching
on linen or aida...
you do not use a knot...
just weave the floss ends
behind your stitches so that
they will not show or come out.
This flower will also be fun to
stitch on gingham just like I did
in my Let's Bake Sew Along

Now you are ready to
sew your two circle shapes!
The larger circle goes on the
nutmeg fabric to use for the
hoop and the smaller will be
used for your cross spited piece:)
Run the 3/4" strip through
the 3/8" bias tape maker.

I cut all 3 of my straight bias strips
2 1/2" long and pressed the two
nutmeg ones in half and pressed
one end under of the
gray strip for the screw.
You will also use a small gray button
from the STITCH button bag
for the screw head.

Pin baste everything into place like this

Close up of the top detail:)
For some reason the button looks like
it has a white ring on top of it
but that is just the lighting LOL

From top to bottom it should
measure about 10 1/2" tall:)

I love this sweet
CROSS STITCH BLOCK!
After applique you will
trim it down to 12 1/2" square:)

Thank you all sew much
for sewing with me this week...
We are making amazing progress on our quilt...
next week we will do the big
APPLIQUE BLOCK
and I'll meet you right back here!
xx
Lori


"Bee in my Bonnet"
Vintage 1966

1 comment:
Having a great time with the Sew Along. The cross stitch block was fun to stitch. I ended up using a Frixion pen to mark in the X's, it helped me place the stitches correctly. Any remaining marks ironed off easily. Thanks for all that you do and love all of your videos too.
Post a Comment