

"APLIQUE BLOCK"

Welcome to week seven of the
"MY HAPPY PLACE"
Sew Along!
Join me here each week
when I will be doing tutorials
on the blocks for the quilt.
I will be posting each Monday
right here on my blog
and you can follow my tutorials
any time during the week that
is convenient for you.

For this sew along...
We are making the
My Happy Place Quilt
74" x 88"

The quilt is made with my newest fabric
collection called STITCH...


If you are just joining us
and need a fabric kit...
just do a quick google search
to find out which quilt shops
may have one left for you.
Simply type in
"My Happy Place Quilt Kit"
to find one!

As all of my
Sew Simple Shapes Sew Alongs go...
We are using the shapes
for the pattern of this quilt
and of course the Sew Along Guide and my tutorials each week.
The set of shapes that we are
using for this quilt are called
MY HAPPY PLACE
I have already posted the
post which details all of the supplies
for the sew along and how it works.
I have also given the link there
for the free PDF Download
of the Sew Along Guide
to read that post.

This week we are making the
Applique Block
and hopefully you already have
all of your pieces cut
as per the sew along guide:)

The Sew Simple Shapes
for the Applique Block
that you will need:
9 - L4
4 - L6
4 - L26
4 - L27
1 - L28
4 - L33
4 - L34
You will need the 5/8" wide strips
for the 1/4" bias tape maker
for the stems.
You will also need to
have your background cut:
22 1/2" x 22 1/2"
and you will trim it to
20 1/2" x 20 1/2"
AFTER
it is appliquéd:)

I started first by sewing the appliqués
that do not have seam allowances
that need to be clipped:)


All ready to go!!

Next I stitched the shapes that
have cleavage areas to clip:)

Remember that you only
need to clip just once...
right to your stitching line
but not into it of past it:)
If you do not clip all the way
to your stitching line...
you will have a hard time
getting it to lie flat.

I use my Quick Press Seam Roller
to help with that when pressing.

The last shapes for this block have both cleavage and inner curves to clip.

Here's a close up of
the inner curve clipping.

This is how I cut the
interfacing for these shapes:)

Turned and pressed!

Okay...
Now all of the shapes are pressed
and it's time to lay them out onto the background and glue baste:)

First thing that you will want to do
is to press your background fabric
in half both ways and
also diagonally both ways.
These pressed lines are important
to help you place your pieces
accurately and symetrically.
Also cut the first four stems 4" long:)

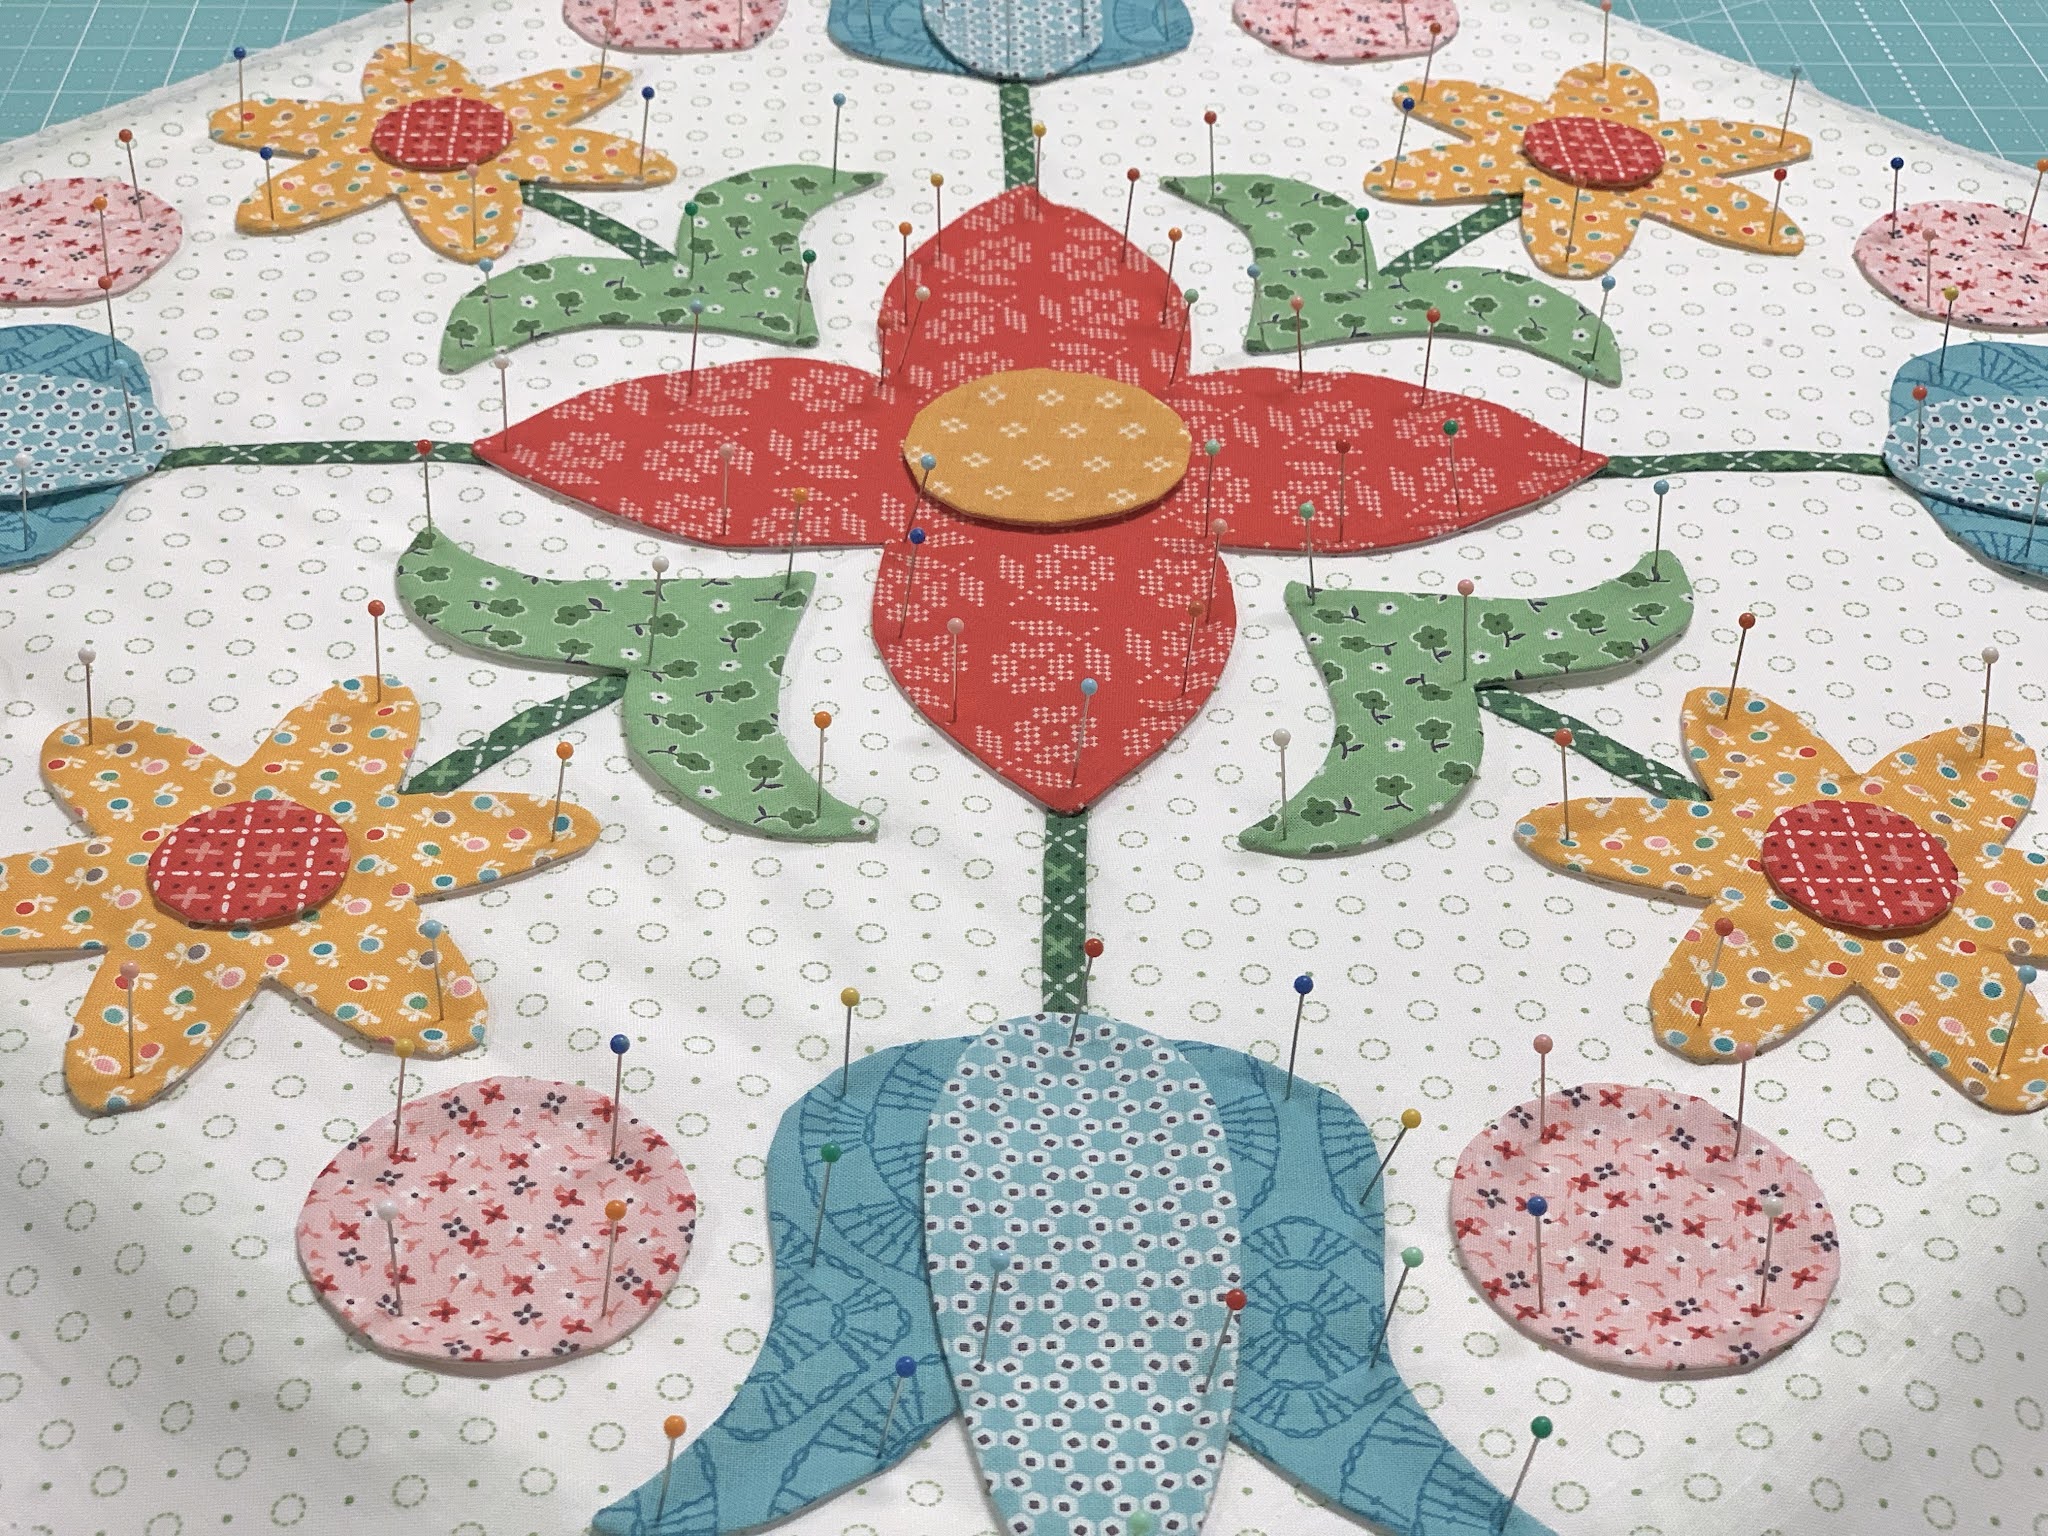
Place the center applique first
using your pressed lines
to center it perfectly.
Glue baste the stems onto
the diagonal pressed lines.

Now pin the tulips into place.
They should measure 2 1/4" from
the tip of the red center piece.

From bottom of tulip to
bottom of tulip should measure 13 1/2"

Now add the centers on the tulips.
From tip to tip of the tulip centers
it should measure no more than 23"

Looking good!!

Now cut the next set of stems
3" long and lets start
pinning the daisy flowers.
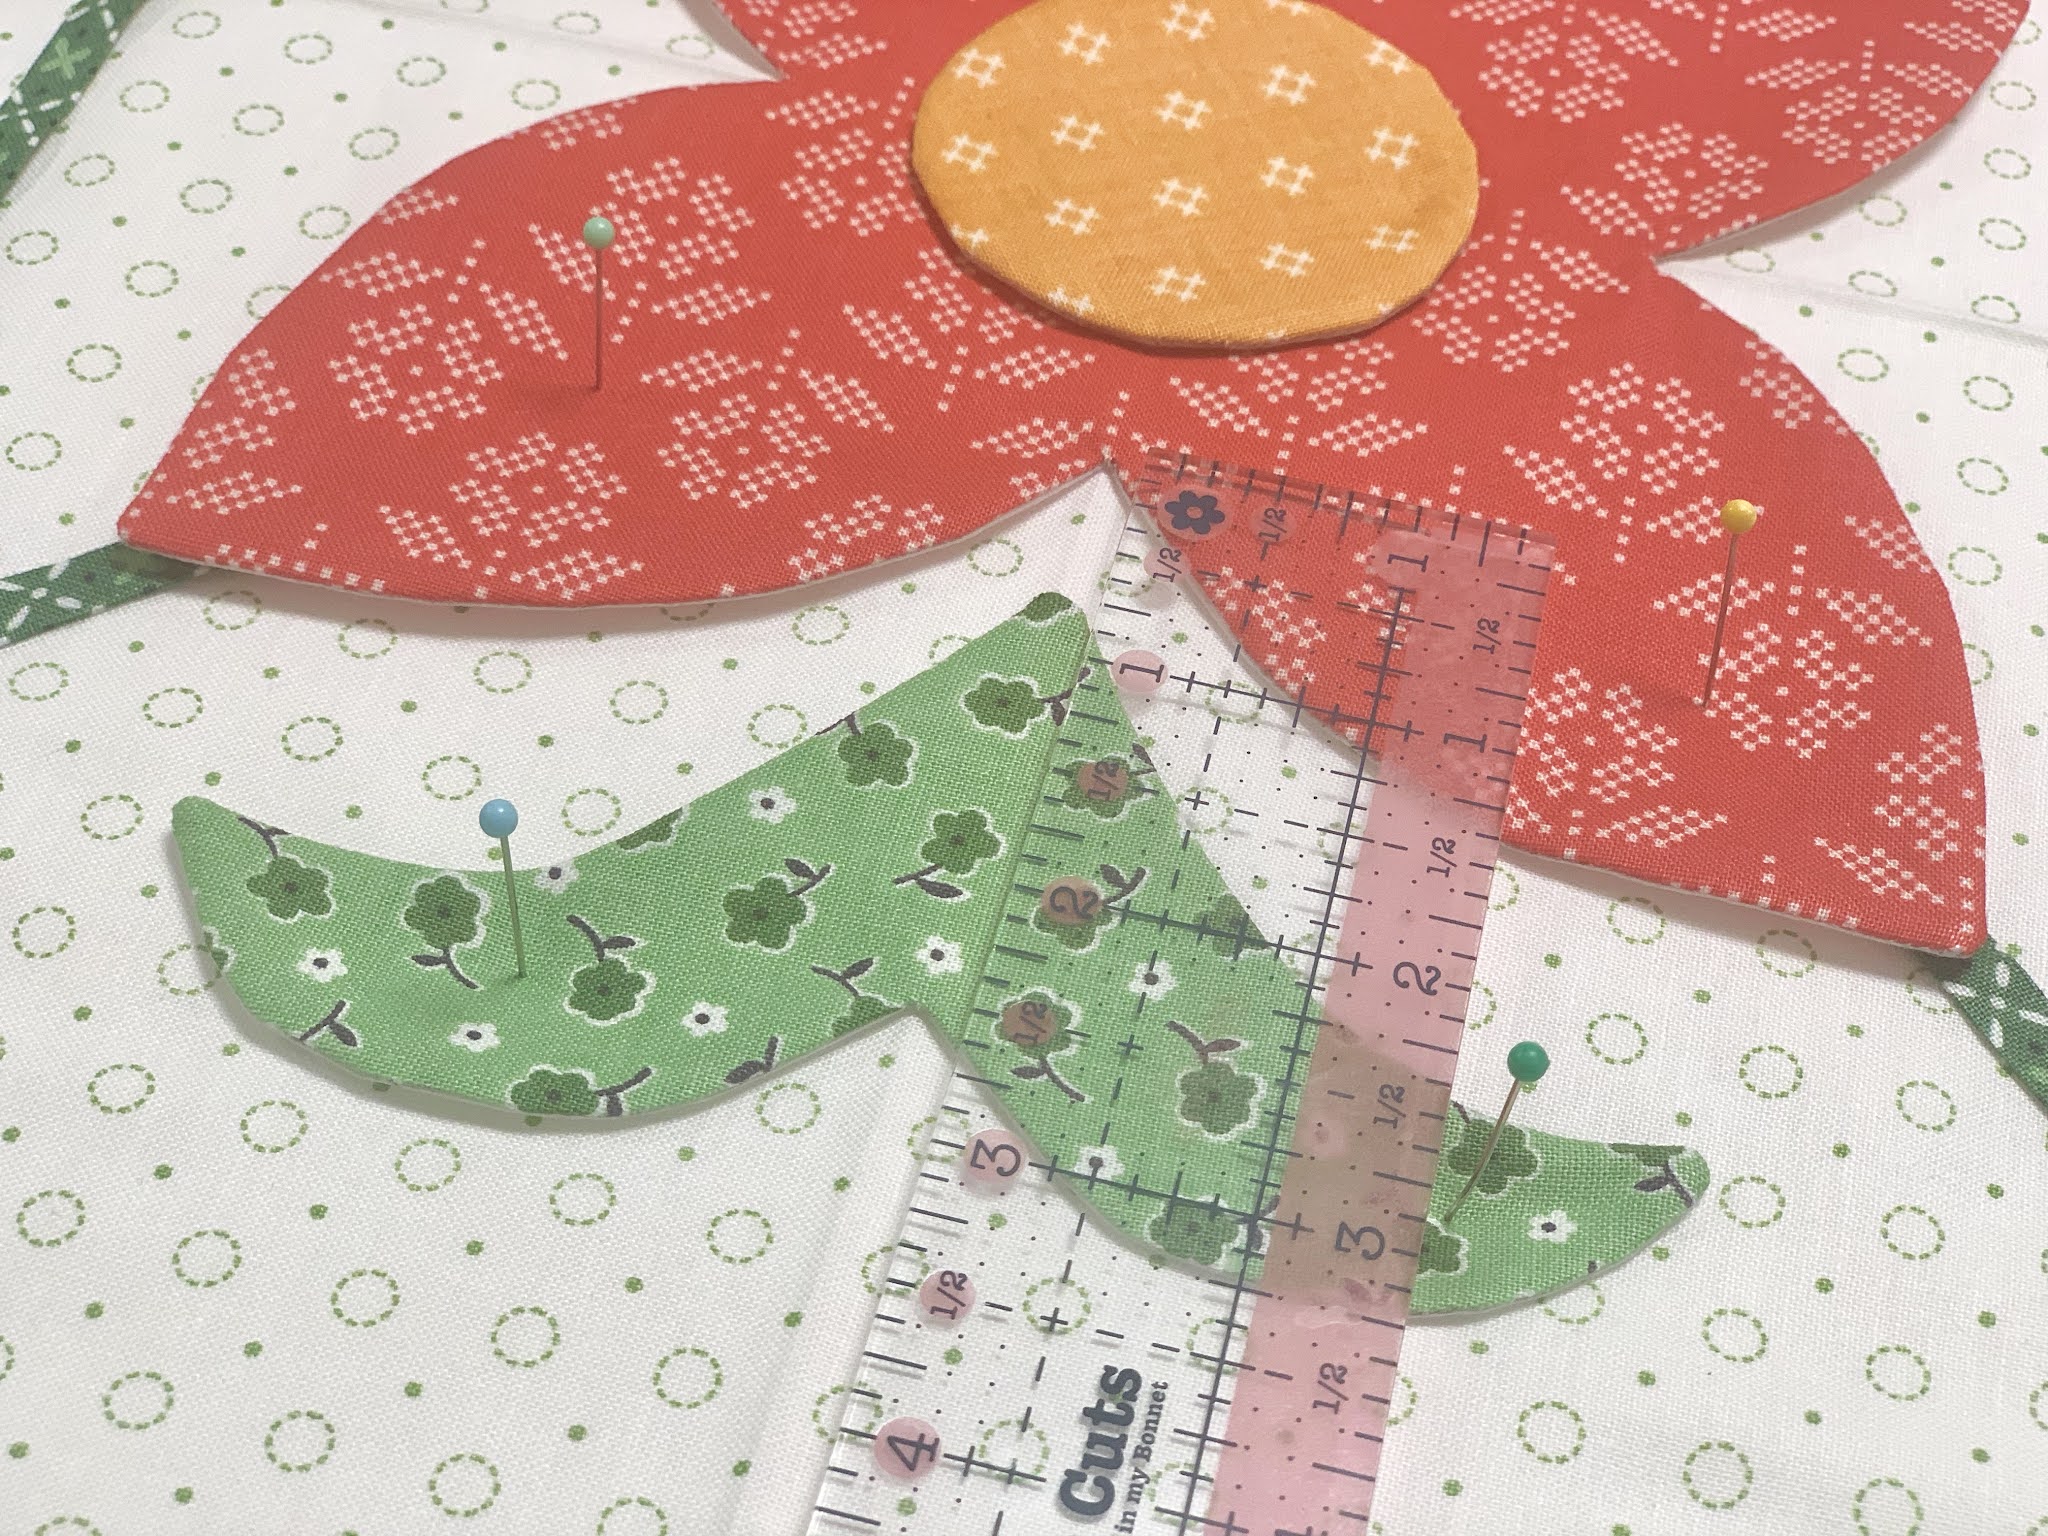
Start with the leaves and
place the bottom point
3/4" from the center red applique.
Remember to continue using
your pressed lines to place
the pieces correctly.

Each daisy flower should measure
7" tall from bottom of leaves
to top of petals.

As I'm pinning...
I just place a few in each piece to
keep it in place and I am not
glueing anything but the stems and
the flower center circles at this point
so that I can adjust if necessary.

All that we have left
to pin are the pink circles:)

Pin them evenly with the tops
of the daisy and corners of tulips
and centered in between them.
Once you have everything pinned
into place you can go ahead and
glue with just a few dots on each piece...

Then remove the pins and lay your
20 1/2" Trim -It Ruler
onto your block to make sure
everything measures up correctly
by using the lines on the ruler.
If you need to adjust any of the pieces
they are easily pulled off
and adjusted at this point.
Then go ahead and glue all of the pieces!

Using the Trim-It Rulers
are very very helpful to me
when placing my applique pieces
that are symmetrical like this one.
Of course you will use this ruler
to trim your block to
20 1/2 x 20 1/2
AFTER it's appliquéd:)

APPLIQUE BLOCK
will measure 20" square
when it's sewn into your quilt:)

Take the time this week to
enjoy making this weeks block.
I really love traditional applique blocks
and really wanted to
include a super sweet one in the quilt!
I'll be right back here next week
with more block tutorials!!
xx
Lori


No comments:
Post a Comment