


"YARN BLOCK"

Welcome to week eight of the
"MY HAPPY PLACE"
Sew Along!
Join me here each week
when I will be doing tutorials
on the blocks for the quilt.
I will be posting each Monday
right here on my blog
and you can follow my tutorials
any time during the week that
is convenient for you.

For this sew along...
We are making the
My Happy Place Quilt
74" x 88"

The quilt is made with my newest fabric
collection called STITCH...


If you are just joining us
and need a fabric kit...
just do a quick google search
to find out which quilt shops
may have one left for you.
Simply type in
"My Happy Place Quilt Kit"
to find one!

As all of my
Sew Simple Shapes Sew Alongs go...
We are using the shapes
for the pattern of this quilt
and of course the Sew Along Guide and my tutorials each week.
The set of shapes that we are
using for this quilt are called
MY HAPPY PLACE
I have already posted the
post which details all of the supplies
for the sew along and how it works.
I have also given the link there
for the free PDF Download
of the Sew Along Guide
to read that post.

This week we are making the
Yarn Block and the
pieced Spools Block.
Grab your block kits that you
have already cut
as per the sew along guide
and let's get started!!

The Sew Simple Shapes
for the Yarn Block
that you will need:
6 - L9
6 - L14
6 - L25
You will also need to
have your background cut:
16" x 18"
and you will trim it to
14 1/2" x 16 1/2"
AFTER
it is appliquéd:)

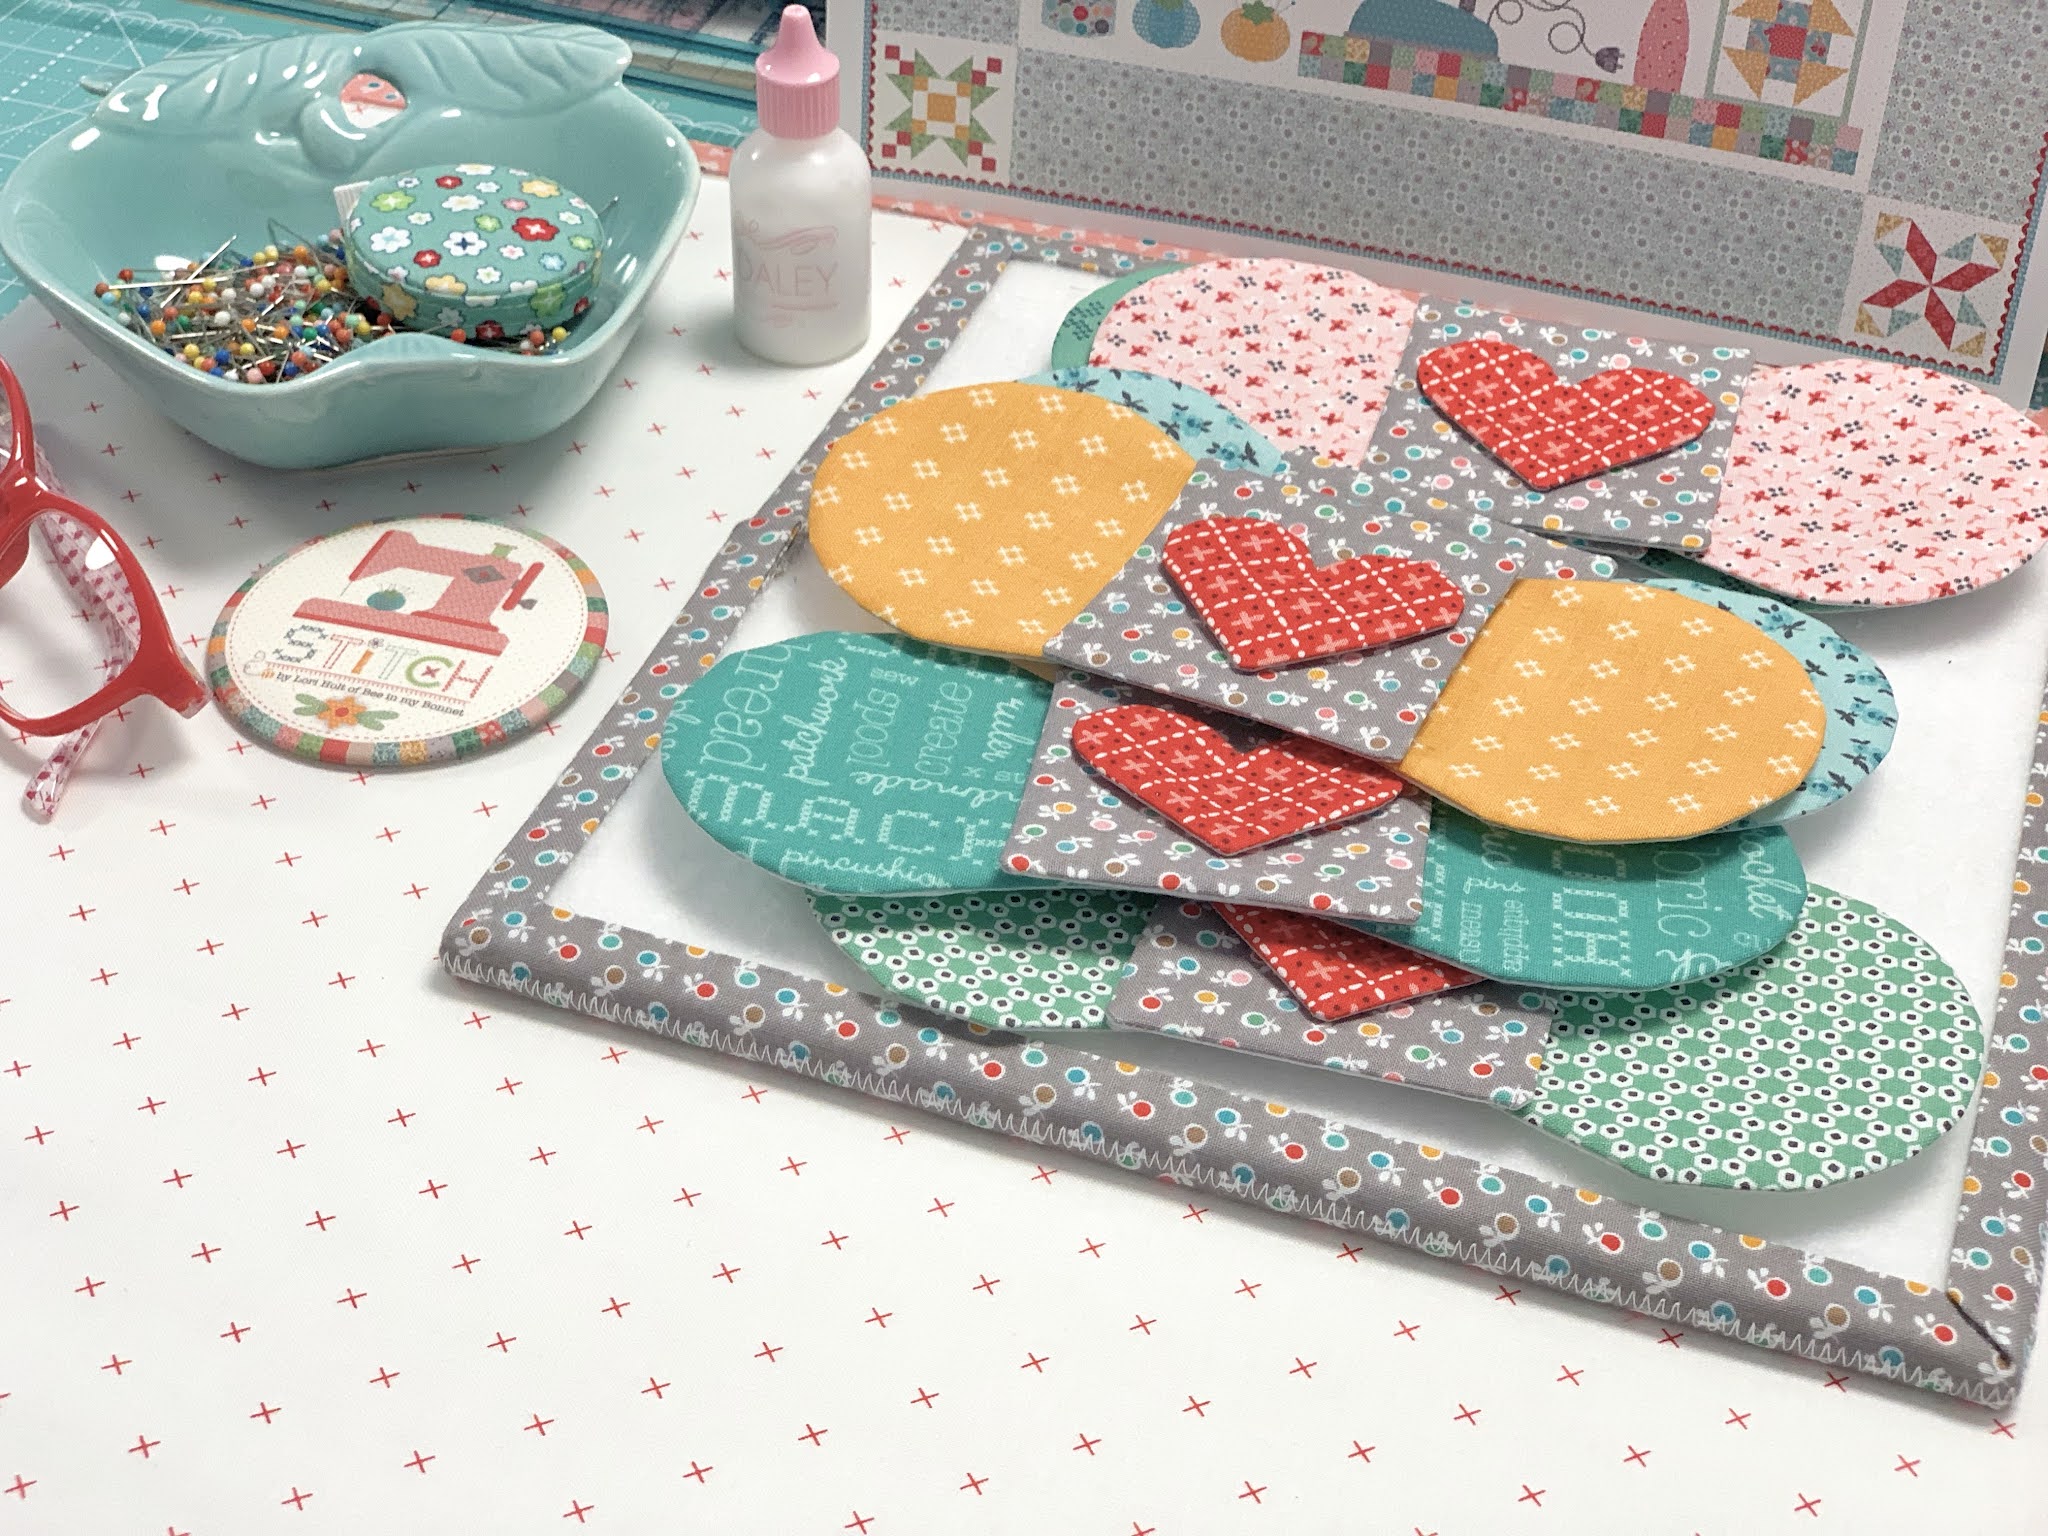
Ready to sew!

And now for the trimming:)

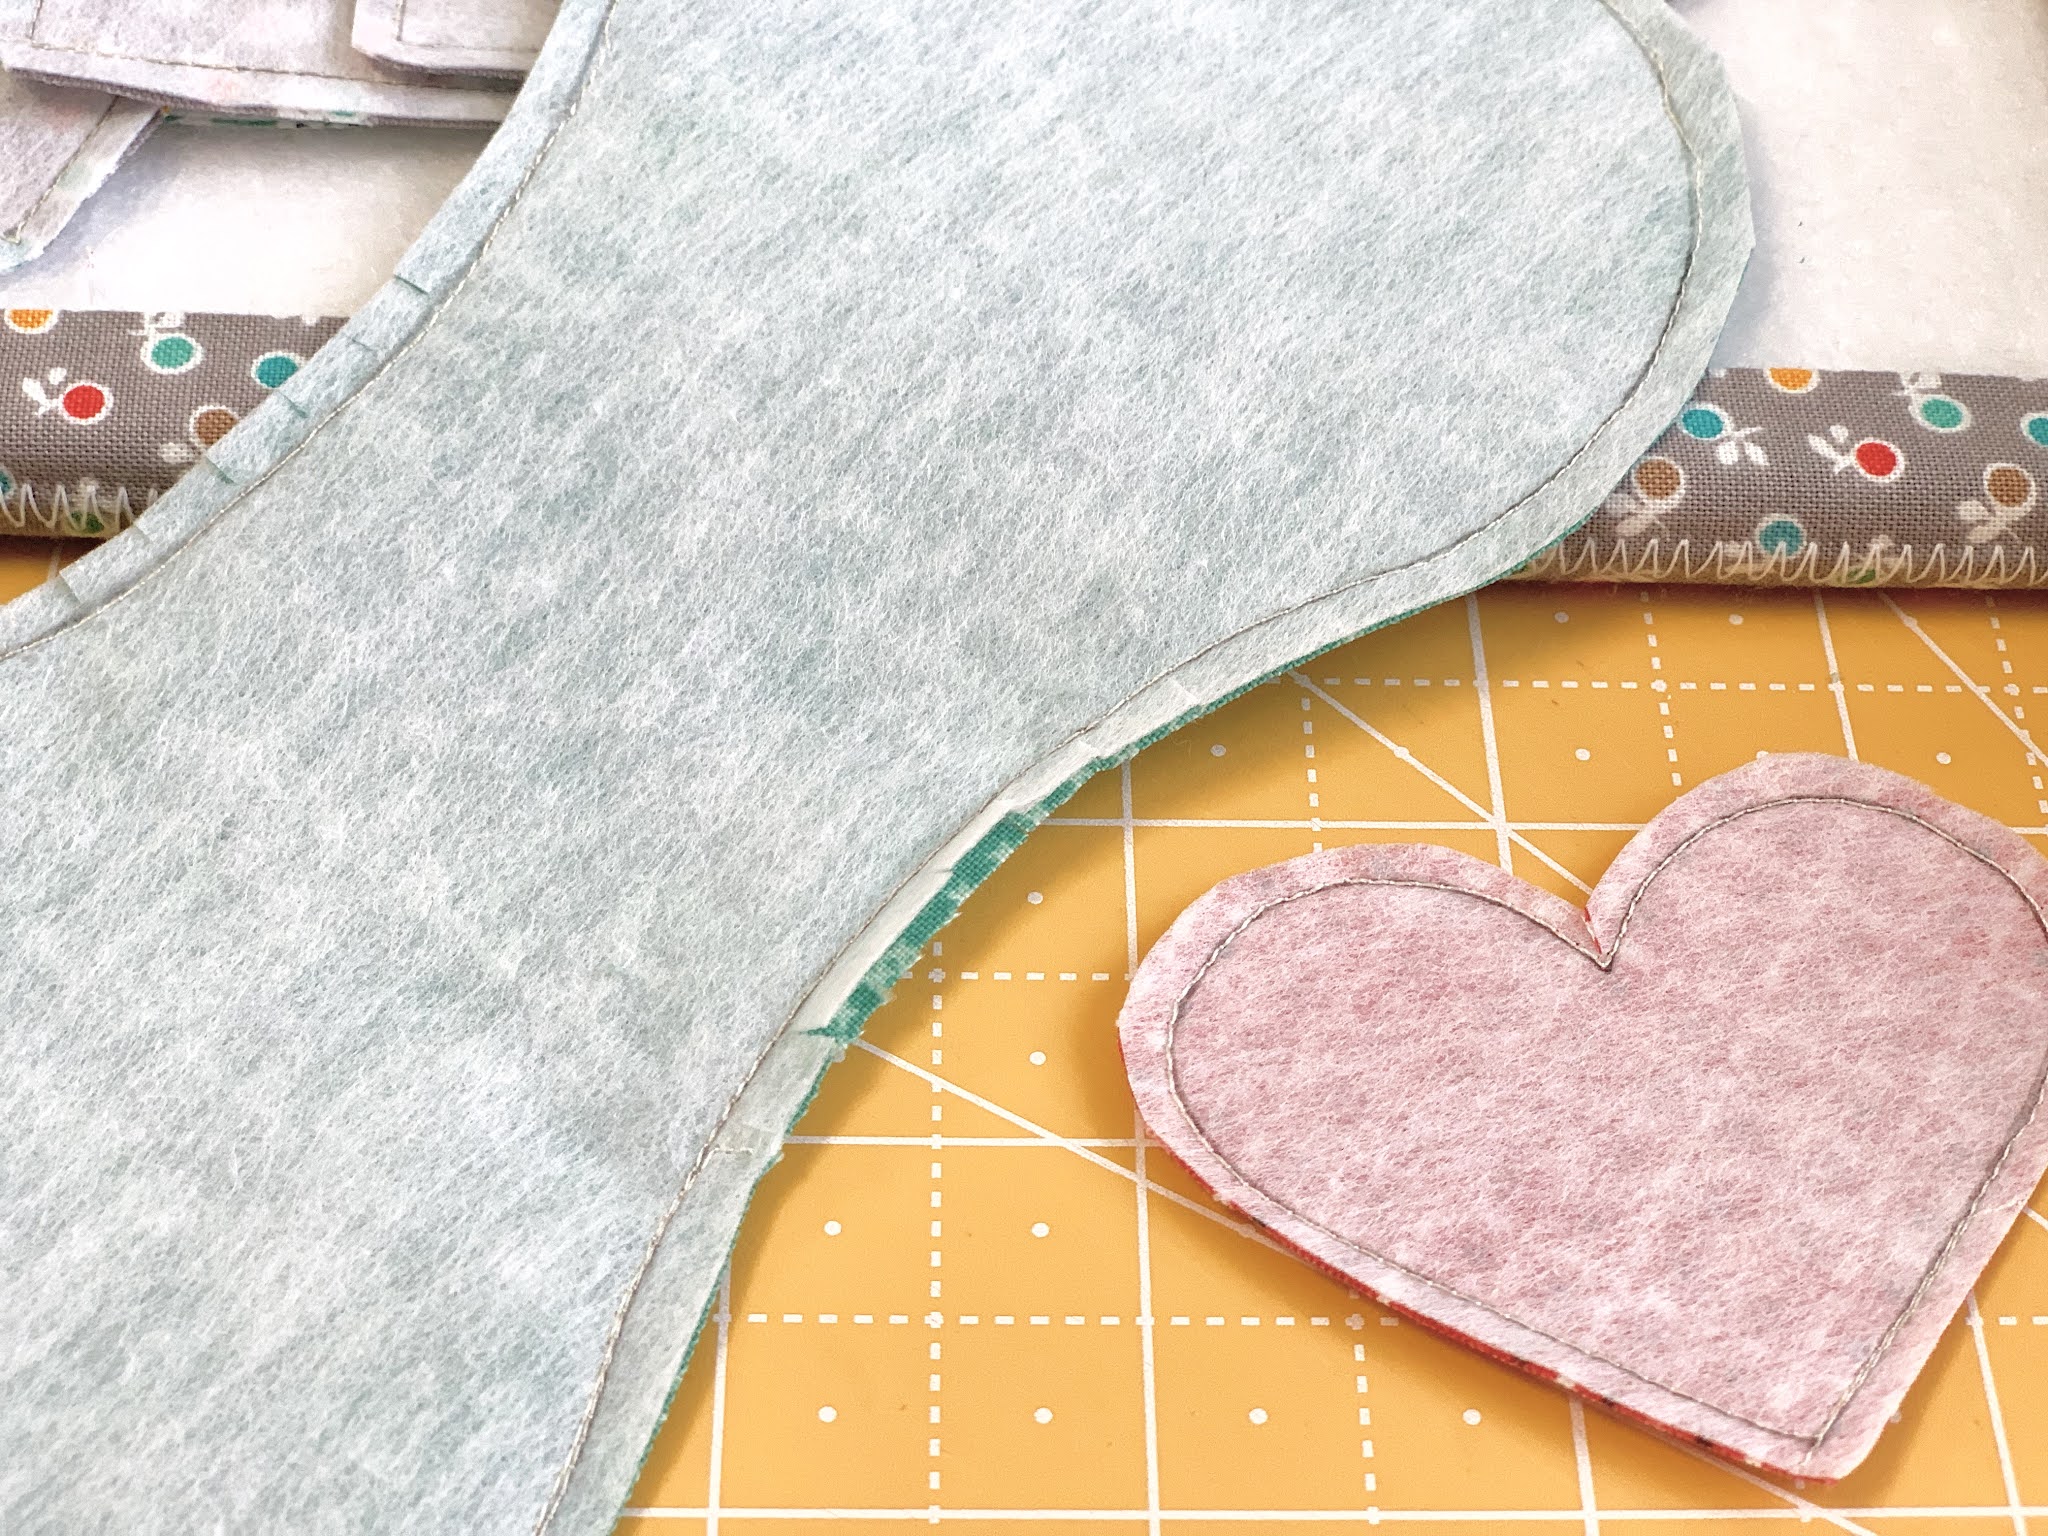
The inner curves on the yarn skeins
and the cleavage area in the hearts
will need to be clipped...

Before turning and shaping:)

I Sue Glued the hearts onto the labels
and then glued the labels onto
each skein of yarn before I
went to the work table to layout
the appliqués onto the background.
I found it makes glue basting
and laying out this block easier!

You want your design to
measure about 12" wide...

And 14 3/4" tall.

Pin into place...

And glue!

"YARN BLOCK"
After your block is appliquéd
trim the block down to
14 1/2" x 16 1/2"
will measure 14" x 16"
after it's sewn into your quilt.
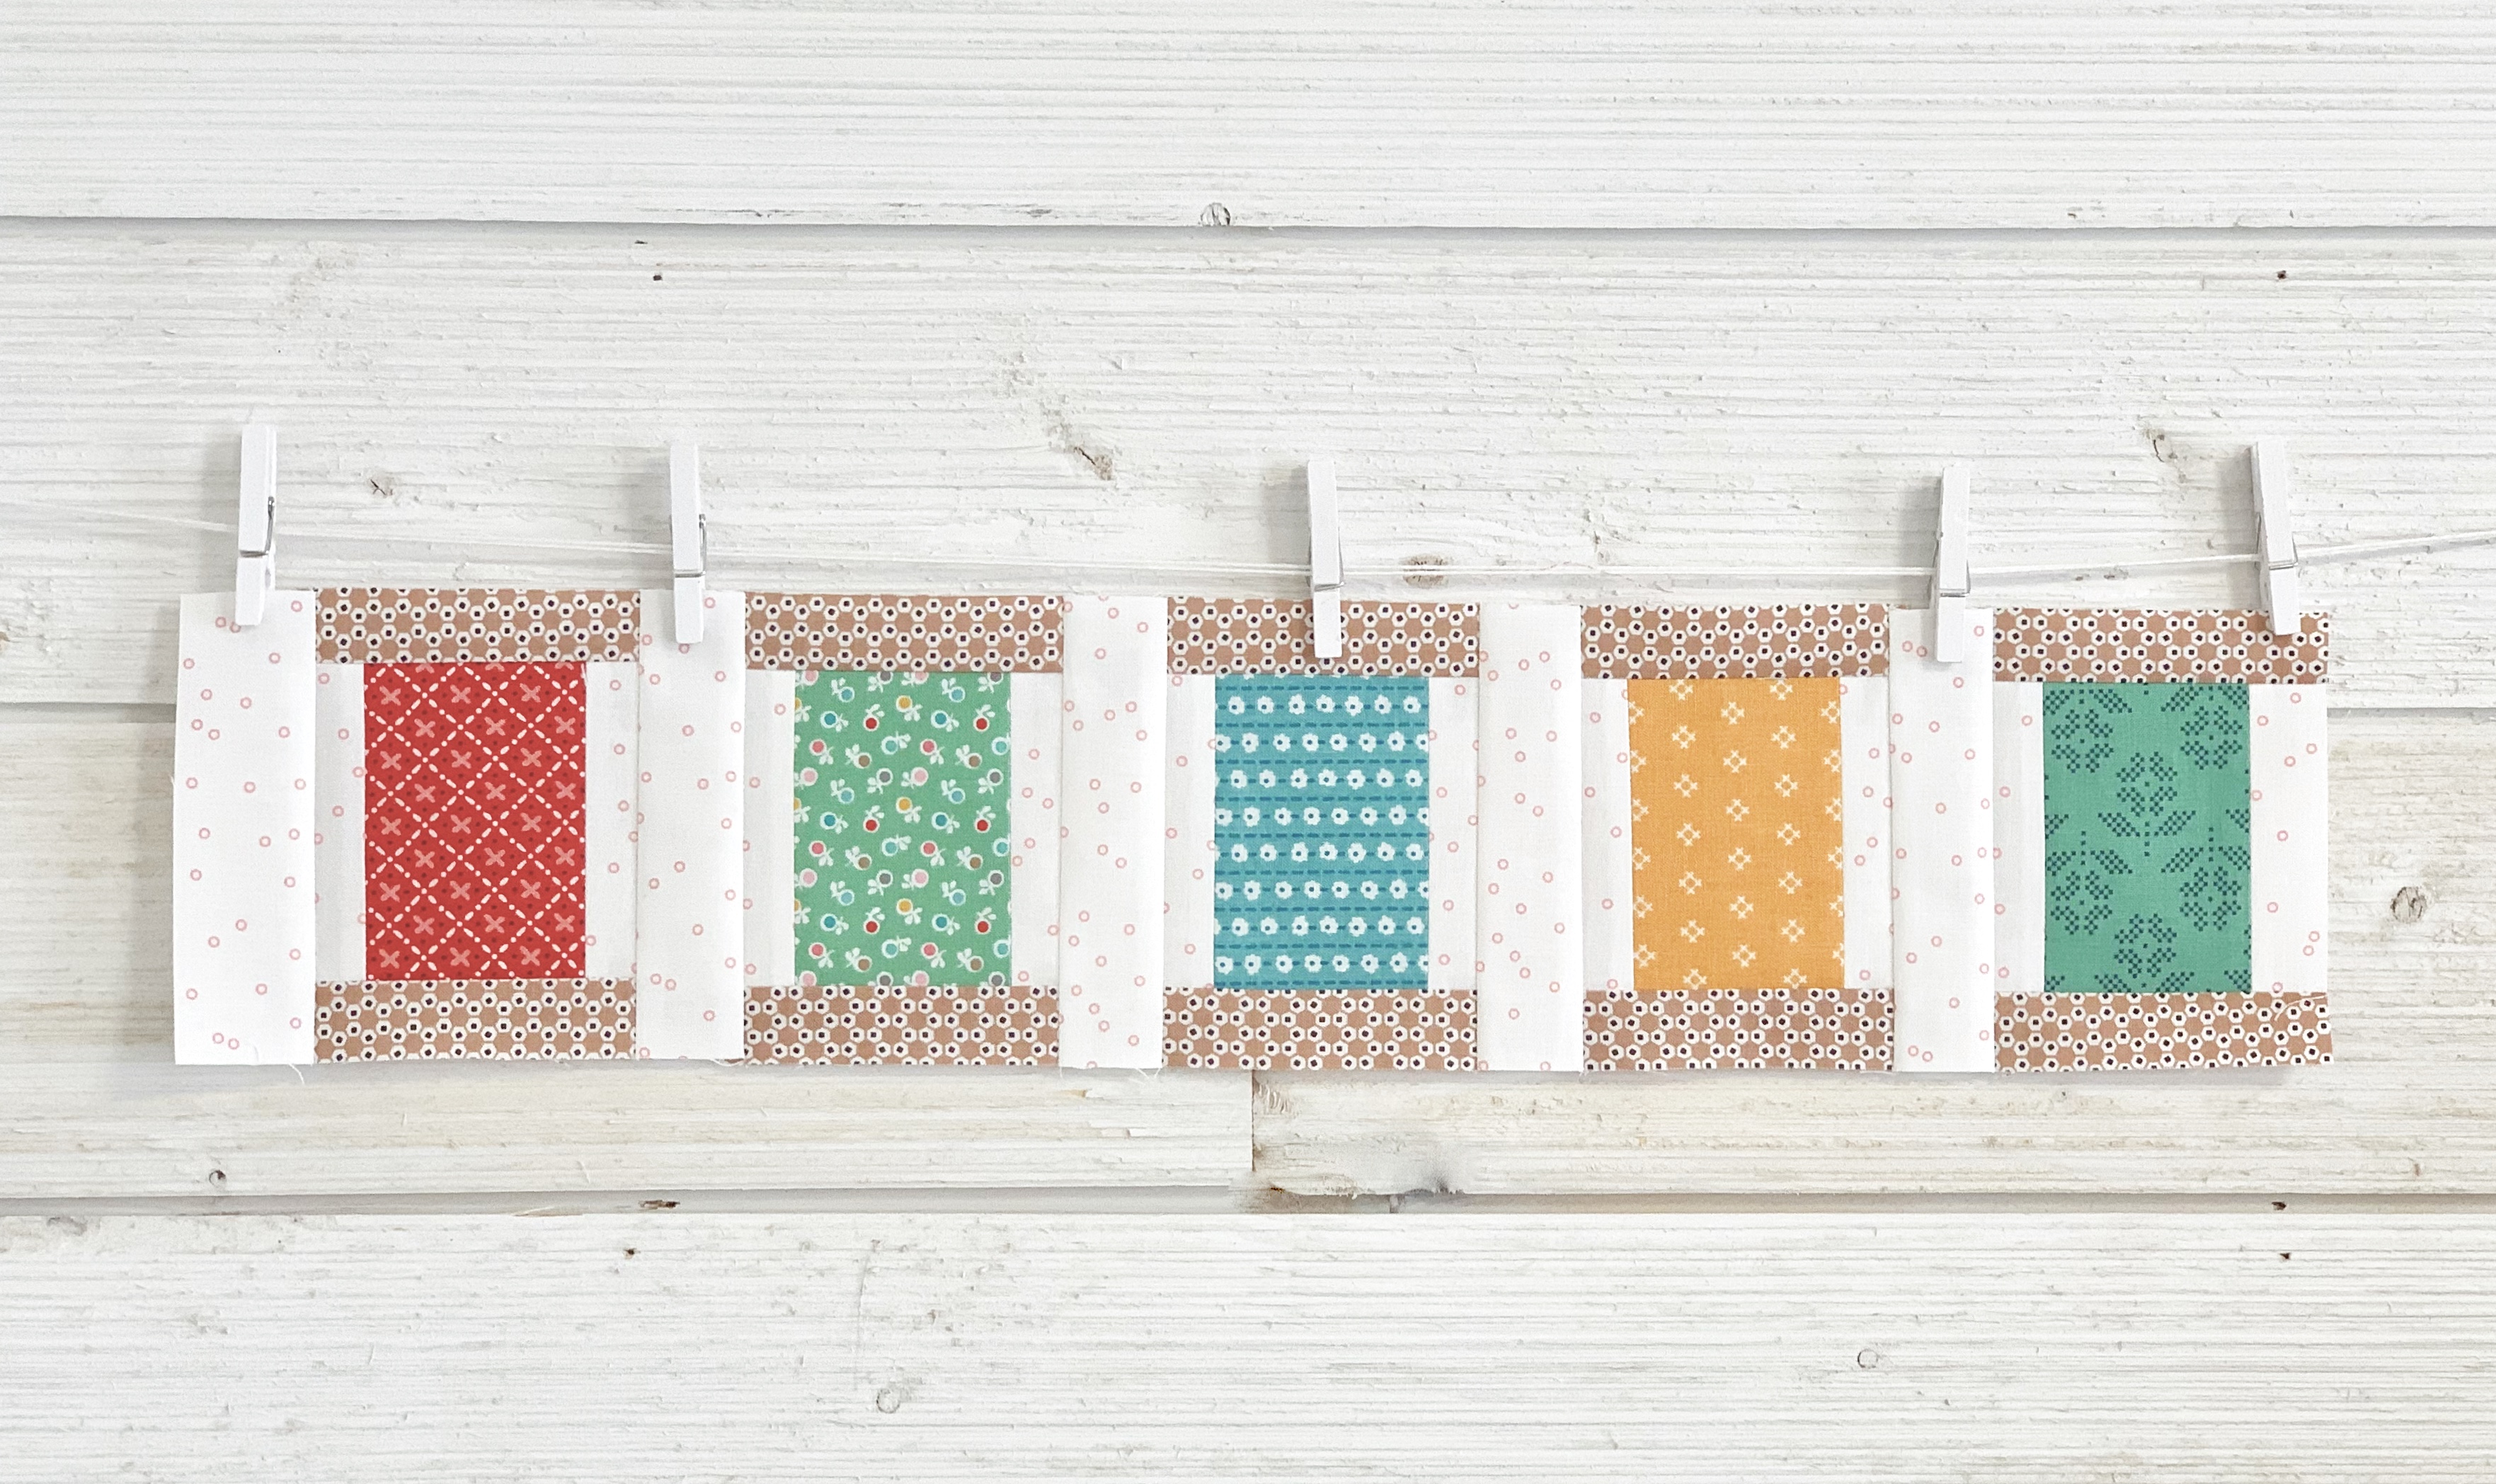
Now let's sew this quick and easy
Spool Block:)


Start by sewing the smallest background
strips to each side of the thread prints.

Now add the spool print
to the top and bottom like this.

This is how I pressed my blocks:)

When joining together...
take note that the red spool
has a strip sewn to both sides
and the remaining spools are
joined together as lain out here.

Now join the block together
to look like this!

"SPOOLS BLOCK"
should measure 4 1/2" x 20 1/2"
at this point but will measure
4" x 20"
after it's sewn into your quilt.

Have fun making your
blocks for this week...
and I'll meet you right back here
next Monday for week nine!
xx
Lori


No comments:
Post a Comment