
Welcome to Week Two

of the Sweet Land Sew Along!!

If you are just joining us and would
like to know more about this sew along
and how it works
to read my blog post called
"Bee Prepared"
where I tell you all about it:)
if you still need to download
the sew along guide.
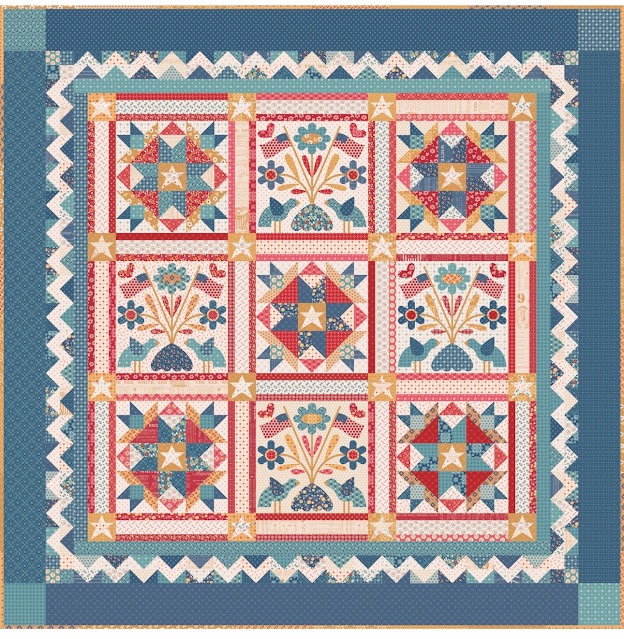
We are making the
Sweet Land Quilt
which finishes at
88" x 88"
It consists of 5 pieced blocks
and 4 applique blocks
as well as a scrappy pieced border!

To make the appliqué blocks,
we will be using my
Sew Simple Shapes called of course...
Sweet Land Sew Simple Shapes!


The collection that we are using
for the quilt is...
AMERICANA!!

Last week's tutorial was for the
Sweet Land Applique Block #1
to go to that blog post and tutorial:)

This week I'm going to show you how
I make the Sashings and the
cornerstone blocks for the quilt.

Let's start with the cornerstone blocks first!
Use the sew along guide to prep
for each of your cornerstone blocks.
There are 16 blocks but once again
I only need to show you how to make
one or two because all of
the cornerstone blocks
are done the exact same way and just
have different fabric.
You will know which fabric for which block
from the details in the sew along guide.

I cut all the fabrics and traced the
Sew Simple Shapes for all 16 blocks...

Took them to my machine (Sweet Baby James)
and sewed directly on the lines as per usual.

Trimmed all the seam allowances...

And clipped the cleavage in all of
the star base shapes like this:)

This is how I cut the back of the
interfacing on these shapes for turning.

Shaping and pressing...

Pairing a few up and glueing:)
I chose four of the blocks from the guide
when pairing up...

And glue basting to the background.

I have not appliquéd the
stars yet but after I do,
I'll press from the back and
then trim each block down to
4 1/2" x 4 1/2"
using the 4 1/2" Trim-It Ruler.
I'll use all of the lines
on the ruler for centering and
keeping things straight before I trim!

Four done...

I'll finish up the rest later
but for now
I'm anxious to move onto the sashing!

I wanted to my plan of making four
of these blocks too because I wanted
to put them on the design wall
with four of the cornerstone blocks
all surrounding an applique block:)

I used the guide and paired up two red
strips with a center background strip...

And sewed them together using the
Seams Sew Easy Guide
for an accurate 1/4" seam allowance.

I pressed all of the seams open like this:)

And just like that
I have four sashing blocks...

And four cornerstone star blocks:)

Now for the design wall photos!

When I layed out my block
I did a little bit of overlapping
because obviously I haven't
trimmed down any of my applique blocks...

But you get the idea!!
I am sooo excited to be finally
sewing this quilt:)
As I've said before,
my design schedule
is woking quite far ahead and
I've had this quilt drawn up
for a few years now!

I love how the sashings borders the blocks!

I think even just one of the blocks
with the sashing borders and
the star corners would make an
adorable pillow or even
a mini quilt for a wall hanging.

It would work great for either
the applique block
OR
the pieced block which we
will be doing next week!

I'll be right back here
next Monday for that tutorial:)
Thanks for sewing on the
Sweet Land Quilt
with me
again this week:)
I hope you have fun making your blocks!
xx
Lori

1 comment:
Hello Lori, I am new to your Blog. I really like your Americana fabric, I have a layer cake of it. I am going to make a table quilt with it for the 4th of July.
Question: Do you buy your featherweights already painted or do you have a person paint them for you? I currently have two and one is badly worn and needs repainted. Thank you, Georgett
Post a Comment