Wednesday, March 21, 2012

Lined Travel Bag Tutorial...


Today I thought I would share a
 fun and easy tutorial for  
"Lined Travel Bags"
 I designed them to go with my new
 Millie's Closet fabric line.

I don't know about you...
but when I travel,
 I like to keep my things separated
 inside my suitcase to protect them.

Things like sweaters or delicate clothing
 items are good to keep separated so 
that they aren't roughed up during travel...
and I also like to keep my shoes 
in separate bags too.
This bag finishes at about 10" x 16"
 perfect for a pair of shoes or
 for whatever else you may need it:) 

For each bag you will need...
2 Fat quarters.
One for the outside of the bag...
 and one for the lining.
Cut EACH fat quarter to measure 17" x 21".
For the tie you will need one
 2 1/2" x 44" strip of fabric.


Fold the lining in half with 
right sides together so that it
 measures 10 1/2" x 17".
On the side that isn't folded,
 measure 7" down from the top and
 5" up from the bottom...
placing a mark on the seam allowance
 so that you know where to 
stop and start stitching....
this is your opening for turning
 right side out later.

Using a 1/4" seam allowance,
 sew along the bottom edge and the side, leaving the top open... 
and make sure to leave the opening
 that you have marked unstitched.
 Don't forget to backstitch each time
 that you stop and start again.


Fold the bag front in half with right sides together so that it measures 10 1/2" x 17".
You will need to leave an opening for
 the tie on this piece.
Measure 2" down from the top and mark...
then measure another 1 1/4" down 
from that line and mark again.
 You should have 2 marks 1 1/4"apart.

Stitch along the bottom and the side...leaving the area between your markings unstitched. Backstitch to secure stitches each time
 you stop and start again.


You will need to finger press the seams open on the bag front and stitch around the casing opening so that the seam allowance won't come out when you tie and untie your bag.
By the way...I used matching thread on my other bags but I used contrasting thread for this one so that you could see my stitches:)


For this next step,
 turn the bag front right side out but
 keep the lining turned wrong side out.

Place the bag front inside of the lining and line up the top edges and the
 side seam allowance.
Pin into place and stitch all the way 
around the top edges.


Like this.


Remember the opening in the lining?...
it's time to pull the 
front of the bag through it...


Like this.


Now both front and lining are sewn together 
at the top and both are turned 
right side out like this.
Now top stitch the opening in 
the lining closed...


Like this.


As I said before, your front and lining are sewn together at the top...
now push the lining inside of the
 bag front until they both lay 
as flat as possible and 
give your bag a nice press. 

To form your casing for the tie...
sew a line 1 1/2" down from the top...
and then another line 2 3/4" from the top.


You will have a casing that 
measures 1 1/4" wide..
and a finished opening in the 
 bag front for the tie!


Fold your 2 1/2" x 44" strip of fabric
 with right sides together and 
stitch down the side with 
a 1/4" seam allowance.


Use your favorite turning method and
 turn it right side out...
for this one I used the
 tried and true 
safety pin method 
that my mom taught me:)


After turning...
give it a nice press and 
tuck the seam allowance inside on
 each end and topstitch closed.


 I used the safety pin again 
to thread 
my tie thru the casing.


Lay your bag out flat until the end
 of the ties are even...


And stitch a small zigzag back and forth
 a few times over the center of 
the tie inside the casing 
so that it won't come out!


The tie is long enough to tie a cute bow:)


Your bag is ready for travel...
or gift giving:)
I think I'll make a few of these 
for
 my mom for Mother's Day 
and fill 
them with something fun!


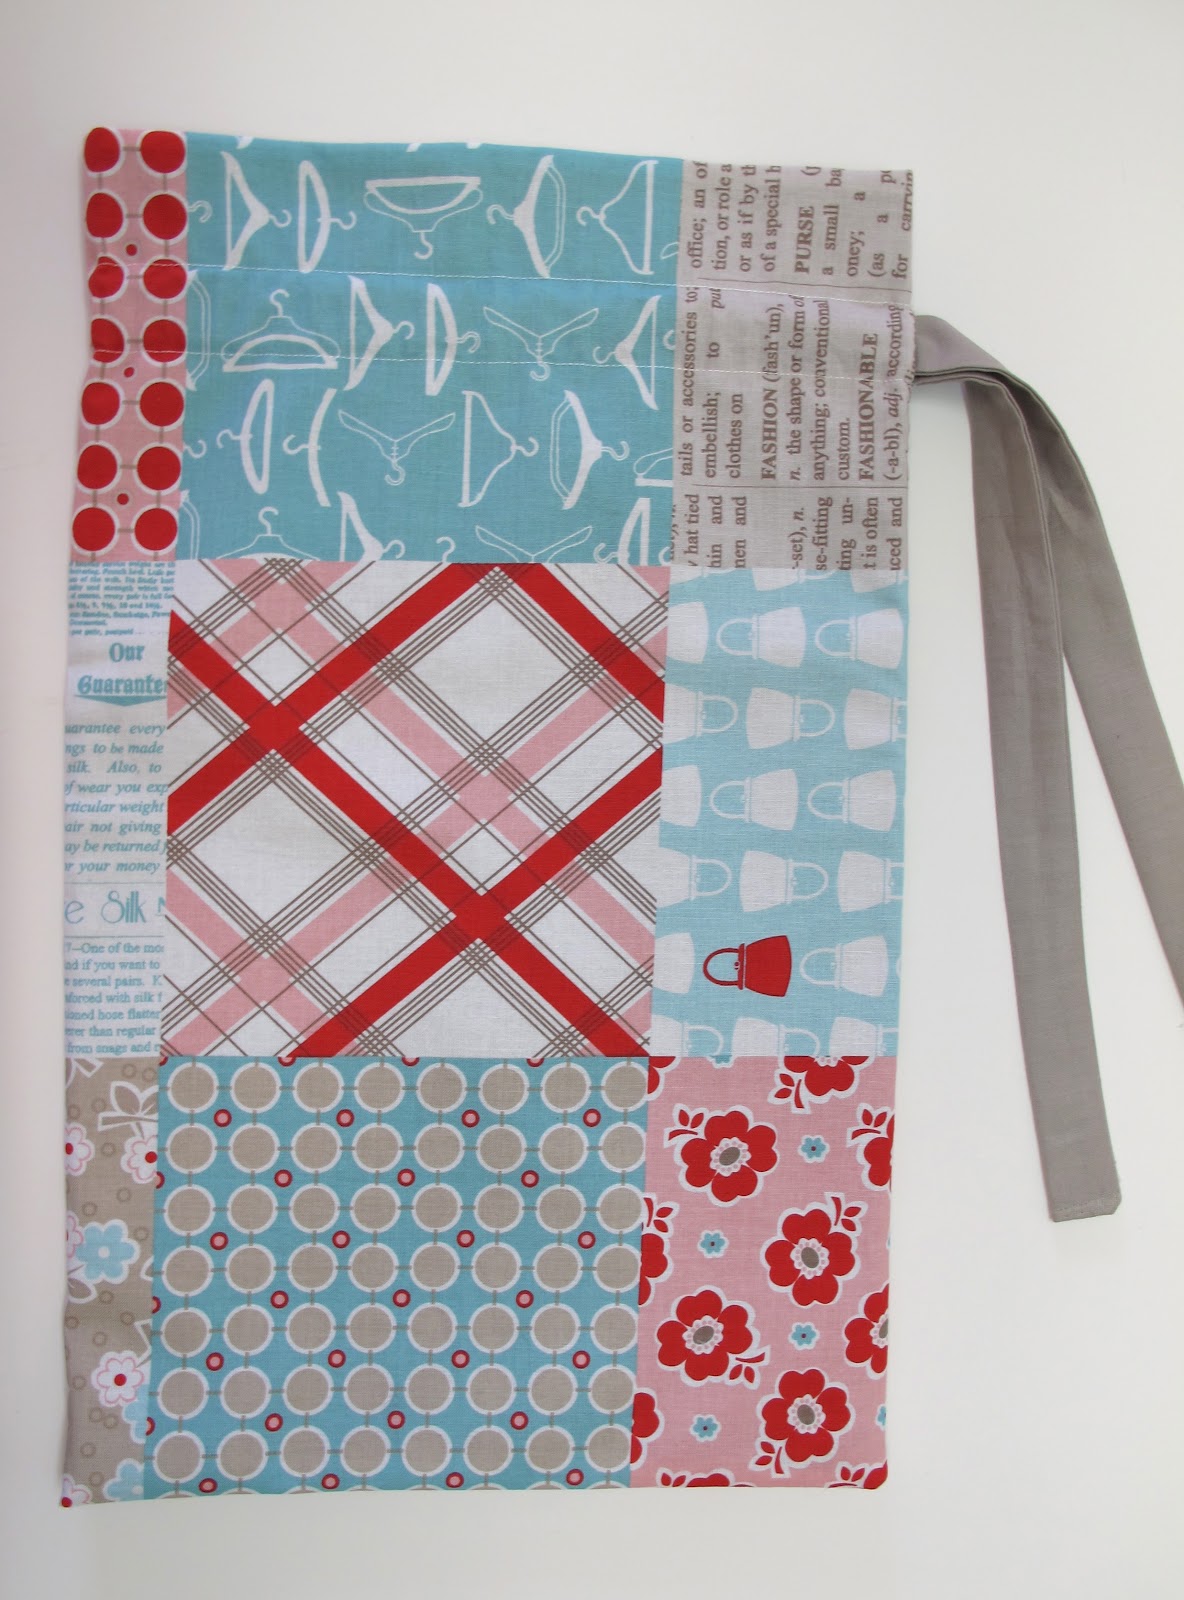
I wanted to show you one of the bags
 that I made using my fabric that 
looks like it's already been pieced...
but it wasn't...it just comes off the bolt 
that way!...that's how I designed it:)


I have made several of these bags already and I have even more cut out and ready to go.
I hope you all enjoyed my latest tutorial...
and until next time...
have a quilty kind of day!!!
xx
Lori


Tuesday, March 20, 2012

Apron Bottle Cover Tutorial...


Can you believe it?...
I'm finally getting around
 to doing a tutorial on my 
apron water bottle/soda covers.
I have had sooo many requests 
for this tutorial ever since 
I started my blog...
today it feels good 
to finally be doing it:)

I can't tell you how many of 
these little cuties 
that I've sewn over the years...
well into the hundreds I'm sure.

I first posted about them 
a long time ago...
if you are new to my blog...
you can read all about them
by clicking 

 For my aprons today...
 I chose to use two cute 
japanese fabrics from my stash. 


It just takes 
1 - 6" square of fabric
 for one apron...
and 2 - 1 1/2"x 3 1/2" 
 for the pockets.
 But I usually make more 
than one at a time...
and today I am making 4!

If you want to make them with me...
you will need my pattern so 
here is a free download!


All you will need to make 4 aprons are...
2 - 10" squares of fabric that coordinate
4 yards of 1/4" bias tape (double fold)
Thread to match bias tape.
I think this is a great way to 
use up leftover 10" squares:)


I like to trace my aprons and pockets
 onto freezer paper and iron them 
onto the fabric so that 
I don't need to use pins.
I think sometimes the pins can 
distort small fabric pieces
 and this way I can get a
 more accurate cut.


Cut 2 aprons and 4 pockets 
out of one square and peel off
 the freezer paper...


Iron the freezer paper patterns
 onto the other square and
 cut out two more aprons 
and 4 more pockets.


Each apron uses one yard of bias tape.


Now you're ready to roll!
Using one yard of the bias tape...
cut a 2" long piece...
a 10" long piece...
and fold the remaining in half and
 place a pin in the center.


*NOTE - When sewing with double folded 
bias tape, use matching thread an
 remember that the shorter side of 
the fold always goes on the top.

Step 1:
Fold the 2" piece over the top of the apron. You won't need to pin...
just go ahead and top stitch into place
 about 1/8" from the edge of the bias tape.
No backstitching needed at this point.
Step 2:
Fold the 10" piece of bias tape around the bottom curved edge of the apron.
Topstitch into place. 
Again, do not add bulk by backstitching.


Trim the ends of the bias tape even with the edges of the apron.


Step 3:
Pin the remaining piece of bias tape
 onto the top side and bottom side corners
 of apron...folding it around the
 inside curves when pinning.
Leave a loop long enough at the top
 for the neck of the apron.
(refer to the download pattern to see
 how big to make the loop)

Now go ahead and topstitch the bias tape together starting at the end of the 
left apron tie and continue stitching.

 When you reach each pin...remove it and continue stitching the bias tape to the inside curves of the apron...continue on stitching the neck...then the next inside curve and on until you reach the end of the right apron tie.
Don't forget to backstitch at the beginning 
and end of each tie.


Finished apron without pockets:)


Now for the pockets...
Press each pocket in half with
 right sides together.
 It should now measure 1 1/2" x 1 3/4".
Press about 1/4" under the 3 raw edges 
leaving the folded edge for the 
top of the pocket.


Pin the pockets onto the apron front
 and topstitch into place...leaving the top folded edge of pocket unstitched.


Use your stylus or small pointy scissors
 to keep the seam allowances turned under
 while stitching.
Don't forget to backstitch!


Completed apron with pockets:)


Now tie it on your soda or water bottle and place a straw in one of the pockets!


In the other pocket you could put a love note...or a cute little candy...or their name for a place setting:)
I have done that for a luncheons.


You could make the pockets a little larger to hold what you want...I've done that too!


Or you can fussy cut the fabric
 so that the pockets match 
like I did with the cherries:)


This Coca Cola bottle looked 
little bit naked to me...


So I made her an apron using my 
Sew Cherry fabric.


And 3 makes a party!!!

I hope you enjoyed my tutorial and
 that you have fun making a few aprons 
for yourself and your
 apron lovin' friends:)
xx
Lori


Related Posts with Thumbnails