Hi there:)

Welcome to Week Eleven in the
Granny's Garden Sew Along

We are using Granny Chic Fabric...

And Granny's Garden Sew Simple Shapes...

to make the Granny's Garden Quilt:)

Today we are making the last two
Flower Blocks!!

Let's start sowing:)

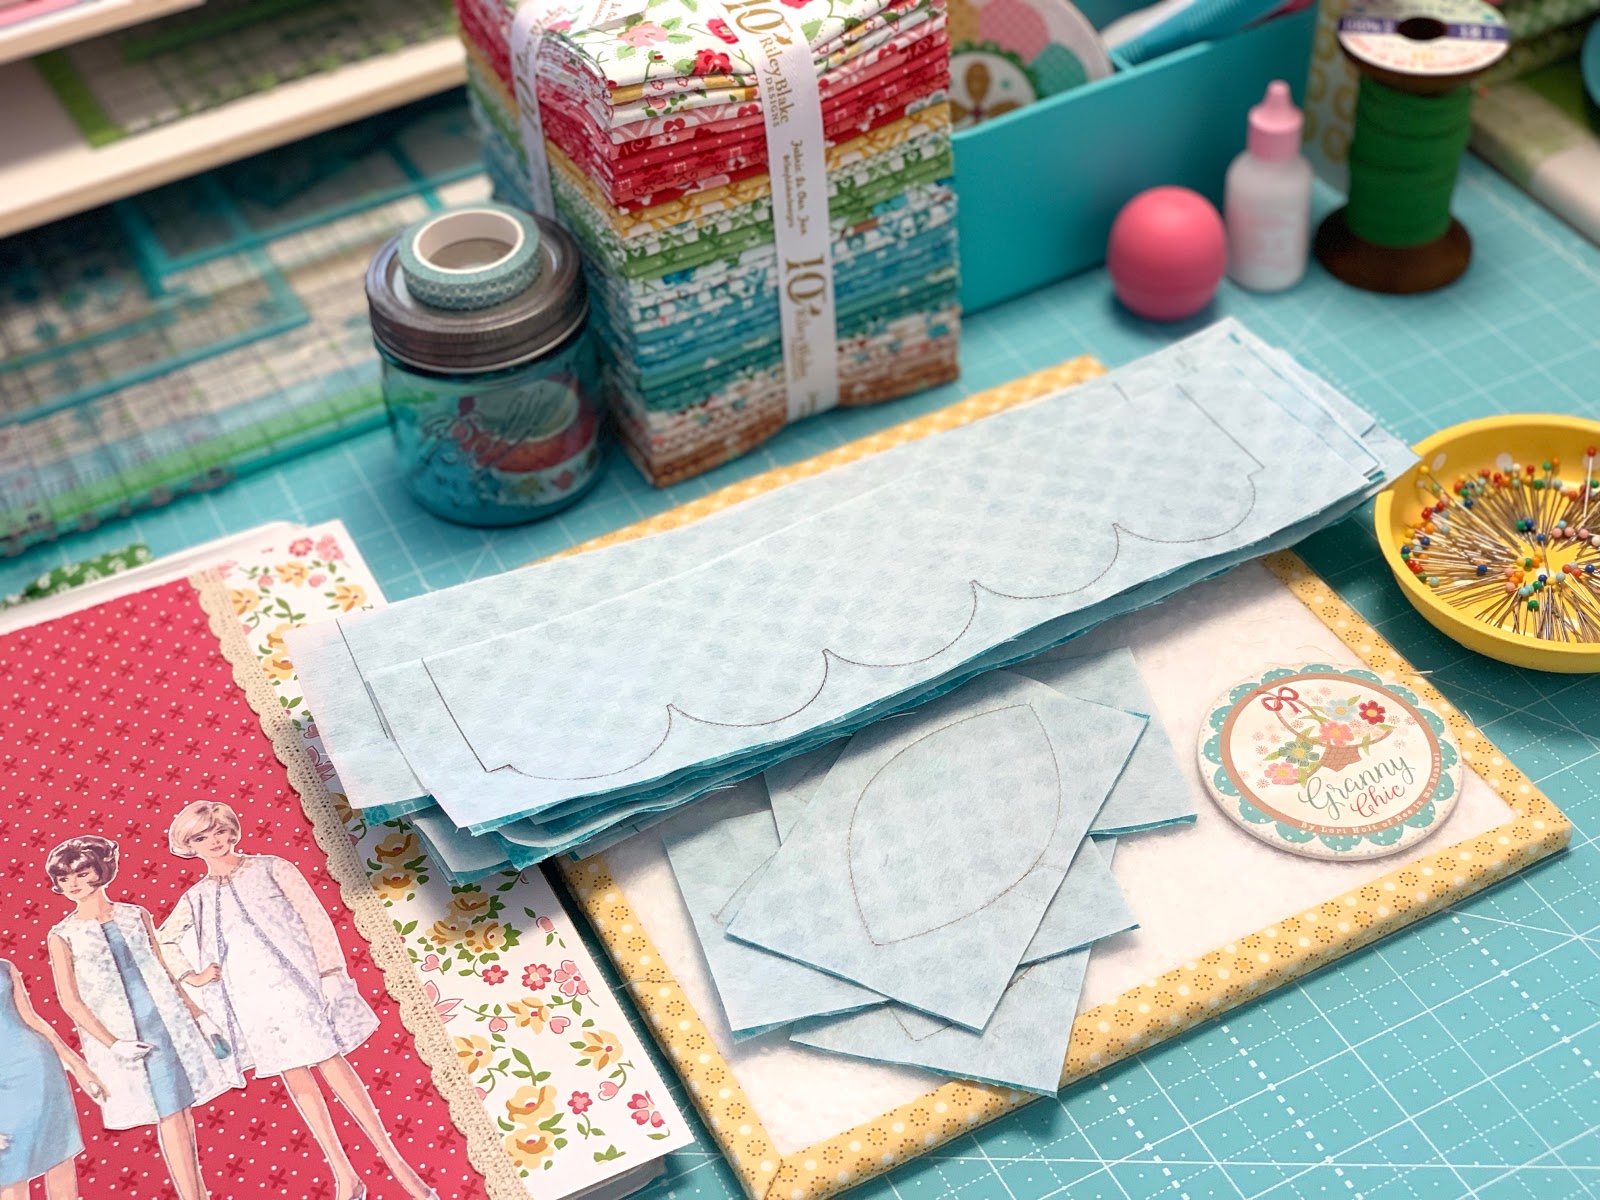
Sew Simple Shapes for Block 41:
2 - I 6
5 - I 8
1 - I 20
Cut the stem 5" long and
press one end under.

There is no clipping needed
before turning in this block:)

All shaped and ready to go!

Pin and glue...
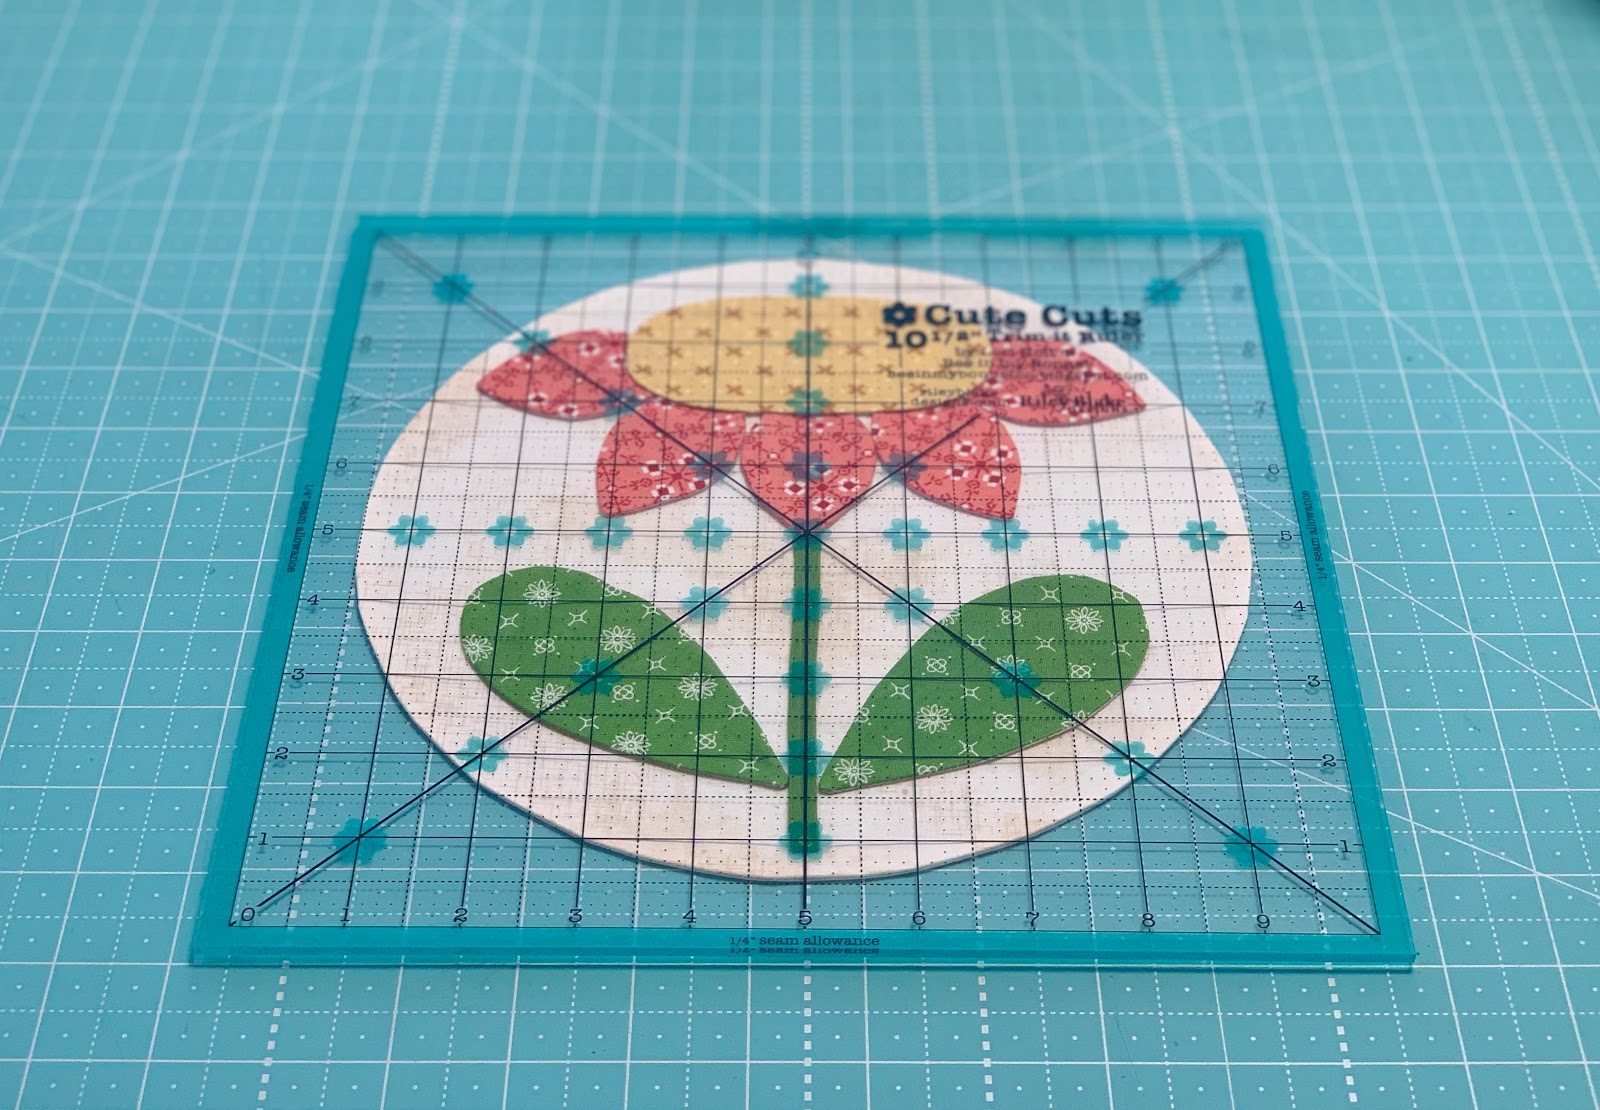
Use the 10 1/2" Trim-It Ruler
to align and center...
and adjust where needed:)

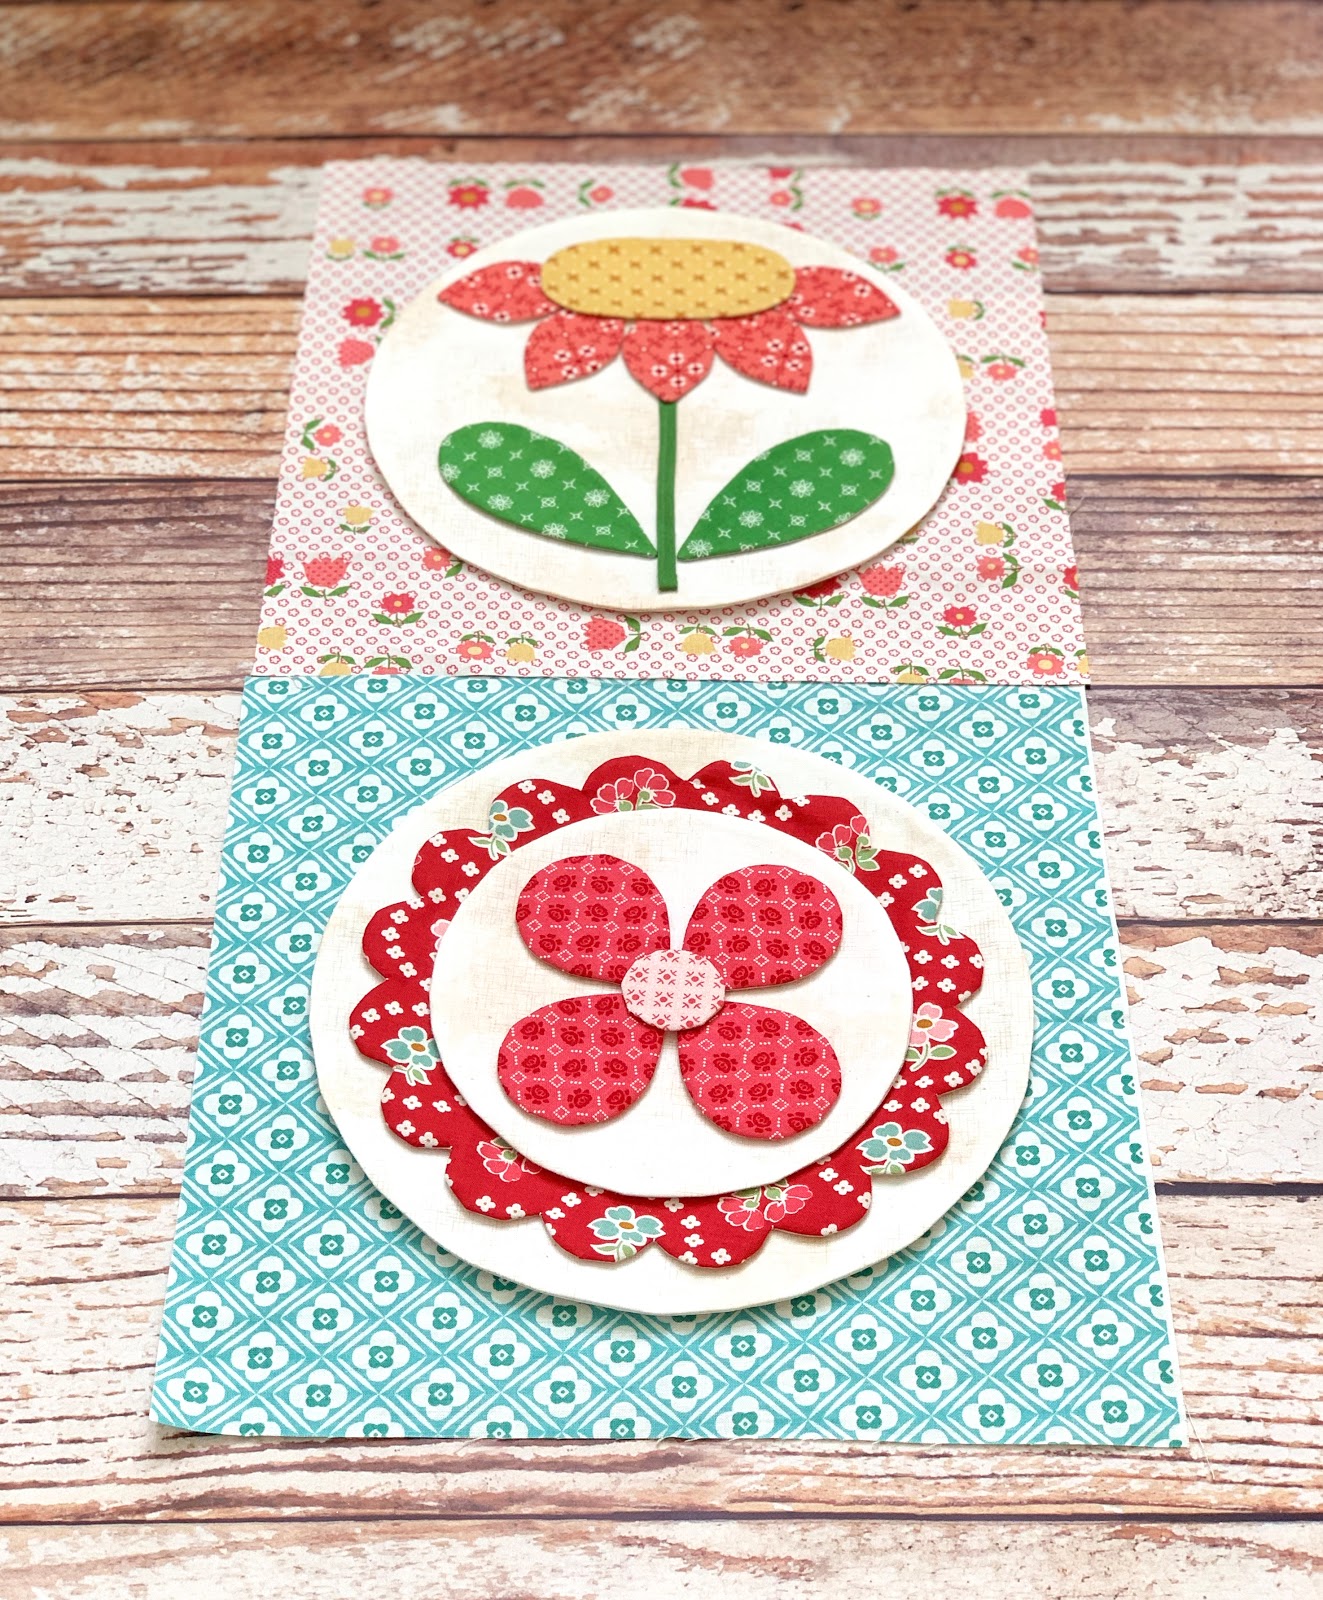
Flower Block 41 ready for applique:)

Sew Simple Shapes for Block 42:
4 - I 4
1 - I 21
1 - I 28
Use the 6" Circle Ruler from
the set for a Shabby Cloud Circle

After sewing you will need to
clip between each scallop before turning.

Turned...shaped and pressed:)

I did my center first...

Ands added it to the scallop!

Then I glue basted it onto the large circle.
Flower Block 42 is ready for applique.
YaY!

After the quilting I'll add buttons to it:)

Applique and applique!
Afterwards...
applique them to their
background squares.

Okay fast forward because
I am finished
with the applique on
all of the flower blocks...
so it's time me to trim them all down to
10 1/2" square using the
10 1/2" Trim-It Ruler.

Make sure your large circles are
centered
BEFORE you do any trimming.
I trim 2 sides first then turn
and trim the remaining 2 sides.

And this is what Flower Block 42
looks like after applique and
trimming down to 10 1/2" square:)
Now I only have 41 more to trim up lol

Now it's time to move on to the border!
You will need 4 - I 11 shapes
for the corners and
26 - I 31 shapes for the scallops.
*Take Note:
When tracing the scallop borders...
center and line up the top edges like this.

*We want to keep the fabric and
the interfacing straight throughout
this whole process...
and especially when sewing...
so keep it all straight by pinning...
and line up the top edge and
side edges of the fabric as well.

When sewing...
don't sew on the side
lines that you traced...
just sew along the bottom like this:)
All border pieces sewn
and ready for trimming:)

Start by trimming along the top like this...
and clipping the cleavage
between each scallop.
Of course you do not need to
cut the interfacing to turn
because the bottom and
the sides are not sewn:)

After turning...
shape each scallop gently
and press back into shape!
Now you could lay it right onto
one of the 8 1/2" x 10 1/2"
border rectangles just like this...
but let me explain something first!
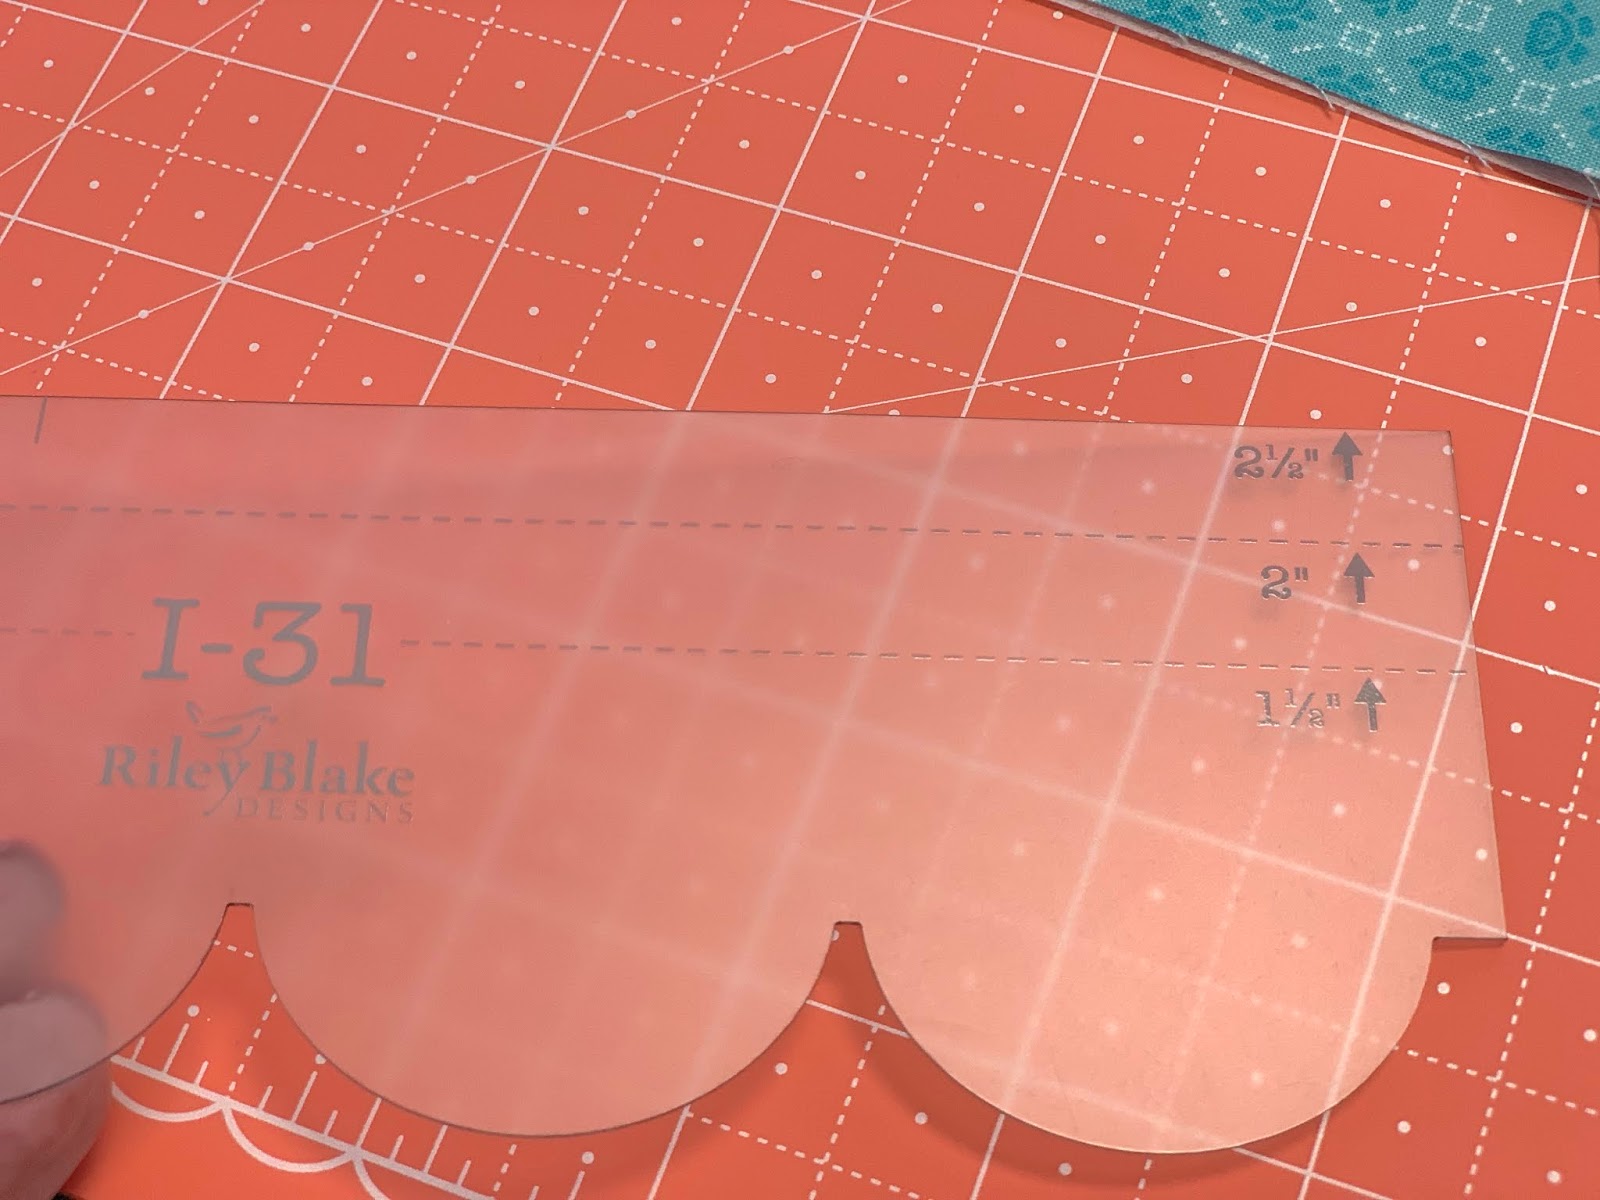
See these lines on the I 31 template?
I wanted you to have a choice
on how wide your scallop border is.
(not just for this quilt
but for other projects that
you will want a scallop border for as well)
The measurements indicate how wide
the finished scallop will be.

I'm going to be using the
1 1/2" finished size
so now is the time to trim to that line...
which is exactly 1" from the top edge.
So I trim just like this!
Easy peasy.
If you want yours to be wider than mine...
only trim off 1/2" and
it will finish at 2".
If you don't trim any off at all
it will finish at 2 1/2"
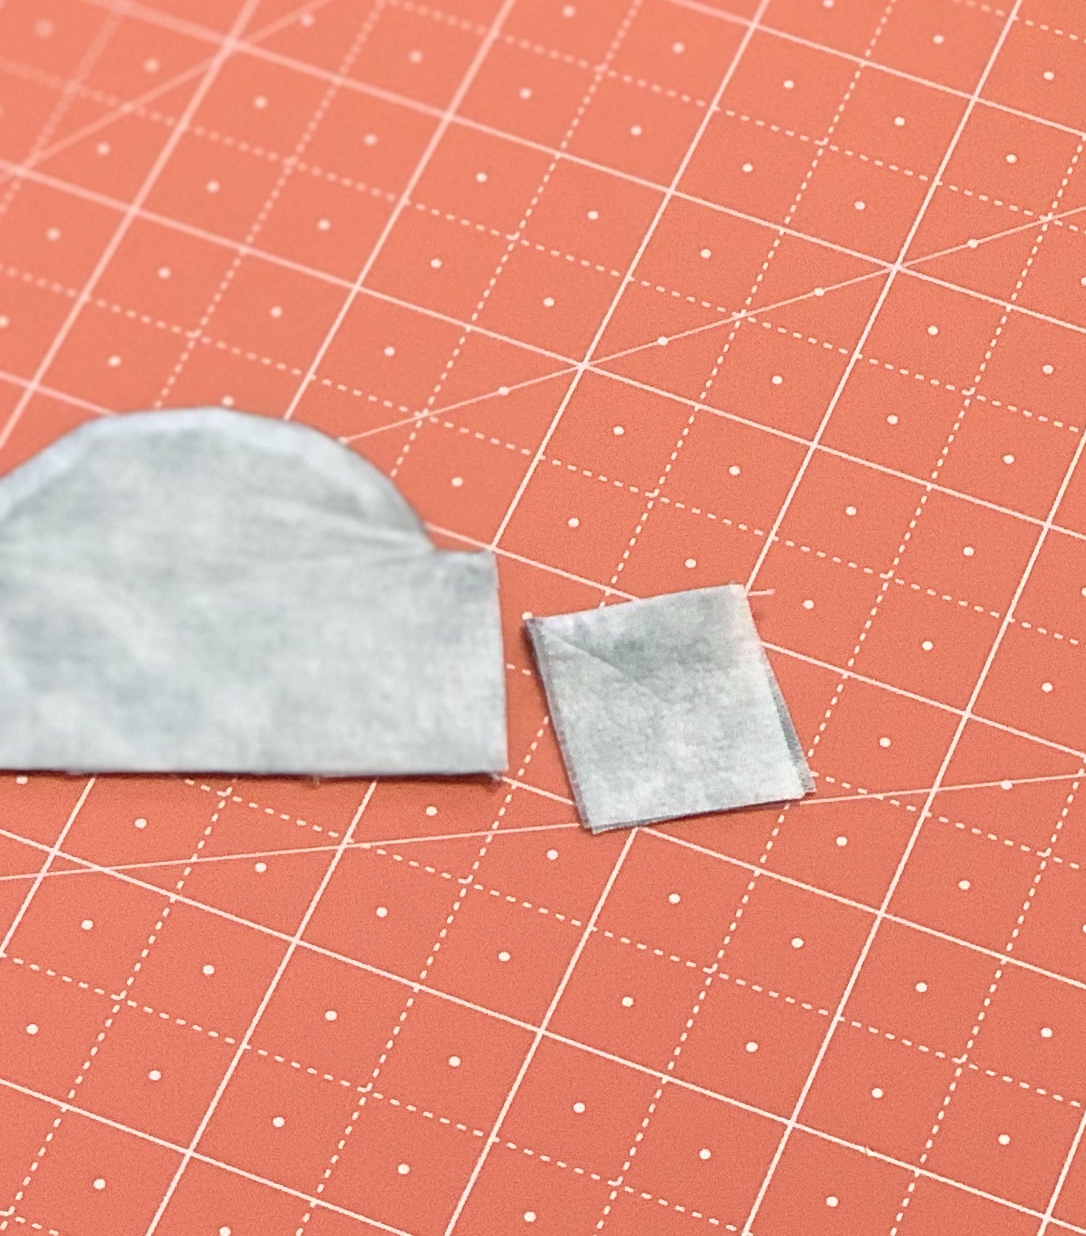
For the side trimming...
I used my traced line on the side
as a guide and trimmed directly
onto the line like this.
The straight part that's left
sticks out and measures 1/4"
and will tuck into the 1/4" seam allowance.
Easy Peasy again!!

Next...glue baste each scalloped applique onto a border rectangle...
centering and lining up both the
sides and top edges...

like this:)
Now this block is ready for applique...
and by the way that is all that needs
to be appliquéd because all of
the other edges will be
sewn into the quilt top by machine.

All 26 border rectangles
have the scallop glue basted
and ready for applique:)

Now for how I do the corner pieces.
I shaped them and set them aside
and will applique them last
after the entire quilt top is sewn together.
I'm doing this so that I can
make sure to place them
exactly where they need to go!

On page 11 of the
Sew Along Guide are the instructions on sewing the quilt top together...
it's super easy construction.
Join me back here next week
and I will have photos of my
finished quilt and close ups
of how it was quilted:)
And goes what?!
I will also have another
fun tutorial for you...
YaY!
Our garden has been planted:)
xx
Lori
Click on the links below
to view each week of this sew along!!
1. Bee Prepared
2. Week One
3. Week Two
4. Week Three
5. Week Four
6. Week Five
7. Week Six
8. Week Seven
9. Week Eight
10. Week Nine
11. Week Ten