

Good morning cute people...
and welcome to another
Bee in my Bonnet episode:)
I have been waiting a long time
to show you my Vintage T.V. Block!


I'm so excited to announce that
all three of my new fabric collections
are soon arriving at the warehouse and
will be shipping to quilt shops!
YaY!
Now I can start doing tutorials
and showing you what
I have been doing with them over the last three months:)

Last year when I designed these 3 collections of fabric...
I knew the first tutorial that I would do was my Vintage T.V. Block.
These are the two Bee Basics T.V. prints:)

I can't tell you how much fun I've had
using all 3 collections together
to make my Bee Happy Quilt.

The Bee Happy Sew Along
will start in August ...
but in the meantime
I have several projects
and tutorials
using my new fabrics
to keep us busy until then!

So lets start with the Tutorial:)
This 12" block is the one that I call my
"Netflix and Quilt"
which is something that
I love to do...don't you?
There's nothing like a good
Netflix binge to
keep us going on fun project!
To celebrate that...
I thought it would be really fun to
put a 6" block on the
screen of the 12"
Vintage T.V. Block:)

I chose these 5 prints from my
Bee Basics
and one of my
Bee Backgrounds for this block.

I decided to use the
Riley Blake Designs
Hashtag print in Rose Gold
for the TV screen...
it goes perfectly with my collections!

You can stitch up any
6" block that you'd like...

For my TV I made my Spring Star block
on page 62 of my book Farm Girl Vintage.
I know it's summer now ...
but back when I made these blocks
it was just the beginning of Spring!

After sewing the block...
cut two strips from the TV screen fabric
1" x 6 1/2" and add to each side.

Cutting for the Block Background:
A - Cut 2 - 3 1/2" x 5 1/2"
B - Cut 1 - 2 1/2" square
C - Cut 2 - 1 1/2" x 8 1/2"
D - Cut 1 - 1 1/2" x 4 1/2"
E - Cut 2 - 1 1/2" x 2 1/2"
F - Cut 2 - 1 1/2" squares
G - Cut 4 - 1" squares

From the #1 Fabric:
H - Cut 2 - 1 1/2" x 10 1/2"
I - Cut 1 - 1 1/2" x 6 1/2"
J - Cut 2 - 1" x 6 1/2"
K- Cut 4 - 1" squares

From the #2 Fabric:
L - Cut 1 - 1 1/2" x 6 1/2"
M - Cut 3 - 1 1/2" x 2 1/2"

Of course you don't have to put a block in the middle of the screen...
You could use just one fabric...for that:
N - Cut 1 - 6 1/2" x 7 1/2"

This block is basically constructed in 3 easy peasy sections.
This is the layout for the middle section.
First add the easy corner triangles (K) onto each corner of the TV screen...
before you can add the other pieces on the sides.

Then add the (H) pieces
on the top and bottom.

Center of TV is completed...
now for the top and bottom!

The top section consists of two easy corner triangles
onto the two top corners the antenna base.
Then adding the (B) square on top
and then the (A) pieces onto each side.
The bottom section consists of first
sewing 2 different size easy corner triangles
onto the feet...(G) and (F)
Keep in mind that these go in opposite directions:)

Top and bottom complete!
Add the (C) pieces to the sides of the TV
before you add the top and bottom.

YaY!!!...how cute:)
Just need to add the
embroidery and buttons.
But I set this one aside
and made a six inch block first....
just for all of you 6" block addicts...
and I KNOW you are out there!!!

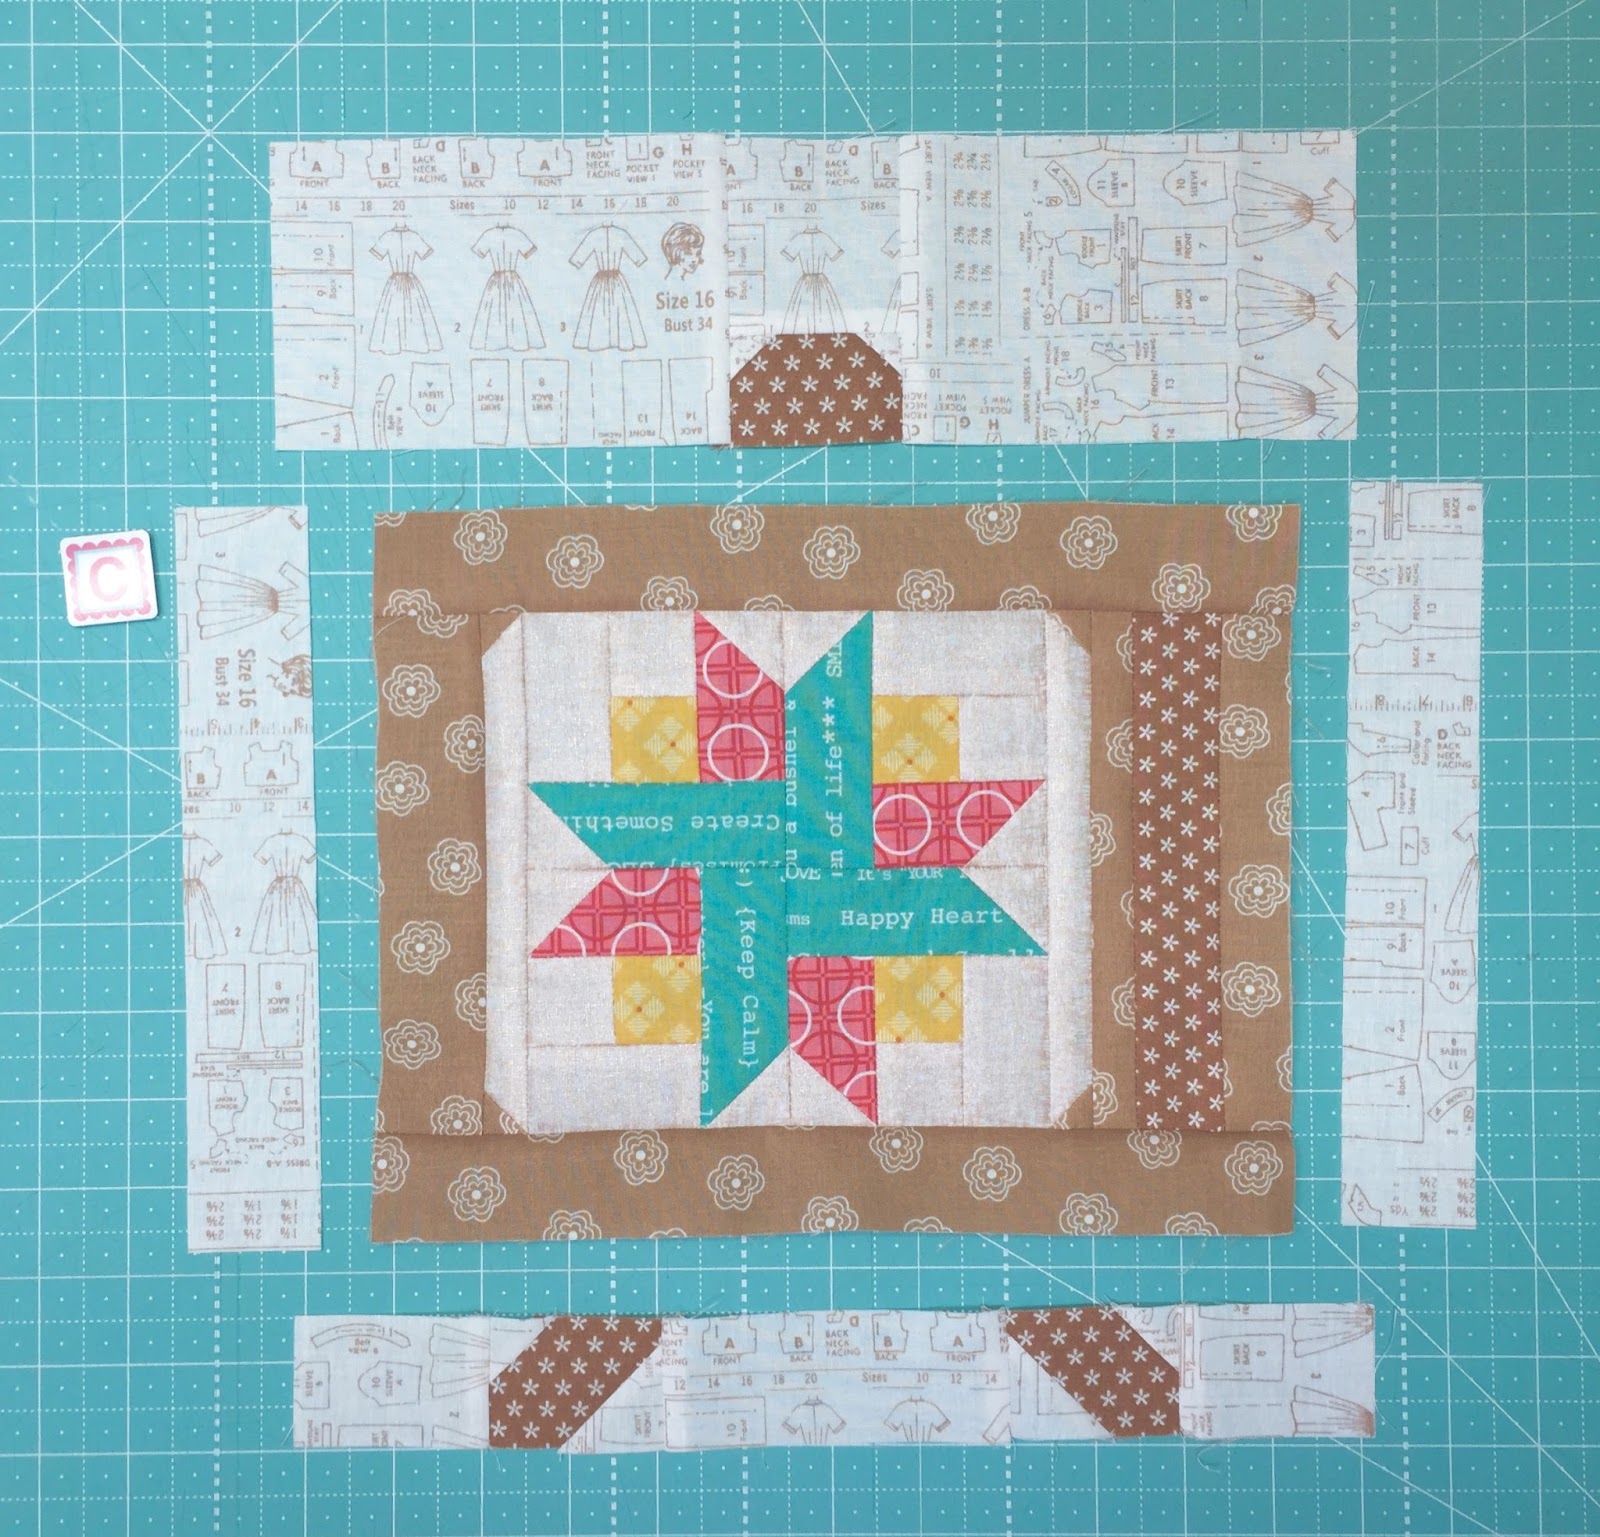
For this block I chose 3 Bee Basics prints and 1 Bee Backgrounds.

I chose Riley Blake Designs Bleached Denim for the TV screen....

And made the heart from the 6" Baby Chick Block
on page 10 from Farm Girl Vintage.

Cut 2 - 1" x 2 1/2
Cut 2 - 1 1/4" x 3 1/2"
and add around the heart.
OR
N - Cut 1 - 3 1/2" x 4"
if you want to use one fabric.

Of course the construction of the block is exactly the same as the 12"...
as well as all of the labeled pieces have the same letter....
but here are the cutting measurements for the 6" size:
Background:
A - Cut 2 - 2" x 3"
B - Cut 1- 1 1/2" square
C - Cut 2 - 1" x 4 1/2"
D - Cut 1 - 1" x 2 1/2"
E - Cut 2 - 1" x 1 1/2"
F - Cut 2 - 1" squares
G - Cut 4 - 3/4" squares
Fabric #1:
H - Cut 2 - 1" x 5 1/2"
I - Cut 1 - 1" x 3 1/2"
J - Cut 2 - 3/4" x 3 1/2"
K - Cut 4 - 3/4" squares
Fabric #2:
L - Cut 1 - 1" x 3 1/2"
M - Cut 3 - 1" x 1 1/2"

Now both sizes are completed and
ready for embroidery and button knobs:)
PS. I cut 1 1/2" borders of
background fabric for the 6" block.
I cut 2 1/2" borders for the 12" block:)

I just grabbed a ruler and a mechanical pencil and drew 2 straight lines...
they are not the same length and go opposite directions just like real antennas...
so don't stress about it:)
Single line on the 6" block....

Double line on the 12" block:)

I used my Aurifloss (all 6 strands) and
I added tiny Cute Little Buttons on the ends
of the antenna and
1/2" Cute Little Buttons on for the Knobs:)

I just did a french knot on the ends for the
6" blocks and more Cute Little Buttons for the Knobs.
This is my
"I Love Vintage TV" Block.
When I'm not binging on Netflix while I quilt...
I usually have all the old shows on.
I really love TVLand and MeTV.
Nothing compares to good old vintage classic shows ...right?

I hope you love this tutorial and these two new blocks as much as I do.
I designed this block in 18" size too and will show you that project tutorial
in the next Bee in my Bonnet episode...
so stay tuned!!!
xx
Lori
PS. I'd love to see
your blocks on social media...
use the hashtag
#VintageTVblock
so I can see them!!

28 comments:
How adorable! I absolutely remember when TVs looked like this, including the rabbit ears antenna! Thank you!
I love this block! And love your lil digits peeking into the last pic! LOL! Honestly, the most difficult part of sewing/quilting/creating for ME is choosing fabrics. Everything you chose is perfect. xoxo
❤️ the blue and red one the best!!!
Absolutely love it! How did you ever come up with the idea to do an old fashion TV?
Super cute and fun Lori! Brings back childhood memories!
Love this block and the fabric!!! My question is...where is the tin foil?' LOL
These are so clever!! Creatively vintage! Guess that means I am too, as I remember tv's just like this, but even before color! Hehe. Thx for sharing your creativity with all of us.
Thank you! I love this block!
How cute! I will have to get busy
the tv is cute. will have to make one. :)
What a cute vintage block!
So adorable! I have some Disney Bambi and Jungle Book fabric that would be perfect inside the tube. Thanks for sharing.
Love, love, love it...Thanks Lori, for sharing your creativity!!
My first TV had bunny ear`s. This block reminded me of that time when there was only me and my cat. :) I will look at my `Farm Girl Vintage` book for a favourite block. Looking forward to `Bee Happy Sew Along`. Hubby and I will be in USA soon after this starts celebrating 50 years of Pen Pal time with my Pen Friend. :). Hope to catch up once home again. Happy Stitching.
Love it!! Can't wait to make one. Was so happy to find your post, I have been missing your blogs.
I love classic TV too, especially MeTV. I am a classic tv addict. This will be perfect as a pillow too. Thanks for sharing your beautiful work.
This is adorable! I need to make one.
Love it!! Can't wait to make one. Was so happy to find your post, I have been missing your blogs. Keep the beautiful colors and patterns coming. I sent you a message on your Etsy account about a six inch canning jar block. I have looked through all of my patterns and books and cannot find one. Please let me know I just need a single jar in a 6-inch pattern.
LOVE the TV blocks!! I cannot wait to get started on sewing them up. I am planning on joining in on the sew along at summer's end. ☺
This made me giggle. Wow, do I remember those old TV's and using tinfoil on the rabbit ears. Thanks Lori!!
P.S. Can't wait for your August Sew Along, looks like fun!
Hi Lori,
I love, love it! You are such and amazing and inspirational quilter! I made a quilt top from your Farm Girl Vintage book for a local quilt shop and now I can't wait to make these TVs! THANK YOU for making it so much fun to quilt!
amazing creation with beautiful pictures. Thank you so much for sharing this.
I'm so old it took me a minute to remember the foul.
I cannot WAIT to make this - I might have to put a hockey stick in the middle of mine, as I have many fond memories of watching the Detroit Red Wings on our old black and white Zenith with my dad! This is SO adorable!!!!
And I totally forgot to say THANK YOU!!!!!!!!!!!!!
What gorgeous Mini quilts thanks for sharing the tutorial!
Lori, thanks for sharing this! I love making mini quilts and this is perfect. I wonder if the blocks could be coasters??? I'll have to reread and see the size of the stars. Don't want my glasses tipsy.
Awesome tutorial post. Though a video might have made it easier to understand but considering the posts age it is really good. ...
Post a Comment