

Today is the day for the
"Bee Prepared"
post that I do in preparation for my
appliqué sew alongs using my
Sew Simple Shapes
and my latest fabric collection.
This one is the
PRIM SEW ALONG
and I'm so impatient for it to start!

We will be making the
Prim Quilt which finishes at
72" x 90"
It has twelve 16" appliquéd blocks
which we will be using my
Sew Simple Shapes to make...
and there are fourteen
rotary cut and machine pieced
Prim Steps Blocks for the borders...
and also four - 10" Prim Corner Stars
that are rotary cut and machine pieced.

My Sew Simple Shapes Sew Alongs
always take place here on my blog
and they are on Monday's.
This one starts August 24th...
just three weeks from today!!!
How do you join the sew along?
1.You simply grab yourself a
PRIM Quilt Fabric Kit
2. You will need the
PRIM Sew Simple Shapes and
the Sew Along Guide
3. Gather up supplies needed
to make the quilt
4. Come here to my blog every Monday
during the sew along
(starting August 24)
where I will give you the
free step by step tutorial
for that weeks block.
Please read ALL of the information
within this post telling you all that
you need to know about this sew along.
Once the sew along has begun...
each of my weekly posts will be
tutorials about actually
making the blocks and so I am
telling you here all about the supplies
and other things necessary to get started.

There is no pattern to purchase...
basically the
are the pattern and the instructions on
how to use them for each block
are shown weekly here
on my blog during the sew along.

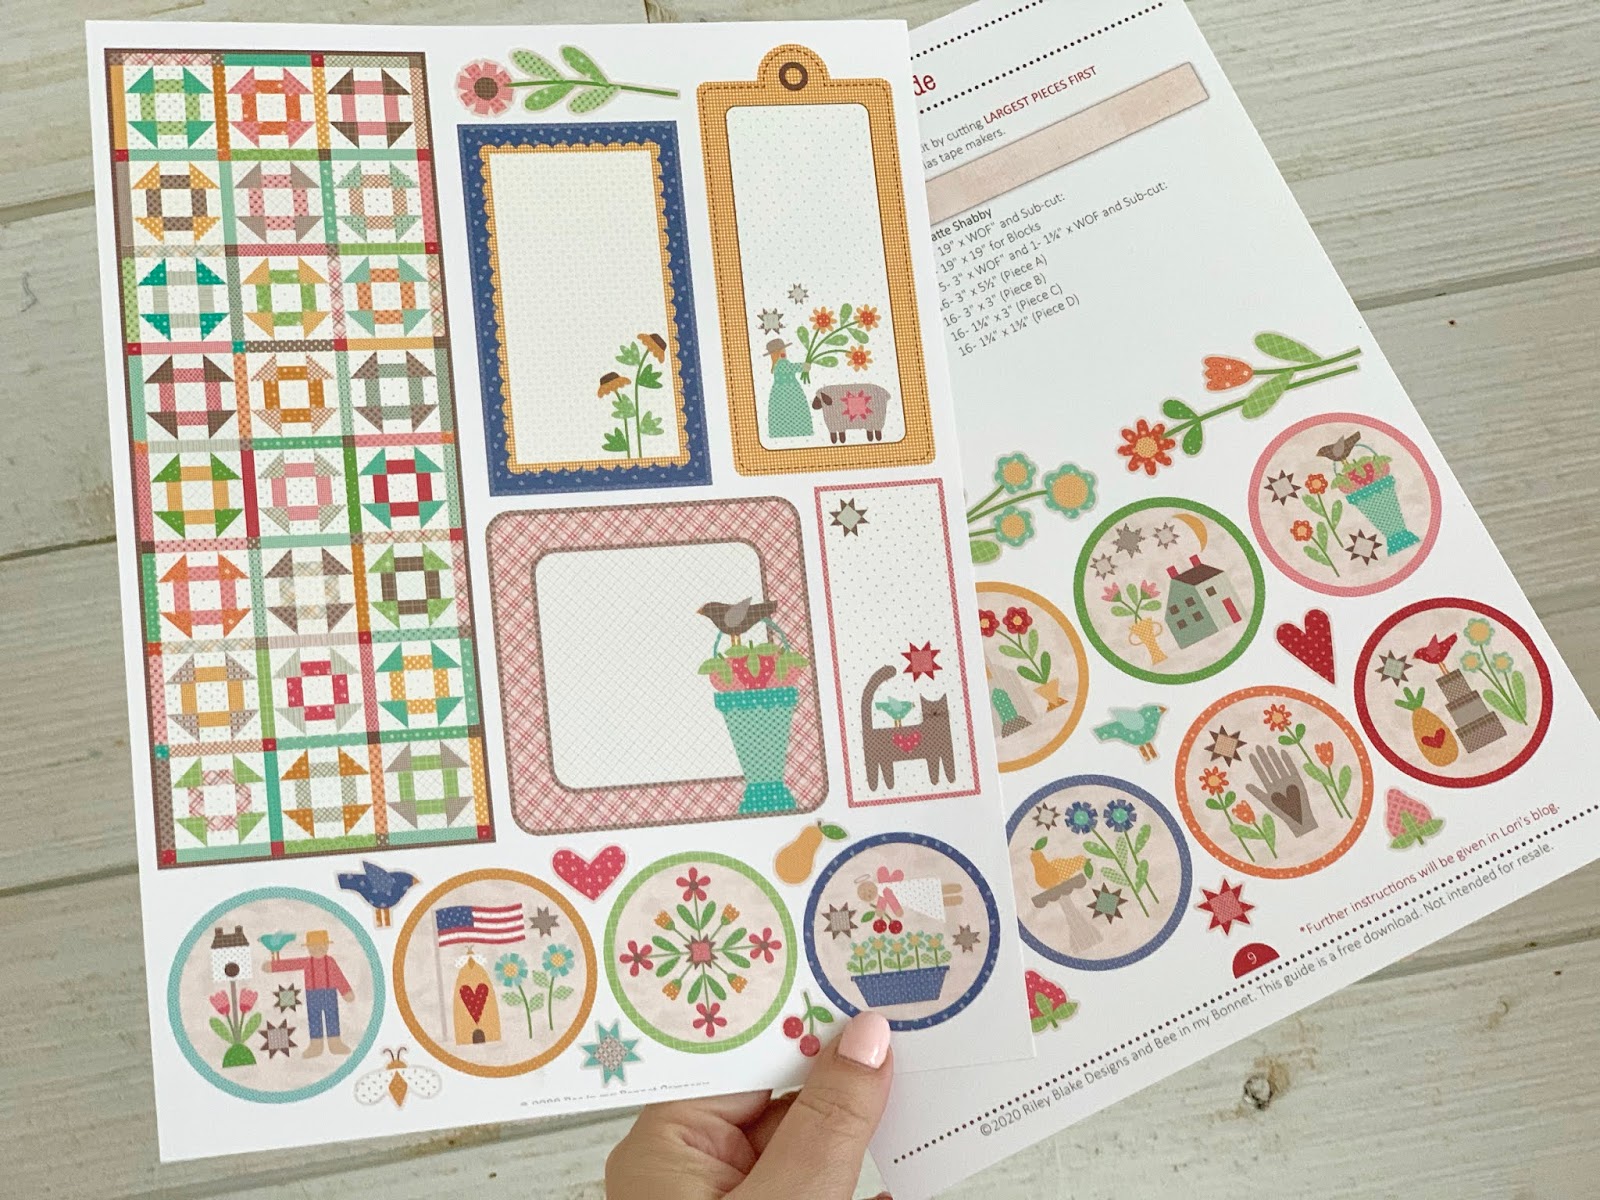
Along with the shapes you will
need to download the handy dandy
Prim Sew Along Guide
for the free download.
In the guide you will have:
A print out of the finished quilt...
the schedule of what blocks
we will be doing each week
during the sew along...
(in this photo the number 8 shows up
twice lol the dates are correct)
Also in the guide you will find
fabric requirements for the quilt...
and notion requirements for the quilt
as well as suggested notions
that I use when making mine.

You will also find instructions
for cutting each and every
piece of fabric in your kit!
It will tell you what that piece is for...
which Sew Simple Shape it is used with
and what block it belongs to.
This way you can cut ahead of time
and make individual block kits for
your quilt and have them all
ready to go each week!

As with any sew along...
organization is really the key.
I like to have this information
ready for you ahead of time
so that each week we can
simply make the block!!
You will also find the cutting
measurements of the Sew In Interfacing
that goes with each Sew Simple Shape
so that you can have that all cut
and ready to go:)
I like to put my Sew Along Guide
in a binder and decorate it
for the sew along...
after all I will be using it
for at least 13 weeks and
it needs to be cute!
With that being said...
I have given you a page and a half of "PRIM" Clip Art
to decorate your binder!
I am also a paper crafter and planner girl
at heart because I never have
grown out of the cutting and pasting era
of my childhood and I know a lot of you
have not either...
which makes us kindred spirits:)
You can also use this clip art to
decorate your planner...
make bookmarks...
or tags for organizing and gifts.
If you are a shop owner
you have my permission to use my clip art
to tag your PRIM items and kits
that you are selling in your shop.
I have put each of the
12 Prim Applique Blocks into a circle...
you could use these to
put within each block kit
to label them...
the possibilities are endless!
I hope you enjoy them:)

And as always I have designed a page
for "PRIM Notes" so that you can
jot anything down from my blog posts
each week during the sew along.
You can print as many clip art or
note pages as you would like
for your own personal use...
just keep in mind that they are
copyrighted and they are not for re-sale.
They are meant as a gift to you
from me for joining the sew along
and to add even more fun!
P.S. I do recommend copying the clip art pages onto card stock
for paper crafting and decorating:)

Okay...enough about the guide...
let's talk about the fabric!
The collection that we are using
for the Prim Quilt is of course...
PRIM!!
"Take a step back in time with my
latest fabric collection called PRIM.
My inspiration for this line of fabric
comes from an earlier period of history
which was reminiscent of gentler times,
when things were simple and homegrown
and handmade with love...
when friends and neighbors
worked and worshiped together...
and put their hands to work
and hearts to God.
Pull up a comfy chair,
make yourself at home...
and allow PRIM to tug at your heartstrings
as well as your creativity!"

There are 42 prints in the collection
and I also designed 4 more prints
to go into my
Bee Backgrounds Collection
that go especially well with PRIM.

In addition to the 42 prints ...
I have designed a "cheater cloth"
called Prim Churndash.
I love this print!
Although we are not using it
in the Prim Quilt...
there are certainly a lot
of possibilities with this one:)

If you have not already pre-ordered
your fabric kit and still need one...
just do a quick google search of
"Prim Quilt Kit" to find one...
google is your best friend lol...
easy peasy!!
For the quilt we will be
using all 42 prints...

As well as two of the Bee Backgrounds
and the "Clover" Confetti Cotton
for the stems and "Beach"
for the faces, arms and legs.
I developed another of my SHABBY prints
to use for the background of
each of the applique blocks.
So far I have 55 SHABBY colors and
this one is called "Latte"
We will use the Pewter Ticking in the collection for the binding.

With each collection that I design...
I also design 3 wide back prints
(108" wide)
to use for the backings on any and all
of your PRIM projects...
it's so nice when you don't have to
piece the back!
Here are the 3 Prim Wide Backs.
You can choose whichever you would like
for the back of your quilt...
they all match perfectly:)

This is the set we will be using;
PRIM
Sew Simple Shapes
This is my biggest set so far...
big meaning the most pieces...
a whopping 62!!
Because I am a visual person...
I thought you might like to sew
a photo of each of the supplies
and notions that are listed in the guide.
***The following photos are some
of my notions and other of my
favorite notions that I am using
to make my Prim Quilt.
You will see me using them in the
tutorials during the sew along...
so I thought I would tell you about
each of them here...
to answer any questions that
you may have about them.
You can of course use what
you would like...
these happen to be my favorites:
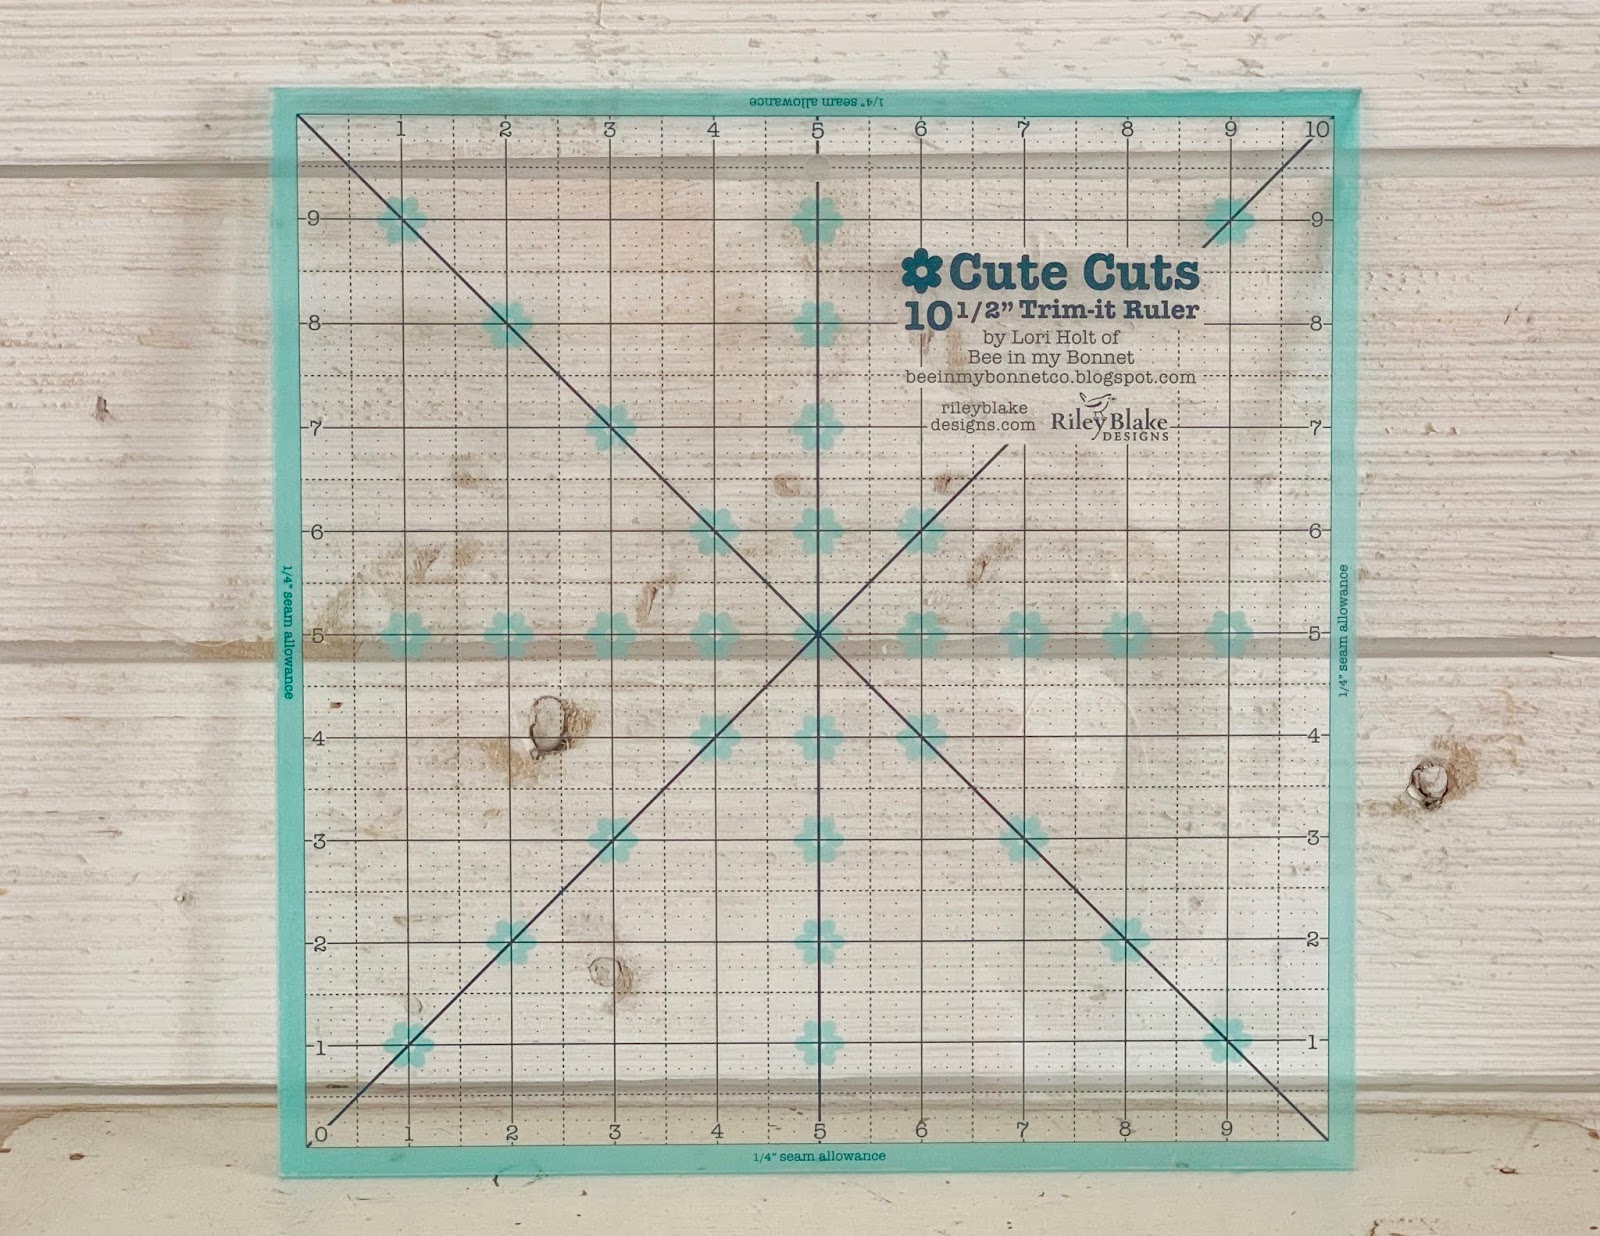
The Cute Cuts 10 1/2" Trim - It Ruler
is used to trim up the border
and corner blocks.
(Prim Steps and Prim Corner Star)

The 16 1/2" Cute Cuts Trim - It Ruler
is used for placing and centering
the applique blocks during preparation
for applique and then
trimming them up after applique.
(Backgrounds are cut larger to allow
for working the block and
then trimmed up later)

You will need close to 2 full packages
of my Sew-In Interfacing.
Since starting my sew alongs that use
my easy applique method...
I have developed what I think is the
perfect strength and thickness of
interfacing for shaping the appliqués.
I also use the
Point to Point Turner by Clover
to shape each of my pieces...
I could not do without this handy tool!

I pin and then glue baste
each block for applique prep.
I love love love this glue by Sue Daley
and affectionately nick named it
"Sue Glue"
It is water soluble...
dries clear...
keeps my pieces in place for applique
but can be pulled off if I need to reposition...its a win win!
Here are the 2 sizes of the
bias tape makers by Clover.
The green is 1/4" and the yellow is 1/2"

Here is a photo of my NIFTY NEEDLES...
they come in a card and also
individual needle tubes as well.
There are 6 different kinds...
shown in the tubes are the ones
that are relevant for this quilt.
Embroidery...applique and binding.
You can also use the sewing needles
in one of the smaller sizes
if the applique needles are
too small for you.
It's really a personal preference...
they both work just as well and
there are several sizes
to choose from within each tube.

This is what the inside of
my needle card looks like.
You can see that I have
color coded each needle so that you
can easily identify them when
they are removed and placed
into your pincushions or needle books.
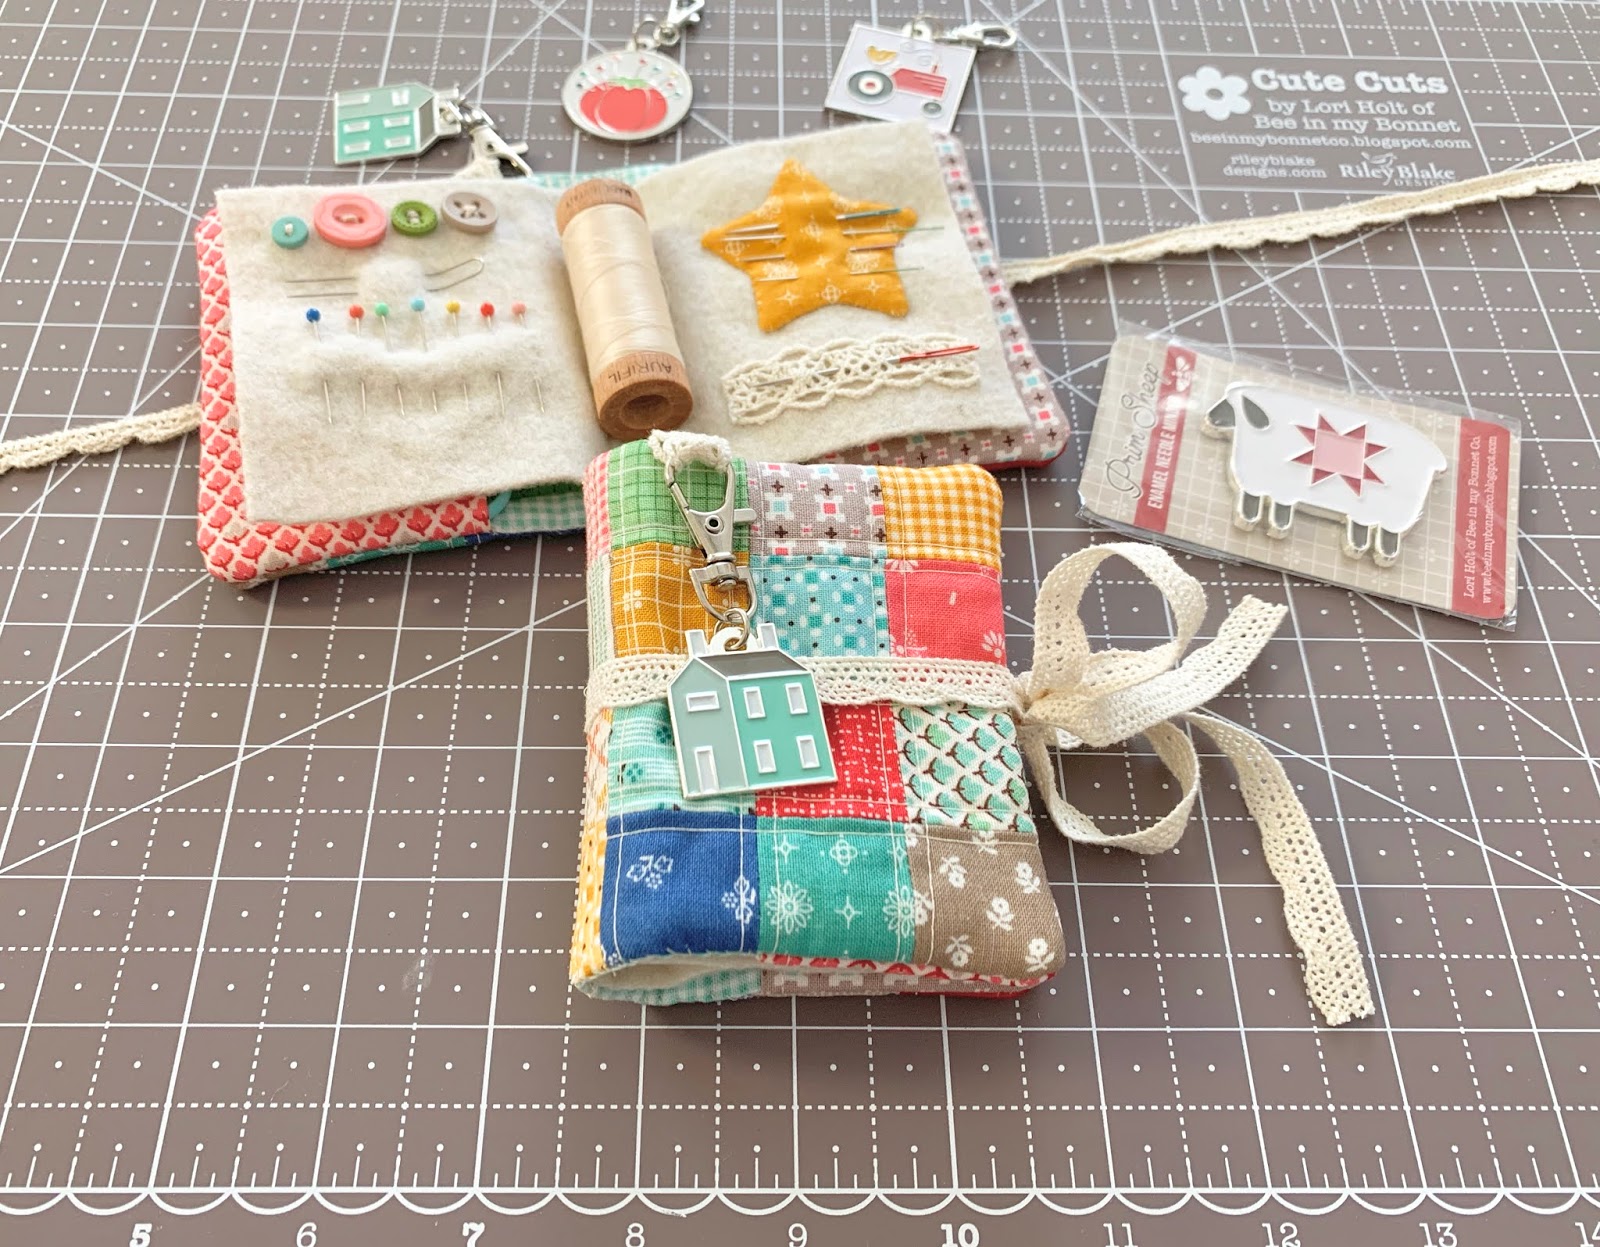
And speaking of needle books...
I have done a tutorial on how to
make my needle book with pockets
using my PRIM fabric.
I recently joined YouTube and have
started my own channel.
That's where you will find the tutorial
to watch and make one for yourself!
It's a perfect place to keep your
needles for applique and your
binding thread too:)

Let's talk thread.
I have a new Aurifil thread set
out for Prim that includes
10 colors that are new.
You can use them in addition with my
other sets to match my fabrics!
The thread is 50 wt. and is used for
APPLIQUE and NOT embroidery.
You can decide if you would like to
machine applique or hand applique...
either way you will need to
have matching thread for each applique.
This thread works for both!
If you are machine appliquéing
you would use it for the top thread
but you would not need to change
your bobbin color as it would
not show on the top.
There is a little bit of embroidery
on a few of the blocks
which uses all the same color.
If you have my PRIM Aurifloss set
for cross stitch you can use the
1140 Raisin
P.S. Aurifloss is made by Aurifil and
is a six stranded embroidery floss
for handwork...not for the machine.
You do not use Aurifloss for applique...
but for embroidery or cross stitch.
You can also use DMC 3021 as it is
a good match as well.
One skein is plenty!

Any embroidery patterns for the quilt
are in the sew along guide.
You can tape that page to a window
on a sunny day to trace directly
onto the fabric for embroidery
(I use a .05 mechanical pencil)
or you can use a light box.
I use my Easy Trace Light Box.
I'm excited to announce that
it's time to produce them again!...
they will be exactly the same but I will
do a different color this time
just to change it up!
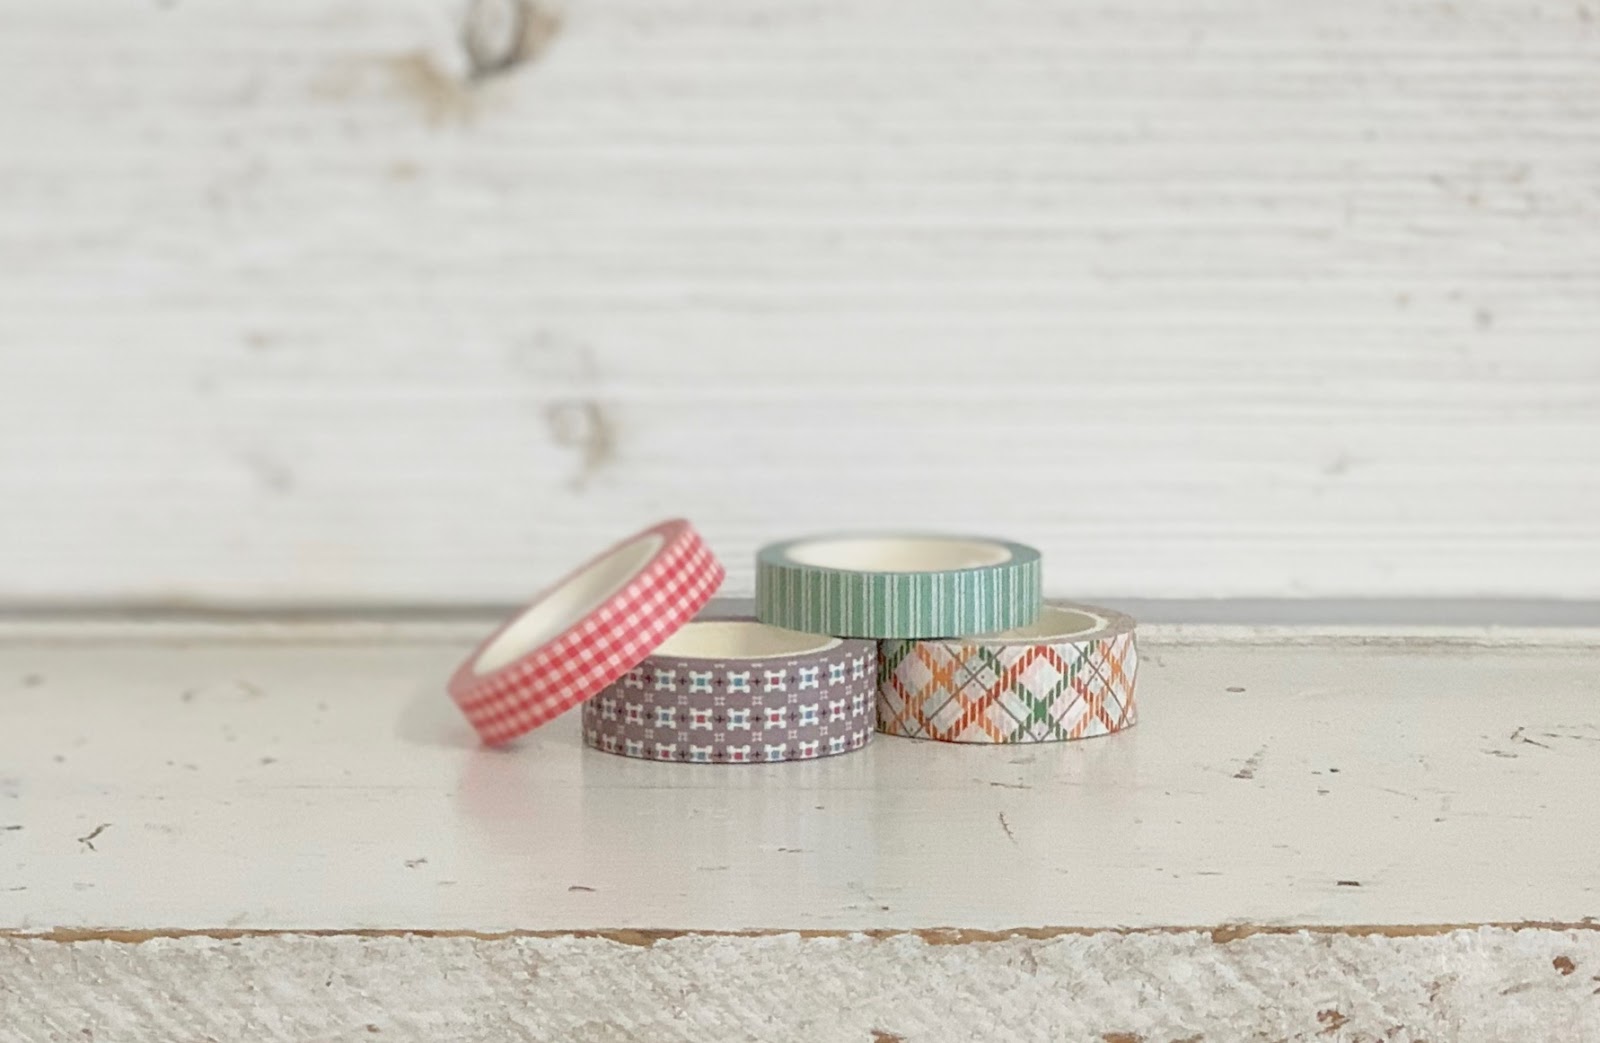
I use my washi tape for
taping my embroidery pattern and fabric
onto my light box for tracing.
I don't want my pattern or fabric
to shift during this process.
For those of you who may not know
what washi tape is...
it was developed for paper crafting and packaging but I also use it
for sewing and quilting!
Just think of it as cute
miniature painters tape.
It has a low adhesive so that it
can hold temporarily and can be
peeled off without leaving
a residue on fabric.
Perfect for taping paper
and fabric to the light box!
I do a set of four washi tape designs
with each fabric collection
and these are from my PRIM set:)

I have several different sets of
Pretty Pins and these are the two
that I use when making this quilt.
The Double Pins are used when
piecing blocks and I will
show you during that tutorial.
The Applique Pins are used for
pin basting into the design boards
and are essential to me!
These are just the right length
for this task...
which is why I call them appliqué.
I also have "mini applique" Pretty Pins
that are short and tiny and are
used for hand applique
when I don't glue baste.

And again...speaking of pins...
of course you need a pincushion
for this sew along!
I made this one to use
when making my quilt...
I made it with one of the prints...
my Bee Cute Lace and a
vintage silver sugar bowl
that I thrifted for just a few dollars.
It has the perfect amount of wear on it
and a beautiful patina.
I also did a tutorial on my
YouTube channel on how I make my
pincushions from vintage finds.
to go on over for a visit!

I use Bee in my Bonnet Design Boards
when cutting and for pinning and
glue basting each applique block.
The new PRIM ones come in
three sizes...10" - 14" and 18"
There are 2 prints for each size.

You will need sewing scissors
as well as embroidery scissors.
I use both...these are my
9" Sewing Scissors (available soon)
and my Stork Scissors
that are available now.
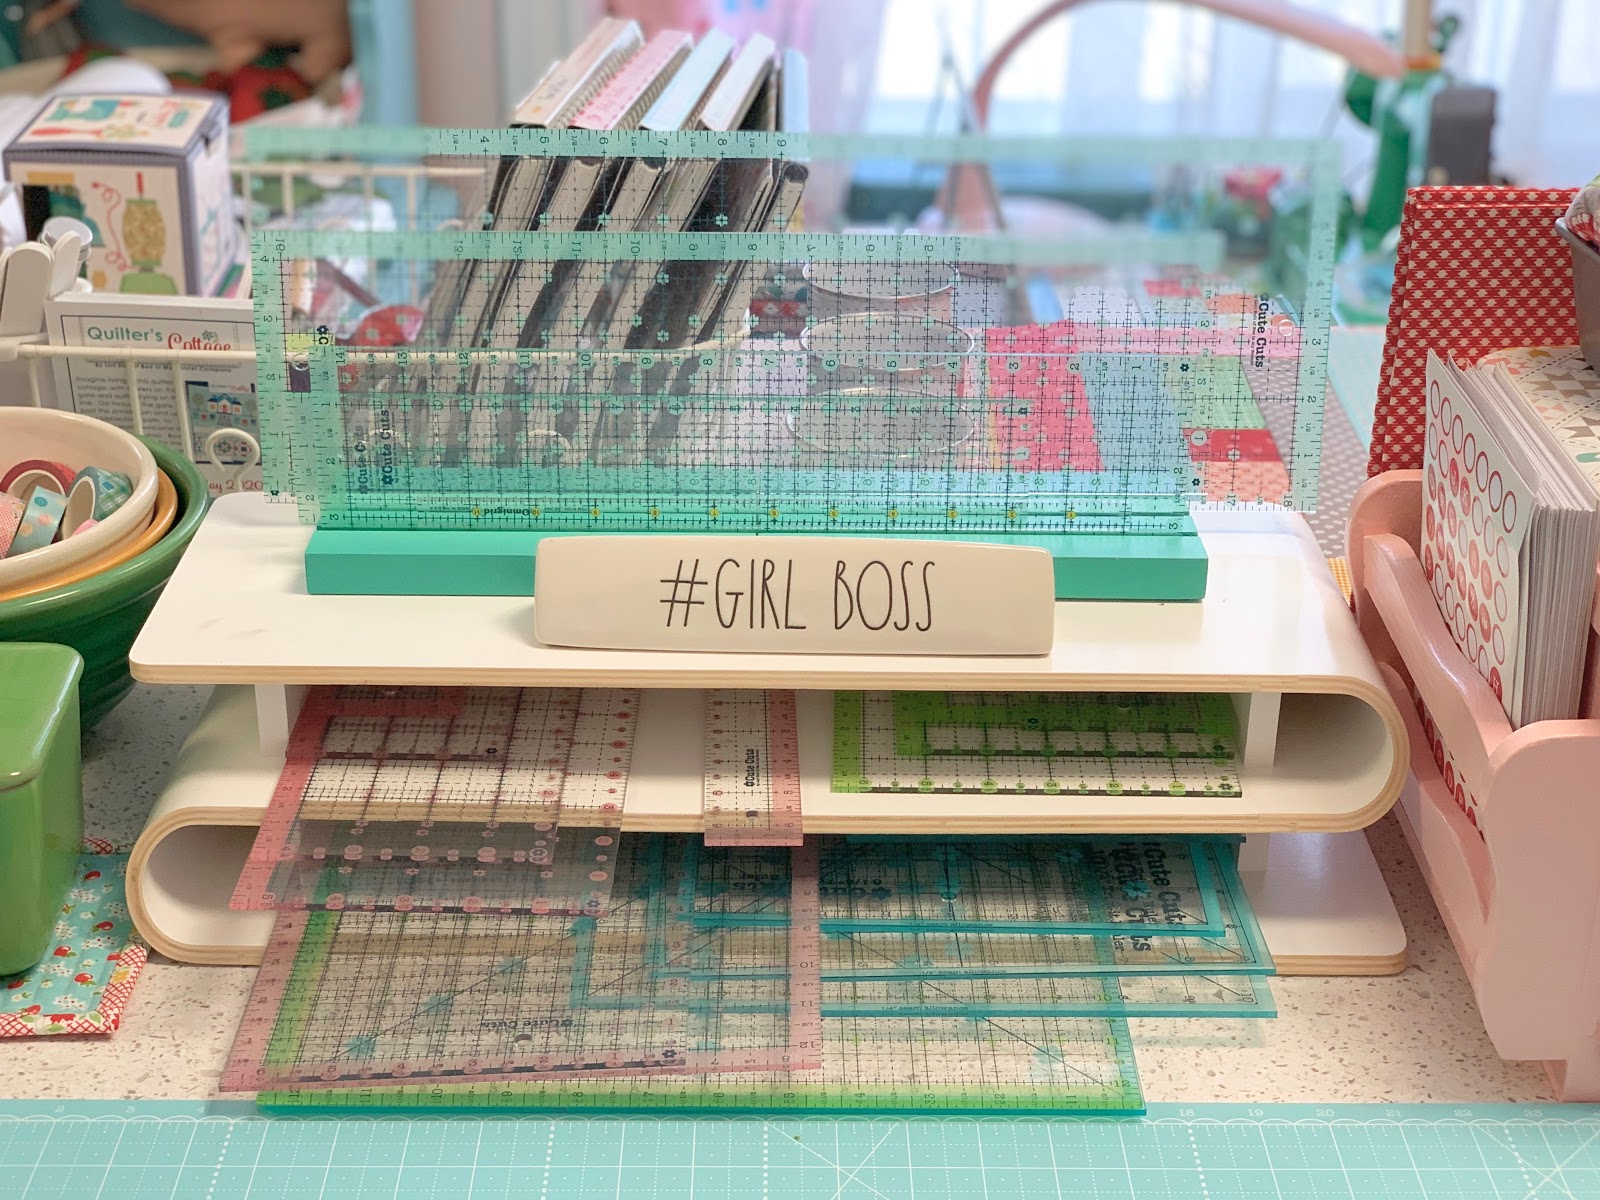
You will need all sizes of
cutting rulers and of course a cutting mat...
I have a variety of Cute Cuts Rulers
in 4 different colors and shapes and sizes.

When I am cutting I use my
Sew Handy Stickers for labeling
my cut pieces and blocks etc.
They come in 5 different colors
and are letters and a few
number pages as well:)
These stickers adhere well...
can be ironed over...sewn over too...
but then they easily peel off
without leaving any residue.
LOVELY!!

When I cut my blocks for this quilt
I grabbed 12 of my small design boards
(I have literally a ton of these lol)
and I stuck a number sticker onto
each one for that block.
(Now that I have my Clip Art ready
I'll have to add these block circles
to the blocks I have not done yet!)

As I cut I placed the pieces
for each individual block on it's
labeled design board...
then stacked them up!
The board keeps them safe and they are
ready to go when needed.
Not pictured but added later was the interfacing pieces
all cut and ready to go on
each individual board as well:)
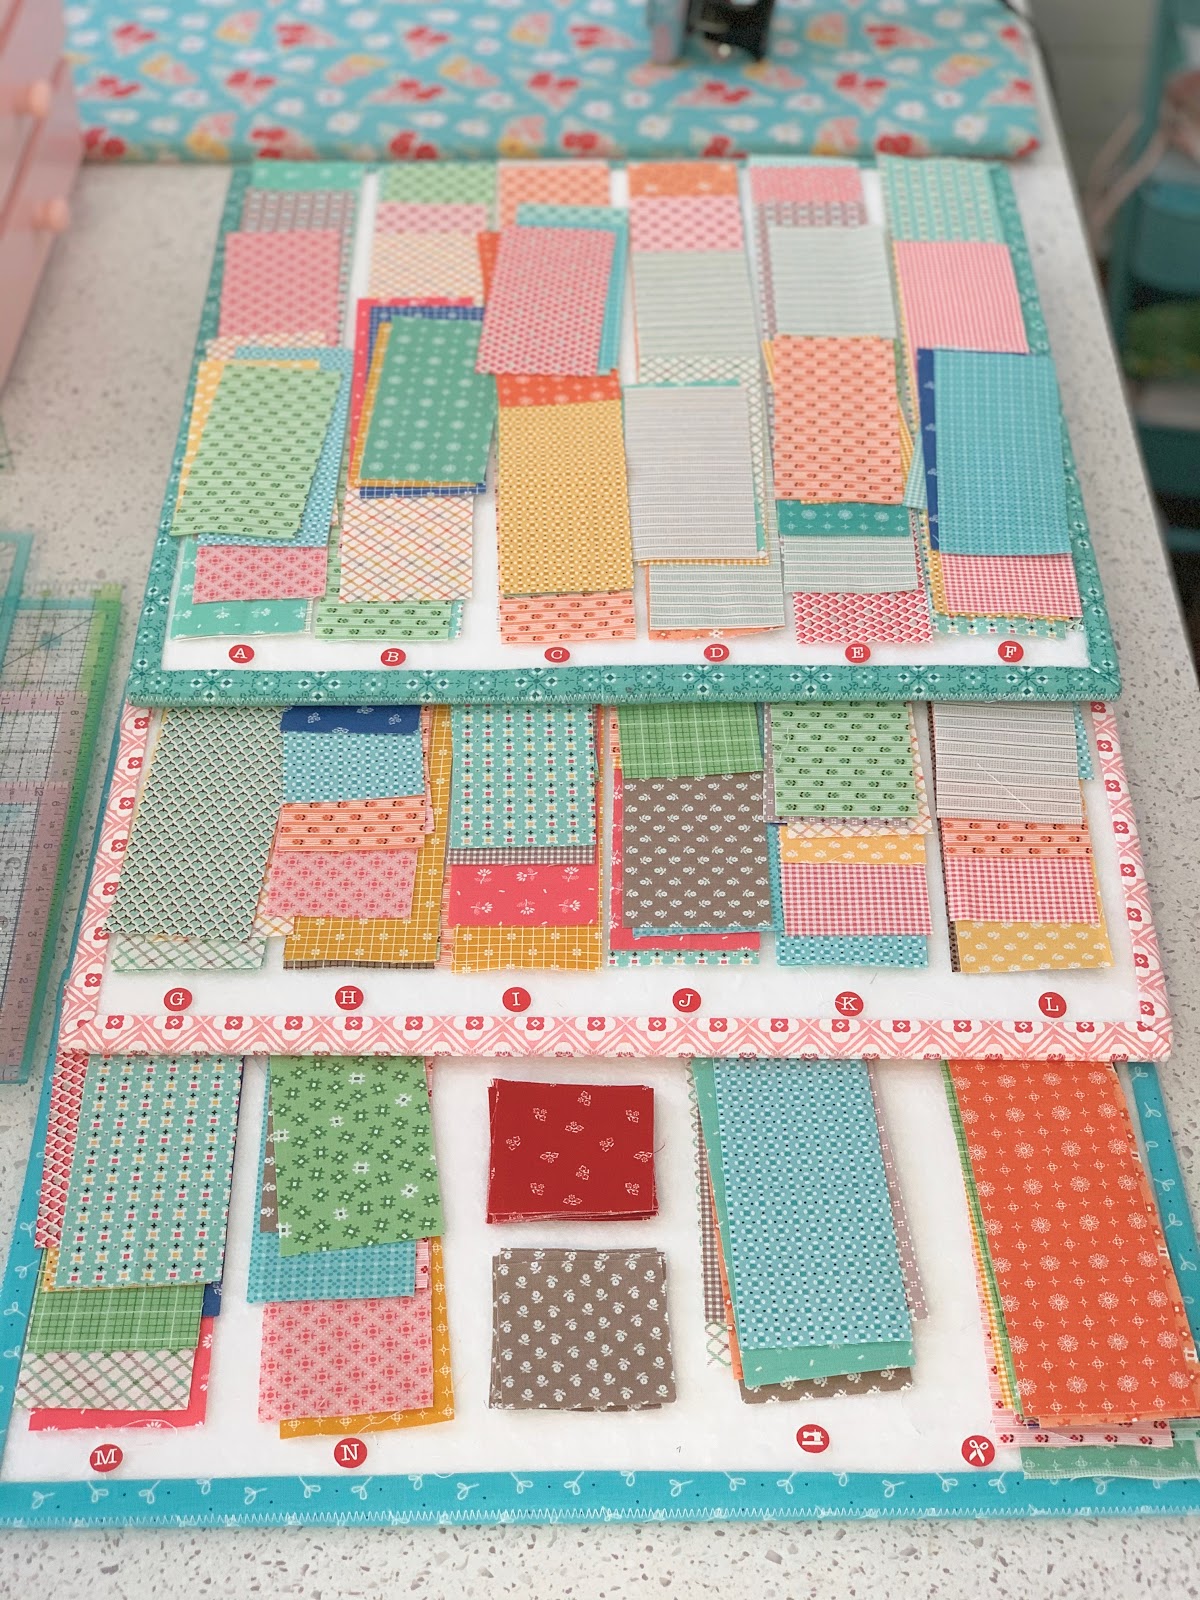
Here are all of my sashing strips...
corner stone squares and
Prim Steps Blocks
all cut and labeled
with the correct letter.
I have assigned each Prim Steps Block
a LETTER in the Sew Along Guide
and have labeled accordingly with my stickers.

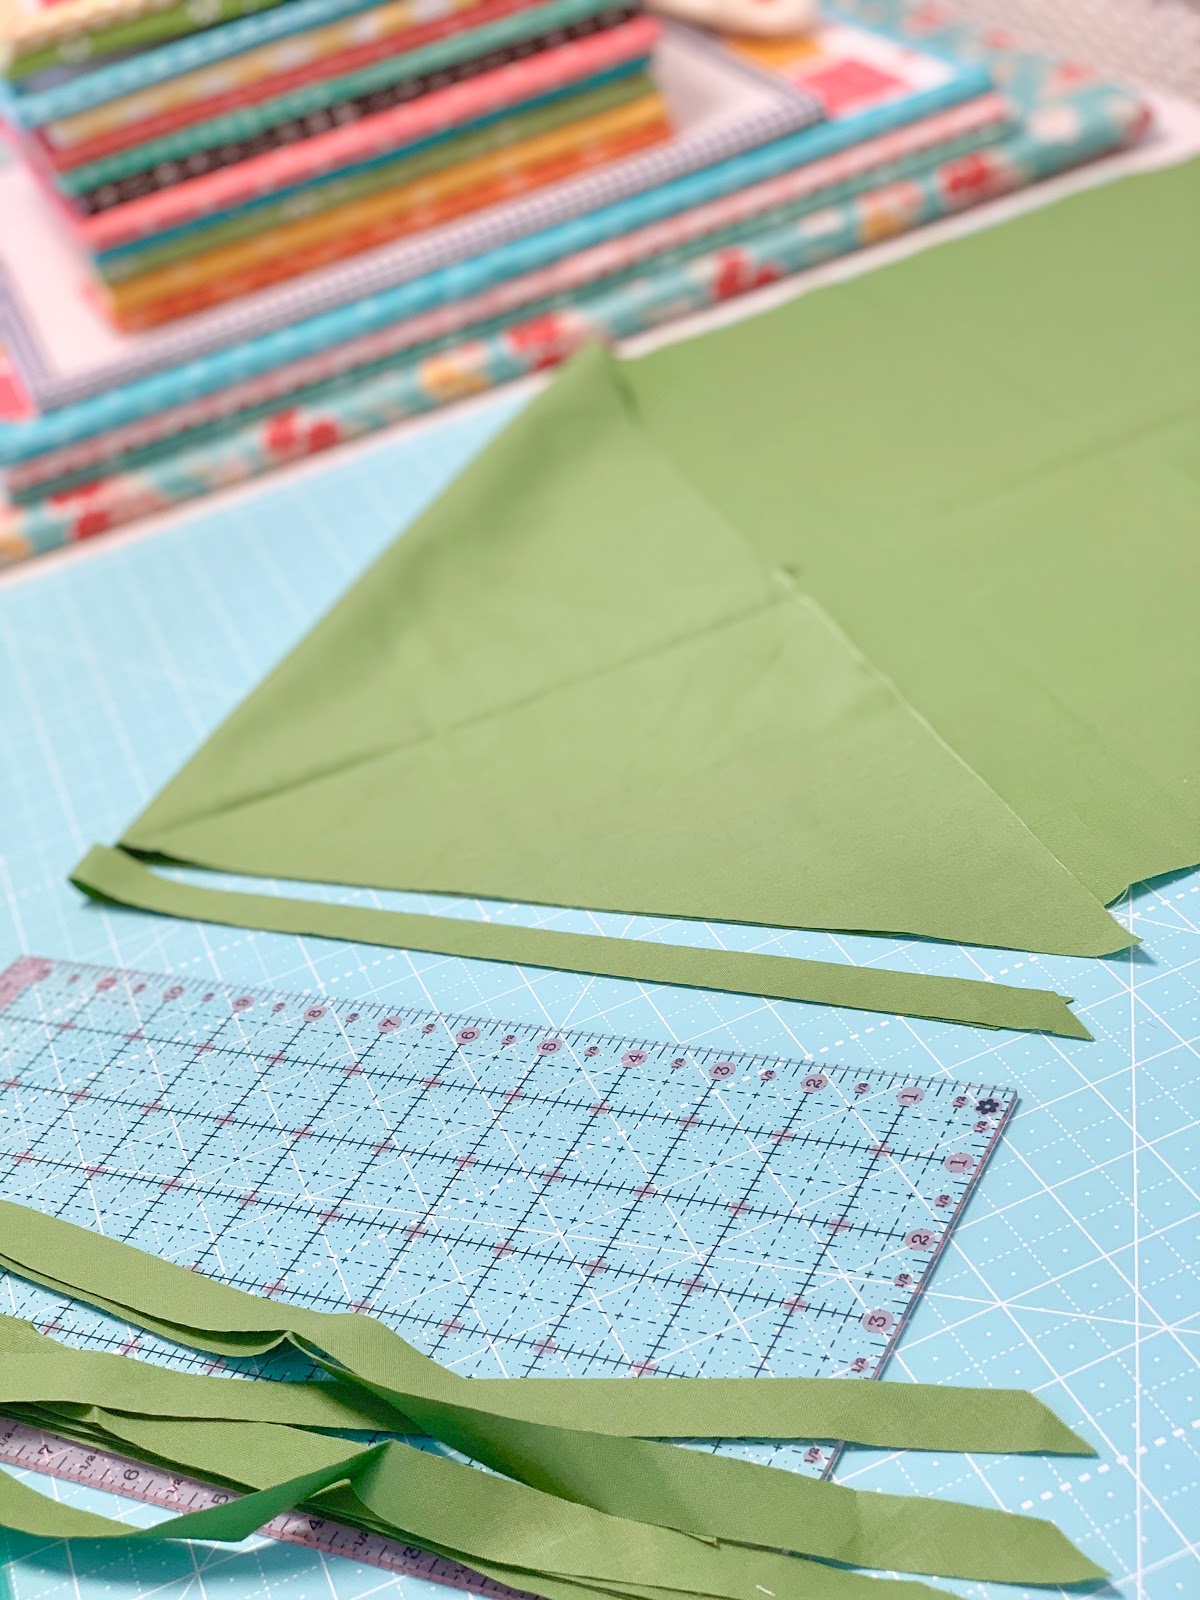
Here is just a visual about
cutting strips ON THE BIAS.
Most of the strips are straight cuts
and are specified in the
sew along guide within
each fabric cutting instructions.
Once in a while I will have you
cut a square and then cut some
strips diagonally from that square from corner to corner like this.
That is when those strips need to curve
so they will need to be cut on the
bias instead of just across
the width of fabric.
This photo is when cutting the
bias strips for block one.
These need to curve because they
are the white stripes on the flag.
You will cut these 1" wide on the bias.
Whenever I have you cut 1" wide
you will run the strips through the
1/2" bias tape maker.
This info is in the guide as well.

These bias strips will be used
for the curved handles in the vase
on block six but I had you cut one extra
on the bias too for the
brim on the mans hat in block four.
Even though the brim is straight
I like the way the gingham looks
on the bias across the hat for the brim:)
All strips are cut 5/8" wide
for using the 1/4" bias tape maker.

Sorry about this photo lighting but
it was dark and I did not have
natural light for this photo:)
Anyhoo...this is the bias strip that
you will cut for the
curved strawberry basket handle
in block two:)
All of this info is
in the guide but again...
visual photos are a help to me and
I hope they help you as well.

In the background of this photo
you can see all of my blocks
and border blocks cut and stacked.
Now I'm cutting across the half yard
of Clover Solid to use for
all of the flower stems.
Most of the stems are curved
which is why we are
actually cutting on the bias.
Some stems are straight like in
block 5 but its okay to make
straight stems from bias cut strips.
These will be cut 5/8" wide
for the 1/4" bias tape maker.
After cutting a few you can
actually fold down your fabric ...
lining up the cut edges evenly
and continue cutting 5/8" wide strips...
the fold would go across the top.
The strips end up the same length...
this is just so that you can
use a shorter ruler...
making it easier to cut.

I'm just keeping my cut stem strips
together in a pile and
pulling them out as needed for each block.

I also wanted to show you a picture of
my cut blocks for the
Prim Corner Stars
I have them separated and placed
on my medium design board until sewing.

And speaking of sewing...
you do not need a
fancy shmancy sewing machine
to make the applique pieces from the
Sew Simple Shapes.
Just a good straight stitch
is all you need...at just a regular
stitch length or just a bit shorter.
I am using one of my vintage
Singer Featherweight machines
for making this quilt.
You can see my
Seams Sew Easy Guide
taped to my machine...
(I use washi tape for that too)

I use my Seams Sew Easy Guide
when piecing all of the border blocks
for adding the easy corner triangles
and an accurate 1/4" seam allowance.
I'll show you during those block tutorials:)

Also...a note about ironing.
I do not use steam in my iron
and you want to make sure not to
after you have sewn your shapes
and are pressing them.
Just a good and dry hot iron works well
and I have found that a
seam roller works fabulous for
pressing my shapes after shaping as well.
I don't like to "smoosh" them down
and iron them too flat.
I like a little poof in my shapes
because it gives my applique a nice finish.
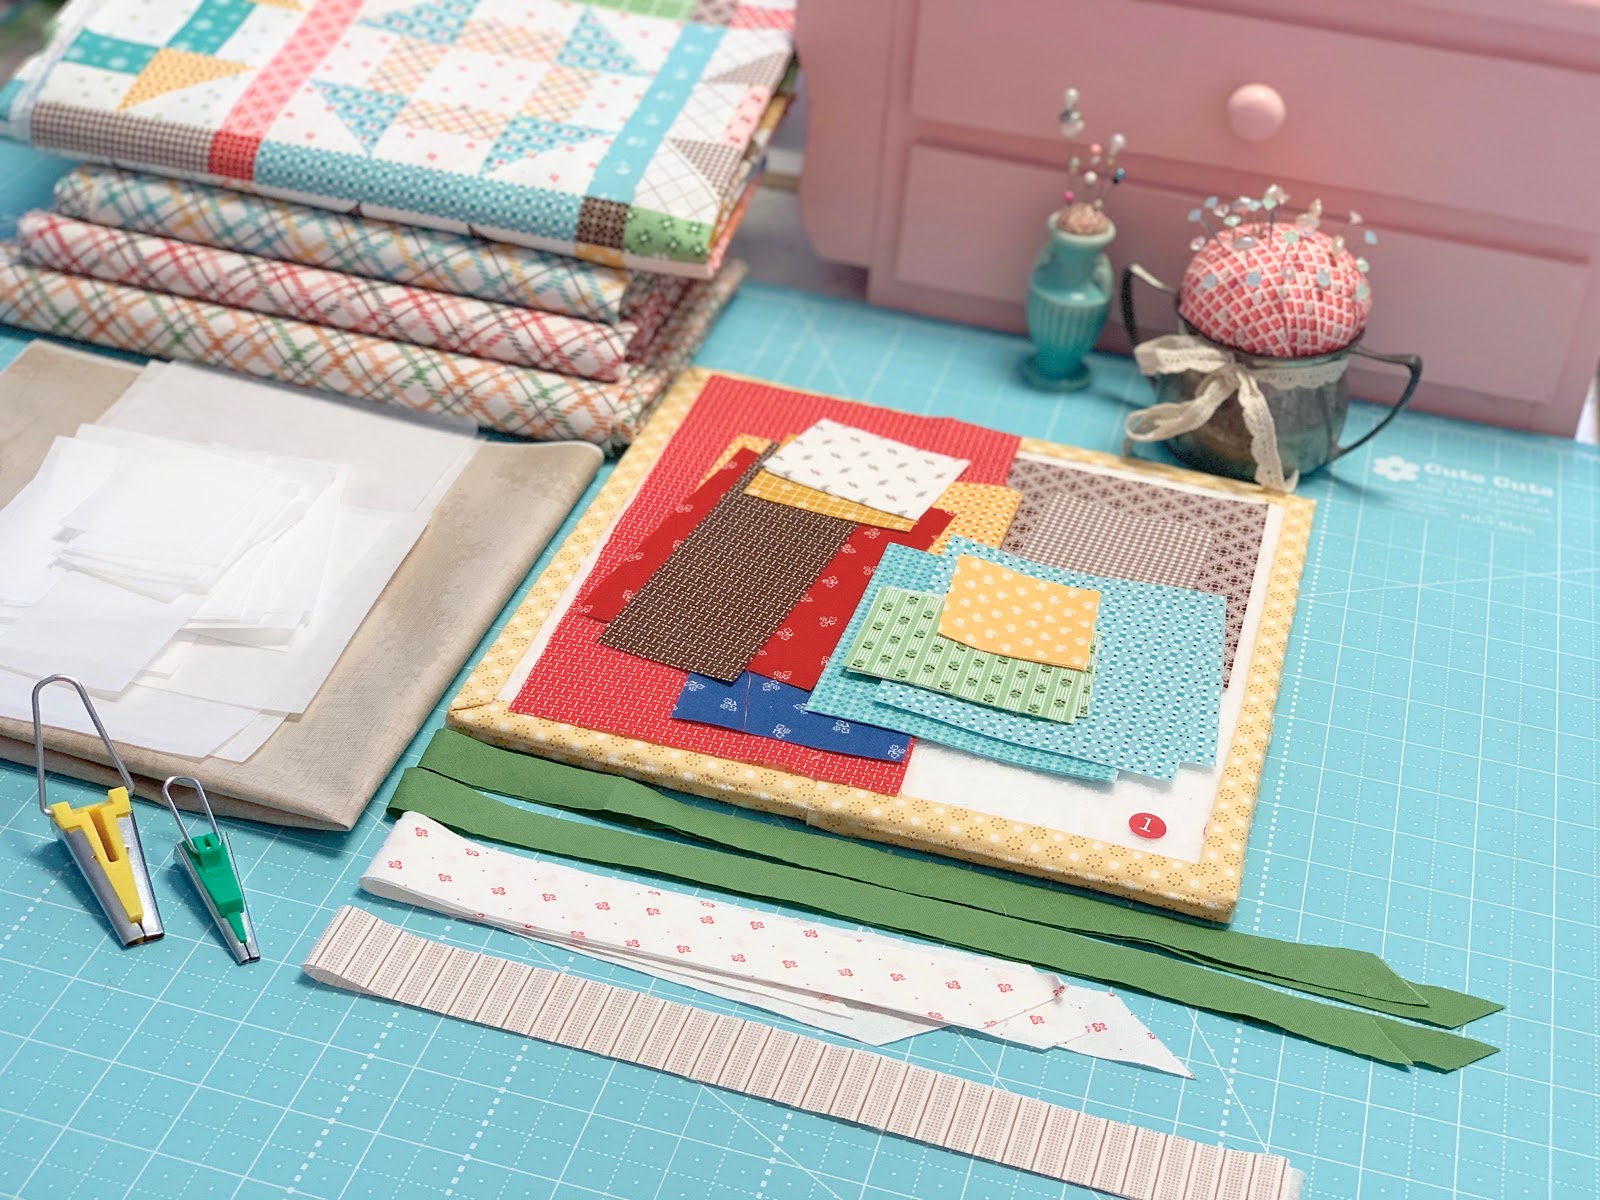
So here is my Block One
already cut and ready to sew and shape!

Here's a little peek at my
Block One in progress.
I have been working ahead so that I
can prepare the tutorials for you...
I am about 5 blocks ahead right now
and let me tell you...
I love love love each and every one!!
I will meet you right back here
on Monday the 24th for the
step by step tutorial for block one:)
Relax and have fun while
preparing your block kits
using the guide instructions.
It's not a race...take your time!
When I have a lot of cutting to do
I like to listen to an audio book
or binge watch something.
While I cut all of the pieces
for my Prim Quilt
I binge watched "Anne with an E"
on Netflix.
It was the perfect companion for Prim!
Sew with you soon...
xx
Lori

7 comments:
I`m looking forward to this and have ordered my Prim Shapes but these could be awhile before I receive them in NZ. Happy stitching.
Beautiful fabric collection as always Lori! Can't wait to start sewing with you, once my kit arrives in Scotland of course!
I am ALWAYS late to the party!! lol! Just starting the BEE PATRIOTIC...but, I will watch and enjoy this SAL and maybe make one too!!! Thank you for your WONDERFUL inspiration!!! Your endless energy and enthusiasm is contagious!
This is my 6th sew simple shape sew along. I may not make the exact same quilt but I really enjoy making the applique blocks! I feel like I have made hundreds of flowers! You are an inspiration! Can't wait to make these prim blocks!
Wow!! Your post is the most perfect prep I’ve ever seen!!! This makes me want to move into my sewing room and never come out!!! AWESOME! Thank you.
Looking forward to this new sew along. During the Covid-19 pandemic, I am staying at home almost all the time, so a new quilt is something to look forward to! Love the new fabrics, but will have to use my stash for this one. This is my 4th sew along (Bloom, Farm sweet Farm, and Bee Happy). Thanks.
Lori I'm sew excited about this Sew Along! You have the most generous warm heart! Great thanks!!
Post a Comment