Showing posts with label Dresden Plate. Show all posts

Saturday, March 19, 2016

Dresden with Points Tutorial using Sew Simple Shapes


Today I'm going to show you how to make another cute little dresden.
This one has points and finishes at 4 1/2".


I love showing you different ways to use my


For this dresden I'm using
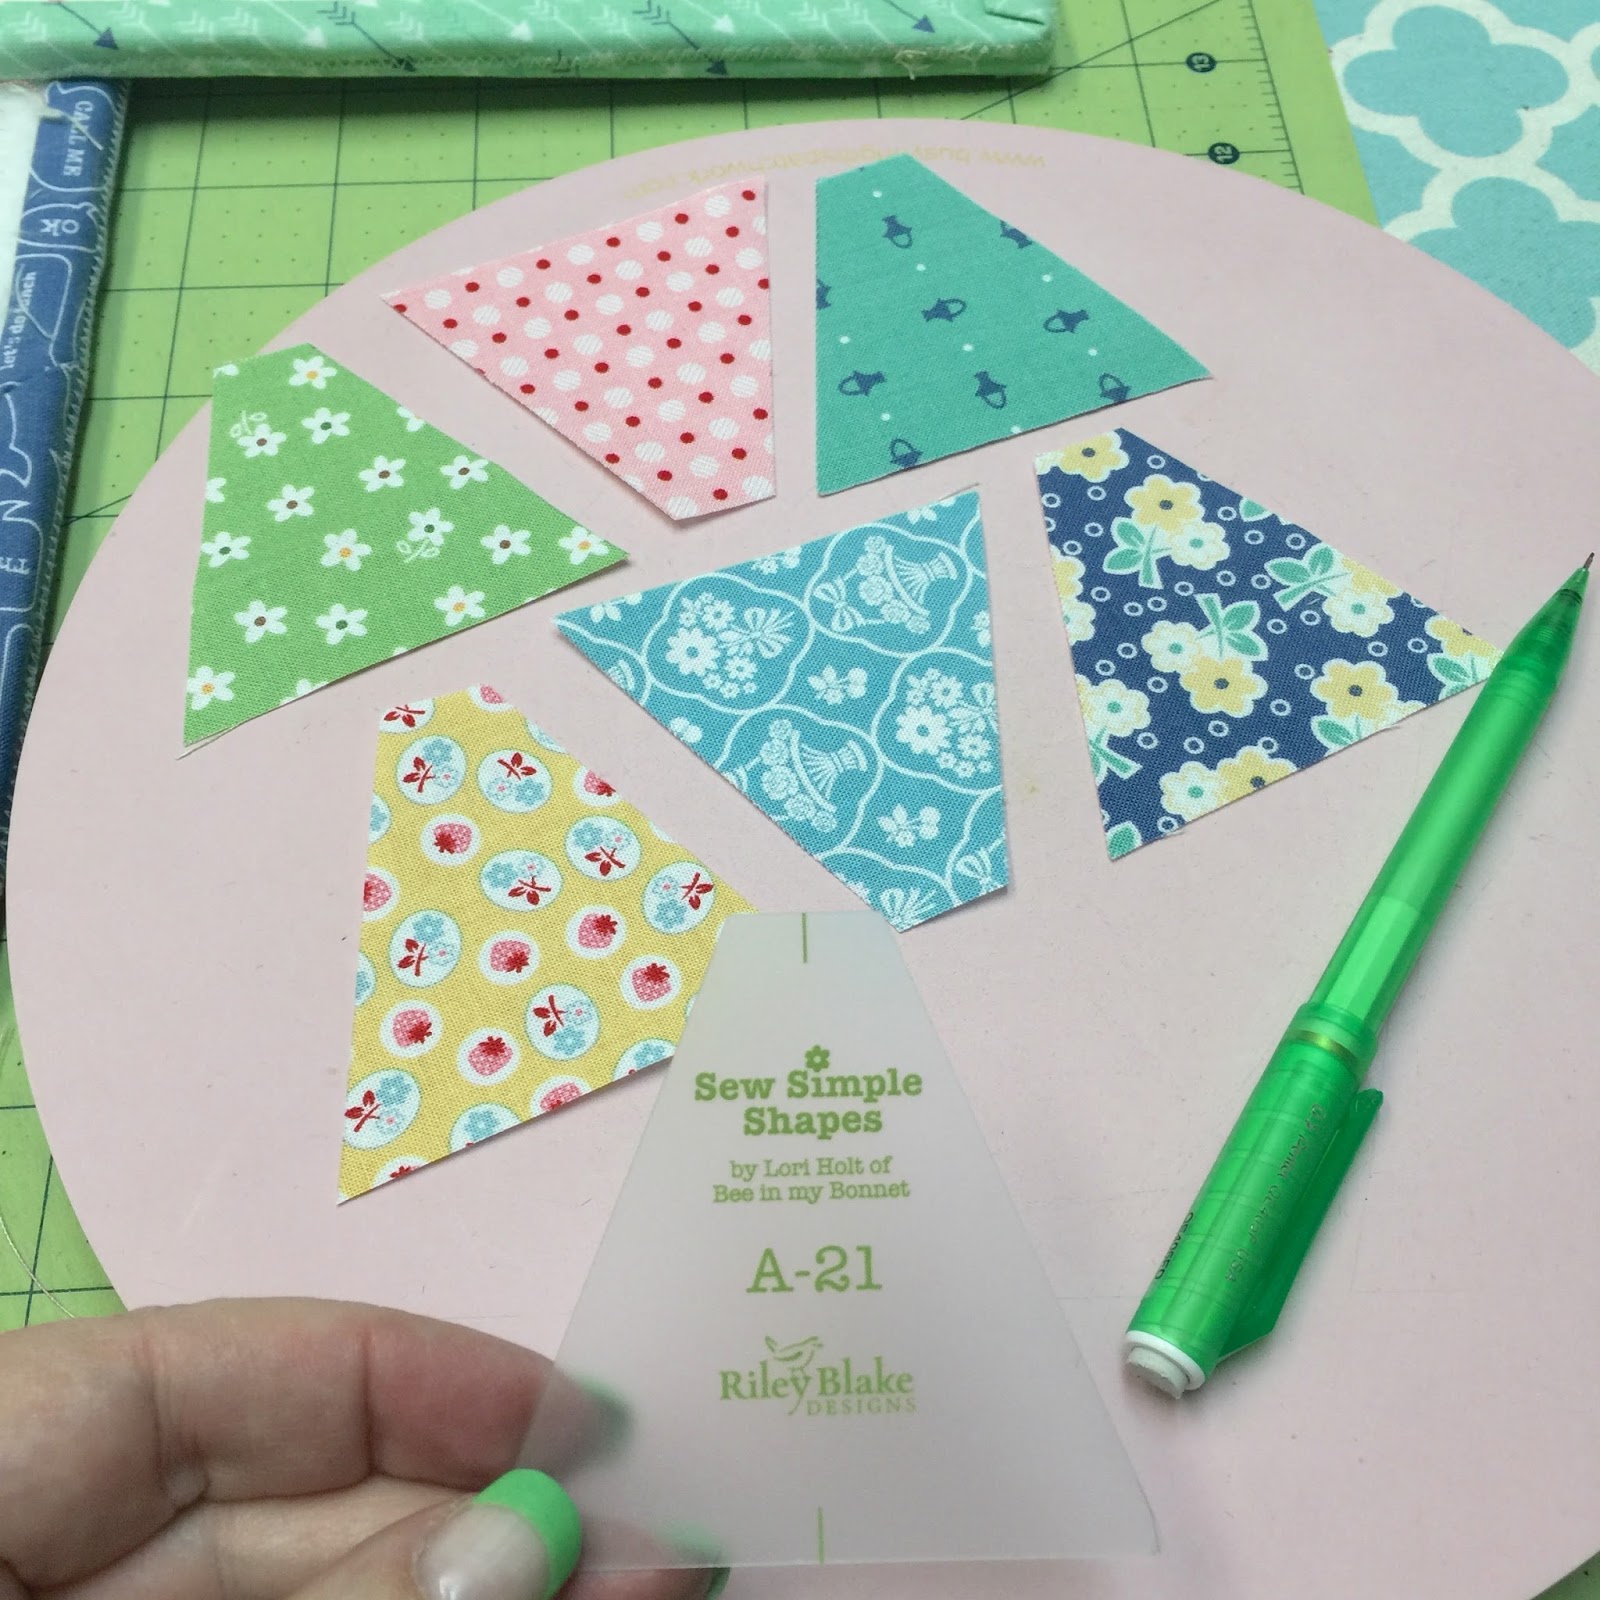
 A-21  Sew Simple Shape 
and cutting a piece 2 1/2" x 3" for each dresden blade.
You will need 8 blades for one dresden.
(I know I am only showing 6...but trust me...you will need 8)


A-21 is 2 1/2" tall 
so place it on the fabric like this...


And trace a line on each side of the shape.


Now place your ruler on the line and cut...


Like this.
Set it aside and cut the rest.


If your fabric is too dark to sew the line...trace on the wrong side:)

Now that your blades are cut...
it's time to make the point!


Fold the widest part of the blade in half and line up the corners and the top edge.


Sew a 1/4" seam allowance across the top where you folded 
and do a small backstitch on each blade
 when you stop and start to secure your stitches.

I like to chain piece mine to save time and thread:)


Cut them apart.
This is what the front
 of one blade should look like at this point.


Finger press the seam open like this...


Then turn the top right side out.


Use your Clover tool to gently push that point out....
this is why I had you back stitch to secure that seam.


Now press it making sure that the seam is in the center.


Because the seams are pressed open it will easily press nice and flat.


After each blade is turned and pressed...
lay then out in a circle.
Ha!
This is where I realized I had only done six.
Whoops!


I quickly made 2 more to complete the circle:)


Sew them together in pairs using a 1/4" seam allowance.
These are short pieces so I used a trailers awl to
 keep the seams flat and accurate as they got to the needle.

I always use an open toe foot when piecing
 so that I can see exactly where my needle goes into my fabric.


I chain pieced these too...
and notice that when I clipped them apart...
 I left a "thread tail" on the top of the dresden blade pairs.
That is so that when I appliqué 
(either by hand or machine)
I can tuck those tails under to ensure that
 the top of that seam will not come apart:)


Press your seams open:)


Sew the pairs together
and then sew the two sides together.


And now you have a super cute little dresden with points!


Here's the back:)


And now for the center circle.
I used my A-1 shape and
 cut a pice of fabric and sew in Pellon 2" square.
I traced the circle onto the Pellon...


Sewed on the line...
trimmed off the excess and 
cut an "X" in the Pelloon for turning right side out.


I shaped my little circle and pressed it.


I'll appliqué it directly onto the center:)


So many things can be done with these dresden...
but of course I always love making flowers:)
There are plenty of leaf options within the 
BLOOM set of Sew Simple Shapes...
be creative!


The 6" round dresden uses the A-20 shape
 and I did that tutorial last week.
to see it again:)

I hope that you have fun making these cute little dresdens...
chat with you on Monday
for week 10 of the 
BLOOM Sew Along:)
xx
Lori


Friday, March 11, 2016

Dresden Plate Tutorial using Sew Simple Shapes


I love dresden blocks and if you do too...
 I'm going to show you something fun!


When I designed my BLOOM set of 
I made sure to design several of the shapes to do double duty.
Let me explain.


When appliquéing, this A-20 shape can easily be used for 
flower petals or a small vase etc.
But today I'm using it to make a cute little dresden plate:)


I used my 2 1/2" strips of Calico Days fabric and cut off a 
2" section from each strip.
In other words...
for one dresden blade you need
 a piece 2" wide x 2 1/2" tall.

The A-20 shape is 2 1/2" tall so just lay it on top...
 and trace down the two sides like this.

PS. There are 2 more fabrics under the yellow one...
I just trace the top piece but cut three at a time.


After tracing...I just lay my 2 1/2" square ruler on the lines and cut.
Using the pink rotating mat for this step really helps.


I just discard the 2 outside leftovers.


See? Now I have three A- 20 shapes cut already.


I just continued...


Until I had a bunch of them cut.
You will just need 18 shapes for one dresden.


I laid 18 out on my design board in the order that I liked and snapped a pic on my iPhone for future reference in case they got mixed up when sewing them together.


I sewed them in pairs and chain pieced
 to save thread and time and keep them in order.


Then laid them back out on my design board again...


After pressing the seams open.


Then I sewed the pairs together into sections of 4 with a two section leftover.


I just keep sewing until all sections are sewn together...


With seams pressed open.

It's important to use an accurate 1/4" seam allowance so that it lies flat...
BUT...if it doesn't...no worries!!!
You can easily take a few tiny bit larger seams on a few of the blades 
until it lies flat.


This one turned out perfectly flat so I didn't have to...
but I have done it before when needed:)


Okay...now to prepare those outside raw edges for appliqué!
I use my 6" finished Circle Ruler.
to get just this size...
or
to get the set of four different sizes.


I laid the ruler on the back of my dresden and used 
the lines on the ruler to 
line up with seams to get it centered.
Then I traced around the circle....


Like this.


Your line should be 1/2" in from the edge.


Now cut a piece of Pellon 7" square.
Make sure it is the lightweight Sew-In kind 
that we are using for the 


Lay your dresden right side down on the Pellon and pin.


Sew directly onto the line and backstitch when you start and stop...
or overstitch about 1/2" to secure for turning right side out.


When you stitch...keep this side up so that all of the seams remain open.


Now trim approximately 1/4" past your stitching line.


Now you can carefully turn right side out 
through the center hole...


Easy Peasy!!


This is what it looks like before pressing...
Use your Clover turning tool if you need
 to gently push out the curves on the outside.


Nice and flat!
Remember to PRESS not iron.
You don't want to distort the shape:)


Now for the center circle:)
Grab your A-2 Sew Simple Shape!


Cut a 3" square out of BOTH fabric and Pellon.


Trace A-2 onto the Pellon.


And sew them together on the traced lines and trim.
Cut an "X" in the back of the Pellon only for turning.


Turn right side out and press.
Now you have a cute center circle!


Place it right in the center of the dresden by measuring
 1 3/4" from the edges of the blades:)


Pin it into place and appliqué by machine or by hand...your choice!
This 6" dresden would look great on a 8" finished background square.
I'll be showing you another dresden with pointed ends next week.

I'm not showing you how I've finished these yet 
because it is part of one of the surprise projects that we will be 
doing in my Calico Days retreat/workshop the last week in April!


If you want to come and sew with me in beautiful Utah...
to register.
I have lots of fun things planned!
See you on Monday for block nine of the
 BLOOM Sew Along:)
xx
Lori

Related Posts with Thumbnails