Well here we are on the
very last week of the
and what I like to call
"the big finish"
because I get to show you
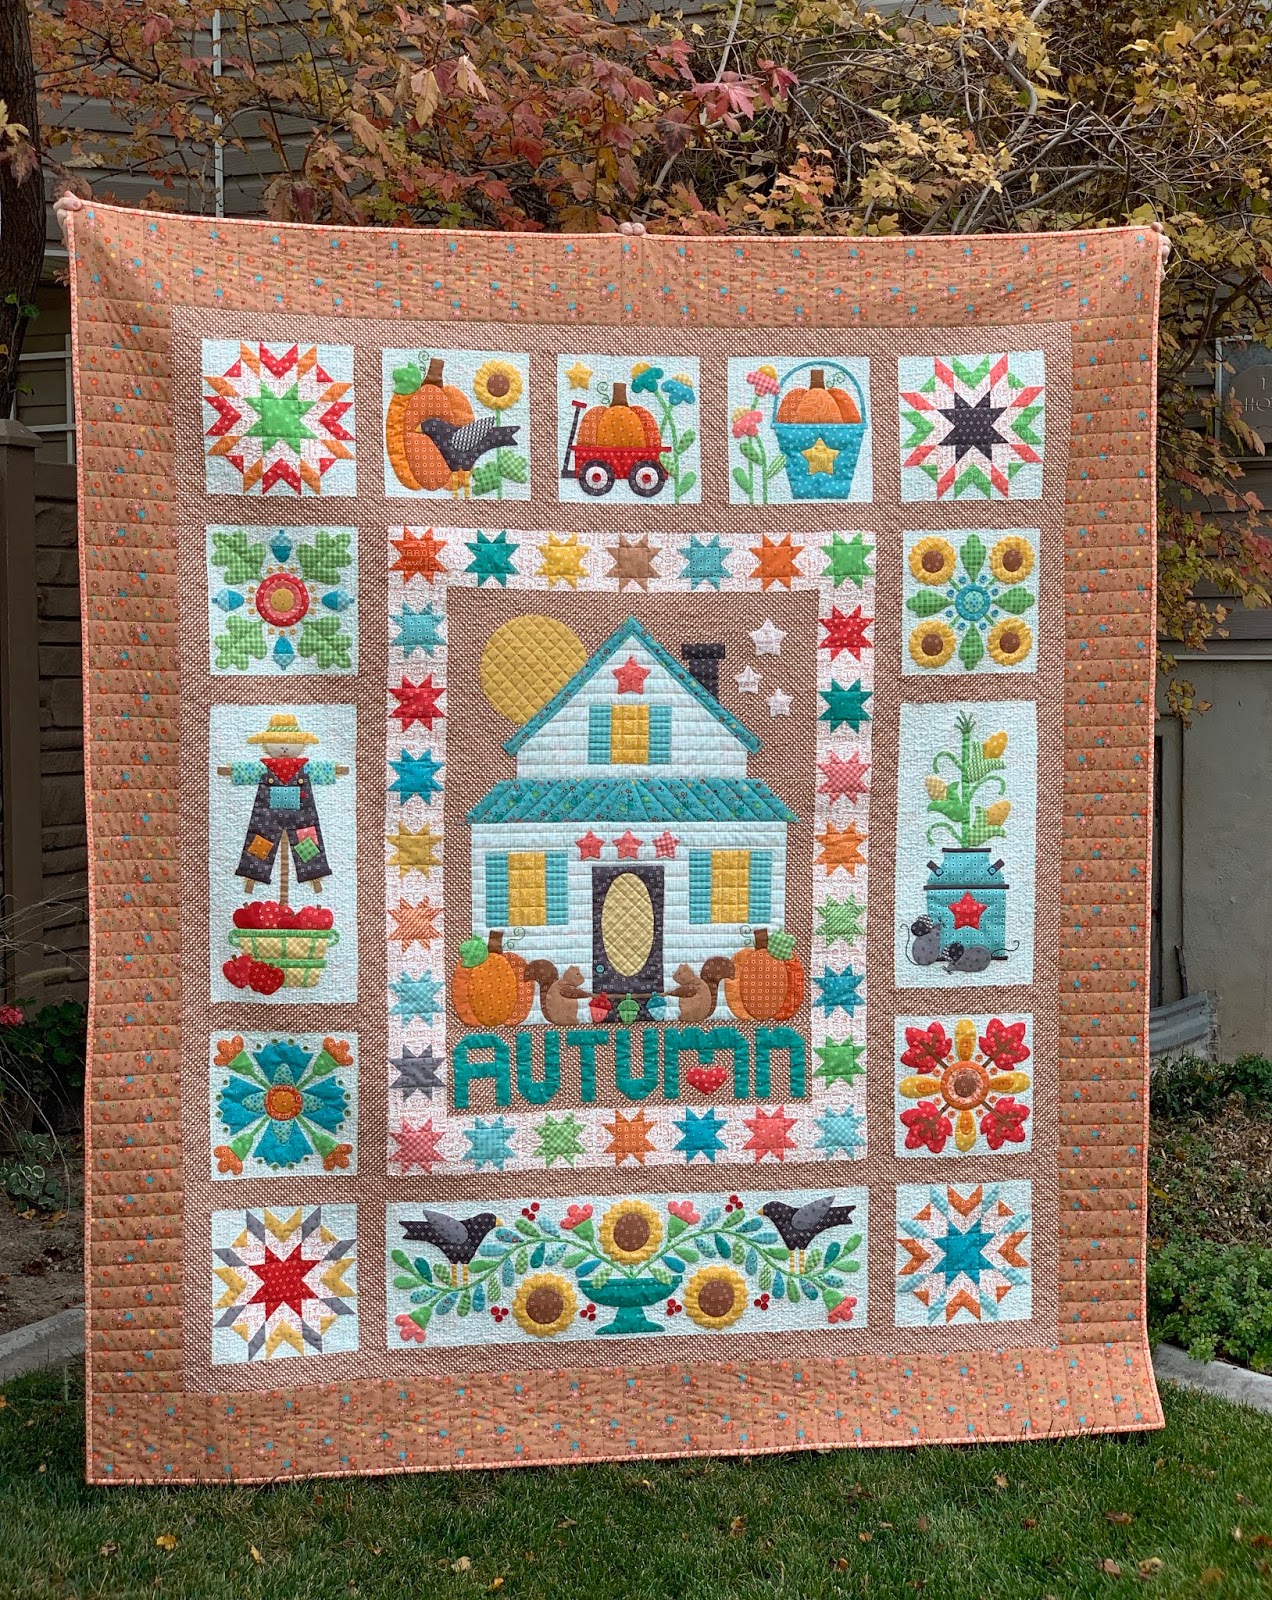
my completed quilt...
and here it is!!

I am sew grateful that my friend
Juli Stubbs...
who does my quilting was able to
get it back to me in time
for photos while the
leaves are still falling:)

This is Toby asking if he can
jump on my quilt:)
Why is it that every time
you lay a quilt down it becomes
an invitation to play?

Just a few leaves left on the Ash tree...
But plenty on my Snowball Bush!
Mr.Honey and Sterling
are my official holder uppers...
LOL

I love how the colors of
the turning leaves blend in
perfectly with the quilt.

Didn't Juli do an
amazing job on the quilting?...
I think it turned out so beautiful!

I am head over heels in Autumn Love:)

There was a perfect chill in the
air and leaves swirling
just for the photo shoot...

YEP!...I'm definitely in LOVE!!
This quilt was a true joy to
design and to create and to make!
Thank you so much for joining me
for this fun sew along:)
I hope you are having a
wonderful time making each block
and have maybe even learned
something new along the way!
Remember that when you are ready
to sew your quilt top together
the instructions for that are
on page 16 of your sew along guide:)
AND...
remember that each and every week
of this sew along will
remain on my blog forever
for your convenience:)
All you have to do to find each
link is scroll down ...
looking on the right sidebar of my blog
until you find them!
But it's not quite over yet because ...
GUESS WHAT?!
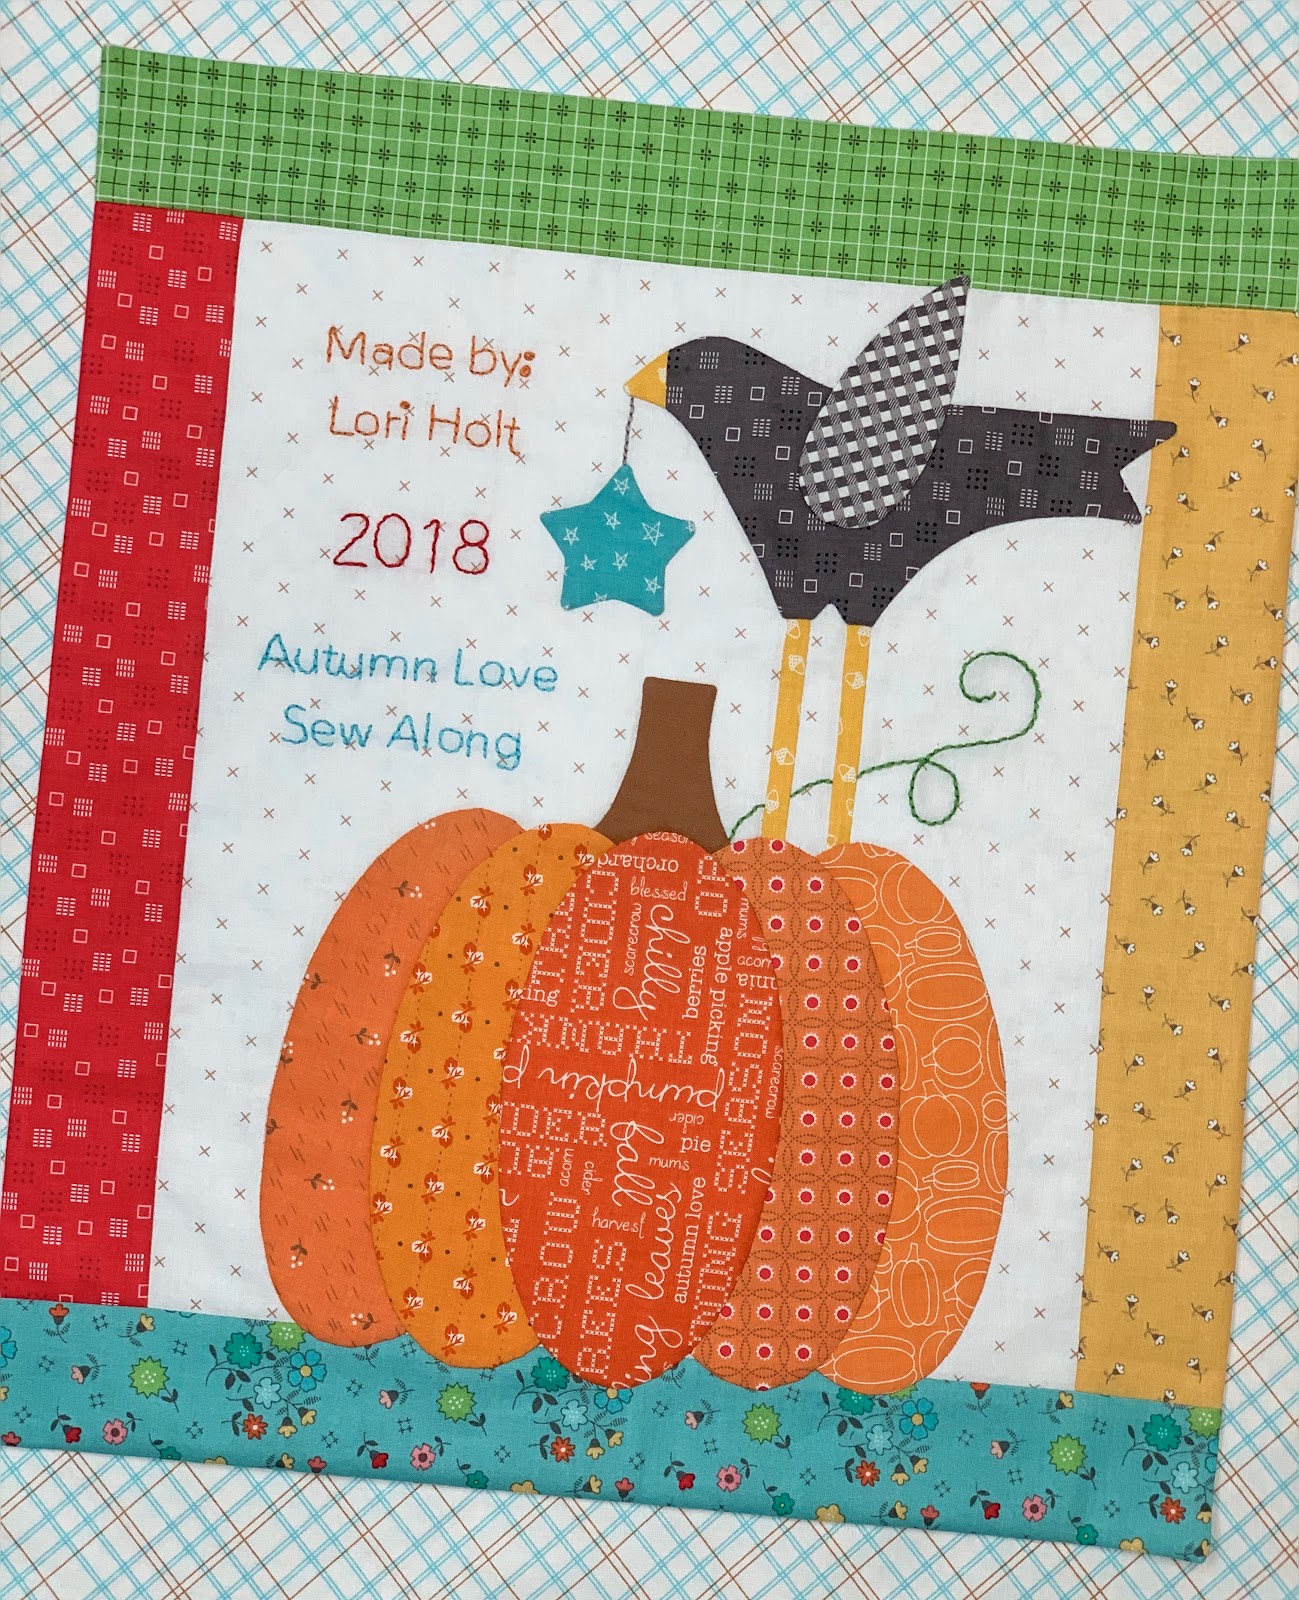
I made this super cute quilt label
for the back and I want to
show you how I did it!

It was easy peasy...
and after making all of the blocks
y'all are experts...
so I'll just tell you that I
used these Autumn Love
Sew Simple Shapes:
5 - F22 for the pumpkin
1 - F-18 for the stem
1 - F29 for the crow
1 - F10 for the wing
1 - F15 for the star
And of course 1/4"
straight bias strip for the legs.

I cut my background fabric
12 1/2" x 14 1/2"
and laid the pieces out to
see how they would fit.
Then I auditioned some
2 1/2" wide Autumn Love strips
for the border.
I made 5 ovals for the pumpkin
because I wanted it extra wide
to make room for the
crow to stand on top!

I sewed the strips on before I glue basted.
I cut two strips
2 1/2" x 14 1/2"
and sewed them to the sides
and then cut two more
2 1/2" x 16 1/2"
for the top and bottom...
then I glue basted all
of my pieces down.
The label finishes at 16" x 18"

I overlapped my appliqués just
a little into the border strips:)

That's a BIG pumpkin!!!

Now for the words:)

I simply typed up on my computer
what I wanted the label to say
and printed it off...

And then taped it to my
Easy Trace Light Box
with my Autumn Love washi...

so that I could trace
on the words to embroider:)

All traced and ready for stitching!

But wait!...
a few more things first.
I decided my pumpkin
needed a long swirly vine:)

Then I sewed
Bee in my Bonnet interfacing
to the back.
I cut it larger and used a
1/4" seam all around the label...

Trimmed off the excess interfacing...

And cut the "X" for turning
behind the pumpkin where there
would not be any embroidery.

NOW it's turned and pressed
and all ready for the stitching.
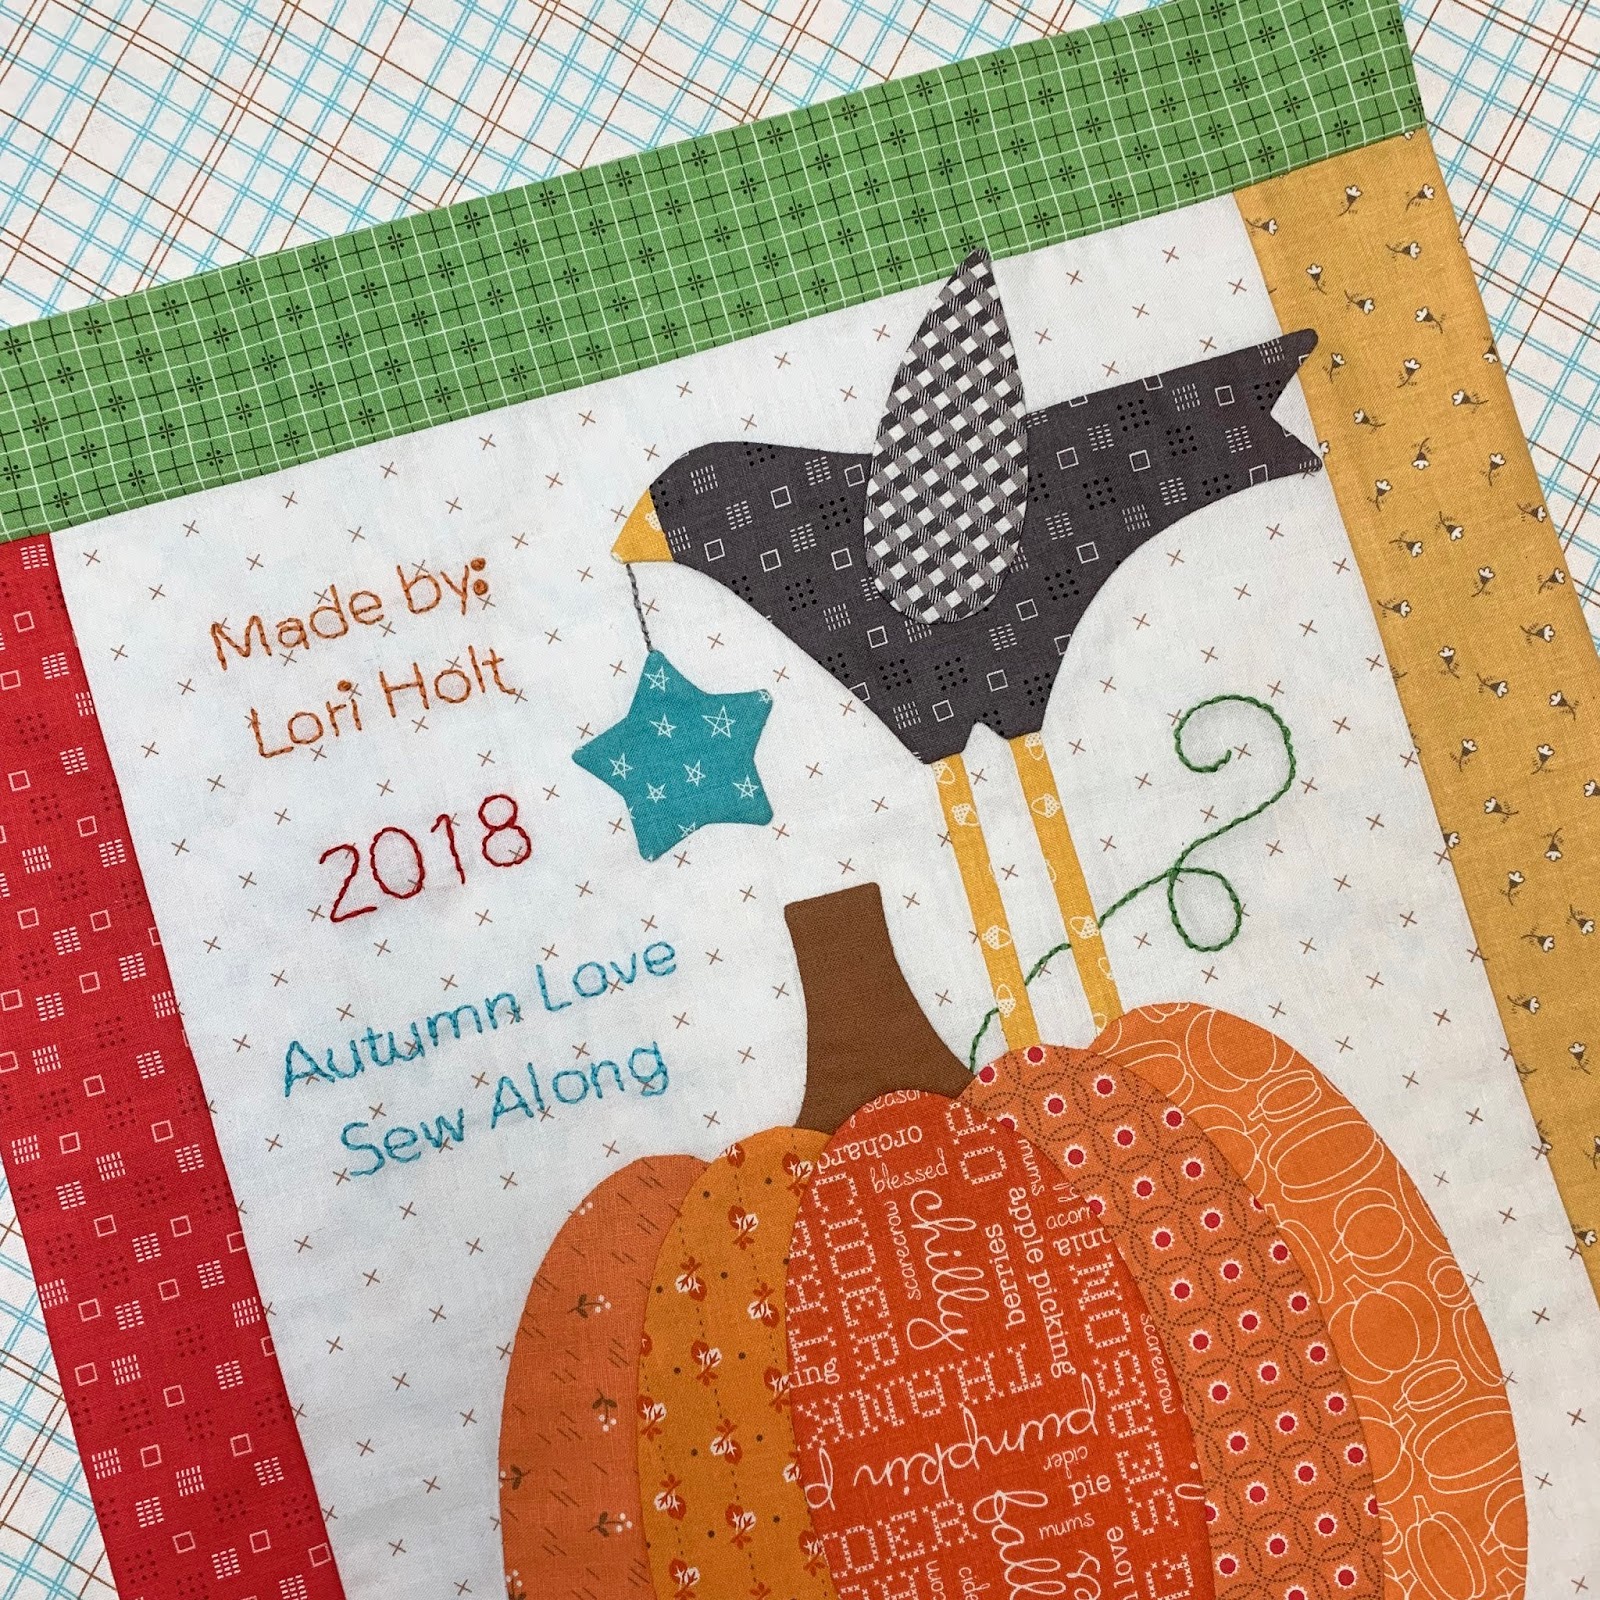
As usual...
I used all 6 strands of my Aurifloss
and a backstitch.

I love adding fun labels to my quilts...

And I think this one is sweet
and is easy to make:)
I hand appliquéd mine onto the
backing fabric before quilting...
just like one great big
Sew Simple Shape!

Oh my goodness I'm so sad that
our Autumn Love time has
come to an end...
but sew happy that
the quilt is completed.
You know that I just love love love
to do sew alongs and I hope
that you will join me for my next one!

We will busing my
next fabric collection called
Farm Girl Vintage
to make the
FARM SWEET FARM QUILT

And of course...
YOU are officially invited:)
Here is the invite with the
January 28th date to save!
I have been showing lots of
sneaky peeks of the blocks
as they were being made for the quilt
to display at Fall Market in Houston
this week and let me just say...
I CAN'T WAIT FOR JANUARY!!
If you want to sew
those sneak peeks...

And speaking of sneak peeks...
I still have ONE MORE Autumn Love
tutorial up my sleeve for you!
I've been whipping up these fast
Fall Flower Pot Blocks
(I made 25 of them)
and put them all into a quilt.
The quilt is currently
on Juli's quilting frame
and as soon as its quilted and bound
the tutorial will be coming your way:)
Thank you again from the
bottom of my heart for
sewing along with me...
xx
Lori