

Good morning!
I'm super excited to show you how
to make this fun and easy quilt:)
"Mama's Flower Garden"
53" x 53"
Are you ready for the details?


I used a 10" Stacker of my new

And these 2 prints from my...


my new

I also used the
D-10 and D-33
from my set of
Bee Happy
Sew Simple Shapes
(they will be available shortly!)

And one package of my

Let's get started by cutting
36 - 6" squares and 36 - 2 1/2" squares
from the interfacing.
That's one of each for each block!

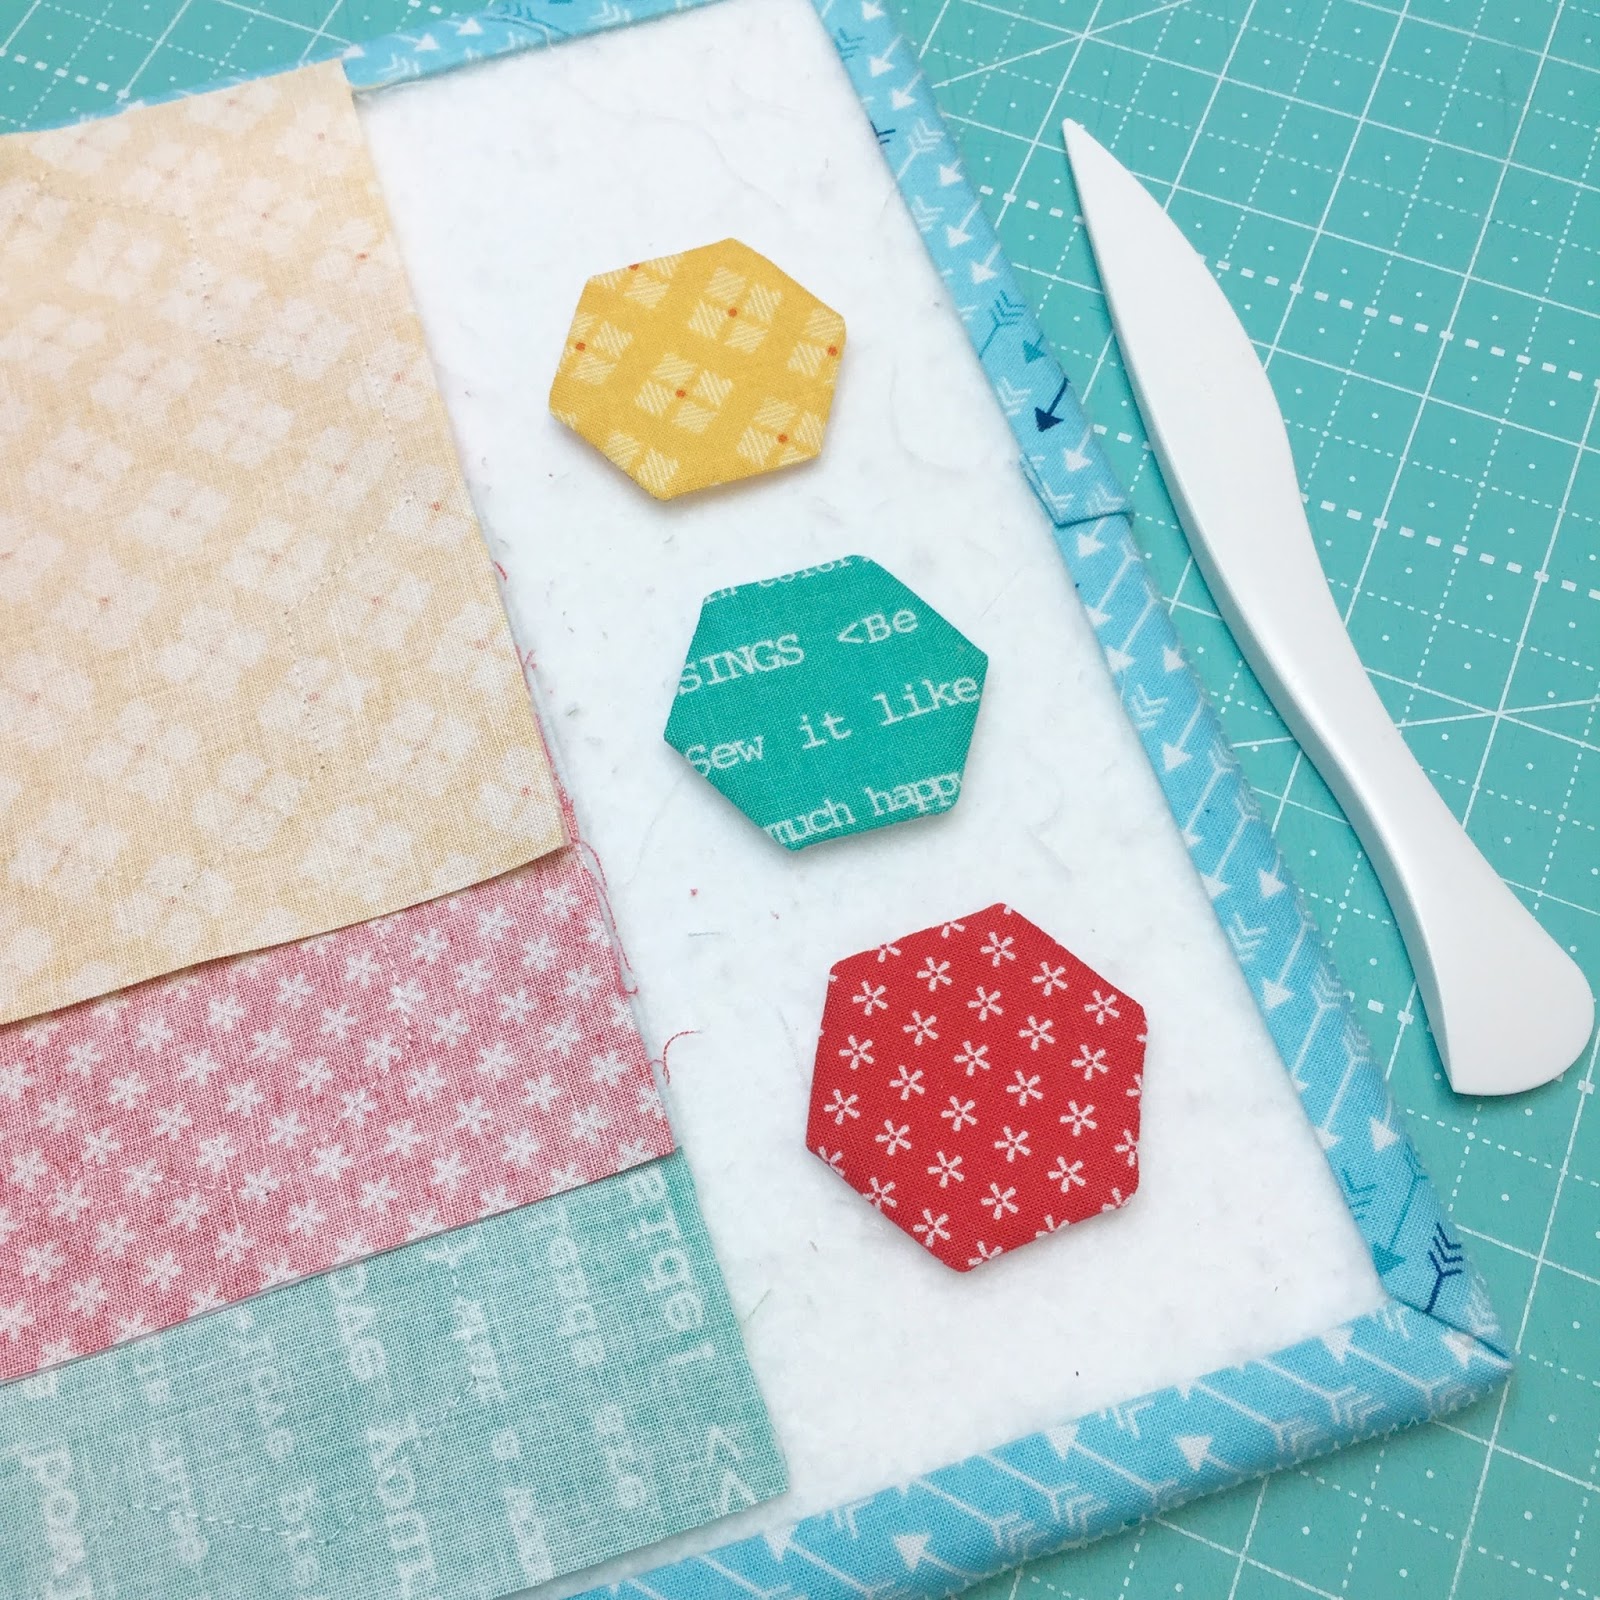
Now trace around each
Sew Simple Shape like this...
using a mechanical pencil
for a nice thin line.
These are your sewing lines!
Set them aside and
let's cut the 10" squares.

There are 30 prints total in the
Bee Basics Collection
(besides the gingham squares print)...
and there are 42 pieces included in the Bee Basics 10" Stacker
so you can double up on a few prints!
You will need 36 - 10" squares...
ONE for EACH block:)
You will have 6 - 10" squares leftover.

From EACH of the 36 - 10" squares...

Cut a 6" x 10"...

From that...cut off a 6" square for a flower

And then from the leftovers cut 6 - 2" squares
for the easy corner triangles.
(you will only need 4 of them)
From the remaining fabric
(on the right)...
Cut a 2 1/2" square for a flower center
and and...

2 - 1 1/2" x 6 1/2" strips for the scrappy sashing.

Here is what you should have cut from EACH 10" square.
Set aside the leftovers on the top right for another time:)
***NOTE***
You will have cut 72
scrappy sashing strips...
but because the quilt needs 84 total...
you will need to cut 12 more from the leftover 10" squares:)

Okay!
We are all cut so lets get sewing:)
Place a 6" flower interfacing square
onto a 6" flower fabric square ...
BOTH with right sides up.
Repeat for the 2 1/2" flower center.
Pin into place and stitch all the way
around the flowers and centers...
directly onto your marked lines.
Overstitch on the line
where you started sewing
before you stop...
to secure your stitches when turning.

Set aside for a minute...

And grab two other prints.
I sewed mine in sets of 3 different prints together for a "controlled" scrappy look.

Stitch up the other
2 prints in the same way...

And be sure to keep the Easy Corner Triangles
from all 3 of this fabric combo together.
The scrappy sashing strips can stay together with all of the others:)

Press them from the fabric side after sewing.

Now trim an approximate
1/4" seam allowance
all the way around your
flower centers like this.

Pinch the interfacing away from the fabric
and cut and X with a pair of
small embroidery scissors....

Like this.

Now turn right side out and use a
to gently push out each corner.
Now give them a quick press:)

Trim around each flower approximately 1/4".

Between each petal is a "cleavage" that will
need to be clipped with just ONE CLIP
right "to" the thread...
but not "through" the thread.

Just like this.
Without these clips...
your Mama's Flower will not
be able to lie flat!

Cut and X in the interfacing...

Turn right side out...

Use your turning tool to shape it...

And press!

YaY!
All three are sewn and ready to
pin to the background squares.

From the "X" print:
Cut 36 - 6 1/2" squares
(you can cut them 7" square and trim them up to
6 1/2" after appliqué if you would like)
You will need 1 1/3 yards of this fabric.

Press your square in half
both ways like this
so that you can easily
center your flowers.

Pin your flowers onto
your background squares.
Switch up the centers
and pin into place.
***NOTE***
Make sure to keep all
of your flowers going
the same direction...

I took this photo to explain.
You can see that the top two flowers
have the flat part on the top and the
bottom red flower is turned so that
the "cleavage" is on the top.
Either way is fine for this quilt...
just as long as you
make a choice between the two ways
and make sure to
stick with your choice
for all 36 blocks
so that they will match:)
I chose to have my flowers
with flat side on top
because of the few
directional fabrics
in the collection ...
and also that is how I
traced them onto the interfacing.

Okay!
They are all going
the same direction and are pinned...
ready for appliqué.
You can hand appliqué
or
machine appliqué...
its up to you!

When they are finished...
Press from the back.

Now it's time to add
the easy corner triangles.
Switch up the prints
again for this step:)

Sew from corner to corner.
I use my
so that I don't have to mark them beforehand:)

After you have chain-stitched
all of the easy corner triangles...

Trim an approximate
1/4" seam allowance
past our sewing line...

And press towards the triangles.

YaY!!!
Three Mama's Flower Garden Blocks
are finished...

And ready for a little photo shoot:)

Now onto making the rest of the blocks!
Continue to match them up into sets of
3 different color combinations:)

Have fun with them...
These blocks work up fast and cute:)
My super stunt double
Beth Brohl
whipped up the rest of the blocks
for me while I was otherwise
occupied with my Bee Happy Quilt.
Thanks Beth!
When all of your blocks are completed...
it's time to sew them together with the
scrappy sashing strips and cornerstones.

From 1/3 yard of "Handmade" print:
Cut 2 - 1 1/2" x 43 1/2" for the side borders
after your blocks are all put together:)
Cut 2 - 1 1/2" x 45 1/2"
for the top and bottom of your quilt.
Cut 49 - 1 1/2" squares for the cornerstones.

Layout all of the blocks
in six rows of six...
along with the scrappy sashing strips
until you are happy with their placement...
and sew them together!

I super love these
Mama's Flower Garden Blocks!
Now it's time to
sew the background print
to the sides and
the top and bottom of the quilt....

And choose the outside border fabric.
Decisions ... decisions.
A tough choice for me because
any of the prints in the collection
will work because all of them are in the blocks.
I finally narrowed my choices down to
these 2 Bee Basics prints ...
the Aqua Polka Dot or the Coral X.

I went with the aqua and
then decided to
use the aqua Vintage T.V. print
for the binding:)

You will need 3/4 yards for the border...
and 1/2 yards for the binding.
Outside Border Fabric:
Cut 2 - 4 1/2" x 45 1/2" for sides
Cut 2 4 1/2" x 53 1/2" for top and bottom.
Binding:
Cut 6 - 2 1/2" x Width of Fabric
and prepare binding.

I decided to use this print for the back...


From my new
There are 12 prints total
in the collection and
they are all 108" wide...
so that means NO piecing.
YaY!!

You will need 1 3/4 yards
of 108" wide fabric.

I love how the back looks
with the front of the quilt!

My friend Juli Stubbs
aka "Super Quilter"
quilted it for me.
She always does such a fabulous job!

Can I just say...
I have all the quilty love feels
for how my
Mama's Flower Garden Quilt
turned out.
I just may have to make
a taberunner with these blocks...
or make a bunch more
for a bed quilt!!!
I hope you like my
quilt and block tutorial...
tune in next time
for another episode of
my quilty adventures:)
xx
Lori

12 comments:
This is such a beautiful quilt with all your delicious fabric pieces. Love how it comes together. Thank you for the tutorial!
Absolutely adorable....SO eager to get the new templates. When will they be ready for purchase?
Carol
Oh my. This is so very charming.
I love this quilt, the fabrics are my favorite, so bright and colorful. Just a perfect quilt. Also loved the letters Hh beside the fireplace, my initials are also HH.
LOVE LOVE this block! Thank you for another great tutorial!
This is so quick and easy. I started a Grandmother's Flower Garden 17 years ago when our first grandson was on the way. It was going to be the crib quilt at Nana's house, but it still isn't finished. The twelve grandkids started rolling in and I've made lots of quilts since. . . . each has a baby quilt, a 2 year old quilt and the 5th one is on the third quilt. I'm thinking there will be a great grandchild one of these days. ☺
Darling!!!
Those are great flowers - I haven't seen that multi-hexie template before. And using the interfacing applique technique is one of my favorites too - it certainly worked well in this cute project! Thanks for the tutorial too!
Lovely!! I can picture this on the back of the couch for people to use while watching a movie.
I SO LOVE THIS QUILT!!! Great job as always, Lori!
Beautiful quilt as always! Love the colors!
Very cute! I might actually finish a flower garden quilt like that. =)
Post a Comment