

Mugs - Bucket
and Heart Blocks

Welcome Quilty Friends!!
Today is Week Two for the
LET'S MAKE A SNOWMAN
SEW ALONG
If you are just joining us
and want to know everything
about this sew along and
making this quilt
for my "BEE PREPARED" blog post.

We are making the
LET'S MAKE A SNOWMAN Quilt
which finishes at
75" x 87"
It consists of 22 pieced quilt blocks
for the border which surrounds
the applique blocks in the center
of the quilt.
(There are a few other blocks
that are also pieced)

To make the applique blocks
we are using my
Sew Simple Shapes called of course...
Let's Make A Snowman!


The collection that we are using
for the quilt is...
HOME TOWN HOLIDAY!!
Home Town Holiday was designed by me...
and produced and distributed
to quilt shops everywhere
by the amazing
If you would like to know everything about
HOME TOWN HOLIDAY
to view the entire storyboard...
to see all of the fabrics close up
and to view the notions and ALL of
the patterns that coordinate with it:)

As per usual I did a video tutorial
on my YouTube channel for week one:)
I showed you how to make the hat
and one of the letters and
gave you tips along the way.
I also chatted about stitching the
appliqués by machine or hand
and about quilting over the
Sew Simple Shapes.
to watch the video and please
leave me a comment and a like!
and then
to read my week one blog tutorial as well.

Now for the week two blocks!
Of course all of the cutting is
in the guide and also because
all of the shapes
are sewn the same way
I don't need to detail each block
but I would like to talk about
a few measurements that may help you
on some of the blocks when laying out
and then show you the rulers that I
use for squaring each one
up after applique.
I took a lot of pics to show you each step
along the way so let's get started!
First I took photos of each of the blocks
all cut and ready to go:)

Heart Block


Bucket Block

to use in the Bucket Block:)
***NOTE***
If you are new to my sew alongs
If you are new to my sew alongs
and have not watched me run
the strips thru the makers...
to watch my week one
Scarecrow tutorial on how I do that:)
***Take Note that I cut a
12" square of fabric for the
bucket handle because that will have to
be on the bias because it's very curvy.
Also take note that I'm using the
1/4" bias tape maker for this
instead of the 3/4" as I had planned...
and I'll talk about that in a bit.
First let's do the red one!


This one is for the top of the
bucket handle and should
measure 1 3/4" wide
AFTER
the two ends are pressed under.

I glued my ends down and now
it's all ready for lay out
when the bucket shapes are sewn.

This one is for the top of the bucket...

And should measure 6" AFTER
the ends are pressed under.

I didn't glue these ends down because
I'll tuck them under the sides
of the bucket when I glue baste.

This is the largest stripe in the bucket and should measure 6 1/2" wide.
Do not press the ends under...

And do the same for the smallest stripe.

Now measure up 1 1/2" from the bottom
of the bucket fabric and
glue the smallest strip.
Now measure 1/4" up from that
and glue the largest.

Now when you lay your traced interfacing for the bucket shape
the stripes will be
sewn in at the same time!!
Easy peasy:)

Okay now for the handle.
I originally wanted to make this wider
but because it was so curvy
it was a little difficult to
make it lie flat so I went down
to a 1/4" instead.

I cut my strip 5/8" wide from
corner to corner of my square....

I'll use the 1/4" bias tape maker and the
2 large rectangles that are left
can be used for the other things needed
in that print for the quilt.
That's how you cut fabric strips
on the bias when you
need them to be curvy:)

As I'm running it through the maker
I do it the same way with the exception
of pressing it into a curve
instead of straight...

This will make it sew much easier
when laying out that curved handle
for the bucket block.

Okay now the bucket block is all prepped!

I sewed the shapes for
all three blocks at the same time:)


After sewing...
these two shapes are the only ones
that have cleavage and need clipping.
There are no inner curves this week:)

All trimmed and clipped and ready for...

Turning - shaping and pressing:)
Now it's time to glue baste all of the blocks
and prepare them for applique:)

Let's start with the heart.
HEART Block to 2 1/2" x 6 1/2"
and I do that by using BOTH
of those sizes of Trim-It Rulers.

So sweet!

Next I did each of the mug blocks.
I started by first glueing the two
ovals together for the mug handles.

Then I simply tuck it under the
right side of the mug like this
before pinning and glueing.

Repeat for the remaining mugs.
After applique you will press
from the back and then use the
5 1/2" Trim-It Ruler for each block...
and then this is how I trimmed them down
to 5"x 5" which is what each one needs to be:
use the aqua 1/4" sides of the ruler
and trim 1/4" off off of all four sides
so that they each measure 5" square
and will finish at 4 1/2" each
after sewn into the quilt:)

Four cute mugs!

Last is the BUCKET BLOCK and first
I glued the star down.
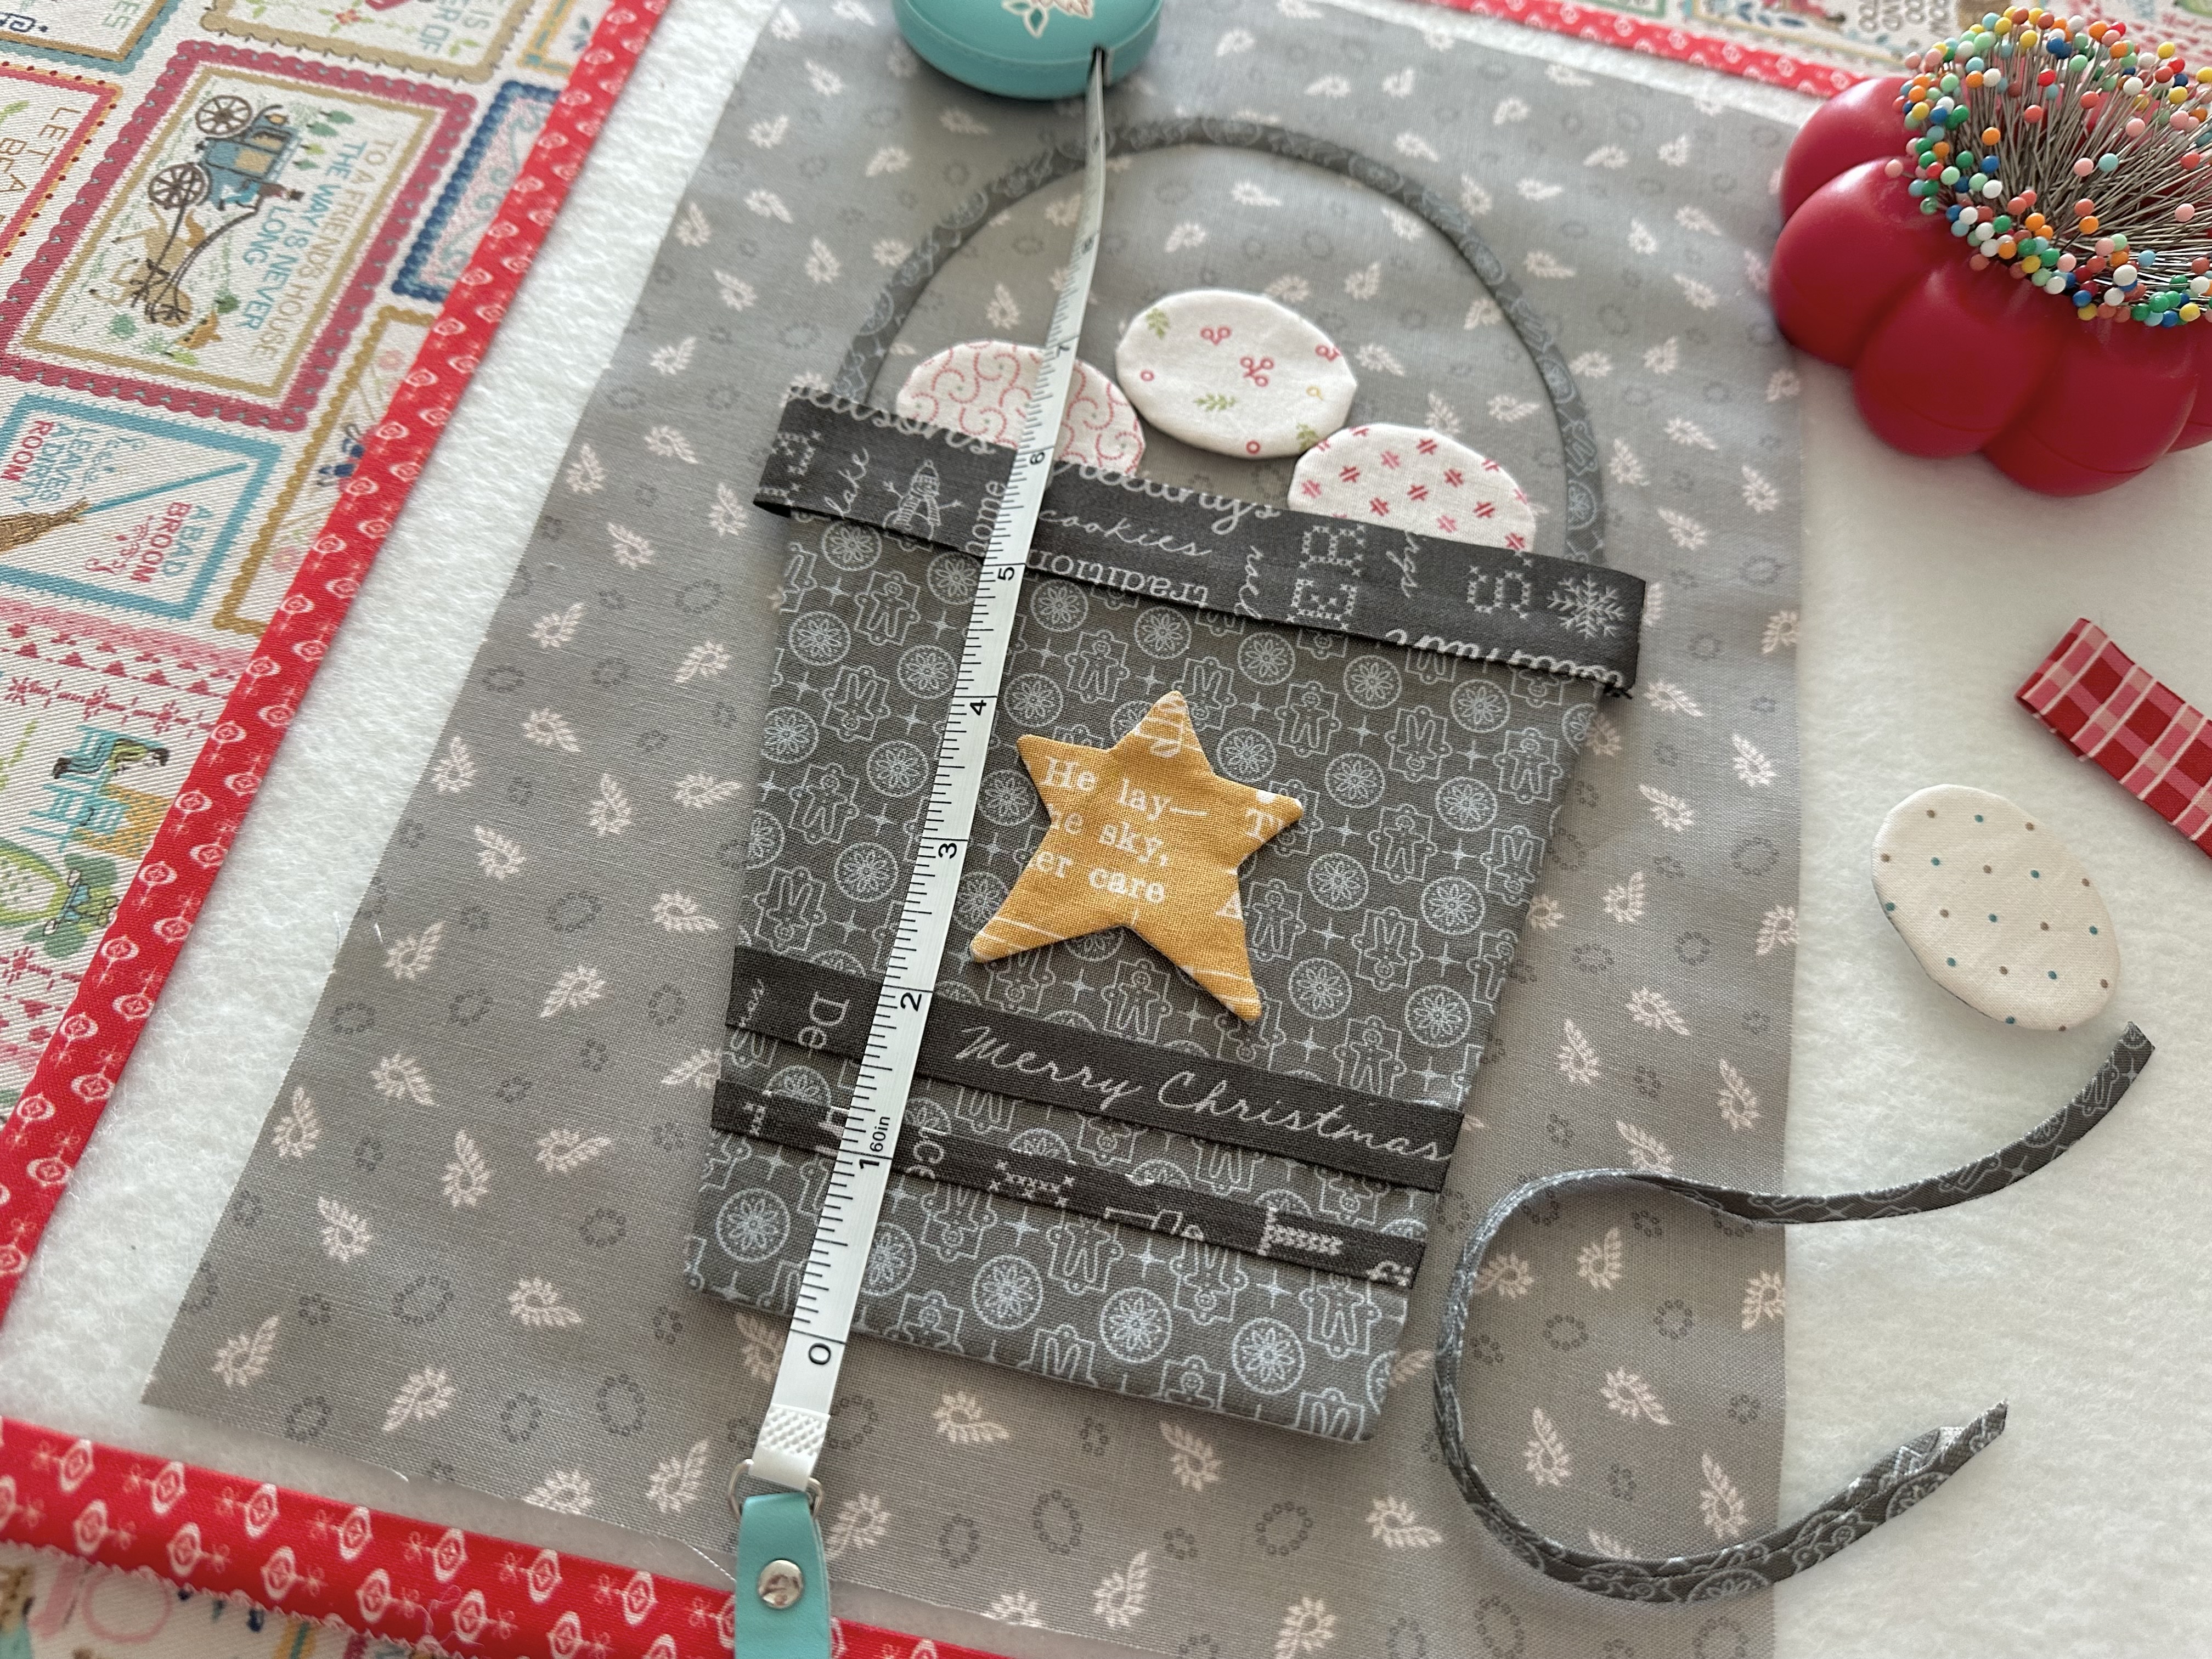
I placed my bucket onto the background
and placed three of the snowballs
on tucking the bottom two underneath.
Then I formed my handle until I liked
the way that it looked ...
and pinned and then glued.

It's 9 3/4" tall from the bottom
of the bucket to the top of the handle.

The handle measures about
5 1/2" wide where it goes into the bucket.

Now it's time for the last snowball...

And the red handle.
Sue Glue everything into place after pinning!

Use the 7 1/2" and the 10 1/2"
Trim-It Rulers
to trim it up after applique.
***TAKE NOTE***
that I used the two 1/2" wide
Marking Rulers
to trim it to 11 1/2" tall.

Super cute bucket of snowballs!


I added these blocks
to my design wall and they
look so cute together!

Remember that I did a tutorial
on how to make my Snow Star Blocks
a few weeks ago so if you
haven't watched it yet...

Thank you for sewing with me today!

I'll meet you right back here next Monday
for the tutorial on making the
Button Blocks, Carrot Block and
the Snowman Head, Middle and Base Blocks.
Sew with you soon!
xx
Lori

No comments:
Post a Comment