Sunday, July 2, 2017

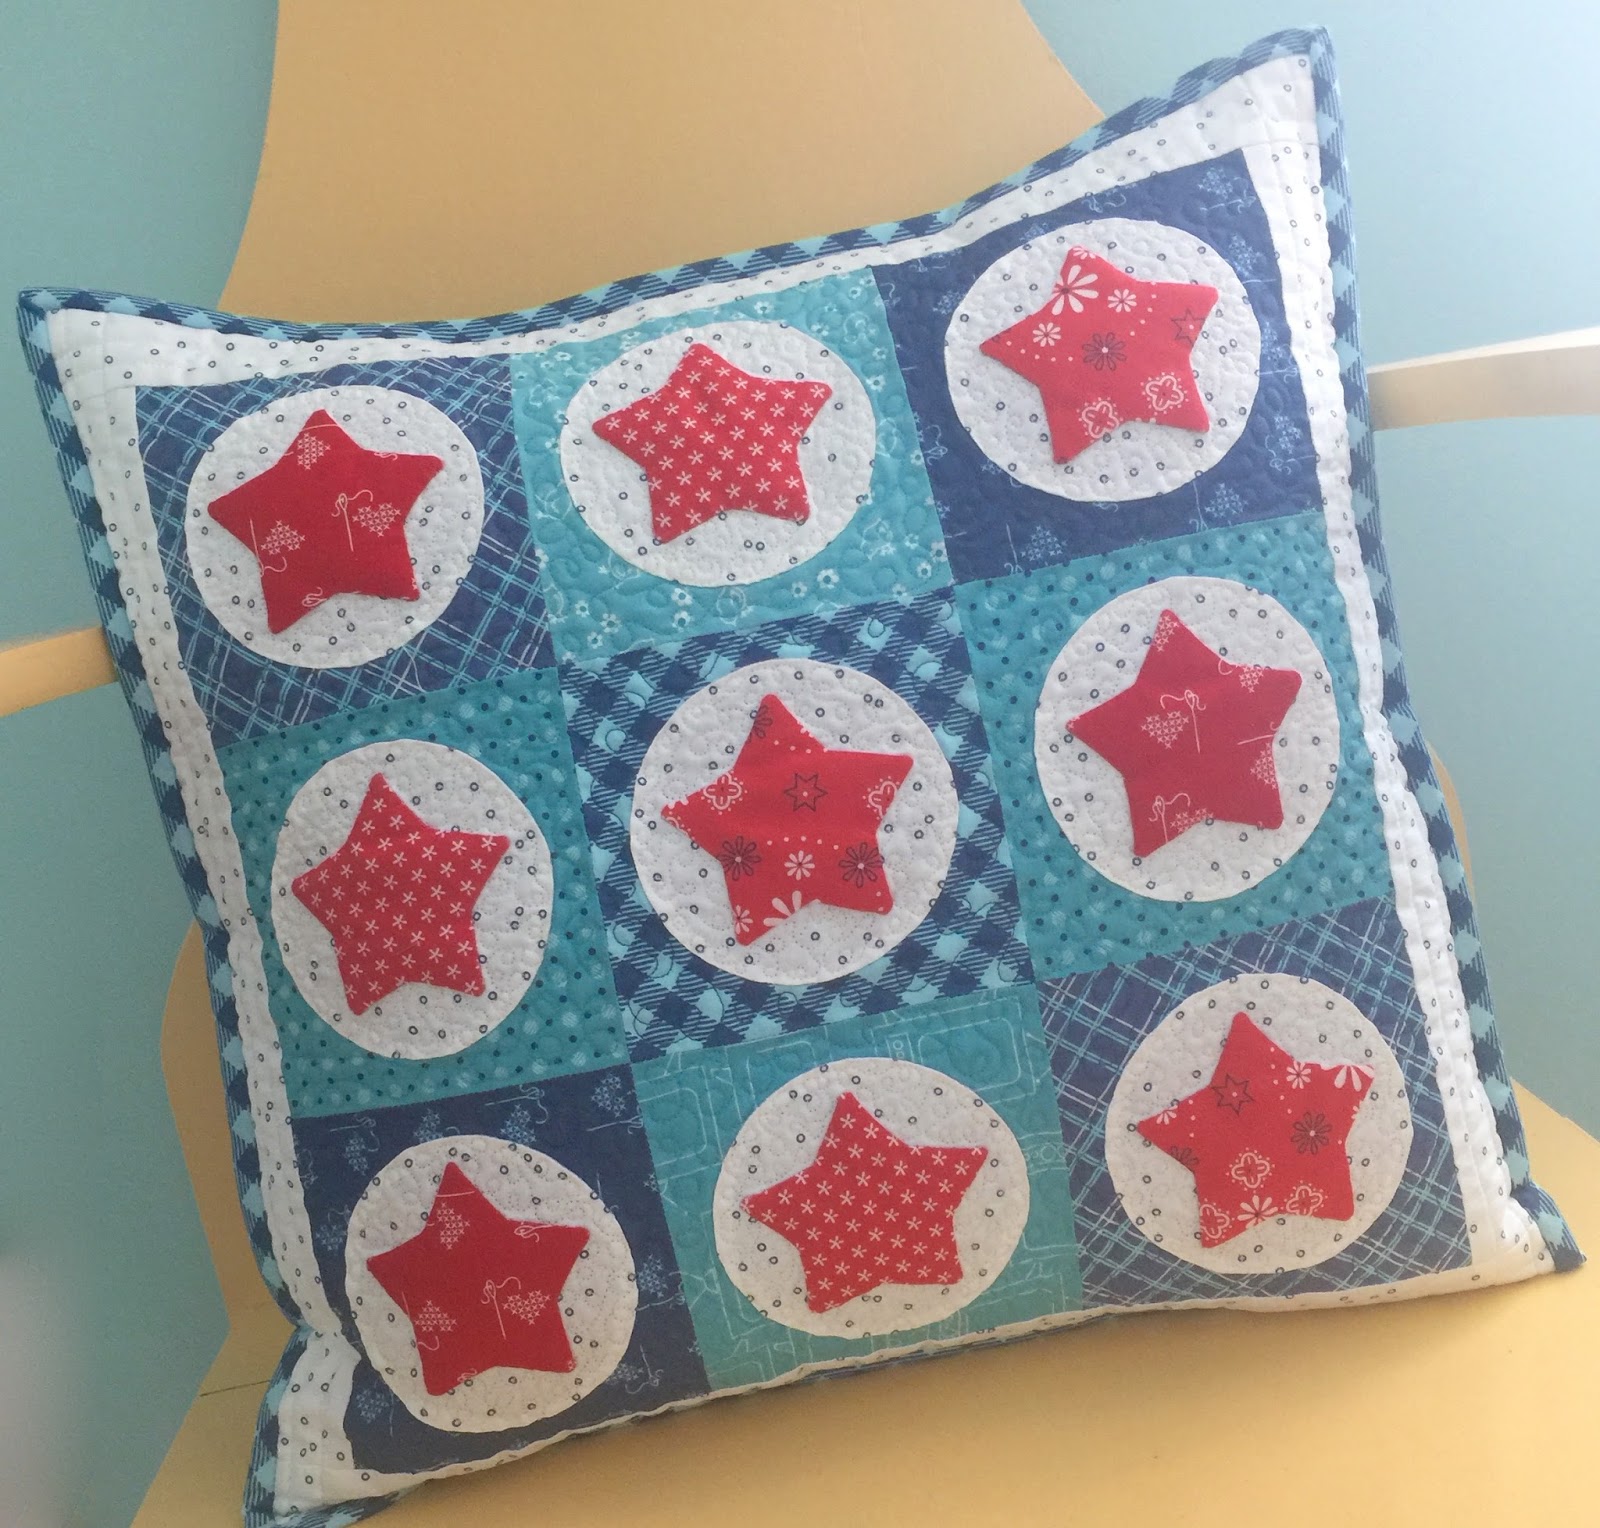
Super Star Pillow Tutorial!!


YaY...its summertime!!
Are you ready for a tutorial?
If so...
I'm going to
 show you how I made my 
"Super Star Pillow" 
18" x 18"


I love using the good old
 "red white and blue" 
to decorate for summer...
and I especially love stars:)

These are easy peasy
 little blocks to make...
so let's get started!


I chose these 9 prints...
3 reds for the stars and 
6 blues for the squares.

The top 6 prints 
in this stack are from my 

and the bottom 3
 are from my 


For the circles and the outside border
 on the pillow I used 
this print from my 


I also used the D-4 Circle and
 the D-14 Star from the 
Bee Happy Sew Simple Shapes

They are due into
 the warehouse anytime now...
and I'll let you know
 as soon as they arrive!


I also used this 
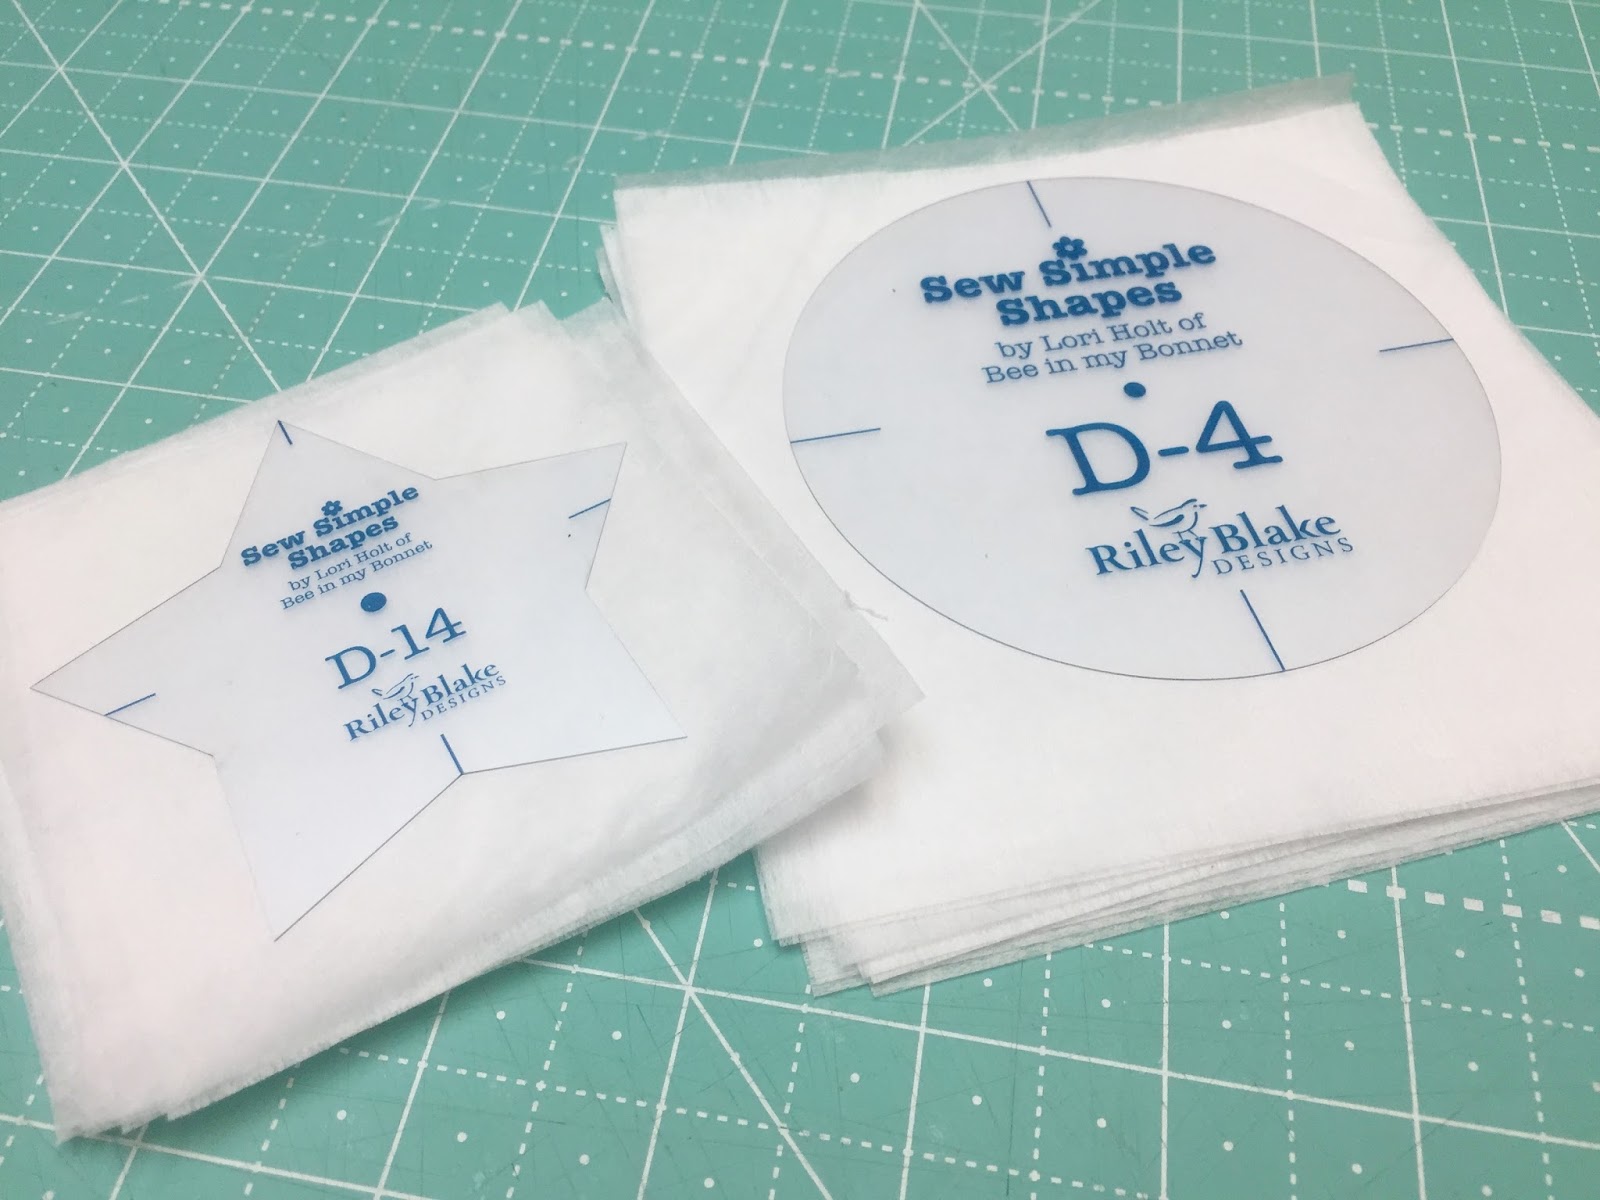


Sew-In Interfacing:
Cut 9 - 3 1/2" squares for the stars
Cut 9 - 5" squares for the circles


Trace around each shape
 onto the interfacing.
This is your stitching line.

I like to use a 
mechanical pencil 
for a nice thin line:)


Okay...lets make a star! 

From each red fabric...
cut 3 - 3 1/2" squares.


Grab one and place an
 interfacing square on top
 (both with right sides up)
and stitch directly 
onto your stitched line.

Over sew a little where you 
start and stop 
to secure your stitches.


Trim an approximate
 1/4" seam allowance. 
You can clip off the points
 but not too close:)


You will need to clip each
 "cleavage"
 with just ONE clip.

Remember to clip right 
 "to the thread but not through the thread"

This is important because
 if you leave this step out...
your little red star 
will not lay flat!
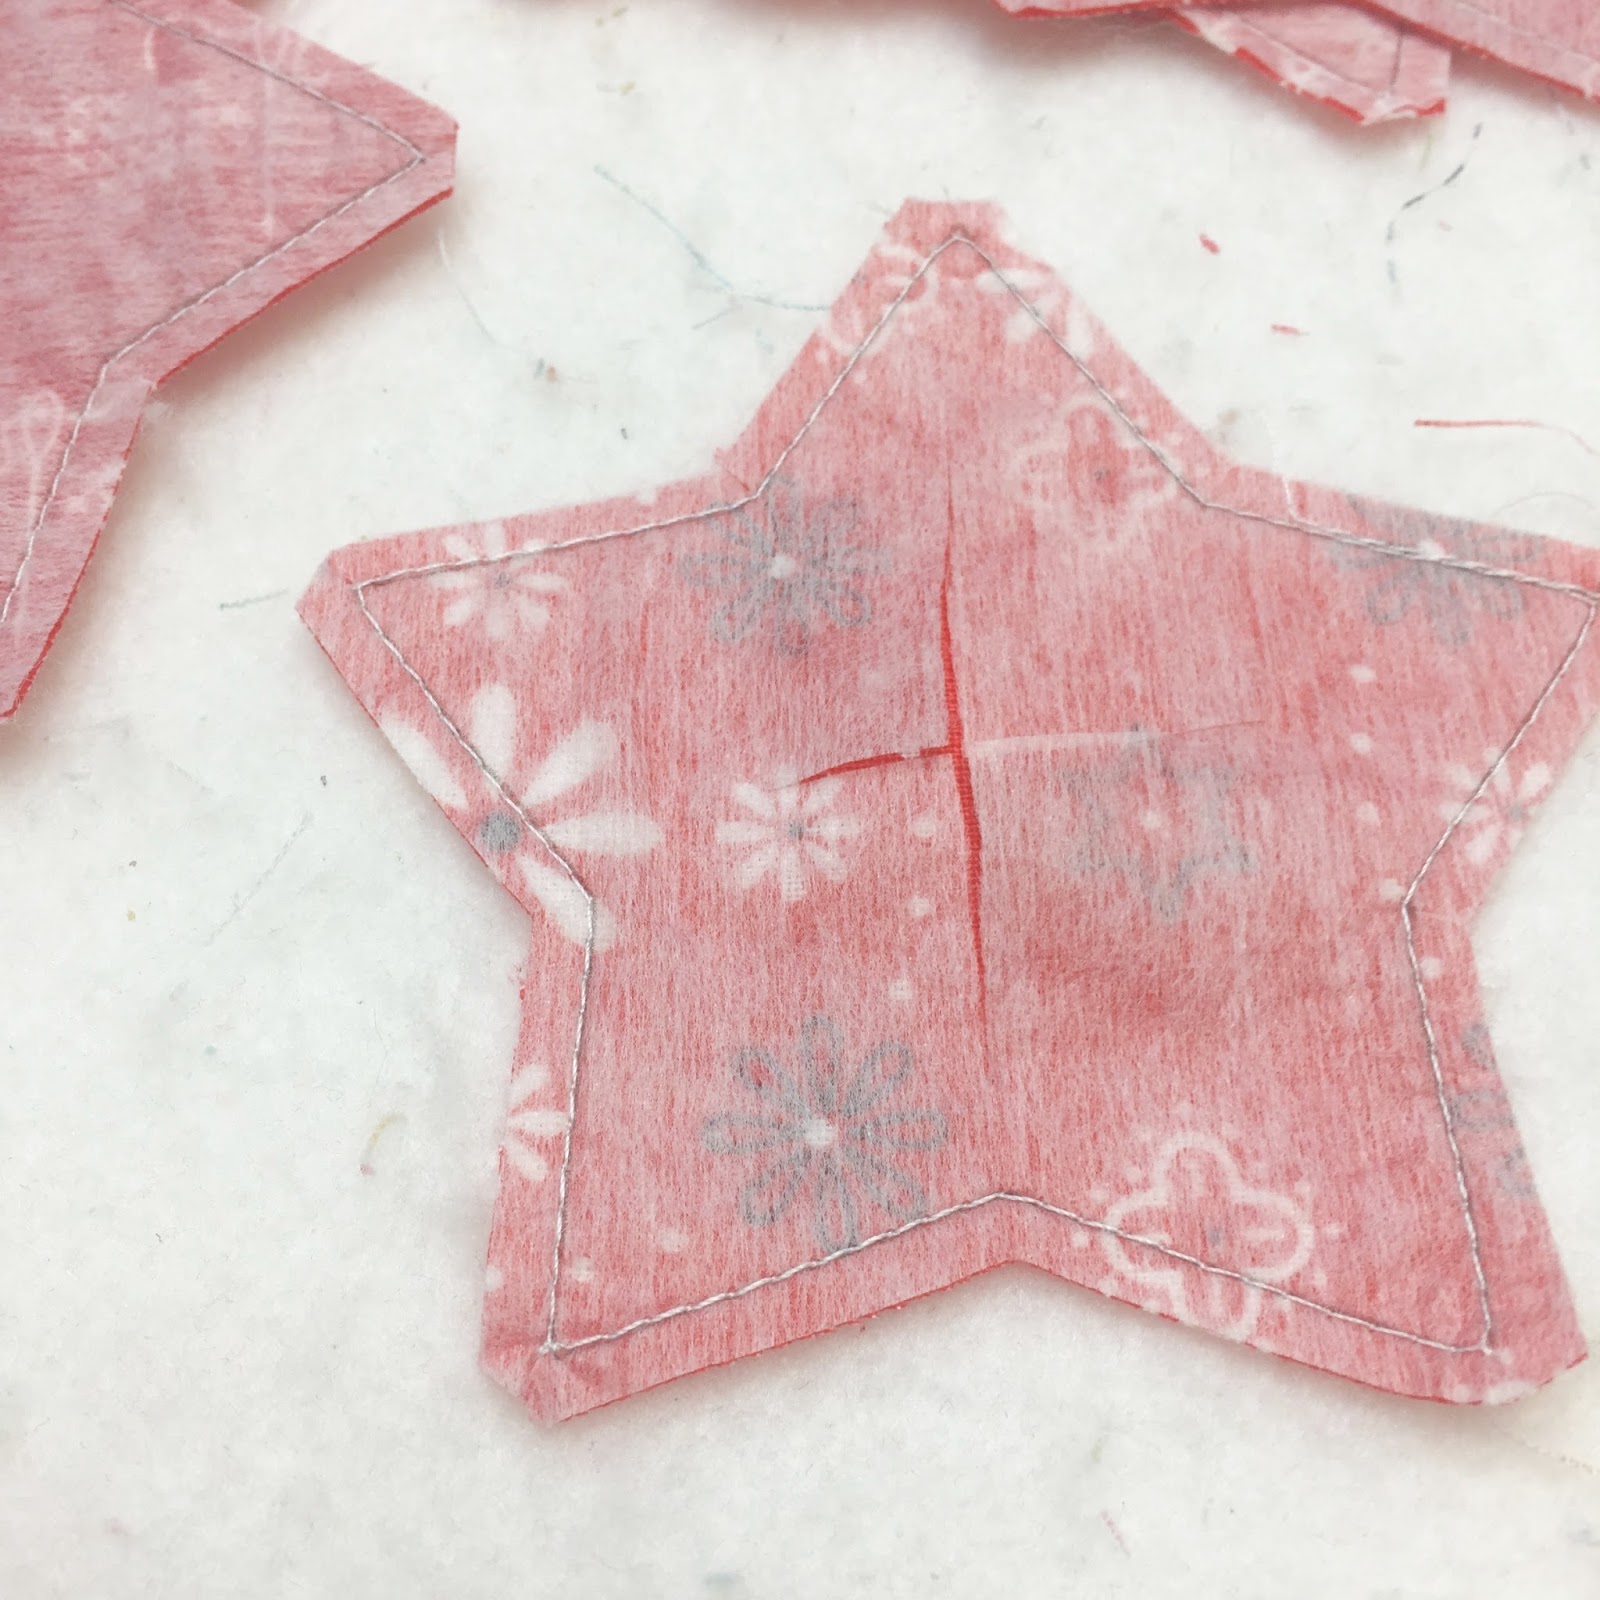


Cut an X for turning
 in the interfacing only.


Turn right side out.
It looks wonky until you shape it...
 and thats when this essential 
becomes important and necessary:)


Gently push the points out
 using the pointy end:)


YaY!!


Now press from the front. 
One cute little red star
 all ready for appliqué!


Repeat the same steps
 and make eight more:)


The next step is to 
make them into circles:)


Cut 9 - 5" squares from 
the background fabric.

They will turn into circles
 after you appliqué the stars!


Center the stars and pin.
Appliqué by hand or by machine...
choose your favorite method or whichever strikes your mood:)


When your applique is completed...
press from the back.


Now place a traced circle interfacing 
on top and make sure that 
the star is in the center...


and pin into place.


Stitch directly onto your
 traced line like this.


Trim the seam allowance...


then cut an X in the interfacing only.


Turn...and shape!
Give it a quick press after shaping.


Repeat the steps until you have 9!


Cut 9 - 5 1/2" squares 
from the blue fabrics.

You can cut them 6" square and 
trim down to 5 1/2" square 
after appliqué if you want:)

Pin the star/circle exactly onto the 
center of the square and appliqué.


YaY!
I love this little block!
It should measure 5 1/2" at this point:)


Make 8 more!


Sew them together into
 3 rows of 3:)


Cut 2 - 2" x 15 1/2" strips 
and sew to the sides
Cut 2 - 2" x 18 1/2" strips 
and sew to the top and bottom.


Quilt and bind!!!

I used an 18" x 18" pillow form.

This would make a 
super cute 
mini quilt or runner too...
but I wanted another pillow 
for my sofa this summer.


Thanks for tuning in to another
 "decorating for summer" tutorial.

In the next episode...
I'll show you how to make my
 "Movie Night" snuggle quilt!!!
xx
Lori


Monday, June 5, 2017

6" and 12" Vintage T.V. Block - New Tutorial!!!


Good morning cute people...
and welcome to another 
Bee in my Bonnet episode:)

I have been waiting a long time
 to show you my Vintage T.V. Block!


I'm so excited to announce that 
all three of my new fabric collections
 are soon arriving at the warehouse and
 will be shipping to quilt shops!
YaY!
Now I can start doing tutorials
 and showing you what
I have been doing with them over the last three months:)


Last year when I designed these 3 collections of fabric...
I knew the first tutorial that I would do was my Vintage T.V. Block.
These are the two Bee Basics T.V. prints:)


I can't tell you how much fun I've had 
using all 3 collections together
 to make my Bee Happy Quilt.


The Bee Happy Sew Along 
will start in August ...
but in the meantime 
I have several projects
 and tutorials
 using my new fabrics 
to keep us busy until then!


So lets start with the Tutorial:)
This 12" block is the one that I call my 
"Netflix and Quilt" 
which is something that
 I love to do...don't you?

There's nothing like a good 
Netflix binge to
keep us going on fun project! 

To celebrate that...
I thought it would be really fun to
 put a 6" block on the 
screen of the 12" 
Vintage T.V. Block:)


 I chose these 5 prints from my
 Bee Basics 
and one of my 
Bee Backgrounds for this block.


I decided to use the 
Riley Blake Designs 
Hashtag print in Rose Gold 
for the TV screen...
it goes perfectly with my collections!


You can stitch up any 
6" block that you'd like...


For my TV I made my Spring Star block 
on page 62 of my book Farm Girl Vintage.
I know it's summer now ...
but back when I made these blocks  
it was just the beginning of Spring!


After sewing the block...
cut two strips from the TV screen fabric 
1" x 6 1/2" and add to each side.


Cutting for the Block Background:
A - Cut 2 - 3 1/2" x 5 1/2"
B - Cut 1 - 2 1/2" square
C - Cut 2 - 1 1/2" x 8 1/2"
D - Cut 1 - 1 1/2" x 4 1/2" 
E - Cut 2 - 1 1/2" x 2 1/2"
F - Cut 2 - 1 1/2" squares
G - Cut 4 - 1" squares


From the #1 Fabric:
H - Cut 2 - 1 1/2" x 10 1/2"
I - Cut 1 - 1 1/2" x 6 1/2"
J - Cut 2 - 1" x 6 1/2"
K- Cut 4 - 1" squares


From the #2 Fabric:
L - Cut 1 - 1 1/2" x 6 1/2"
M - Cut 3 - 1 1/2" x 2 1/2"


Of course you don't have to put a block in the middle of the screen...
You could use just one fabric...for that:
N - Cut 1 - 6 1/2" x 7 1/2"


This block is basically constructed in 3 easy peasy sections.
This is the layout for the middle section.
First add the easy corner triangles (K) onto each corner of the TV screen...
before you can add the other pieces on the sides. 


Then add the (H) pieces
 on the top and bottom.


Center of TV is completed...
now for the top and bottom!


The top section consists of two easy corner triangles
 onto the two top corners the antenna base.
Then adding the (B) square on top
 and then the (A) pieces onto each side.

The bottom section consists of first
sewing 2 different size easy corner triangles
 onto the feet...(G) and (F)
Keep in mind that these go in opposite directions:)


Top and bottom complete!


Add the (C) pieces to the sides of the TV 
before you add the top and bottom.


YaY!!!...how cute:) 
Just need to add the
 embroidery and buttons.

But I set this one aside
 and made a six inch block first....
just for all of you 6" block addicts...
and I KNOW you are out there!!!


For this block I chose 3 Bee Basics prints and 1 Bee Backgrounds.


I chose Riley Blake Designs Bleached Denim for the TV screen....


And made the heart from the 6" Baby Chick Block
 on page 10 from Farm Girl Vintage.


Cut 2 - 1" x 2 1/2 
Cut 2 - 1 1/4" x 3 1/2" 
and add around the heart.
OR
N - Cut 1 - 3 1/2" x 4"
if you want to use one fabric.


Of course the construction of the block is exactly the same as the 12"...
as well as all of the labeled pieces have the same letter....
but here are the cutting measurements for the 6" size:

Background:
A - Cut 2 - 2" x 3"
B - Cut 1-  1 1/2" square
C - Cut 2 - 1" x 4 1/2"
D - Cut 1 - 1" x 2 1/2"
E - Cut 2 - 1" x 1 1/2"
F - Cut 2 - 1" squares
G - Cut 4 - 3/4" squares
Fabric #1:
H - Cut 2 - 1" x 5 1/2"
I - Cut 1 - 1" x 3 1/2"
J - Cut 2 - 3/4" x 3 1/2"
K - Cut 4 - 3/4" squares
Fabric #2:
L - Cut 1 - 1" x 3 1/2"
M - Cut 3 - 1" x 1 1/2"


Now both sizes are completed and 
ready for embroidery and button knobs:)
PS. I cut 1 1/2" borders of 
background fabric for the 6" block.
I cut 2 1/2" borders for the 12" block:)


I just grabbed a ruler and a mechanical pencil and drew 2 straight lines...
they are not the same length and go opposite directions just like real antennas...
so don't stress about it:)

Single line on the 6" block....


Double line on the 12" block:)


I used my Aurifloss (all 6 strands) and 
I added tiny Cute Little Buttons on the ends
 of the antenna and
 1/2" Cute Little Buttons on for the Knobs:)


I just did a french knot on the ends for the
 6" blocks and more Cute Little Buttons for the Knobs.
This is my 
"I Love Vintage TV" Block.
When I'm not binging on Netflix while I quilt...
I usually have all the old shows on.
I really love TVLand and MeTV.
Nothing compares to good old vintage classic shows ...right?


I hope you love this tutorial and these two new blocks as much as I do.
I designed this block in 18" size too and will show you that project tutorial
 in the next Bee in my Bonnet episode...
so stay tuned!!!
xx
Lori

PS. I'd love to see
 your blocks on social media...
use the hashtag 
#VintageTVblock
so I can see them!!


Related Posts with Thumbnails