

"Beauty and Simplicity"

Welcome to week five of the
PRIM SEW ALONG!

We are making the
PRIM QUILT
72" x 90"


And my newest fabric collection
PRIM
to make the quilt:)
I have already posted the
post which details all of the supplies
for the sew along and how it works.
I have also given the link there
for the free PDF Download
of the Sew Along Guide
to read that post.

So far we have made
"PATRIOTISM and INDUSTRY"
for the first week blog post

"JOY and CONTENTMENT"
for that blog post

"PEACE and PLENTY"
for that blog post

KINDNESS and GENEROSITY
for last week's tutorial

this week we are making the block
"BEAUTY and SIMPLICITY"

Prim Sew Simple Shapes
needed for this block are:
4 - K11
1 - K12
1 - K13
8 - K51
4 - K57
4 - K58

You will need to sew these two
fabrics together for the
flower buds before you sew
the K57 SSShapes

After sewing and trimming...
you will need to clip the cleavage areas
in the appliqués that are
on the cutting mat...
not the design board.

Okay...let's pin baste these flowers!

Use the 1/4" bias strips for the stems:
Cut 4 - 3 1/2" long
Cut 4 - 7" long

Because this block is symmetrical...
the easiest way to lay it out
is to press your background
in half both ways...and then both ways
on the diagonal as well:)
Now you can pin your
star directly in the center!

And then pin the stems
right on the center of
the creased lines.

See how these pressed lines
are the same as the ones on the ruler!!
Neat-o:)

Pin the flowers like this.
Now you can use the Sue Glue
and remove your pins:)
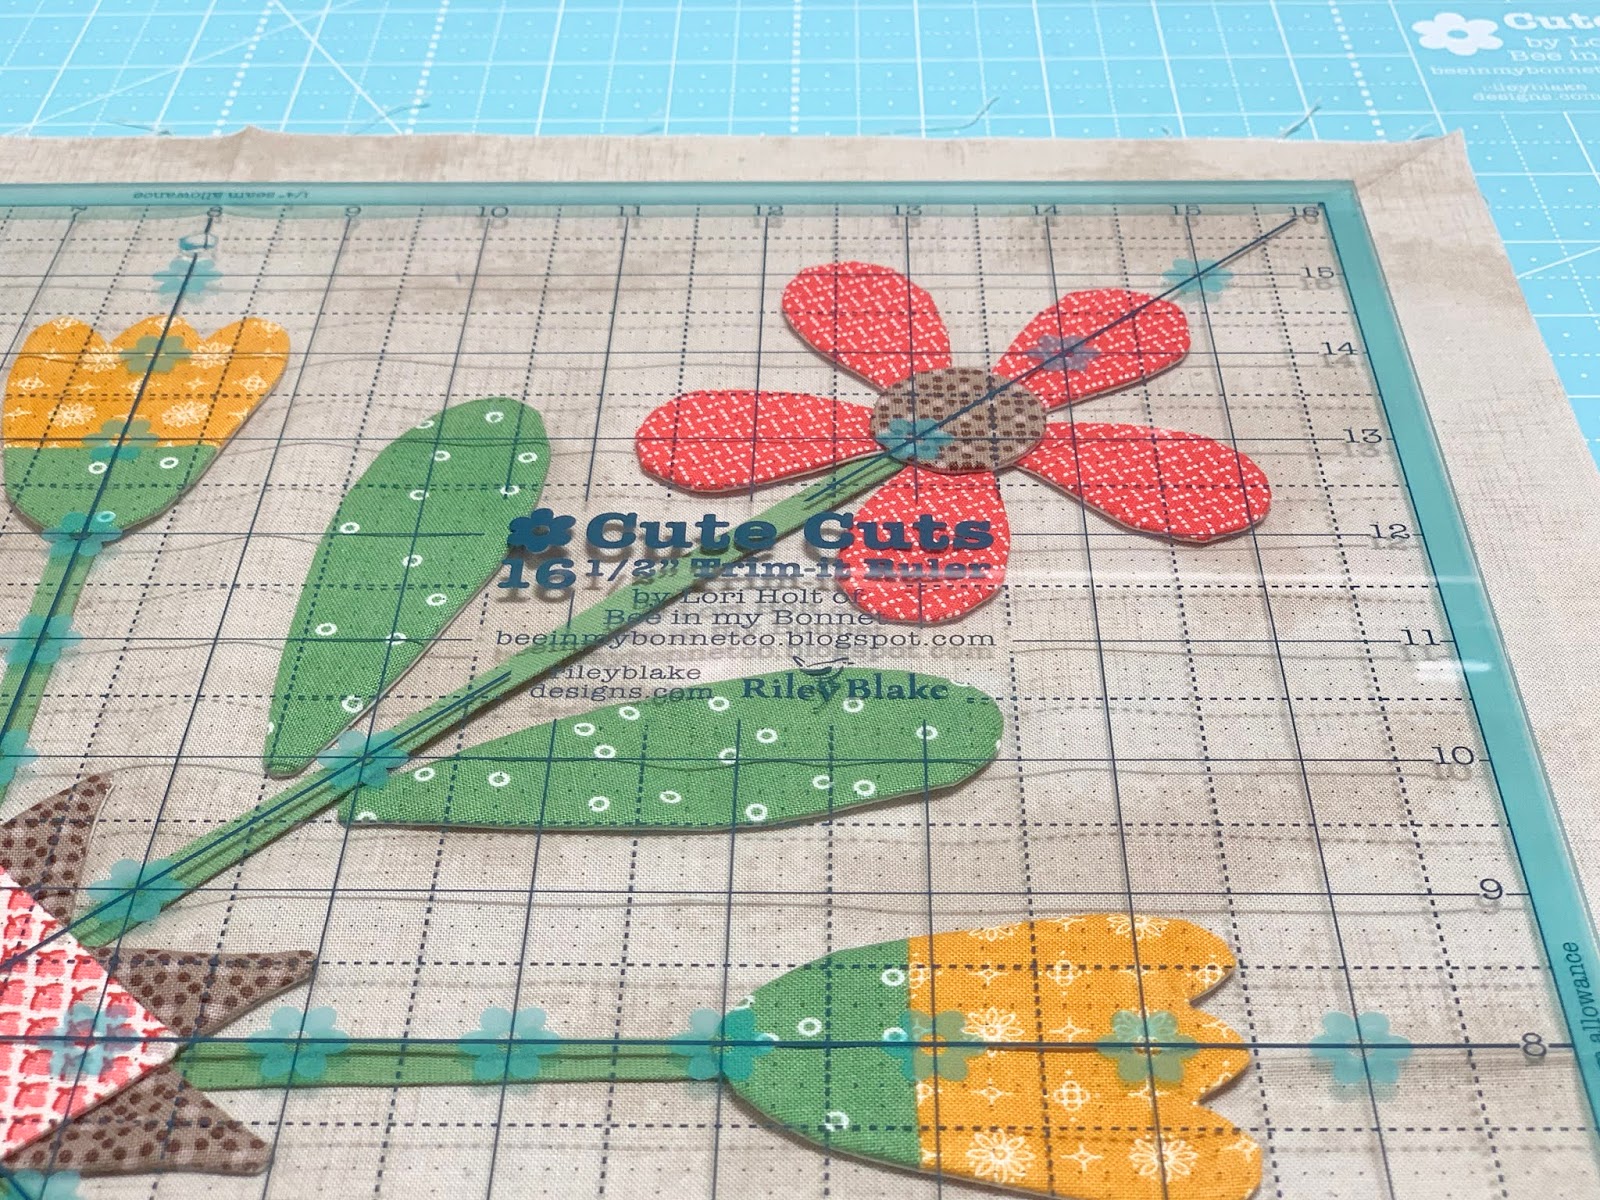
Use your ruler to center them
correctly and stay within the
aqua border on the ruler.


Place something heavy on top
while the glue dries....
I put my brand new Prim Notebooks on mine!

Block 5 is all ready to appliqué:)

After applique...
trim it to 16 1/2" square
so that it will fit into the quilt!

I love this block and I think it
would make an adorable pillow
as well as making several of them
for an entire quilt!

If you didn't get a chance
to watch the Prim Steps Block
tutorial on Friday
to watch it and find out
all about making
the blocks for the border.
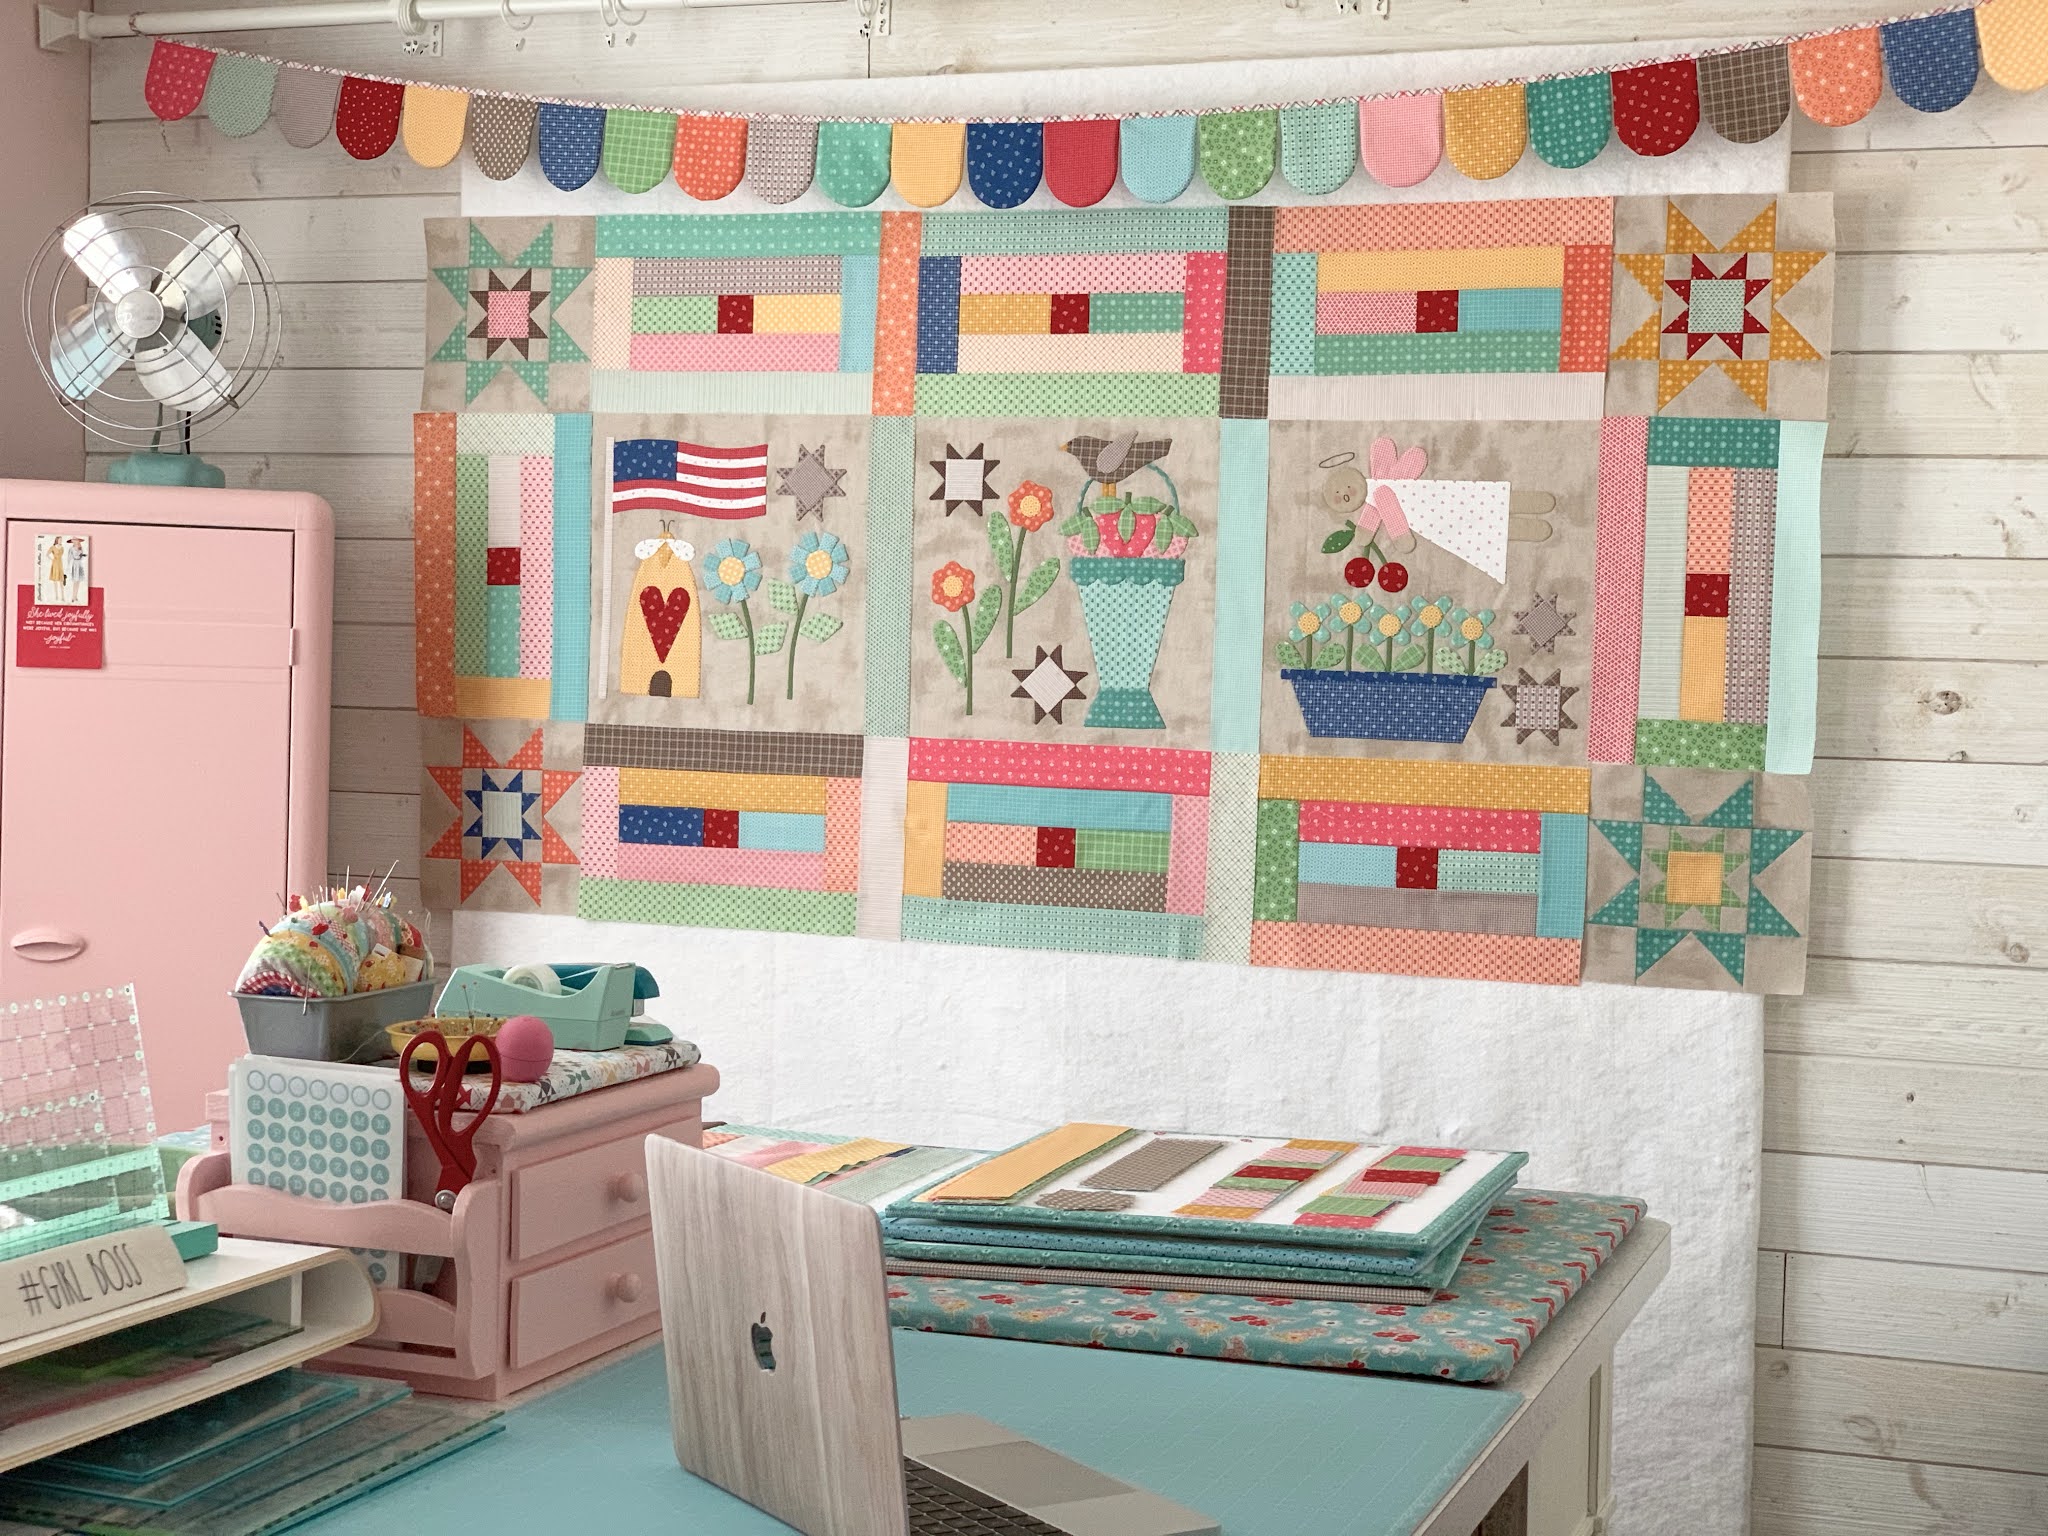
For the video I pinned the
first three blocks to my design wall
and sandwiched them between the
Corner Stars and the Steps Blocks.
Wouldn't it be cute as a
wallhanging just like this?
Then I took the bottom row off
and added the sashing and
cornerstones underneath just like
they are in the quilt.

Here are a few close up photos
for you so that you can sew
which sashing strips go where.

Of course on page 14 of the guide
it shows you exactly how to
sew the rows and the entire quilt together...

But photos always help!

When you have the first three blocks
finished you can sew the
top of the quilt together like this...
or wait until you have
all the blocks completed:)
Whichever way that you decide to do it
is up to you and your
individual sewing time schedule.
The most important thing is to relax
and enjoy each step of the way!
I'll meet you right back here
next week for another
Prim Block tutorial:)
xx
Lori

No comments:
Post a Comment