

YaY!!
Today is the day for the
"Bee Prepared"
post that I do in preparation for my
appliqué sew alongs using my
Sew Simple Shapes
and my latest fabric collection.
This one is the
MY HAPPY PLACE SEW ALONG
and I'm so excited for it to start!

We will be making the
My Happy Place Quilt
which finishes at
76" x 88"
It has fifteen appliquéd blocks
which we will be using my
Sew Simple Shapes to make...
and there are thirteen
rotary cut and
sewing machine pieced blocks.

My Sew Simple Shapes Sew Alongs
always take place here on my blog
and they are on Monday's.
This one starts September 13th
How do you join the sew along?
1.You simply grab yourself a
My Happy Place Quilt Fabric Kit
2. You will need the
My Happy Place Sew Simple Shapes and
the Sew Along Guide
3. Gather up supplies needed
to make the quilt
4. Come here to my blog every Monday
during the sew along
(starting August 23rd)
where I will give you the
free step by step tutorial
for that weeks block.
Please read ALL of the information
within this post telling you all that
you need to know about this sew along.
Once the sew along has begun...
each of my weekly posts will be
tutorials about actually
making the blocks and so I am
telling you here all about the supplies
and other things necessary to get started.

There is no pattern to purchase...
because basically the
My Happy Place
Sew Simple Shapes
are the pattern and the instructions on
how to use them for each block
are shown weekly here
on my blog or YouTube channel
during the sew along.
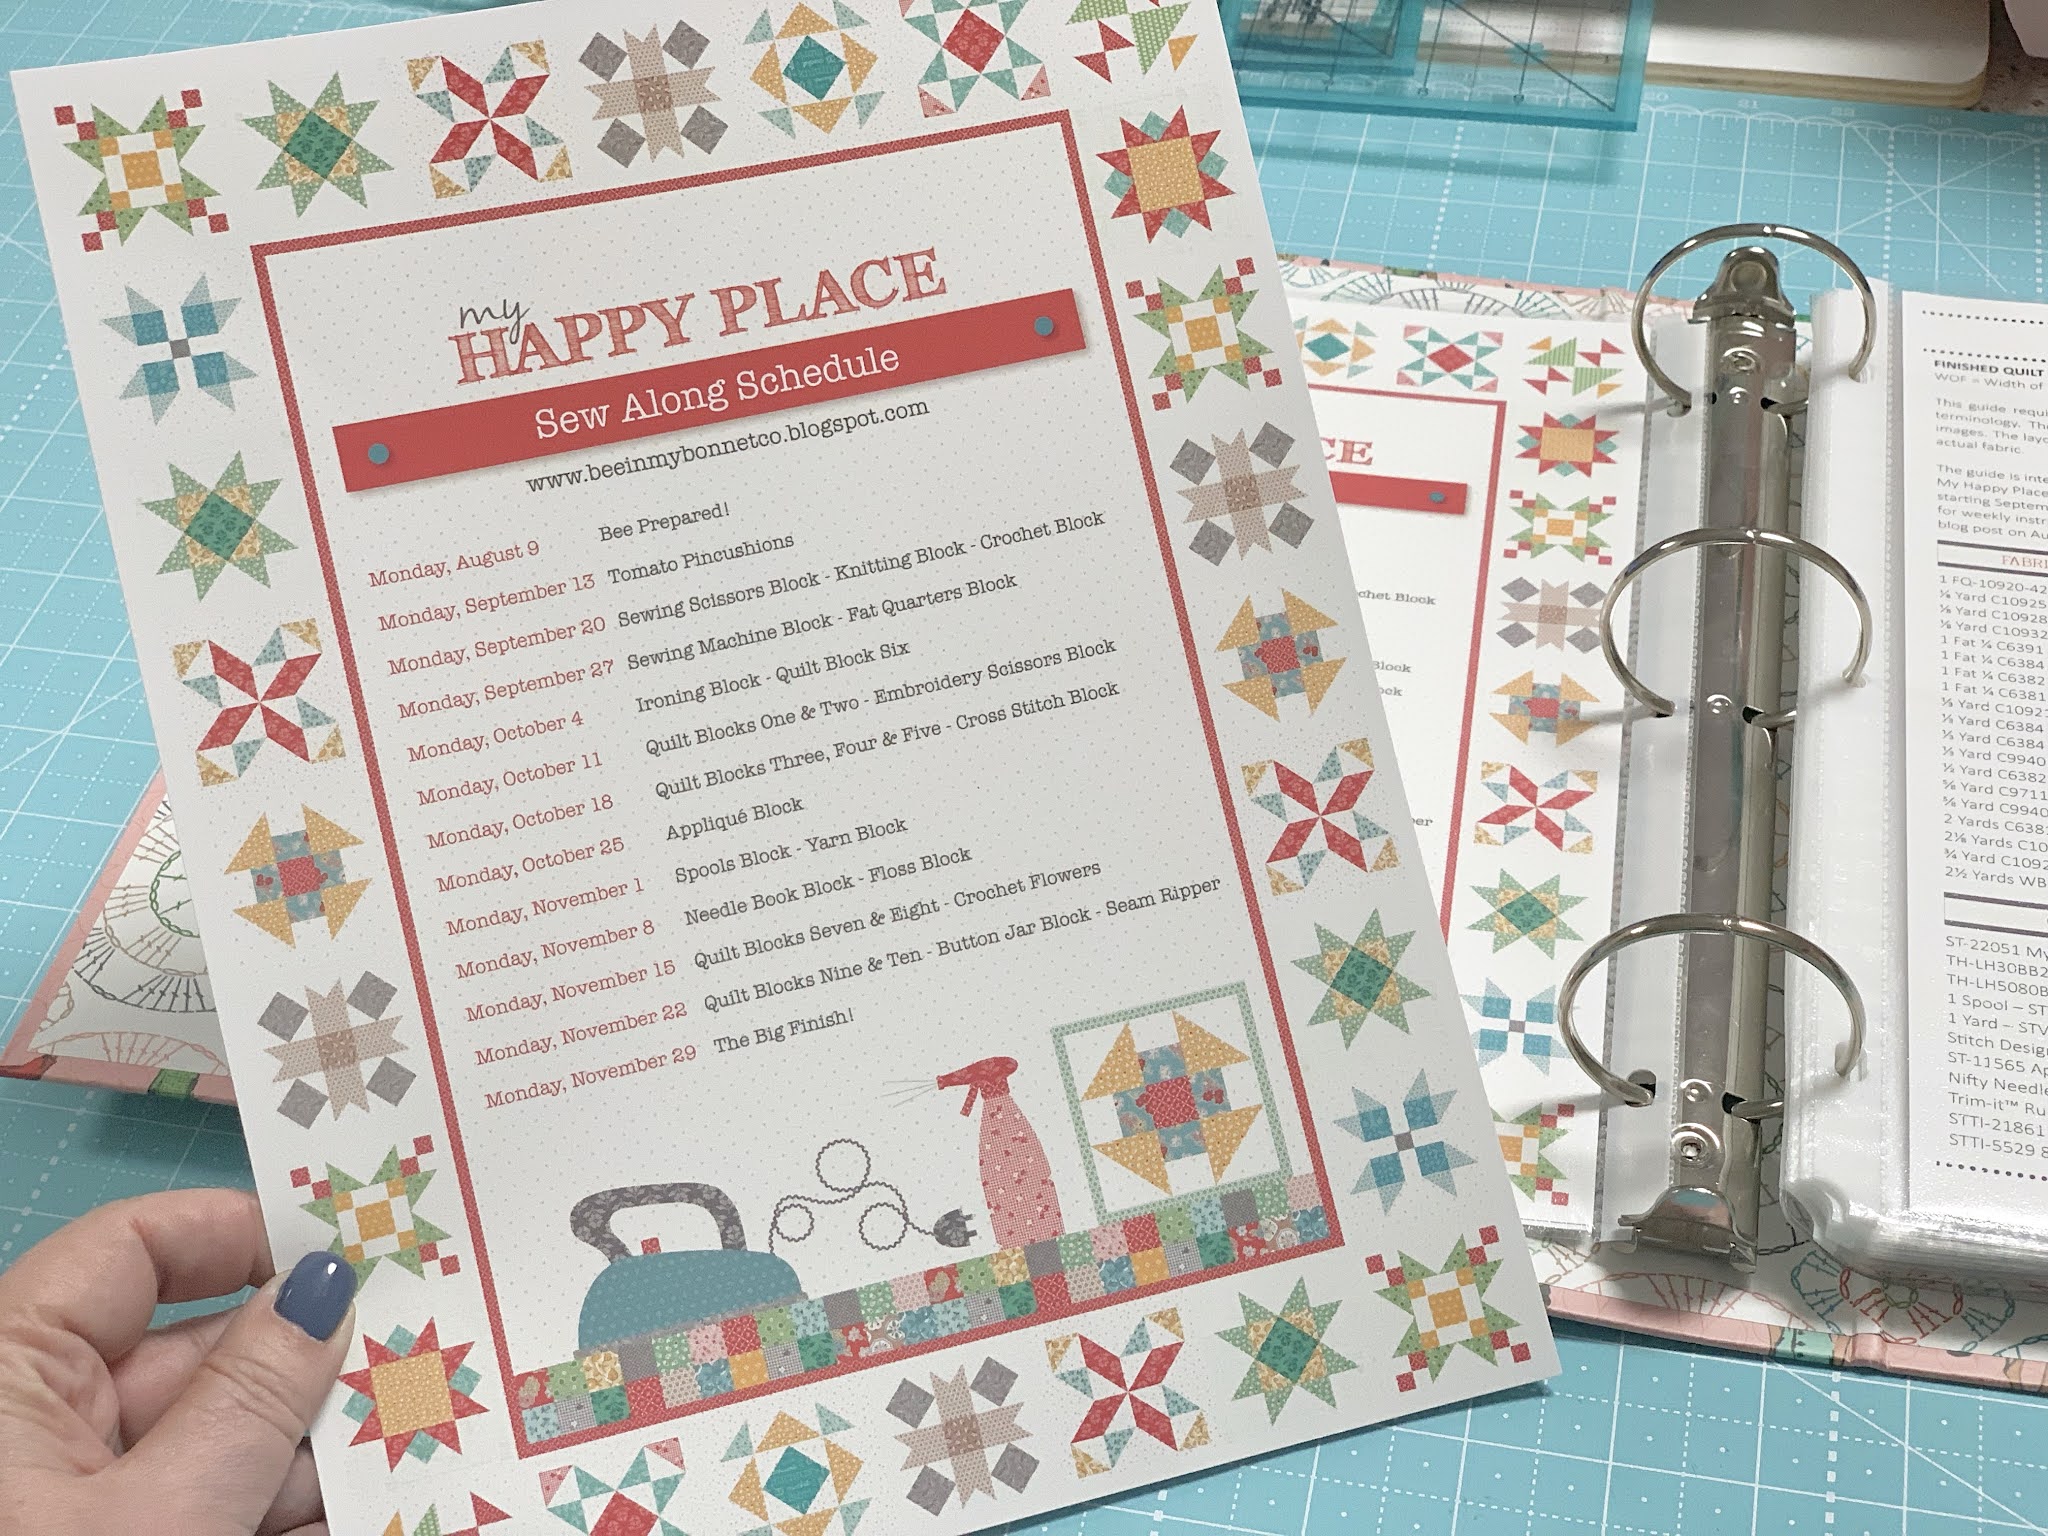
Along with the shapes you will
need to download the handy dandy
My Happy Place Along
Sew Along Guide
for the free download.
In the guide you will have:
A print out of the finished quilt...
the schedule of what blocks
we will be doing each week
during the sew along...
Also in the guide you will find
fabric requirements for the quilt...
and notion requirements for the quilt
as well as suggested notions
that I use when making mine.

You will also find instructions
for cutting each and every
piece of fabric in your kit!
It will tell you what that piece is for...
which Sew Simple Shape it is used with
and what block it belongs to.
This way you can cut ahead of time
and make individual block kits for
your quilt and have them all
ready to go each week!

As with any sew along...
organization is really the key.
I like to have this information
ready for you ahead of time
so that each week we can
simply make the block!!
You will also find the cutting
measurements of the Sew-In Interfacing
that goes with each Sew Simple Shape
so that you can have that all cut
and ready to go:)

And as always I have designed a page
for "My Happy Place Notes"
so that you can
jot anything down from my blog posts
or video tutorials
during the sew along.
You can print as many
note pages as you would like
for your own personal use...
just keep in mind that
they are under copyright
and they are not for re-sale:)
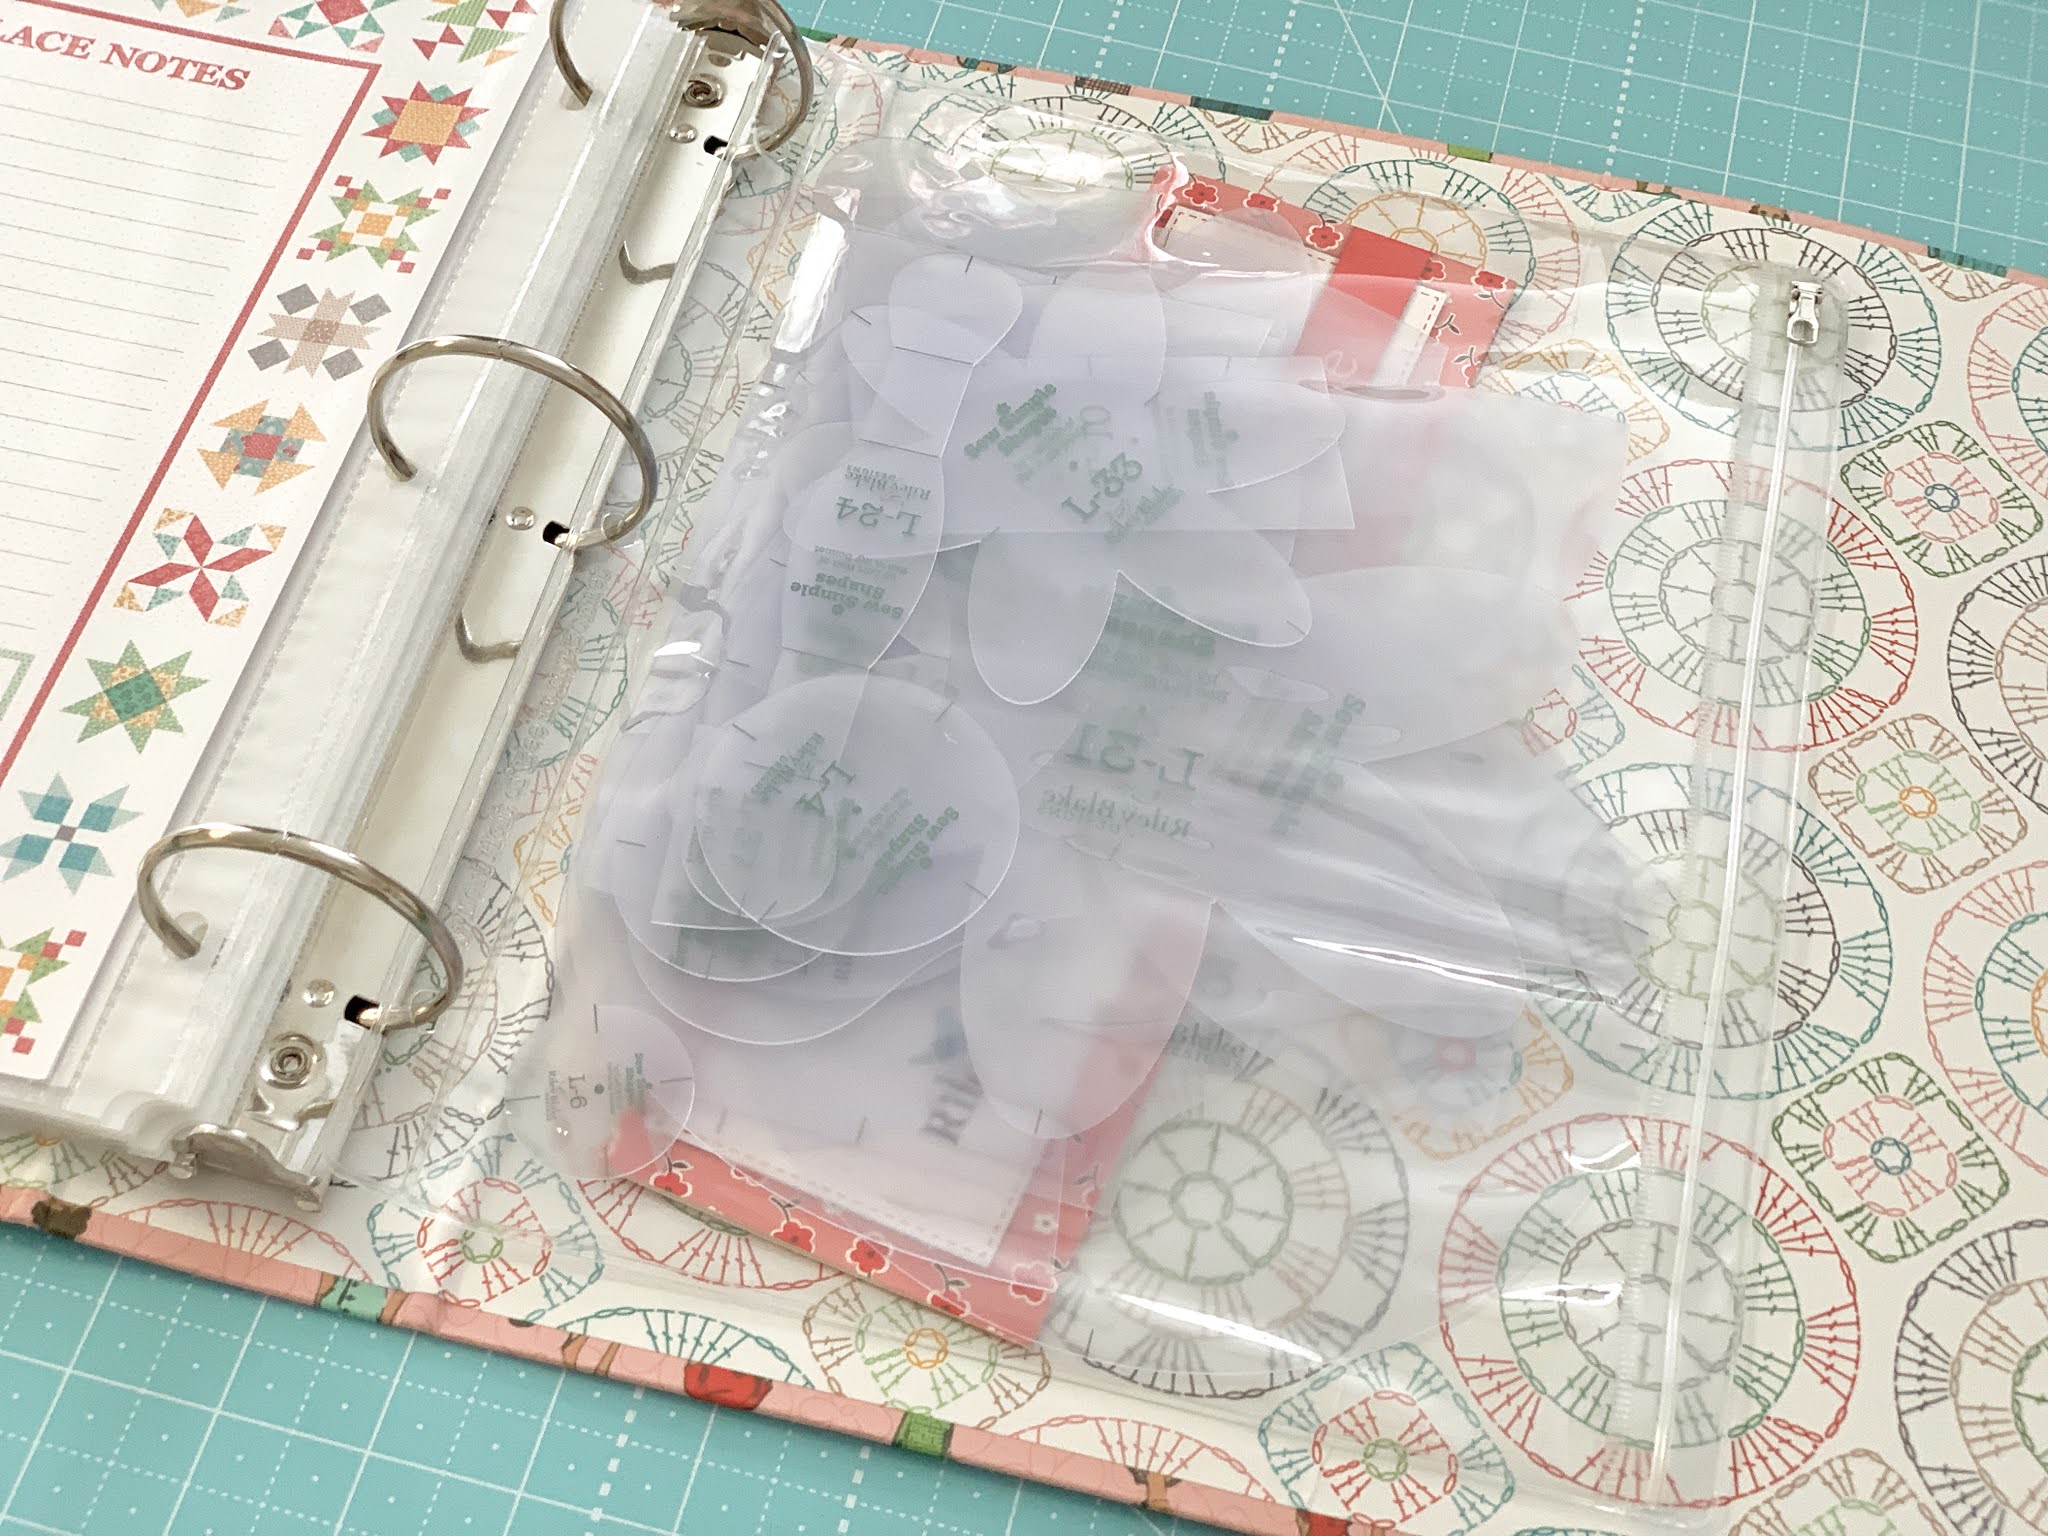
I put one of my
Bee Keeper Binder Pocket Inserts
in there to hold my set of
Sew Simple Shapes....
for easy access during the sew along!

The two largest circles in the set
do not fit inside of the pocket
because I needed to make these circles
very large for the Cross Stitch Block...
 I'll show you where I store these
two shapes as soon as my
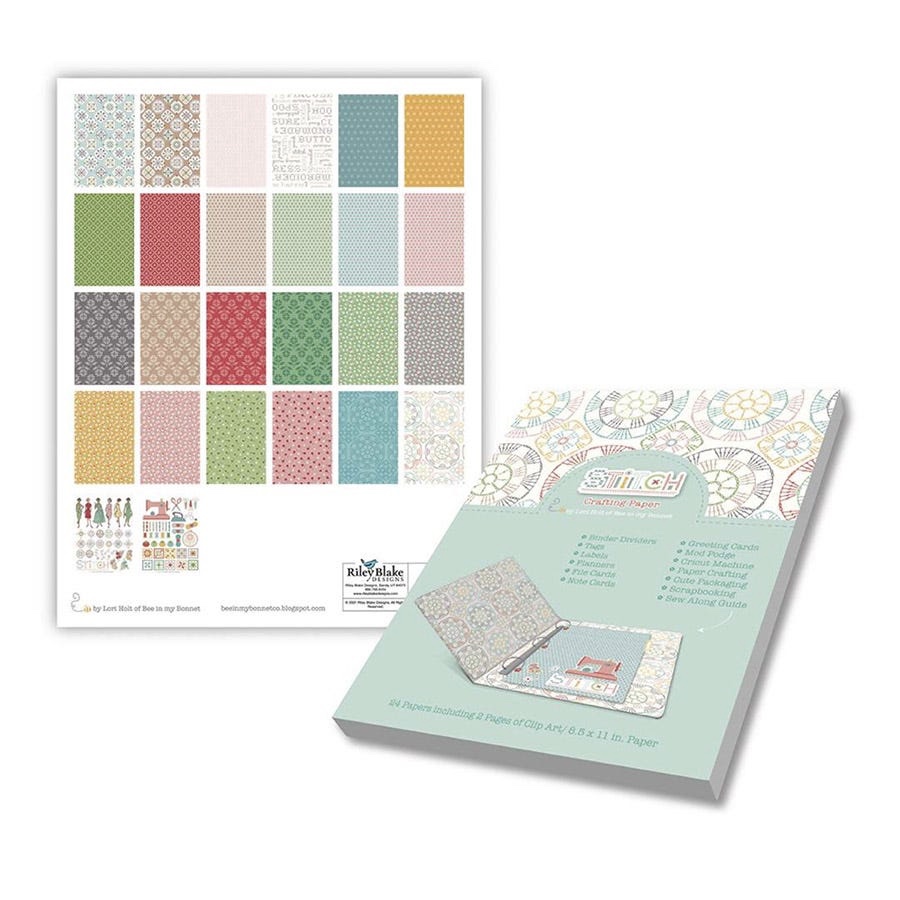
STITCH Crafting Paper Pad gets here...
it's going to be a nifty solution!!

This is the STITCH Beekeeper Binder
that my Sew Along Guide will live in:)
I love this print because
of all the vintage ladies...
reminding me of my
Grandma's, my Aunt's and my Mom:)

wider than my Flea Market binder was
and will house the guide perfectly.
YaY!


Okay...enough about the guide...
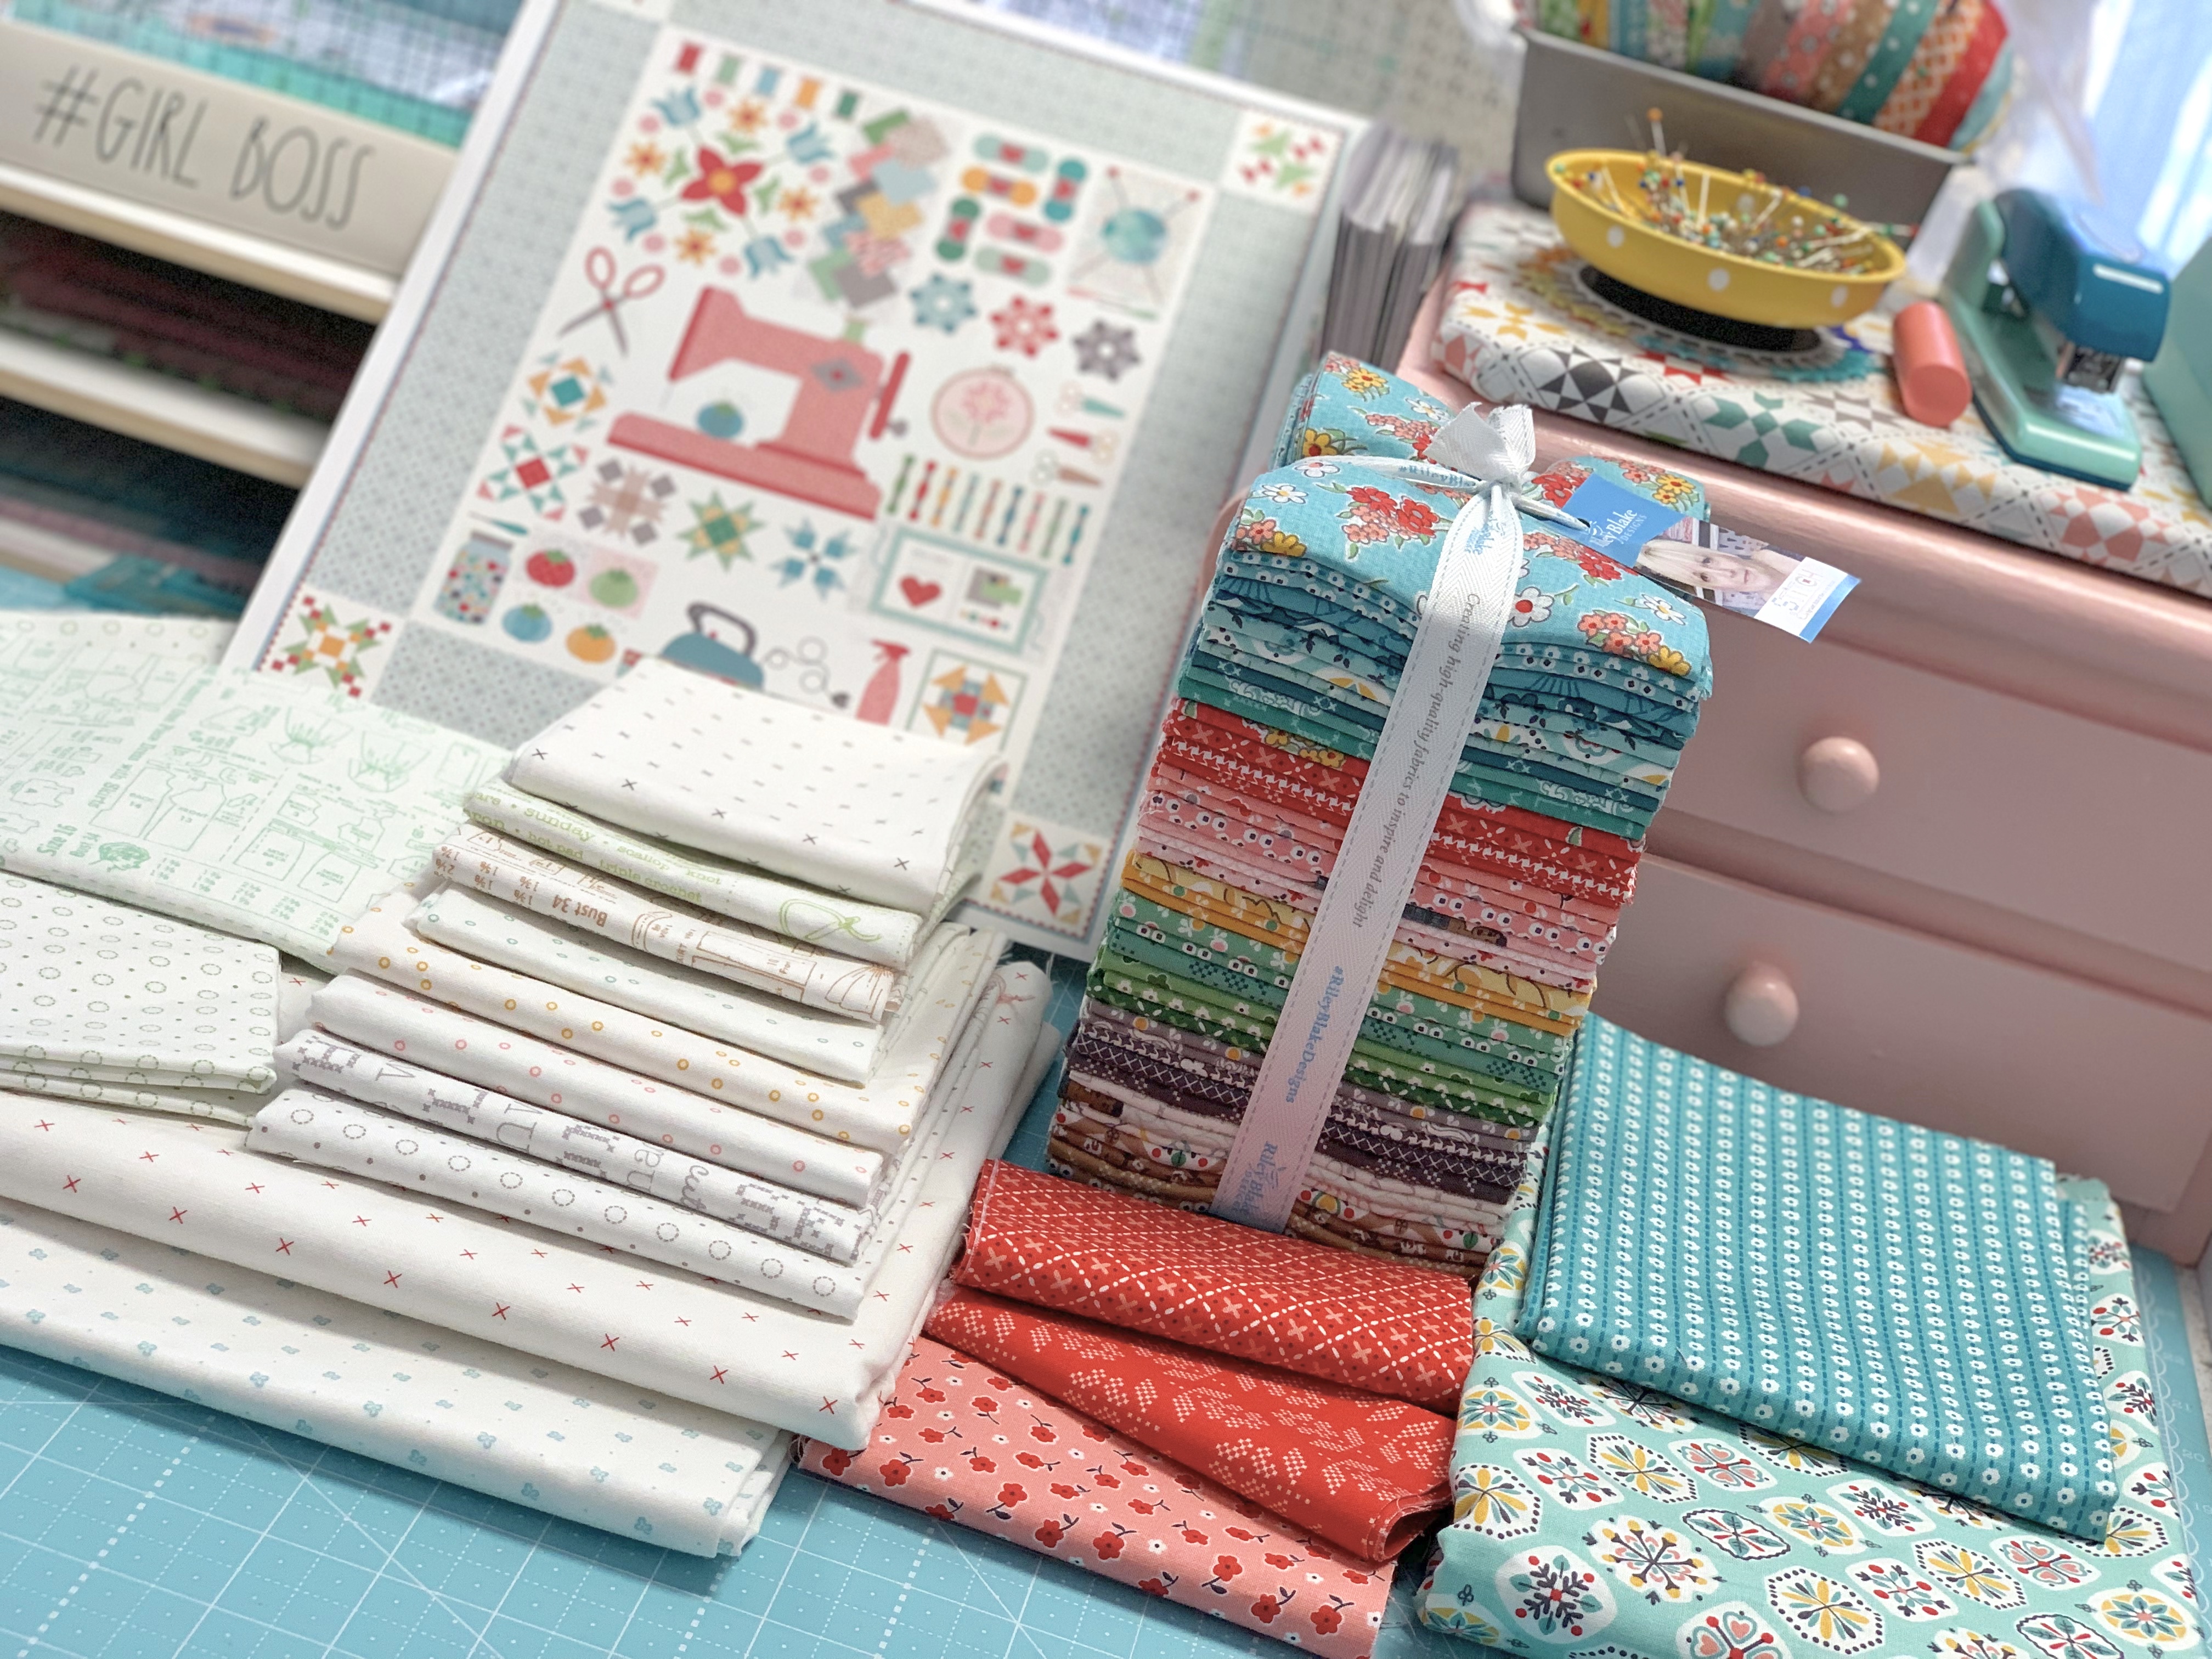
let's talk about the fabric!
The collection that we are using
for the My Happy Place Quilt is of course...
STITCH!!
This is the written introduction
to STITCH that is written on the back
of the fabric storyboard
that goes to quilt market:
"Riley Blake Designs is
introducing STITCH fabric!
This newest collection
by Lori Holt of Bee in my Bonnet
is all about her sweet
love affair with stitching -
whether it's piecing quilts,
sewing for her home,
doing applique blocks or
embroidery, cross stitch,
knitting or crochet...
she loves all things
that have to do with stitching.
Lori's Mom has often been quoted
as saying that she was practically born
with a needle in her hand!
Most days you will find Lori
in her Happy Place -
just happily stitching away.
Several prints in this collection
are a nod to all the types
of stitching that Lori loves to do,
as well as her endearing love of vintage.
We hope that you will love her new
STITCH collection and that it will
inspire you to "stitch all the things!"

STITCH
Fat Quarter Bundle:)
Now about the fabric kit.
Several shops are stocking the kit...
both brick and mortar shops
as well as online quilt shops.
If you have not already pre-ordered
your fabric kit and still need one...
just do a quick google search of
"My Happy Place Quilt Kit" to find one...
google is your best friend lol...
easy peasy!!

With each collection that I design...
I also design 3 wide back prints
(108" wide)
to use for the backings on any and all
of your STITCH projects...
it's so nice when you don't have to
piece the back!
Here are the 3 STITCH Wide Backs.
You can choose whichever you would like
for the back of your quilt...
they all match perfectly:)

You will need 10 yards of my
Large "Riley Red" Vintage Trim.
It comes on a large spool with 12 yards.
It's to sew into the binding and is so cute:)
You will need 1 yard of my
Small "Steel" Vintage Trim
for the Iron Cord.
It comes on a small spool...
also 12 yards are on there as well.

of my new STITCH Buttons to use
throughout the quilt and
for the Button Jar Block.

of my 1/4" Cute Little Buttons.

MY HAPPY PLACE
Sew Simple Shapes
This is the back of the header
and you can see that the set includes 38 shapes...
two of them are bonus shapes
that will not be used in the quilt...
but I will be using them this month
in the August ReMix Block
in my ReMix Series on my YouTube channel
Because I am a visual person...
I thought you might like to see
a photo of each of the supplies
and notions that are listed in the guide.
***The following photos are some
of my notions and other of my
favorite notions that I am using
to make My Happy Place Quilt.
Some are listed in the guide
and some are not ...
but I will explain each one!
You will see me using them in the
tutorials during the sew along...
so I thought I would tell you about
each of them here...
to answer any questions that
you may have about them.
You can of course use what
you would like...
these happen to be my favorites:
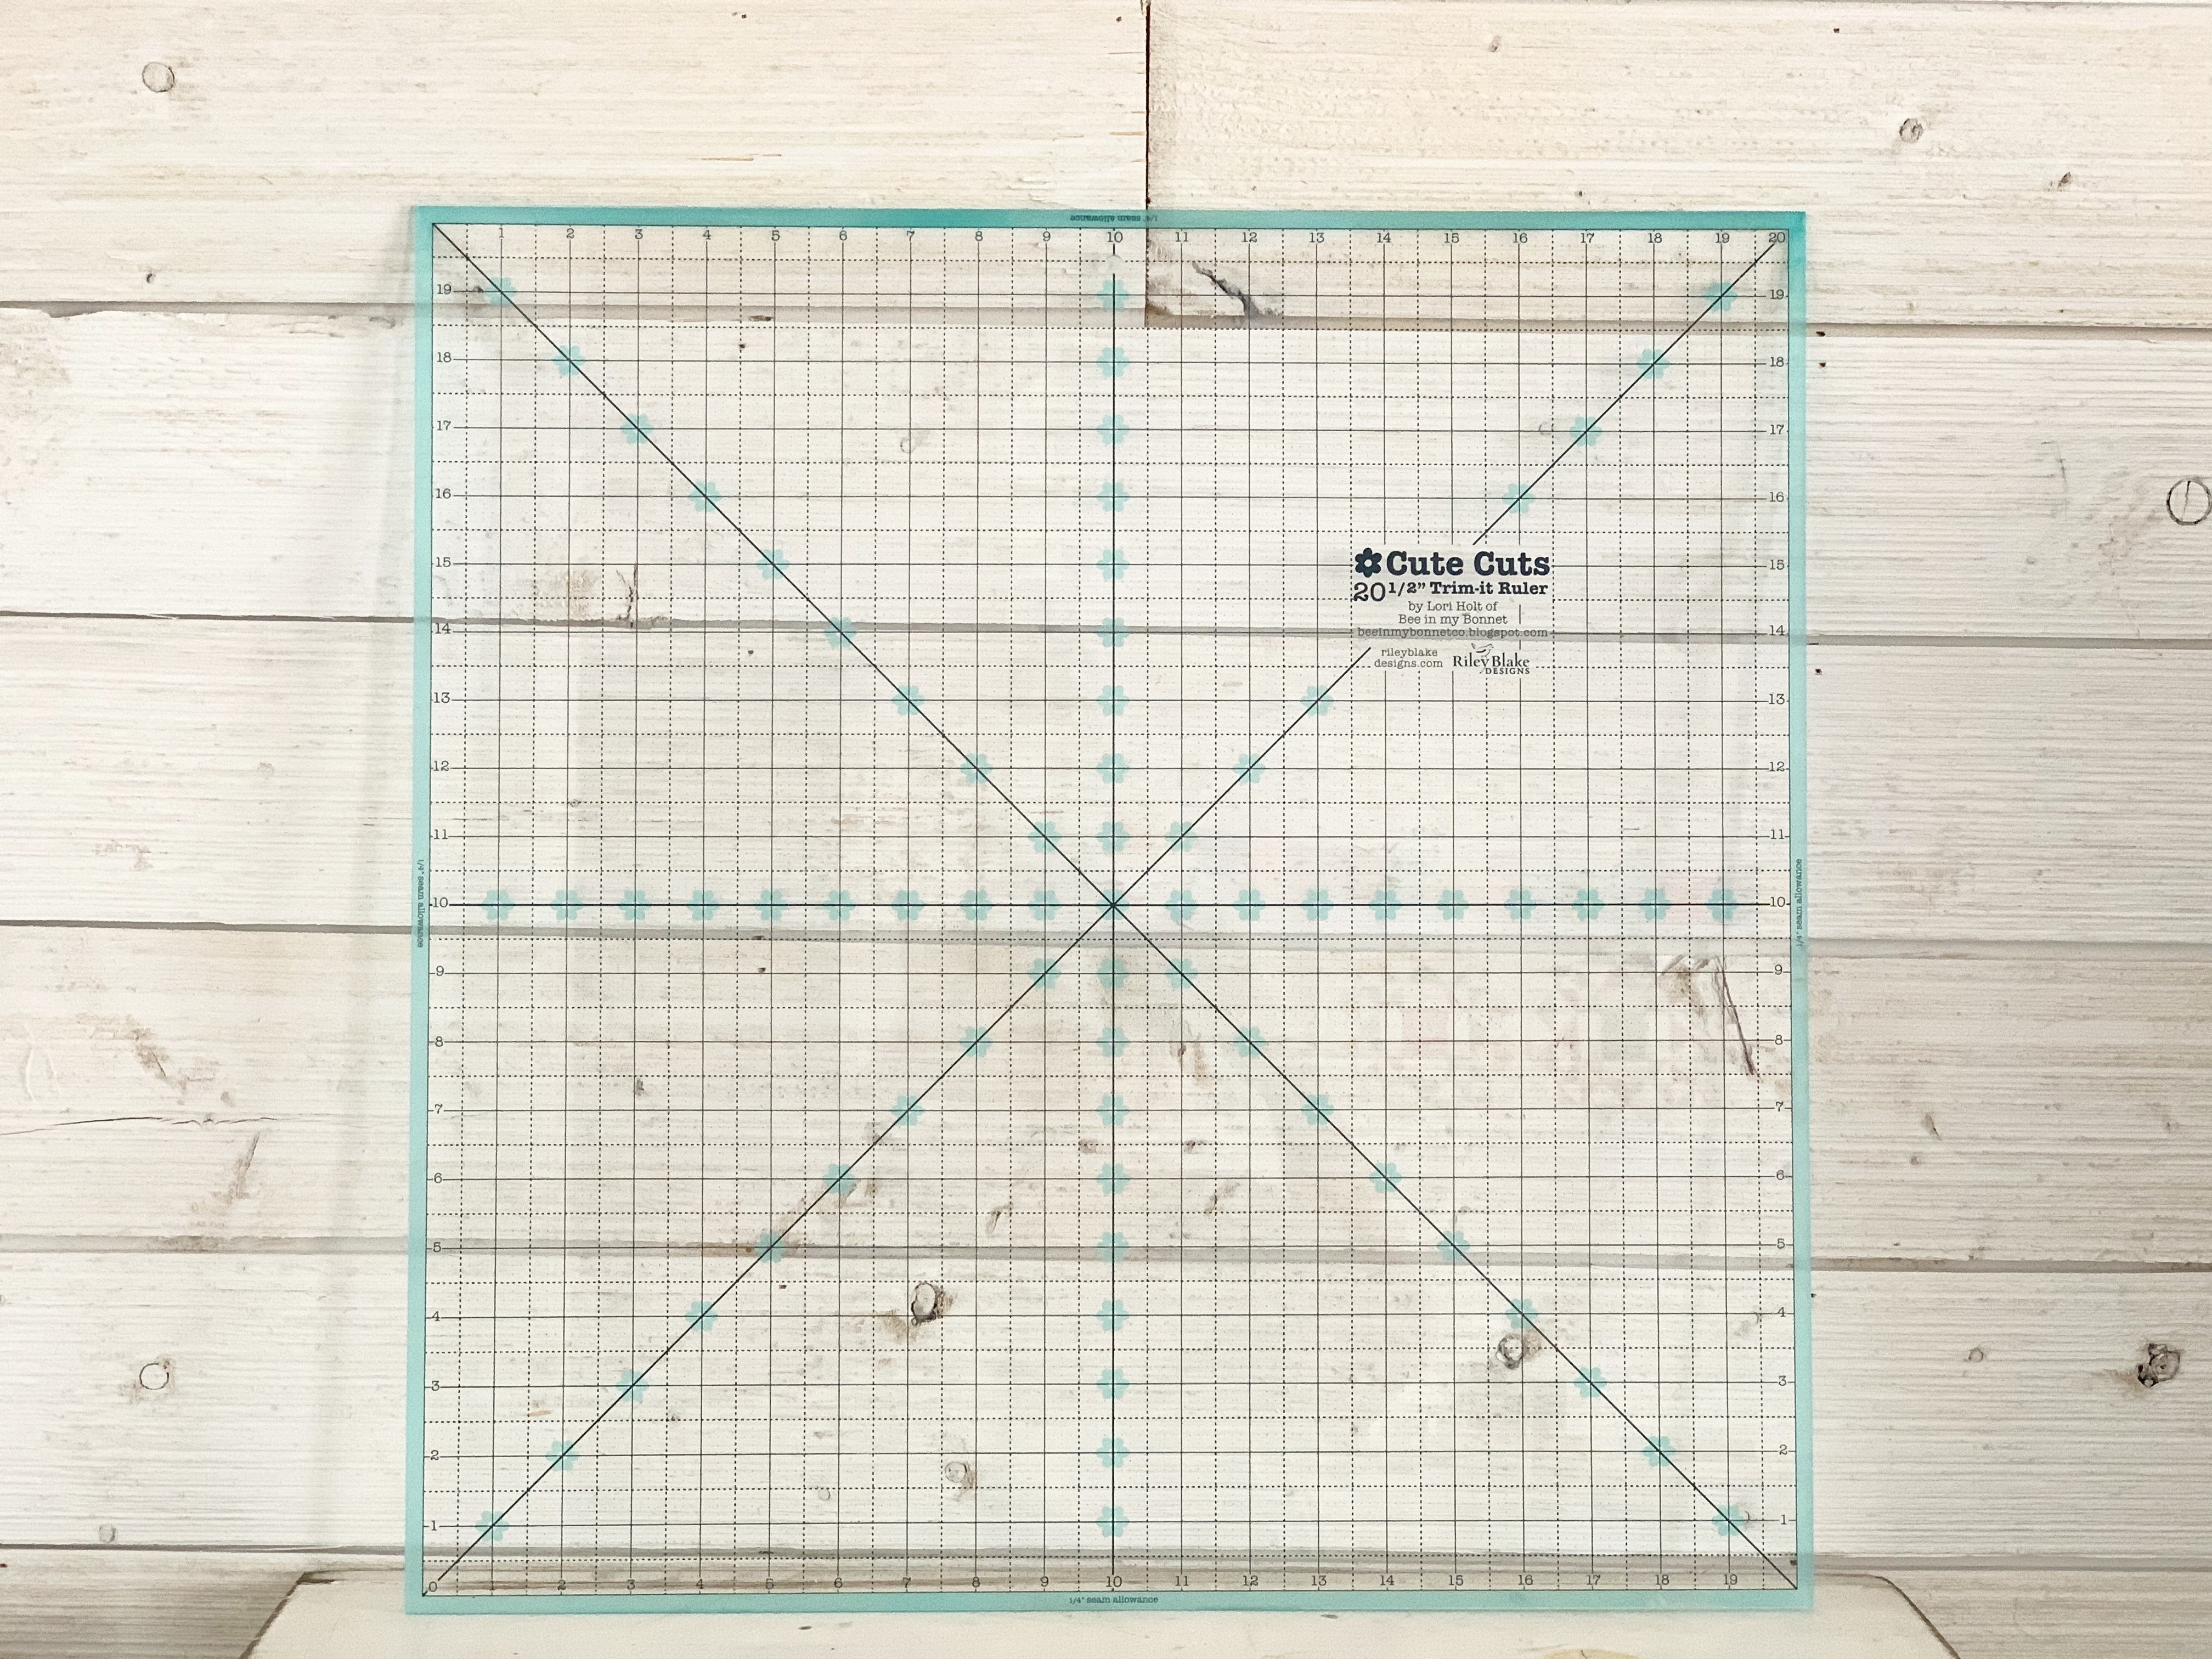
The Cute Cuts 20 1/2" Trim - It Ruler
is used to not only to
trim up the large applique block
in the top left corner of the quilt....
but to lay out the appliques
and place them where they go
before basting and applique.

The 8 1/2" Cute Cuts Trim - It Ruler
is used for centering and trimming up the Pieced Quilt Blocks 1 thru 10
All of them are 8" finished blocks:)
I have several other sizes
of my Trim-It Rulers
listed in the guide that will
come in handy for every
applique block in the quilt.
(Backgrounds are cut larger to allow
for working the block and
then trimmed up later)

You will need 1 1/2 packages
of my Sew-In Interfacing.
Since starting my sew alongs that use
my easy applique method...
I have developed what I think is the
perfect strength and thickness of
interfacing for shaping the appliqués.
I also use the
Point to Point Turner by Clover
to shape each of my pieces...
I could not do without this handy tool!

I pin and then glue baste
each block for applique prep.
I love love love this glue by Sue Daley
and affectionately nick named it
"Sue Glue"
It is water soluble...
dries clear...
keeps my pieces in place for applique
but can be pulled off if I need to reposition...its a win win!

bias tape makers by Clover
that you will need for this quilt.
The green is 1/4" -
purple is 3/8"
red is 3/4"
and the blue is 1"

Here is a photo of my NIFTY NEEDLES...
they come in a card with several of each different kind...
and also come in
individual needle tubes as well.
There are 6 different kinds
for all stitching tasks...
shown in the tubes are the ones
that are relevant for this quilt.
Embroidery...applique and binding.
You can also use the sewing needles
in one of the smaller sizes
if the applique needles are
too small for you.
It's really a personal preference...
they both work just as well and
there are several sizes
to choose from within each tube.


Now let's talk thread.
I have a Aurifil thread set
called Bee Happy
and it will work for all of the colors in STITCH.
The thread is 50 wt. and 80 wt.
and is used for
APPLIQUE and NOT embroidery.
You can decide if you would like to
machine applique or hand applique...
either way you will need to
have matching thread for each applique.
This thread works for both!
If you are machine appliquéing
you would use it for the top thread
but you would not need to change
your bobbin color as it would
not show on the top.
There is a little bit of embroidery
on a few of the blocks
which uses all the same color.
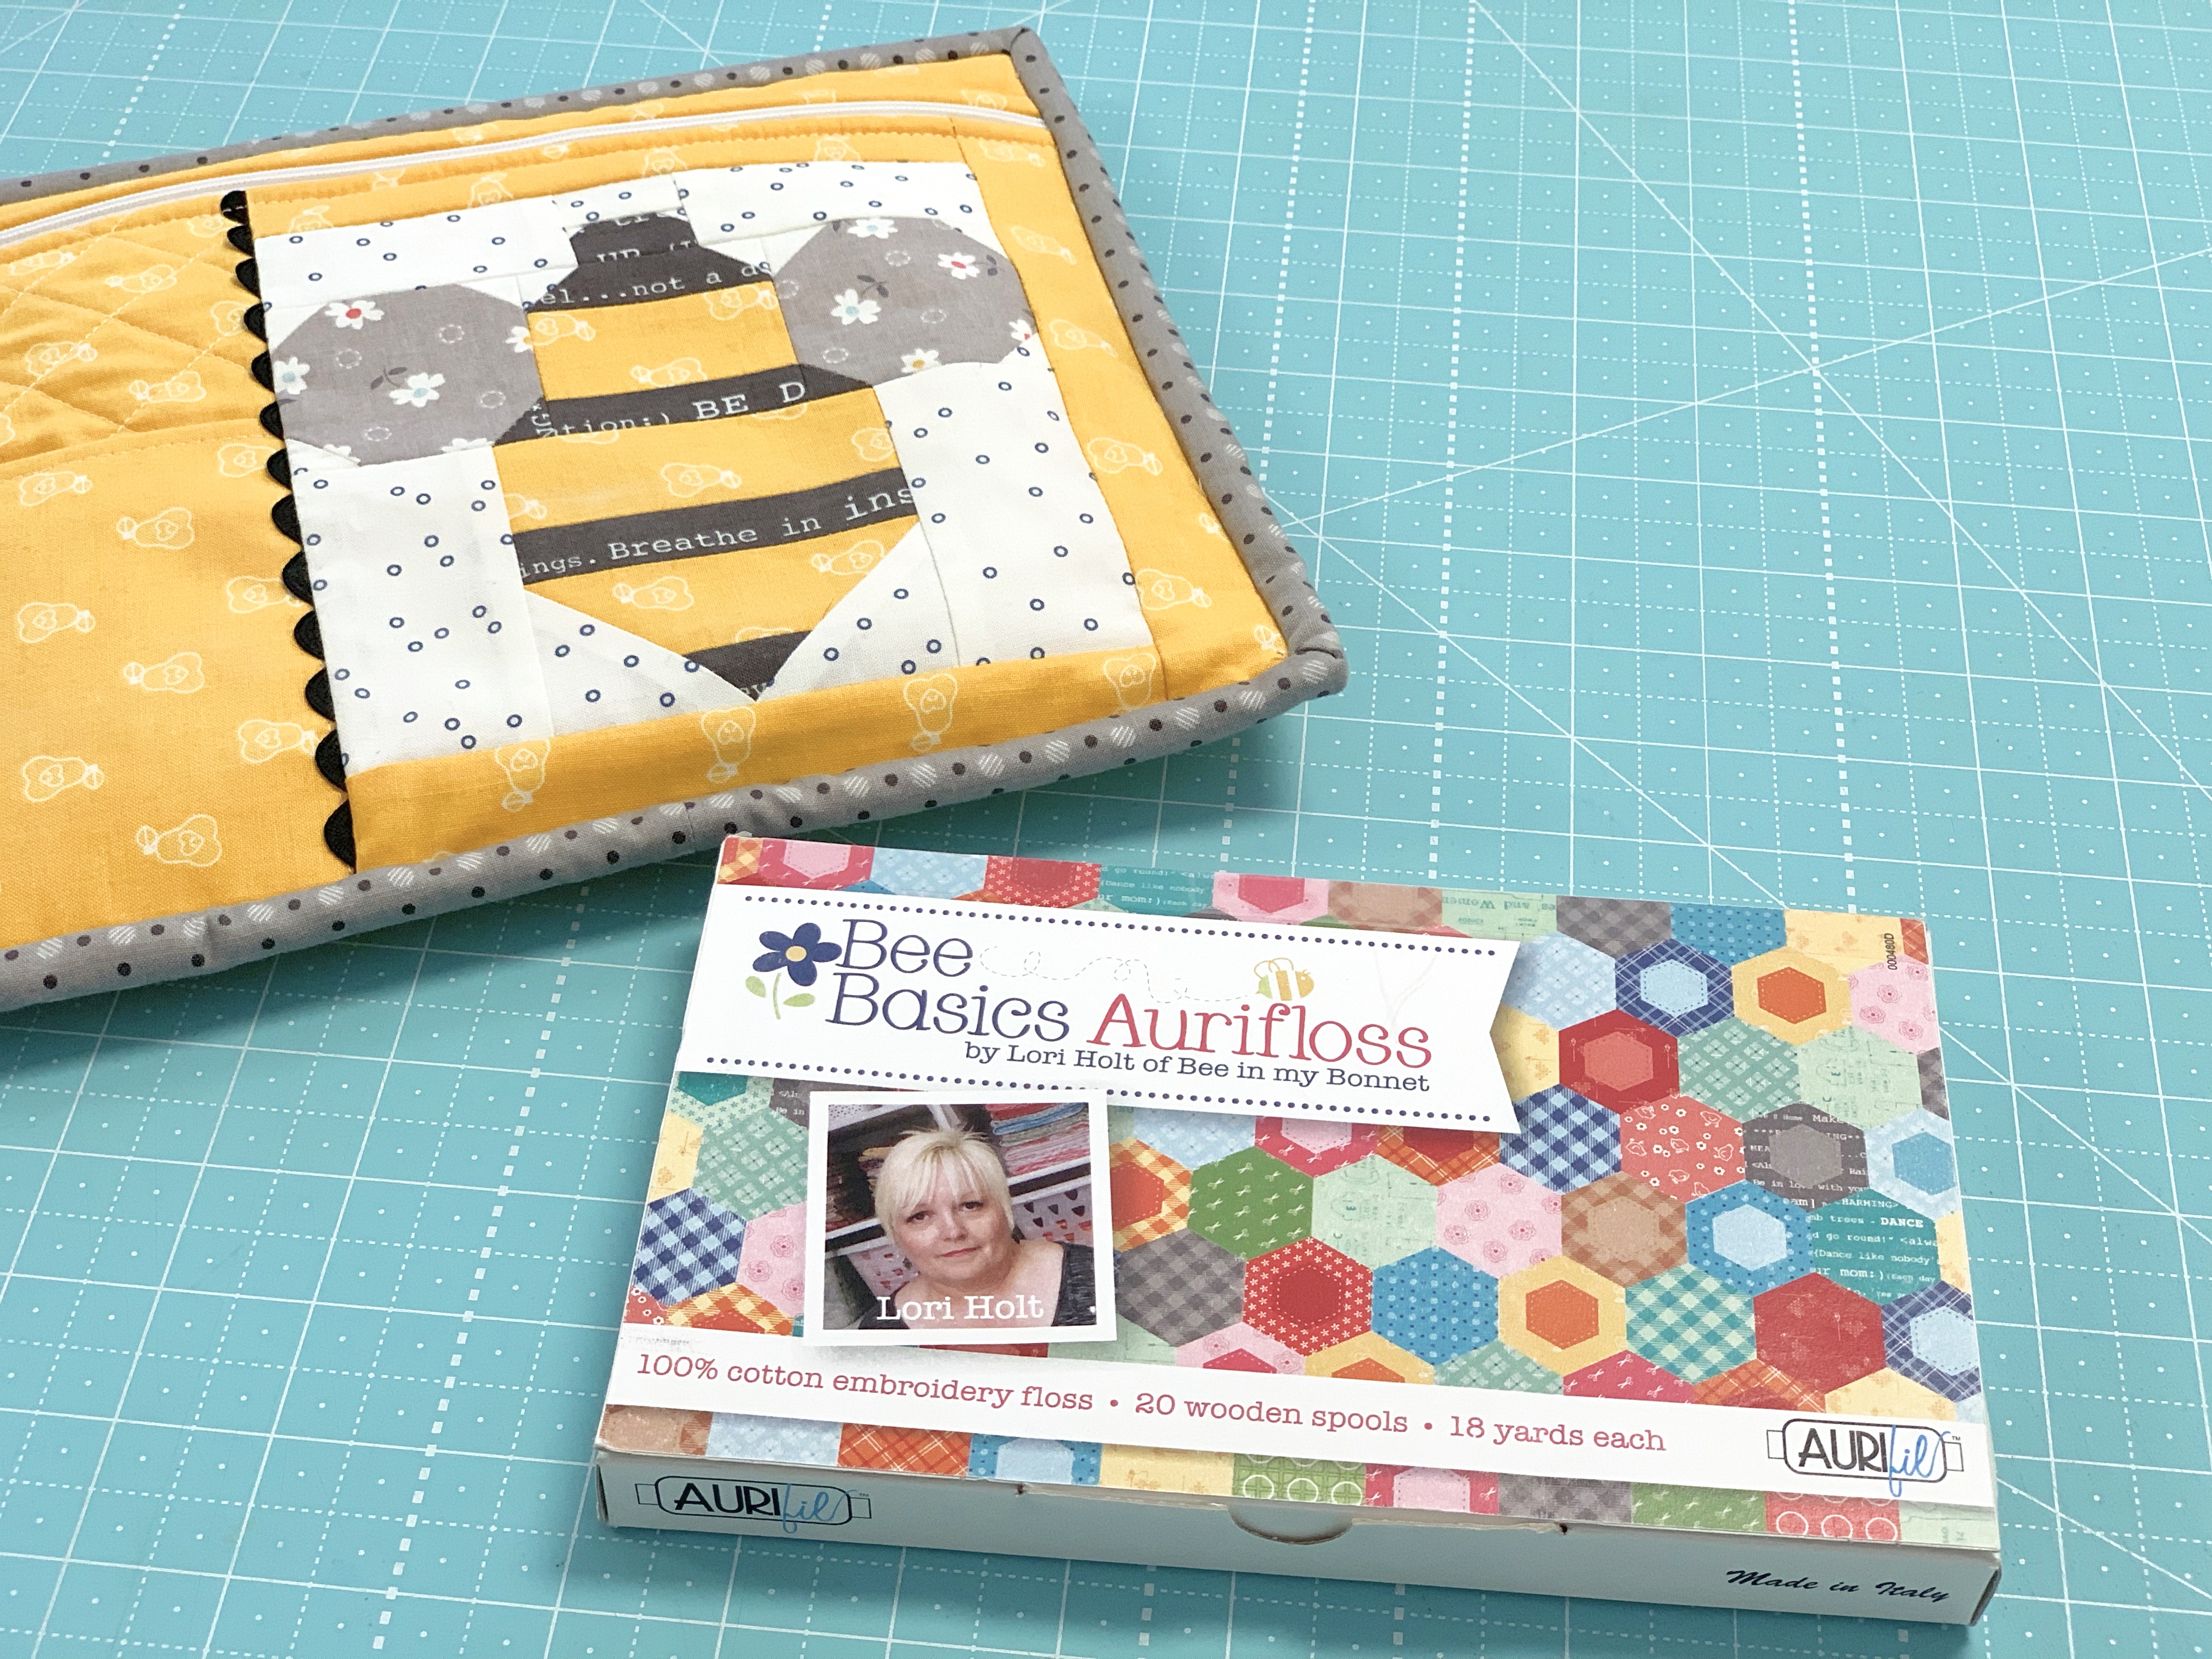
is used for the Cross Stitch Block
and the embroidery that there is
in some of the blocks.
P.S. Aurifloss is made by Aurifil and
is a six stranded embroidery floss
for handstitching...not for the machine.
You do not use Aurifloss for applique...
I use it for embroidery or cross stitch.
The colors I used are listed in the guide.

Any embroidery patterns for the quilt
are in the sew along guide.
You can tape that page to a window
on a sunny day to trace directly
onto the fabric for embroidery
(I use a .05 mechanical pencil)
or you can use a light box.
I use my Easy Trace Light Box.

it was time to produce them again!...
it is exactly the same amazing quality
and the only thing I did was
do it in a different color...
and designed new packaging as well.
It was fun to change it up!

I use my washi tape for
taping my embroidery pattern and fabric
onto my light box for tracing.
I don't want my pattern or fabric
to shift during this process.
For those of you who may not know
what washi tape is...
it was developed for paper crafting and packaging but I also use it
for sewing and quilting!
Just think of it as cute
miniature painters tape.
It has a low adhesive so that it
can hold temporarily and can be
peeled off without leaving
a residue on fabric.
Perfect for taping paper
and fabric to the light box!
I do a set of washi tape designs
with each fabric collection
and these are from my STITCH set:)

I have several different sets of
Pretty Pins and these are the two
that I use when making this quilt.
The Double Pins are used when
piecing blocks and I will
show you during that tutorial.
The Applique Pins are used for
pin basting into the design boards
and are essential to me!
These are just the right length
for this task...
which is why I call them appliqué.
I also have "mini applique" Pretty Pins
that are short and tiny and are
used for hand applique
when I don't glue baste.

And again...speaking of pins...
of course you need a pincushion
for this sew along!
I made this one from a
pretty little vintage aqua apple
dish that I thrifted for
just a few dollars.
For making this one...
I simply glued a good
strong magnet onto the bottom
making it a magnetic pin bowl.
I also did a tutorial on my
YouTube channel on how I make my
pincushions from vintage finds.
to go on over for a visit!

I use Bee in my Bonnet Design Boards
when cutting and for pinning and
glue basting each applique block.
The new STITCH ones come in
four sizes...7" - 10" - 14" and 18"
There are 2 prints for each size.

to piece all of the blocks in the quilt.
It's used as an accurate
1/4" seam allowance and also when
piecing all of the easy corner triangles
in the sewing machine block
and the Quilt Blocks.
I'll show you how to use it
during those block tutorials:)

You will need sewing scissors
as well as embroidery scissors.
I use both...these are my
9" Sewing Scissors
and my Stork Scissors.
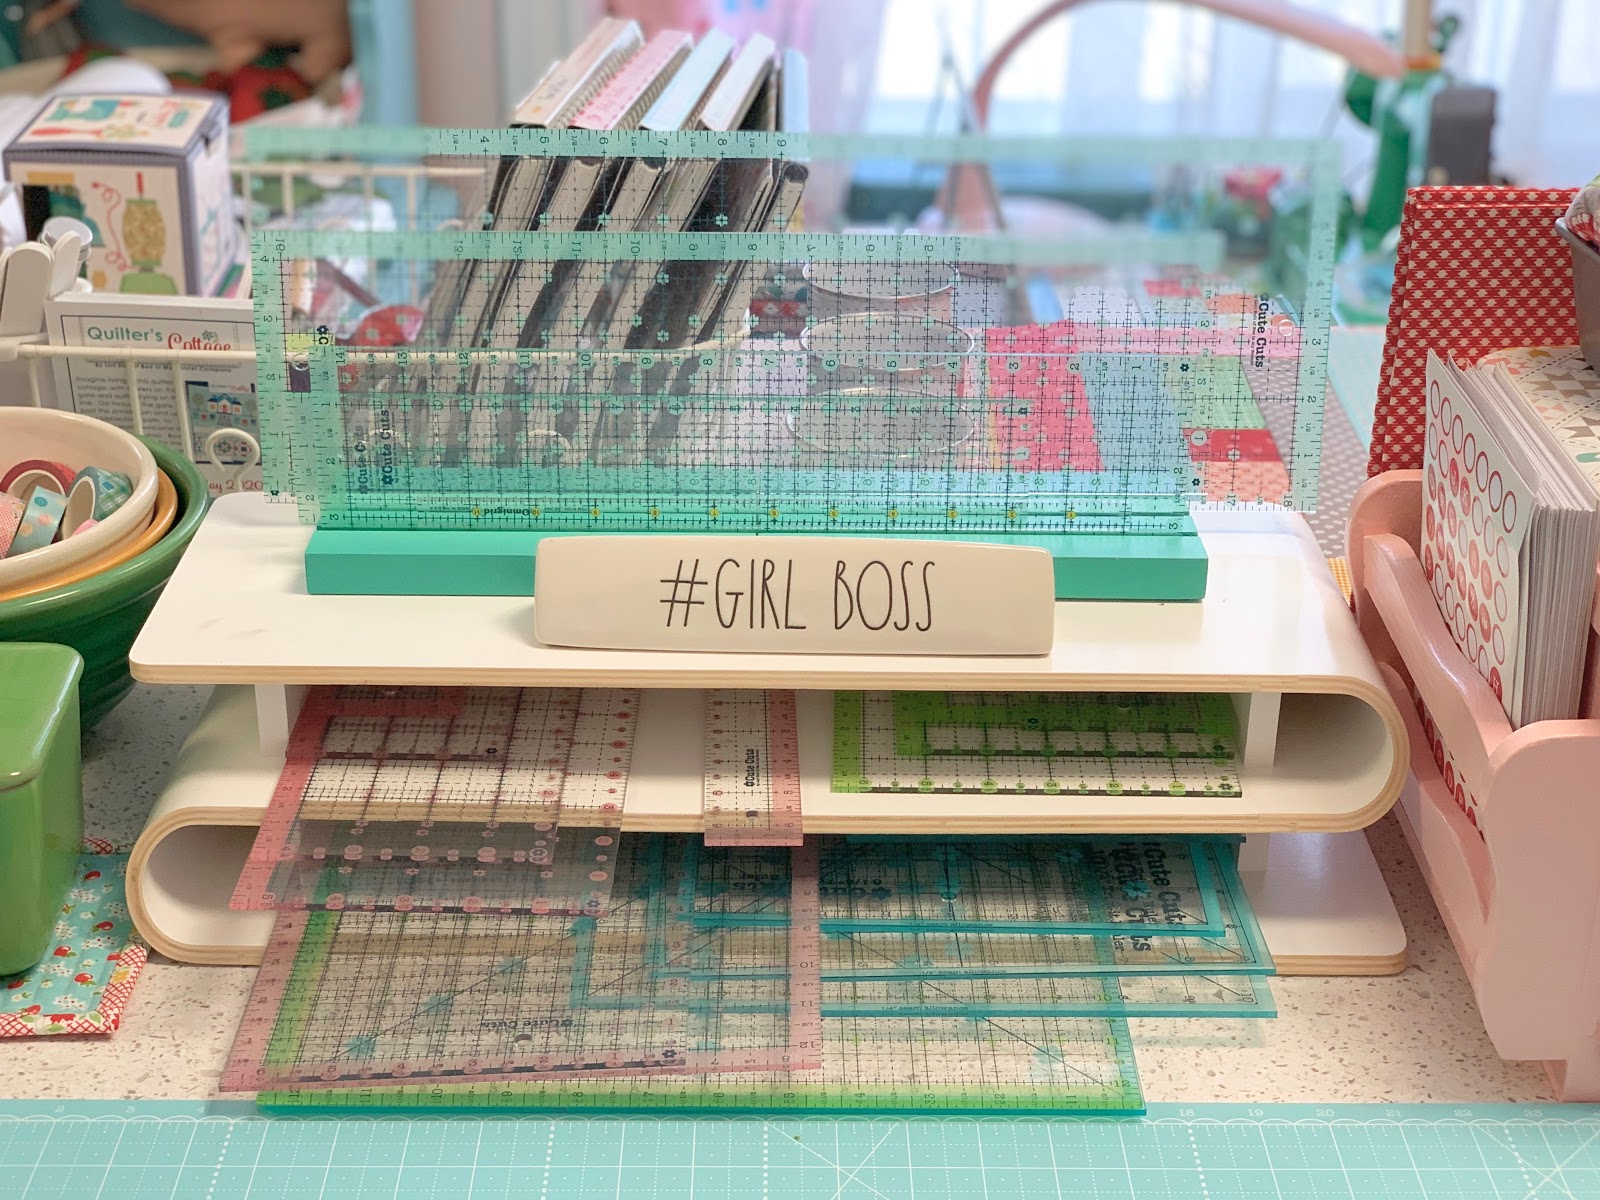
Besides my Trim-It Rulers
for laying out and trimming blocks...
You will need all sizes of
cutting rulers and of course a cutting mat...
I have a variety of Cute Cuts Rulers
in 4 different colors and shapes and sizes.
These are the ones that I use
to cut all of my fabrics for everything...
including all of my pieced quilt blocks.

When I am cutting I use my
Sew Handy Stickers for labeling
my cut pieces and blocks etc.
They come in 5 different colors
and are letters and a few
number pages as well:)
These stickers adhere well...
can be ironed over...sewn over too...
but then they easily peel off
without leaving any residue.
LOVELY!!

And speaking of sewing...
you do not need a
fancy shmancy sewing machine
to make the applique pieces from the
Sew Simple Shapes
or to piece the quilt blocks.
Just a good straight stitching
machine is all you need...
at just a regular
stitch length or just a bit shorter.
As usual...
I am using one of my vintage
Singer Featherweight machines
for making this quilt.
You can see my
Seams Sew Easy Guide
taped to my machine...
(I use washi tape for that too)

Also...a note about ironing.
I do not use steam in my iron
and you want to make sure not to
after you have sewn your shapes
and are pressing them.
Just a good and dry hot iron works well
and I have found that a
seam roller works fabulous for
pressing my shapes after shaping as well.
I don't like to "smoosh" them down
and iron them too flat.
I like a little poof in my shapes
because it gives my applique a nice finish.
to watch my video about why and how
I use vintage irons and where to
find them and what to look for!

So here are my Week One fabrics
already cut and ready to sew!
I just need to trace the shapes onto the interfacing first.
For Week One we are doing the
Tomato Pincushion Blocks.
During the first week I always do
a video tutorial for that block
and I'll be doing that on my
YouTube Channel.
I'll of course also be posting
all about week one here on my blog
and will have a link to my
YouTube video here for you
on my week one blog post.
If you are new to my
Sew Simple Shapes Sew Alongs...
I suggest that you watch a few
of my previous week one video tutorials
because I know that
they will help a you a lot!!
to watch my week one tutorial for my
PRIM Sew Along and
to watch week one tutorial for my
Flea Market Flowers Sew Along.

Here's a little peek at my
Week One in progress.
I have been working ahead so that I
can prepare the tutorials for you...
I am a few blocks ahead right now
and let me tell you...
I am sew excited for this adventure to start!!
I will meet you right back here
on Monday September 13th for the
step by step tutorial for
the Tomato Pincushions:)
Relax and have fun while
preparing your block kits
using the guide instructions.
It's not a race...take your time!
When I have a lot of cutting to do
I like to listen to an audio book
or binge watch something.
While I cut all of the pieces
for My Happy Place Quilt
I binge watched one of my
favorite series again called...
"A Place to Call Home"
Sew with you soon...
xx
Lori

18 comments:
Great detail
Thank you
We have a group of students at 35th Ave Sew & Vac in Phnx that will be stitching along. so excited.
Thank you for all the great applique advice. You're directions have been so
bee-nificial to me!
I can hardly wait to get started and to see this pretty fabric line in real life. I've been watching a few of the applique videos and am getting really psyched to do one. I haven't done any since last year so I've got an itch to scratch.
Sew excited to start this new sew along with you! Time to get organized so I am ready to go💁♀️🧵🪡❤️
Thank you Lori!
I love audio books also.
Thank you, Lori. And I also love listening to audiobooks while I sew :-)
Lori I can’t wait to start this sewalong. I’ve printed out the guide.
Just wondering if you could do a print out we can use to put in the spine of a folder like you did with vintage housewife. I
I actually met a girl in spotlight here in Melbourne Australia that’s in your red sampler group so now have a friend I can sewalong with.
She’s done your red sampler in lovely different colours.
Thank you for all your videos it’s helping distract from being in lockdown. From Jodie
I was so lucky to win a bundle of Stitch fabrics two weeks ago. My friend Shannon works in a quilt shop and will take care of making a kit with it for me. We don't have those beautiful fabrics in the Netherlands so I am thrilled to make this pretty quilt in the future. I hope to travel to Utah next year if the borders will open up for European travelers and take this pretty fabric home with me! I am planning to make this quilt all by hand.
I have never done appliqué. I guess I will learn!
Crochet: Lori thank you for all u do, thanks for the tips and thanks for your beautiful smile. I really do learn a lot from your tutorials. It’s amazing how GOD has blessed you. Thank Kassidy for her great talent I’m sure I will make some of those key chain.
Sew very excited!! I have just discovered you Lori and what a treat it has been just viewing your blog and YouTube. Already learned so much. I have a long list of things I want to make. First time doing a sew along. Found a nearby quilt shop that sells your fabrics and the rest I was able to find online. I am going to be changing some of the fabrics as I want my sewing machine (block) to be aqua blue! I'm a little bit of a rebel I guess. ;) Part of the fun! I also purchased 2 of your fabric bundles and 2 layer cakes, two books and some other supplies. I'm hooked! Lol The beauty is your other lines match in so well with the Stitch fabrics. Now what's not to love? Thank you for all you do and sharing your talent. You are amazing!
I am so excited! I can't wait ❤
Lori, this will be my first sew along. I have already learned so much from watching your utube videos, but I'm anxious to get started "My Happy Place Place Quilt"with you and so many others. I hope I can keep up!
First I will say I love your channel. I am a long time quilter/sewer and fabric lover. I have made the the Quilters cottage and i loved the process. You take such care to make each step clear and easy to complete. I have just purchased most all of the fabrics and supplies for My Happy Place. Can t wait to start. Thanks.
Lori, I love you sew alongs. I've done Bee Happy and Bake Sale 2 for far. I am feverishly working on all the prep. Cant wait for Monday Sept 13th.
I also love "A place to call home" especially after I learned it was based off of a true story. Can't wait to get started on this see along.
I have all my pieces ready for week one and beginning to get them ready to go on their background. I have the second week things partially cut and ready to begin working on them. I am loving this sew along and Lori, you have become my quilting Guru! I love all that you do, you are a wonderful instructor!
I'm excited to be starting this quilt a year after the fact. I don't live quilting, but enjoy nearly all other forms of needlework. When I saw this quilt, I knew I had to make it for my new craft cabin. I've already received the kit and started cutting the pieces. The instructions and videos are great. I don't think I'll have any trouble completing it. Thanks, Lori.
Post a Comment