

"BLOCK TWO"

Welcome to week two of the
"PRAIRIE MEADOW"
Sew Along!
Join me here each week
when I will be doing tutorials
on the blocks for the quilt.
Of course because we are all sewing
from all around the world
we all have different time zones...
But I will be posting each Monday
right here on my blog
and you can follow my tutorials
any time each week that
is convenient for you.

We are making the
Prairie Meadow Quilt
68" x 85"
I've been sew excited to begin...
This is going to be fun!!

The quilt is made with my newest fabric
collection called Prairie...
I hope that you all have all
received your
fabric kits by now...
and that we are all ready to begin!!
If you still need one ...
just do a quick google search for
"Prairie Meadow Quilt Kit"
to find shops who still have some left.

We are also using the
Prairie Meadow
Sew Simple Shapes
I have already posted the
post which details all of the supplies
for the sew along and how it works.
I have also given the link there
for the free PDF Download
of the Sew Along Guide
to download the sew along guide.

It's important to watch my
Week One/Block One video tutorial
because everything I show you in
block one pertains to all
the rest of the blocks.
Things such as tips on sewing...
shaping and turning all of your
appliqués as well as the entire
process of laying out the block.
I also explain about sewing
the scrappy background.
If you have not watched it please

As per the sew along guide
cutting instructions
you should have everything for your
Block Two
all cut and ready to go!

Everything is all cut...
all traced and ready:)
Here is a list of the
Prairie Meadow
Sew Simple Shapes
needed for
Block Two:
1 - N-1
1 - N-2
1 - N-20
4 - N-21
4 - N-24
4 - N-33
4 - N-39
8 - N-57
You will need to cut
4 - 2 1/2" long
of prepared 1/4" straight
bias strips for the stems

Here are the squares and rectangles
for my Block Two background
all sewn together:)

Here are all of my Block Two shapes sewn...
trimmed and clipped.
You will need to clip all of the
shapes except for the two
that I am holding in my hand:)

All turned...shaped and pressed:)

I usually pre-glue the shapes together
that are layered before laying them out
onto the background for pinning.
The above are the shapes
that I pre-glued for Block Two.
The dark orange center in the plaid
orange flowers sticks out 3/4"
The 3 teal pieces are simply
centered on top of each other.
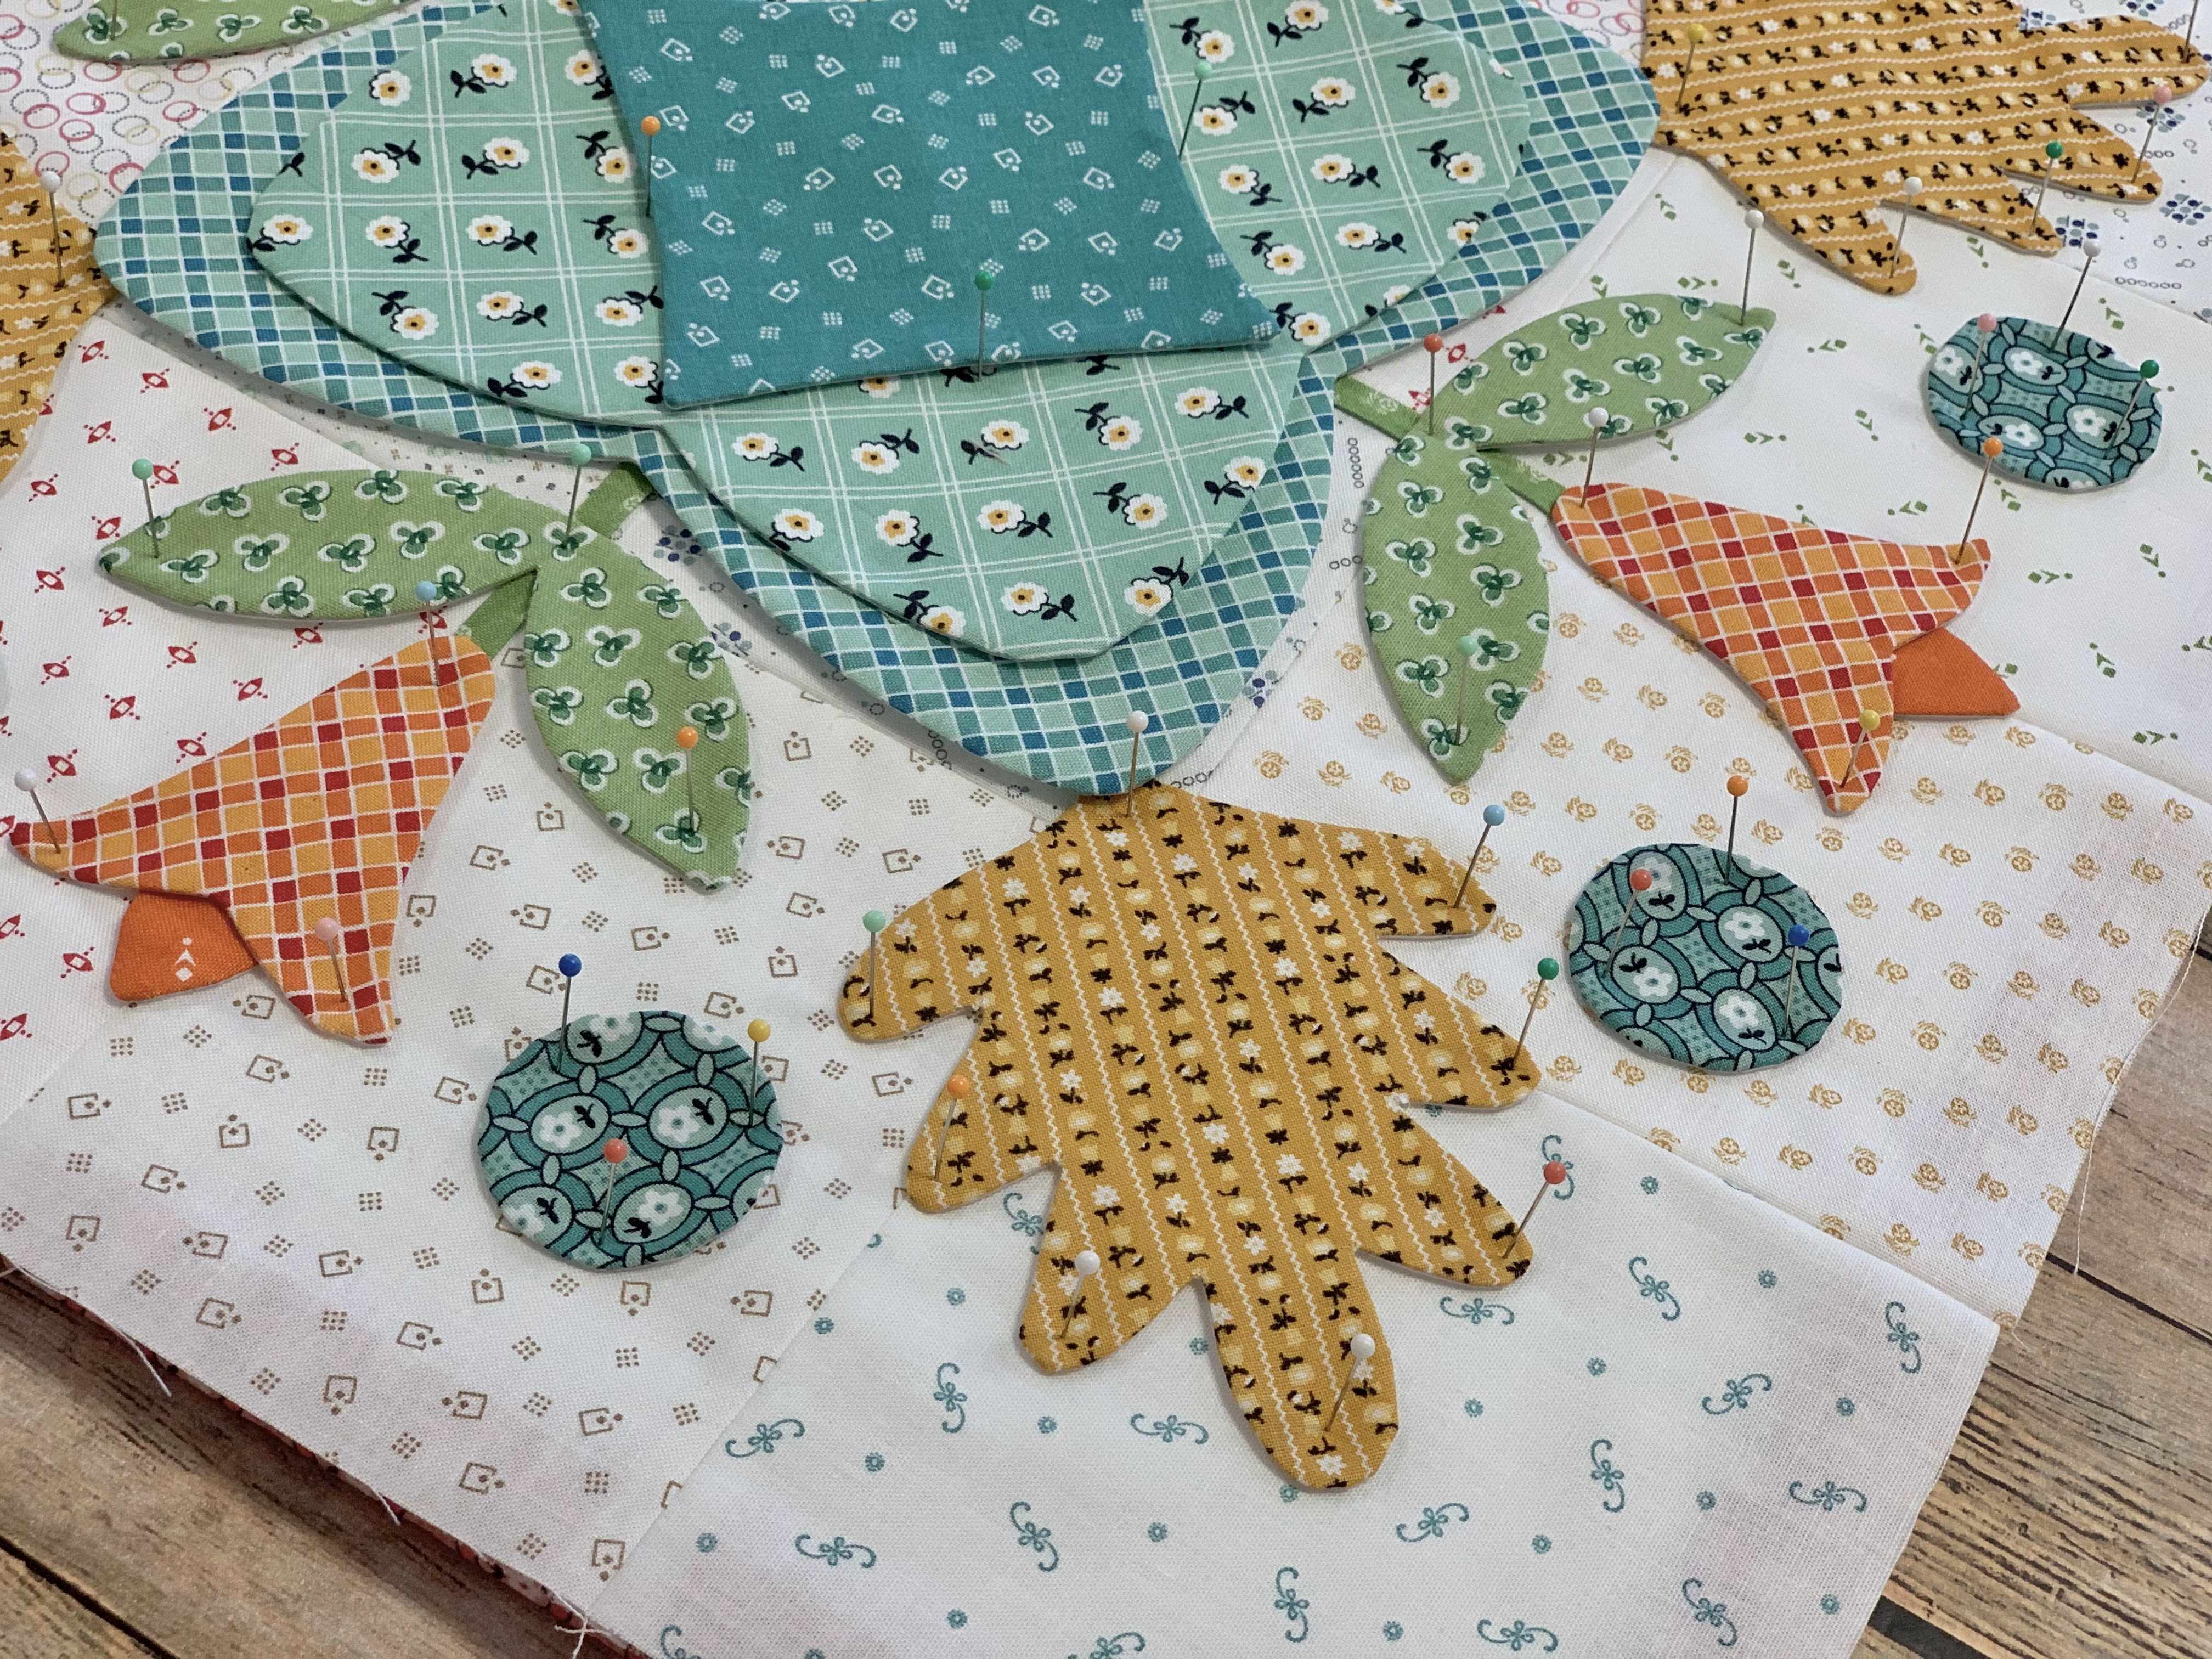
Okay...now to start pinning the block
onto the background.
Place your background onto
a design board and let's get started!!

Remember what I said to you last week
in my video for block one...
I will always start forming each block
in this quilt from the center out:)
So first I pinned the layered teal
appliqués onto the center
of the background.
I pinned them down but made sure to
glue the outer edges down last because
I wanted to be able to tuck the stems
and corner leaves underneath first.

Next I did the stems and the orange flowers.
The stems measure 1 1/2" long from the
teal center shape to the
bottom of the orange plaid flowers...
that means each end is tucked under 1/2"
The dark orange tip of the flower
measures 1 1/2" from your background edge
(before trimming up after applique of course)
I then pinned the double leaf shape
centered on the stem.
The circles also measure 1 1/2" from
the edge of fabric and are
5/8" away from the side points
of the orange plaid flower.
corner of the background and placed
the top of the gold leaf.
The bottom end of the leaf tucks
under the teal center shape.
I used my ruler to make sure that
it was centered exactly on the diagonal.

I love this pretty
"fall flowers on the prairie block"...
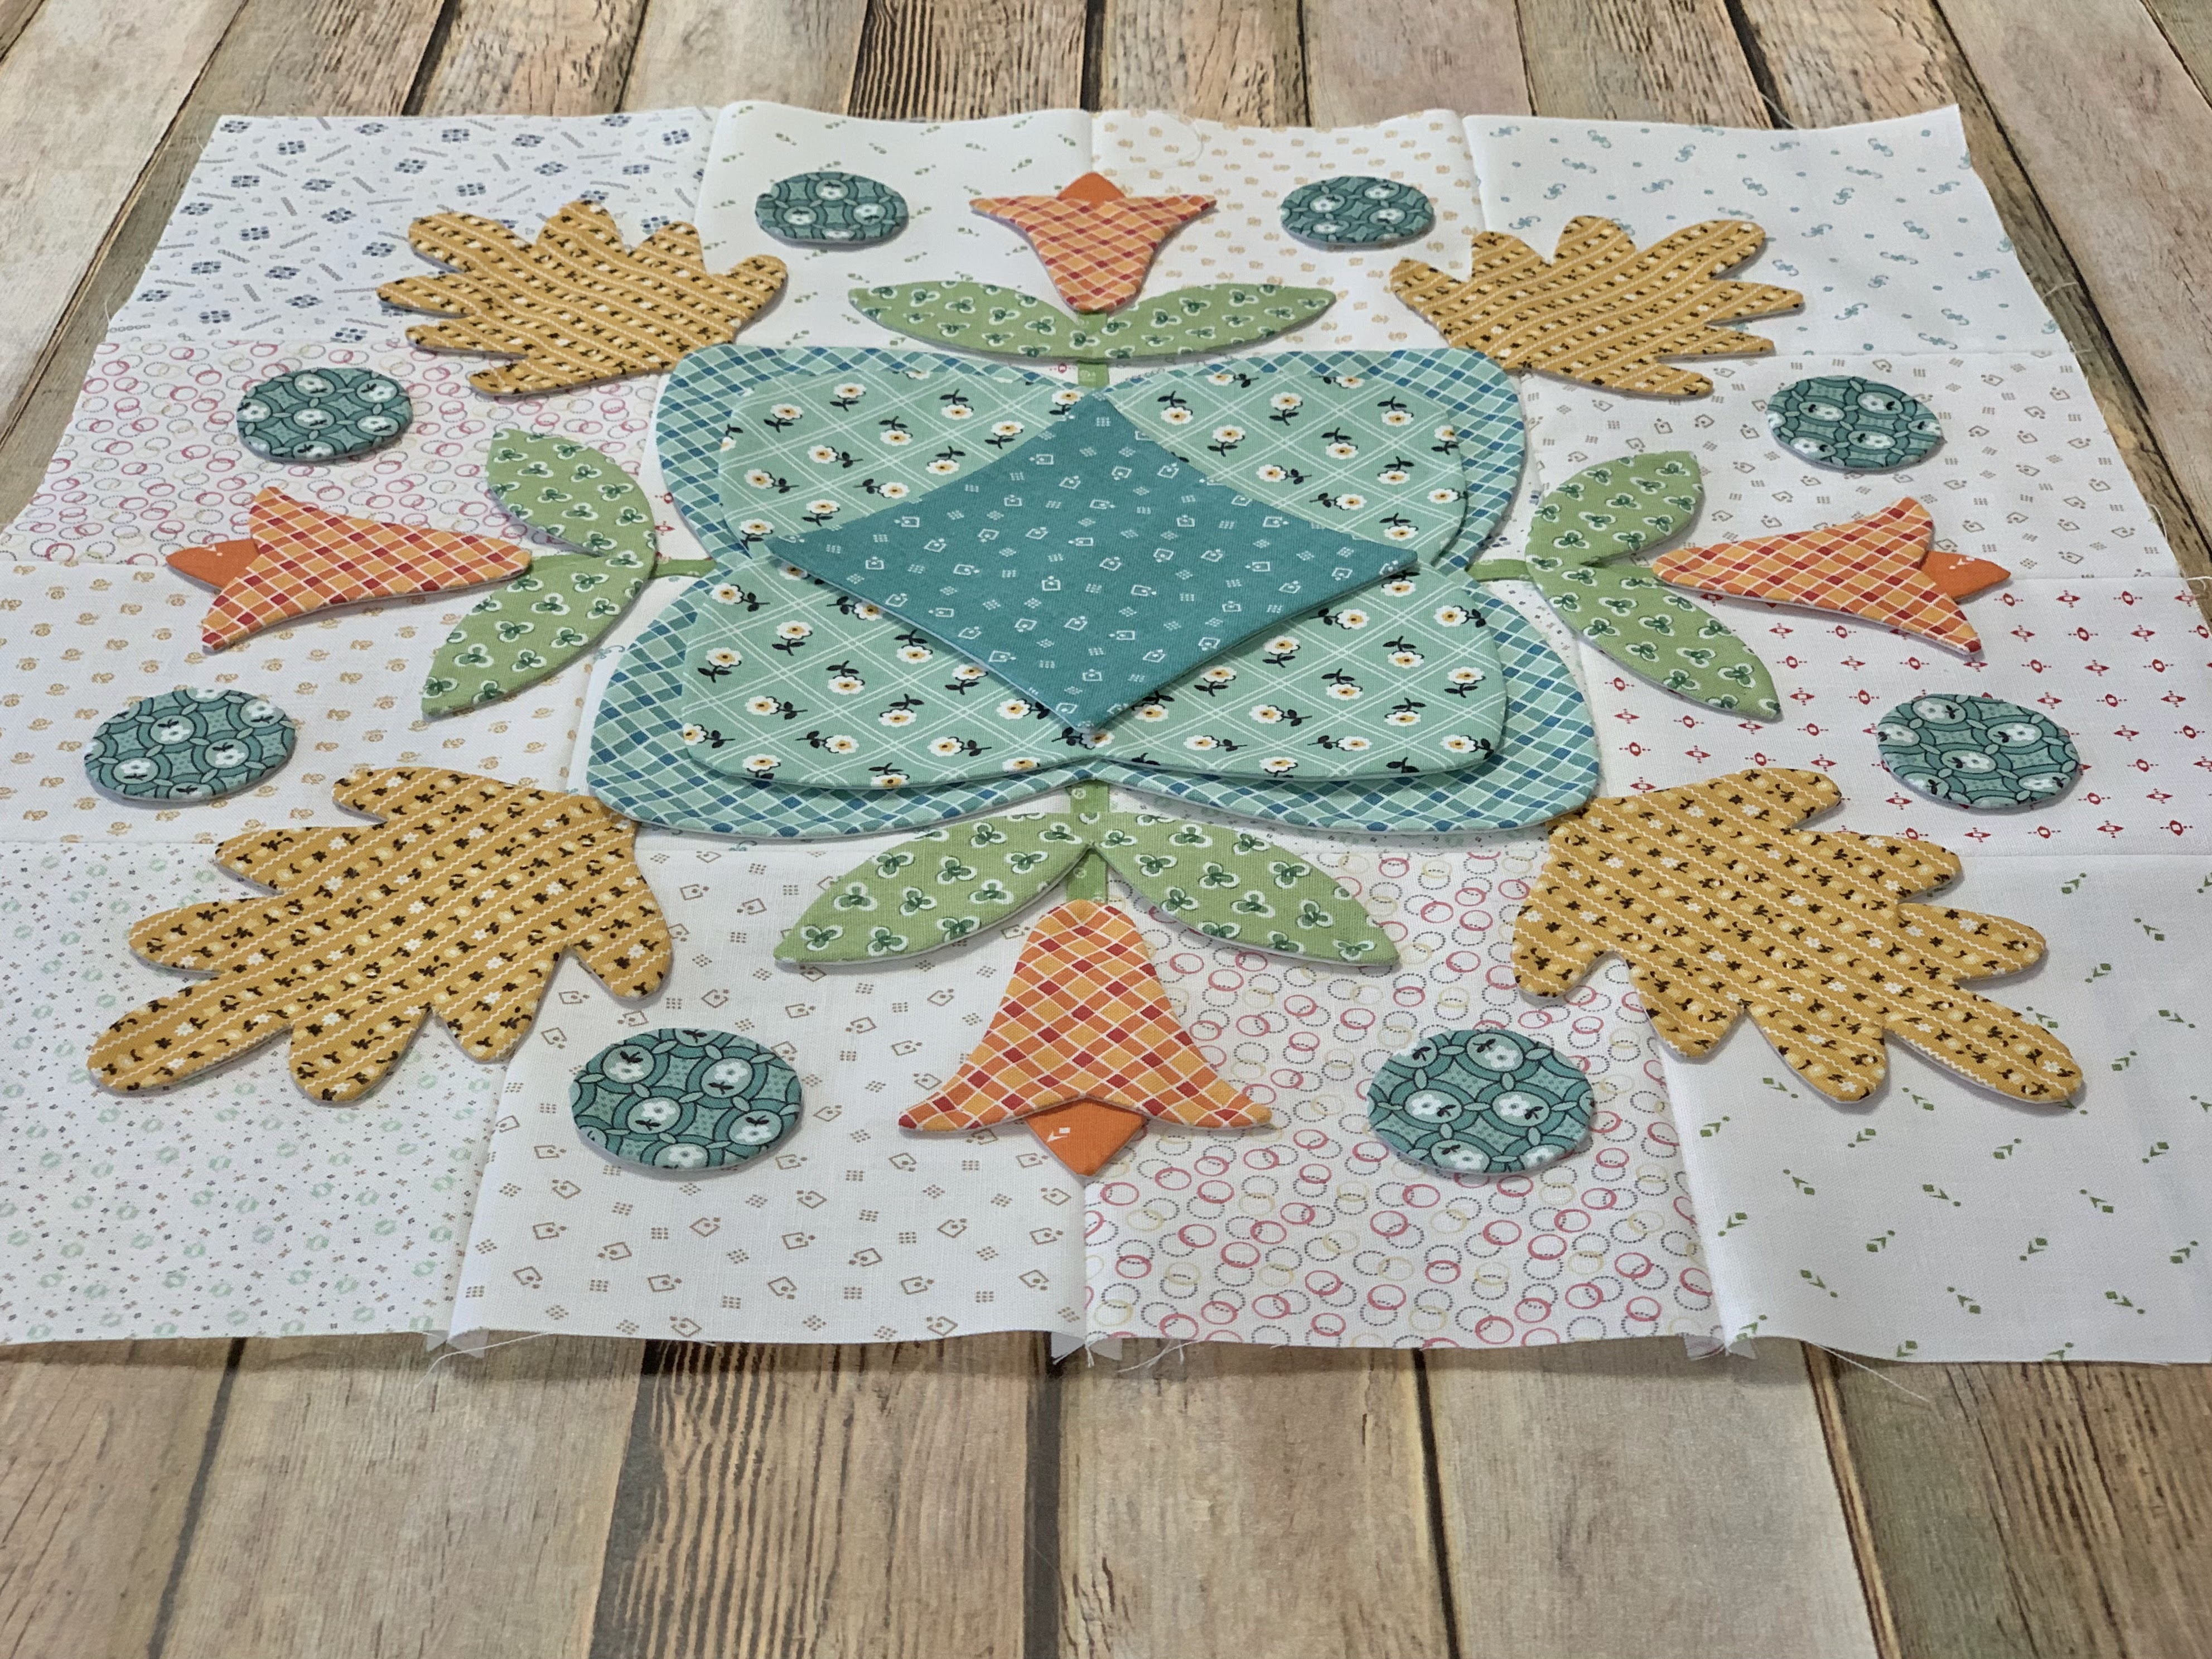
These color and print combo makes me happy!!

Here's my BLOCK TWO
all ready for applique:)
Just like I said in the video...
Afterwards I will
press from the back and then
I will use my 16 1/2" Trim-It Ruler
to trim down the block.
I do not trim away any fabric
or any interfacing.
My grandma used to do that
back in the day when they
hand quilted all of their quilts
and it was hard to needle all
the layers and get tiny stitches.
Although she trimmed because it was
necessary for hand quilting...
grandma didn't like to do it
because she felt that it weakened
the appliques and also distorted
them over time.
Now a days of course that is not
the case as we have wonderful
quilting machines that quilt
over/and around the appliqués very well!

Sew...there you have it!
That's how I made Block Two:)
wagon train and for joining me
today for week two of
Prairie Meadow
Sew Along
I hope that you will enjoy
every step of this journey
and that you will have fun
making your Blocks!!
I'll meet you right back here
next week for the
Block Three tutorial...
xx
Lori
Other Places to find me:

4 comments:
I absolutely love the fabric and the sew along. Having fun with the preparation and hand sewing.
Thank you, I love it!
Thank you for the beautiful fabrics and wonderful instructions. Appreciate all your encouragement!
Thank you Lori for the wonderful instruction for beautiful block #2.
Post a Comment