

"ANGEL STAR BLOCK"

Welcome back to week one of the
"MERCANTILE SAMPLER"
Sew Along!
Are you ready to sew with me?
I hope that you will join me here each week
when I will be doing two tutorials
weekly...every Monday and Friday.

We are making the
Mercantile Sampler Quilt
88" x 88"

.jpeg)

The quilt is made with my fabric
collection called Mercantile:)

We are piecing all 25 blocks
and then turning them into a
12" circle to applique onto a
4-Patch Block background!
I detail all of the supplies
that you need to make the quilt in my
Bee Prepared post right here on my blog.
I have already posted the
post which not only details
all of the supplies needed but
explains how this sew along works.
I have also given the links there
for the free PDF Download
of the Sew Along Guides
to download the sew along guide
if you have not downloaded yet.
to download the sampler block
sew along guide.

As per usual for the first block in my
new fabric collection Sew Alongs
that FIRST tutorial is a video.
Because I now have my own
I have posted the
Birthday Cake Block
Tutorial there.
to visit my channel and watch the
tutorial and I hope that you love it!
Pretty please leave me a comment
over there and let me know:)
If you like what you see
and my other videos there...
click on subscribe and click on the bell
to be notified whenever
I post another tutorial:)
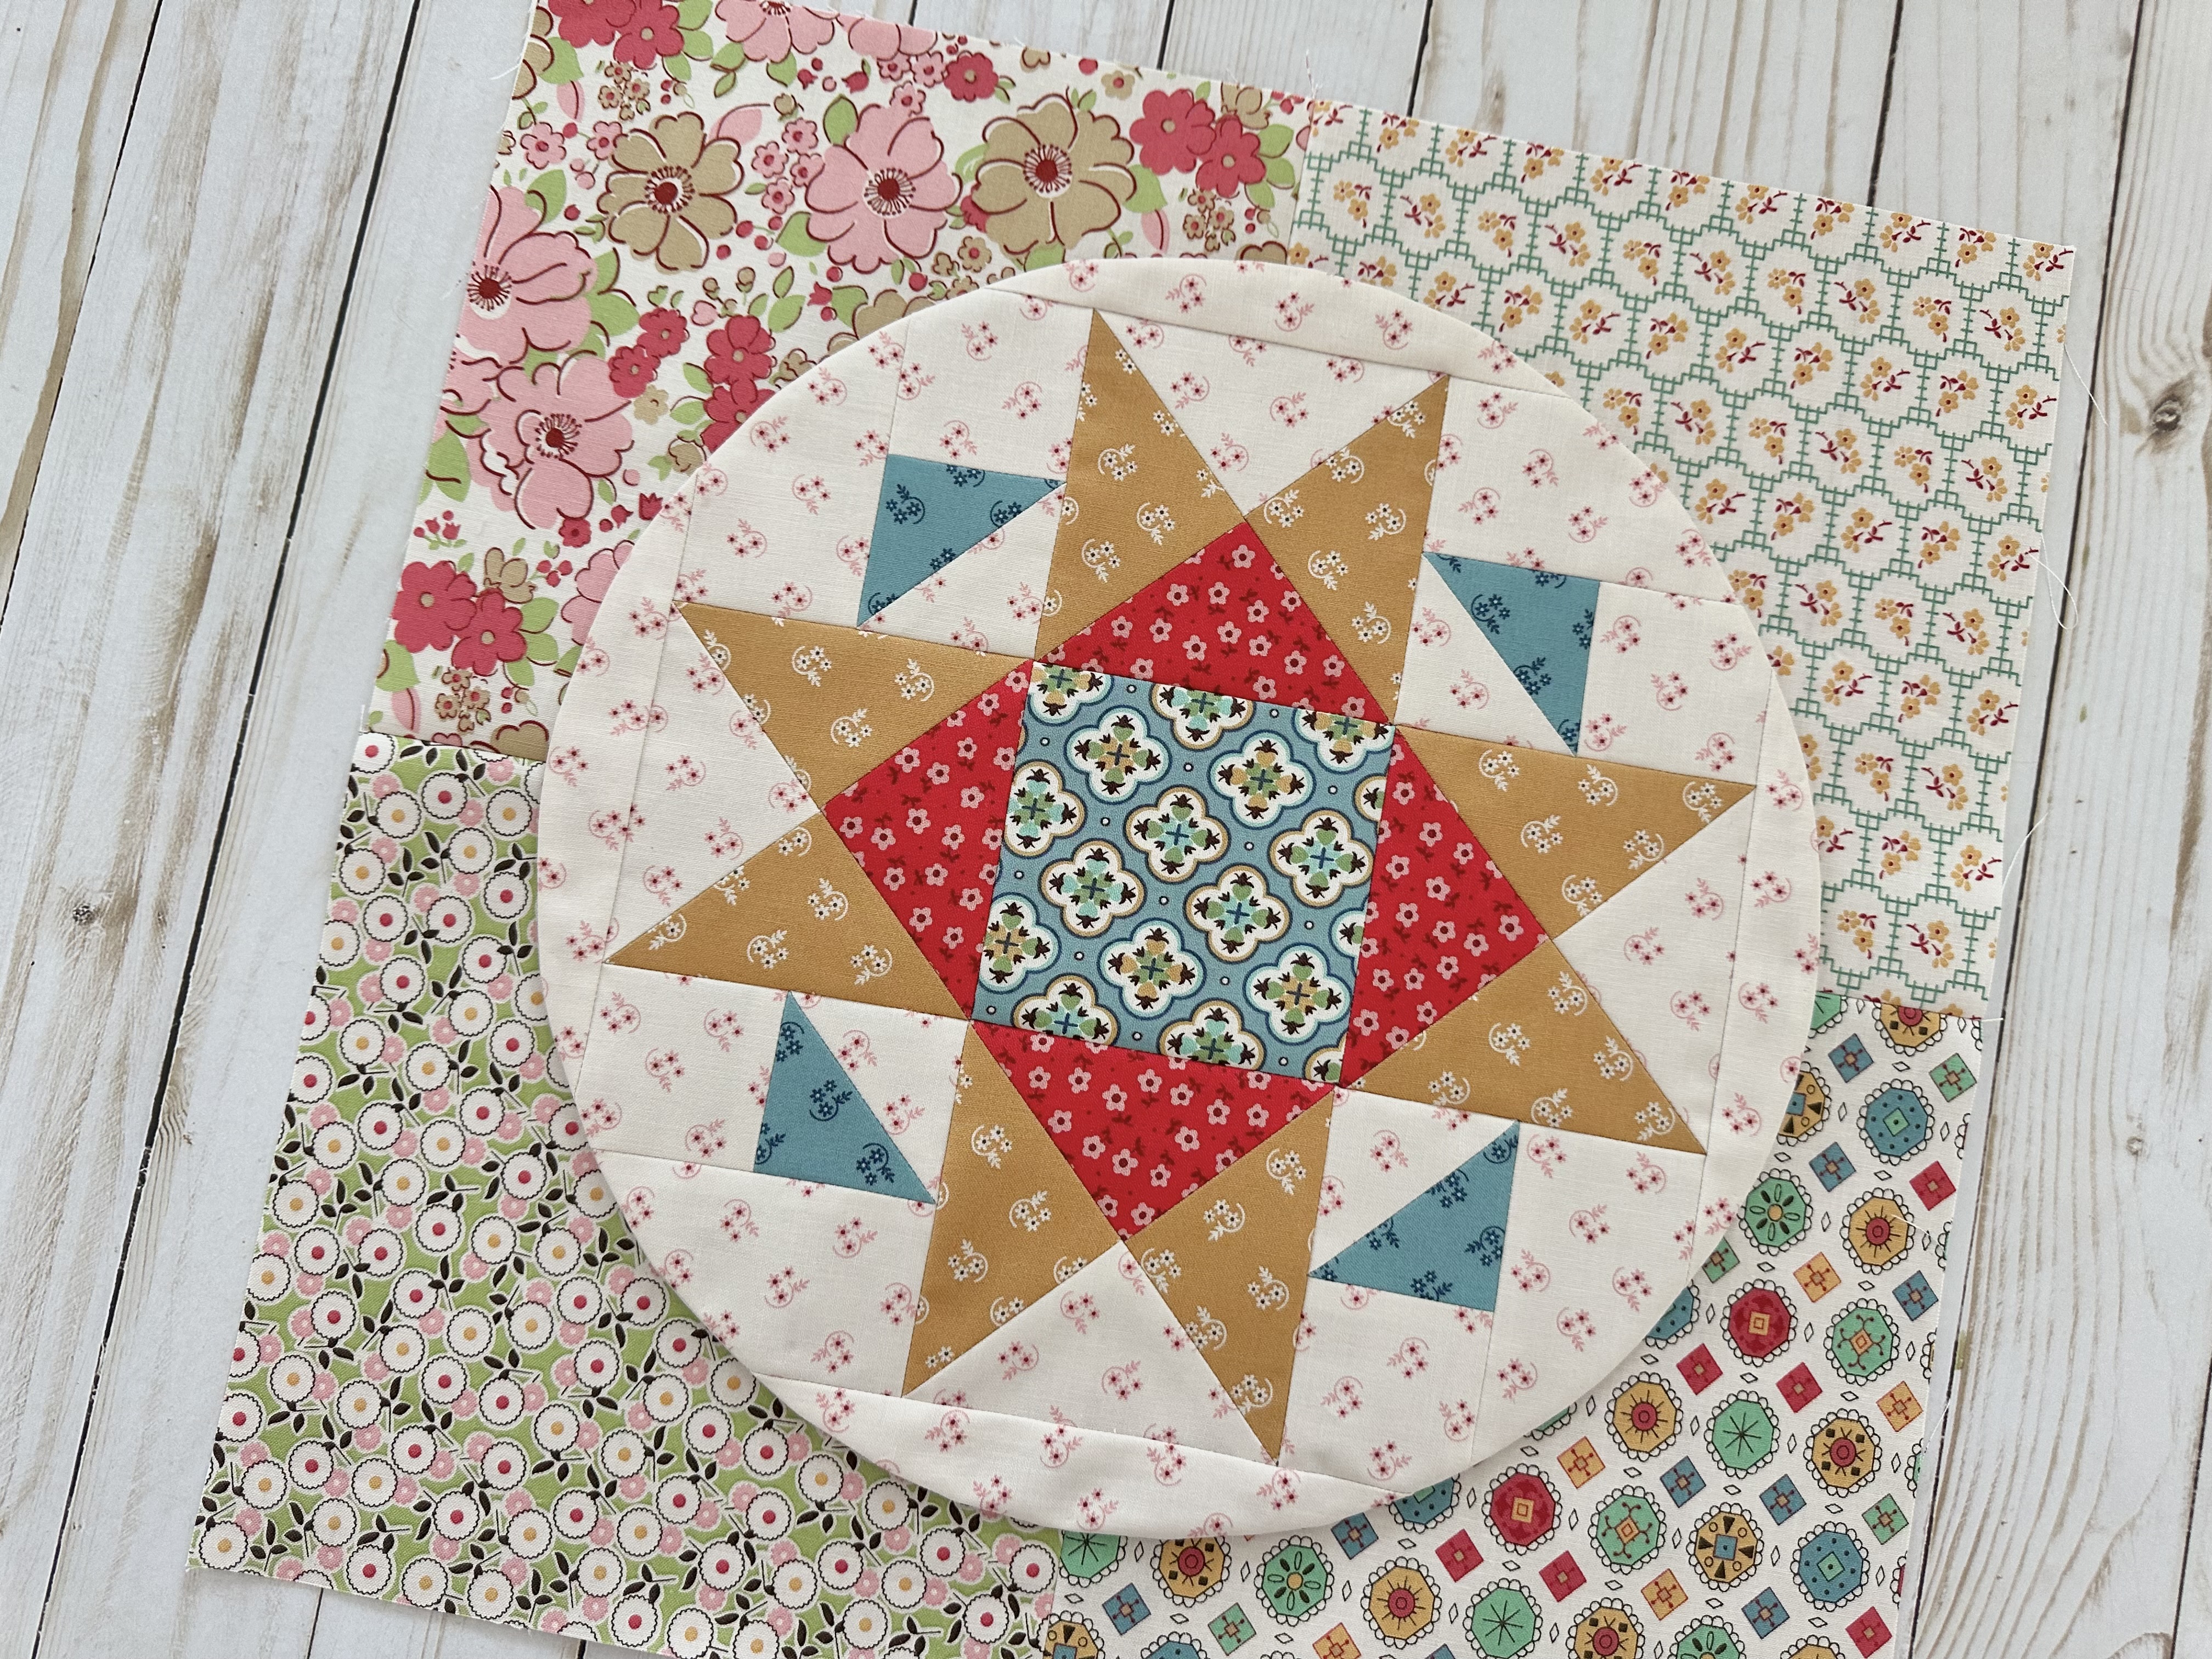
Today we are sewing the
ANGEL STAR BLOCK

Here's mine all cut and ready to sew!

Cutting each block should be easy
because of the sew along guide
that is provided for you.
*Take Note*
At the top of each block cutting diagram
are the unfinished size of block
and then size that the block should be
after the borders are added.

For the Angel Star we will be using the
2 1/4" and the 4" Trim-It Rulers.

Let's start by making the four
quarter square triangles first.
Each will measure
4" x 4" unfinished and then
3 1/2" x 3 1/2"
when sewn into the block.
I'll be showing you two different ways
to make them and you can decide
which way that you would
like to make yours before you begin:)

The first way is to trace double lines
using the marking ruler just like I
showed you in Monday's video.
Trace onto the wrong side of
TWO of the "E" squares.
You will sew one each to an
"A" square and a "G" square
with right sides together...
*Take Note*
This method uses:
2 - E squares
1 - A square
1 - G square

And cut them apart between the sewn lines.


double lines onto the back of the
E/G combo lie this...
making sure that the seams
are going the same direction...

You will sew these two together
on both marked lines...

And before sewing check again to sew
if the seams are lined up like this.


Cut apart and press like this.

Repeat with the other two
so that you have four total.

Now it's time for trimming!
Place your 4" Trim-It on top and
line up the diagonal lines on the ruler
with the four pieced triangles and trim:)

Repeat for the remaining three...

This is your leftovers using this method.
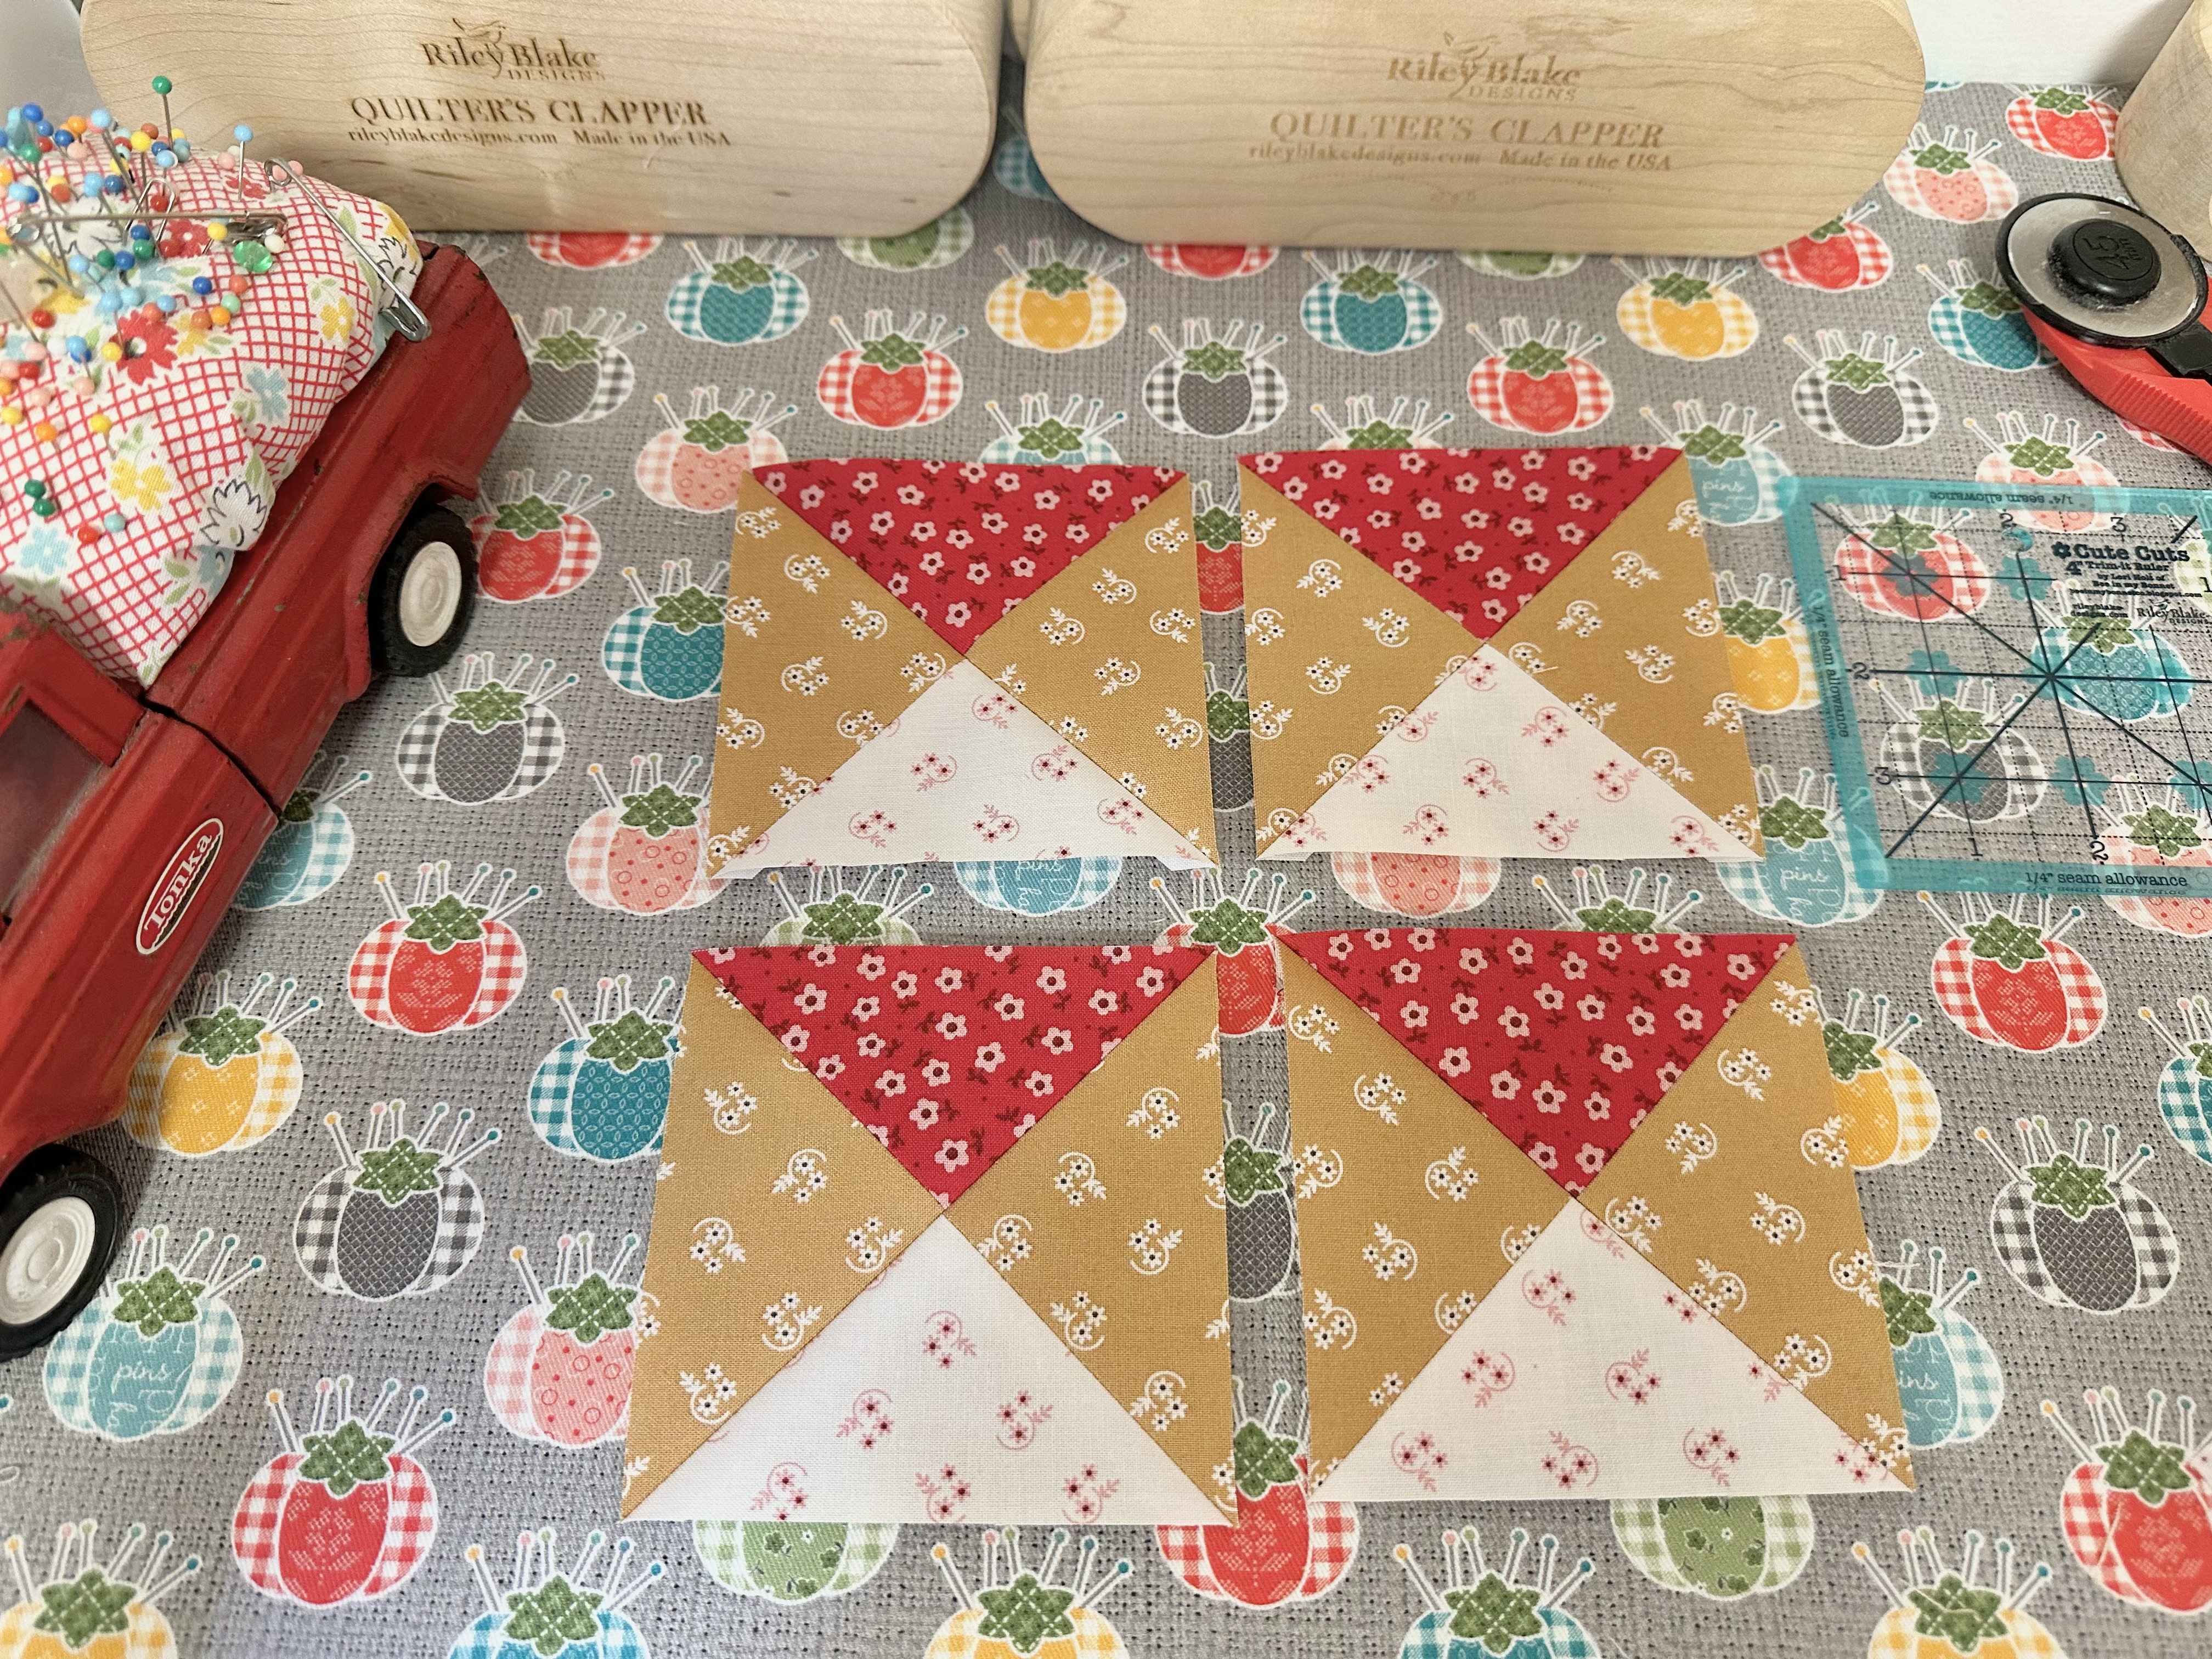
Now you have 4 - Quarter Square Triangles
that each measure 4" x 4"
This is how many you will need for the
Angel Star Block.

I have found in my teaching over the years
that when making quarter square triangles
many of my students prefer
my easy corner triangle method where
you trim the excess off
so I'm showing this method to you as well.
With this one you would be starting
out with a single line marking.
This method uses:
4 - E squares
2 - A squares
2 - G squares
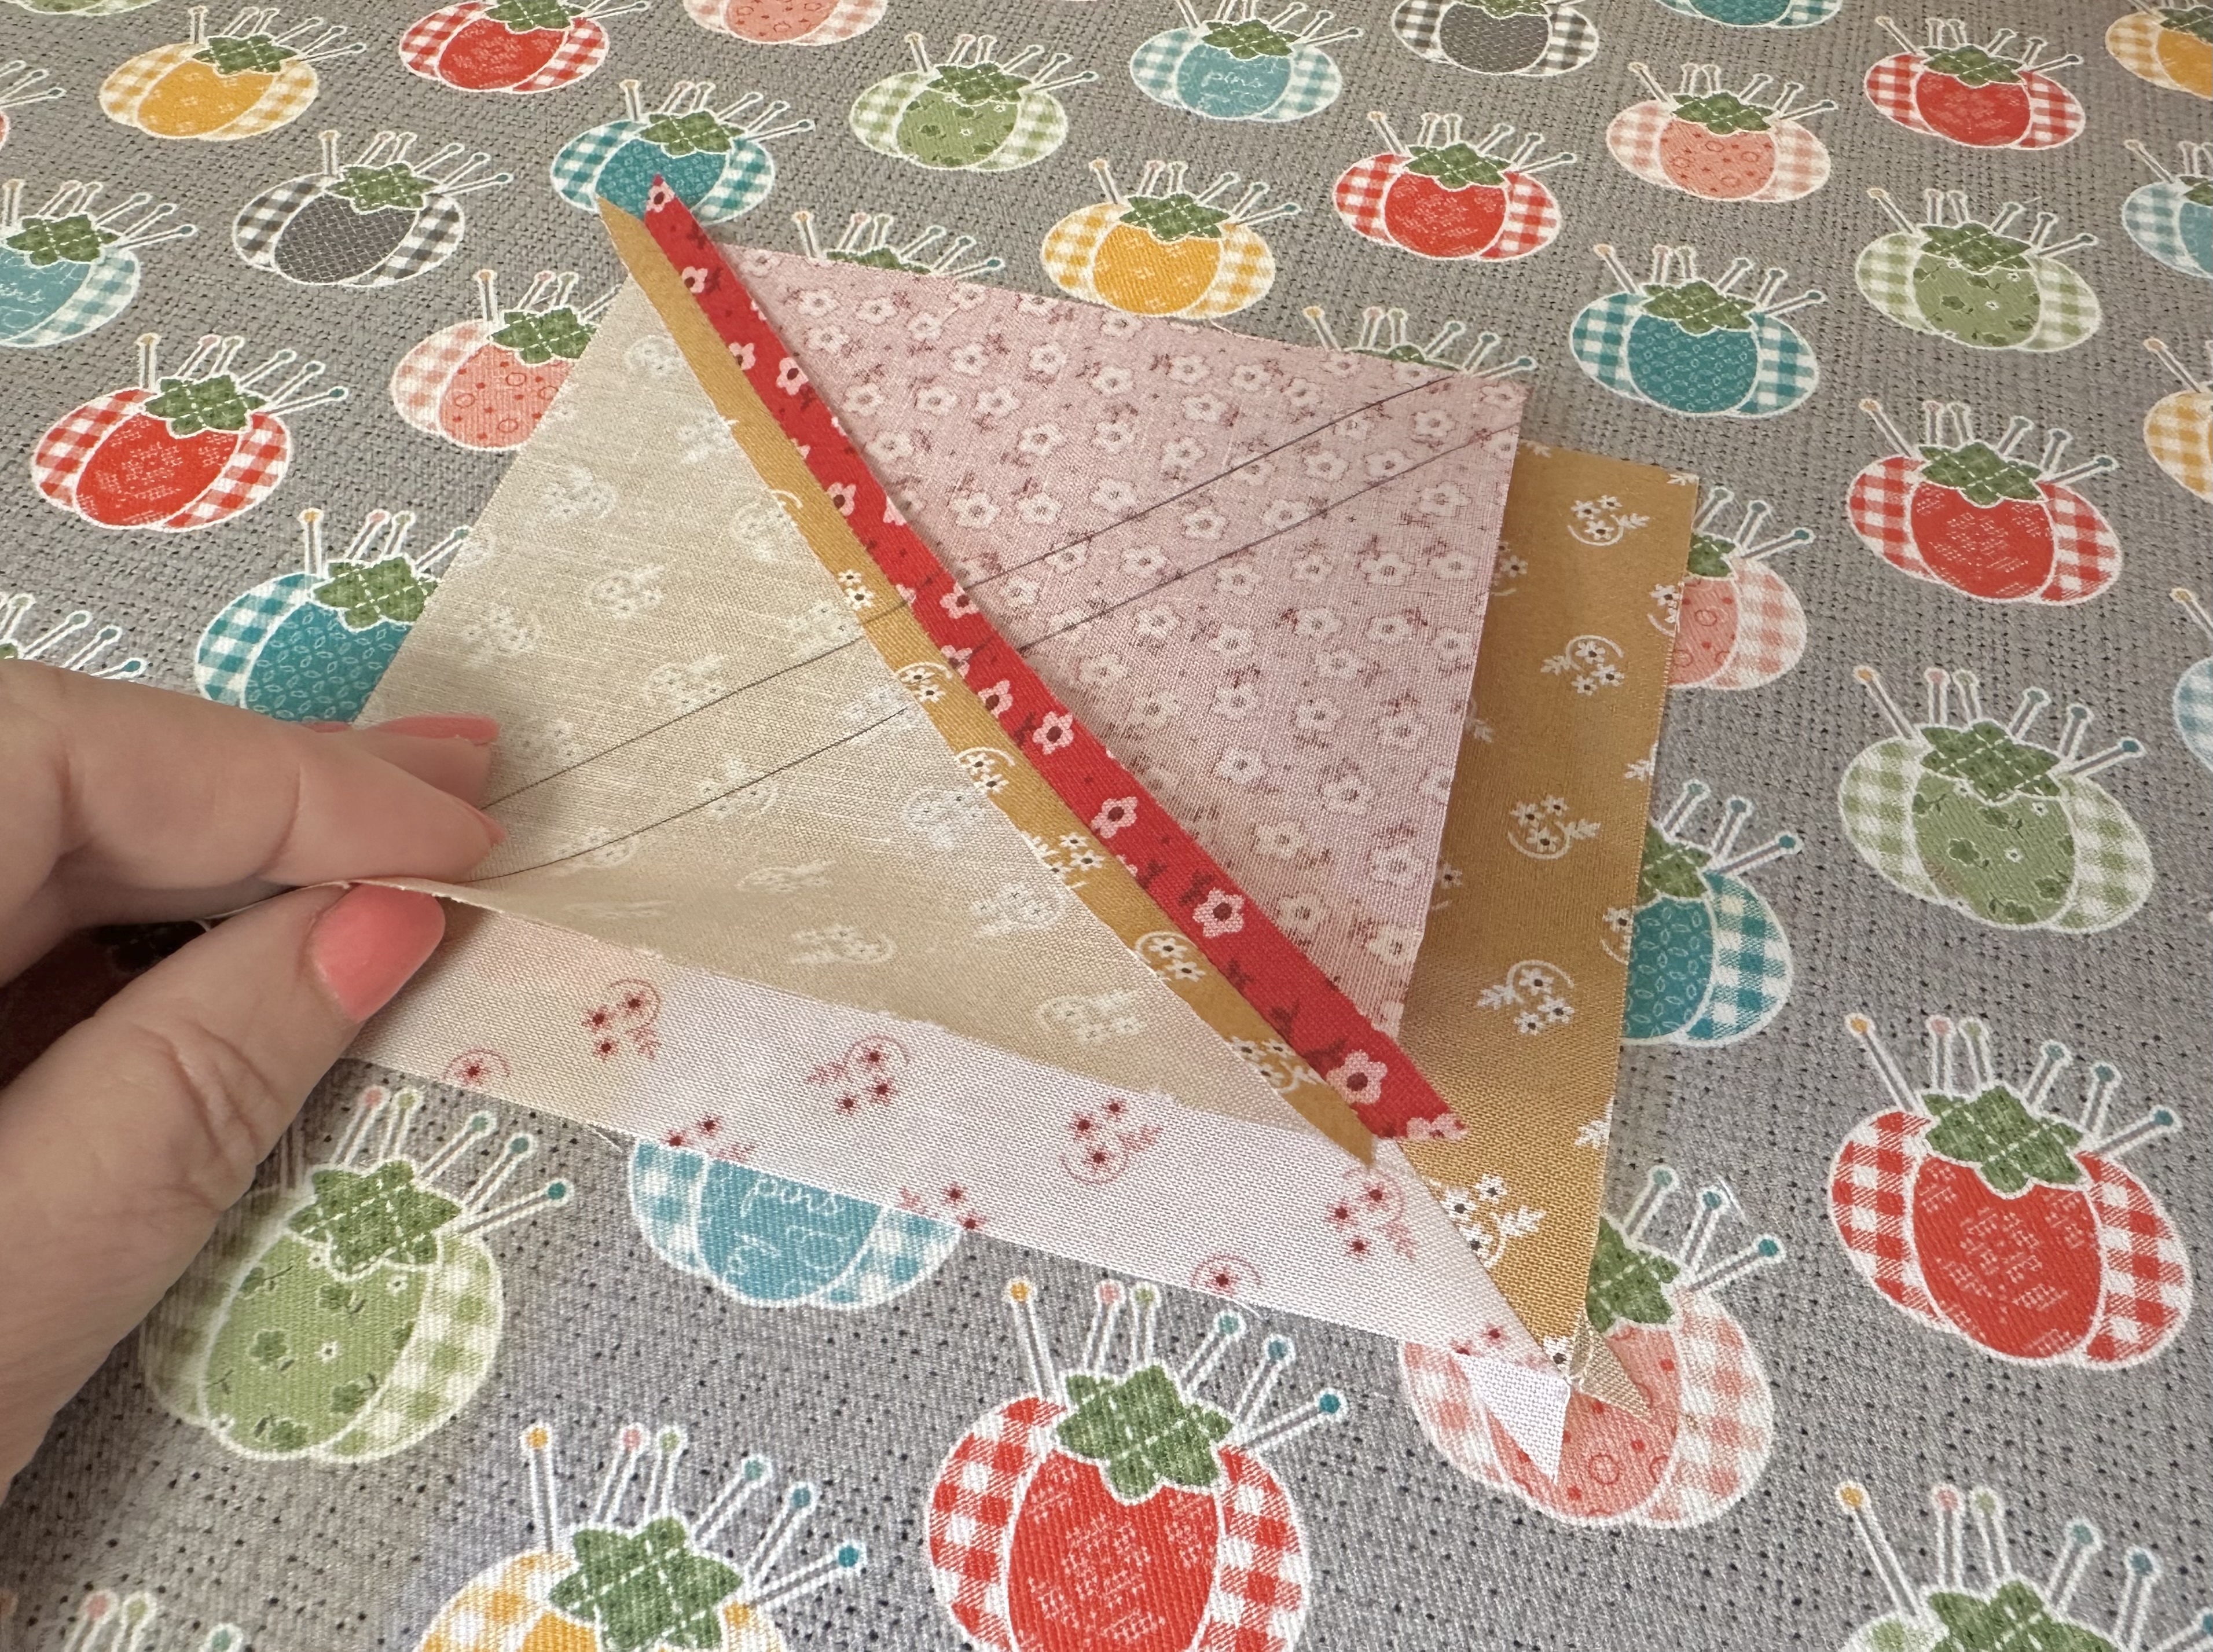
Trace a SINGLE LINE from corner to corner
on all four of the "E" squares
You will sew them to
two "A" squares and two "G" squares

Cut the excess of one side off
using an approximate 1/4" seam allowance.
Set these leftover trimmings aside and
we will chat about them in a minute:)

Press the seams open and mark a
DOUBLE LINE on the A/E segment.

Layer them up for sewing
the two together like this...
lining up the seams.

After sewing on the double lines...
cut apart and press open.

And trim up using the 4" Trim-It Ruler.
Repeat with the others until
you have a total of four!

You will have leftovers like these that
can be either sewn into
half square triangles or trimmed up
into squares to add to your scrappy stash
just like I showed you in Monday's video.
Because we are cutting larger than needed
and trimming down for ease and accuracy...
both methods have leftovers...
the first method leftovers are discarded
the second has usable leftovers and so
you choose which method suits you best!

Okay...
set aside your quarter square triangles
and let's make 4 half square triangles
with the "H" and the "C" squares.
These are made EXACTLY like I
showed you in Monday's video
for the Birthday Cake Block.
I'll take photos of the steps
to refresh your memory if needed!

We will use the two "H" and
the two "C" squares to make the
four half square triangles.
Each will measure
2 1/4" x 2 1/4" unfinished
and then 1 3/4" x 1 3/4" finished
after sewing them into the block.


Now you have 4 - half square triangles
that measure 2 1/4" square
and this is how many that you need
for the Angel Star Block:)

corner segments of the block.

Sew the HST's to "D" squares...

Press the seams open and
next sew them to the "B" rectangles.

Press open again:)
Each segment should measure
4" x 4" unfinished and then
3 1/2" x 3 1/2" finished.
You can use the 4" Trim-It to make
sure that they all measure 4" x 4".

for the block...
let's sew it together!
Lay it out on your design board like this
and sew the three rows together first.
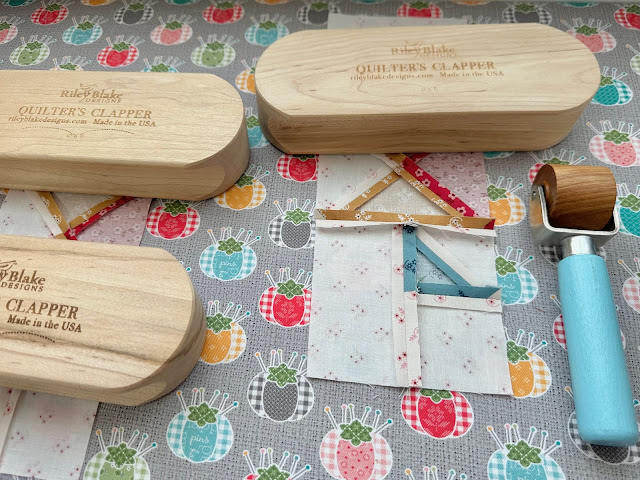
Use the Quick Press to go over the

seams to open them up all the way
especially where they intersect.
Press with your iron and use
the clappers until cool.

repeat the pressing steps.
Your Angel Star Block measures
10 1/2" after you sew the border on.

under the clappers...
I sewed together the 4 patch background:)
I pressed those seams open as well.


This is what the back of my back looks like!
Now it's time to add the borders.

When I sew the borders on
I like to keep the block on top
so that I can make sure my seams stay open
and don't flip closed during sewing...
and also to make sure that
I don't sew any star points off:)

Press towards the borders
and then grab your traced circle!

with the center of the
quarter square triangles and
then pin into place:)

Sew and then trim and cut an X
in the circle just like I showed you
in Monday's video.

Use the Point to Point Turner and
the Quick Press Roller to shape.
Press your circle and use the clappers!

Now let's go to the work table and
lay out the circle onto the background.

Use a ruler to line up the seam lines in
4-patch background with the centers
of the quarter square triangles.

Pin and Sue Glue into place!

My Angel Star Block is ready for applique!

Afterwards I'll press from the back and
then trim it down to 14 1/2" square
so that it can be sewn into the quilt:)


And then there were two!!
I'm sure that you have noticed
from the schedule in the guide
that we are making the blocks
in order that they are in the quilt
so that means after you applique and trim
you can go ahead and sew
these two together if you want:)

I hope that you love
sewing YOUR second sampler block
for our sampler quilt...
and then turning it into a circle!
Sew Fun!

I'll meet you right back here
on my blog this Monday for the
Maple Leaf Block tutorial...
xx
Lori

2 comments:
Thank you Lori for the detailed instructions. Having the block units measurement is very helpful. I love working on this quilt. The fabric line is beautiful and working with it puts me in a happy mood. Thank you again!
Thanks for the detailed instructions love the sewalong
Post a Comment