

"HAY and PUMPKIN BLOCK"


Welcome to week seven of the
"How to Build a Scarecrow"
Sew Along!
Are you ready to sew with me?
I hope that you will join me here
each week when I will be
doing tutorials every Monday!
Of course because we are all sewing
from all around the world
we all have different time zones...
But I will be posting each Monday
right here on my blog
and you can follow my tutorials
any time during the week that
is convenient for you.

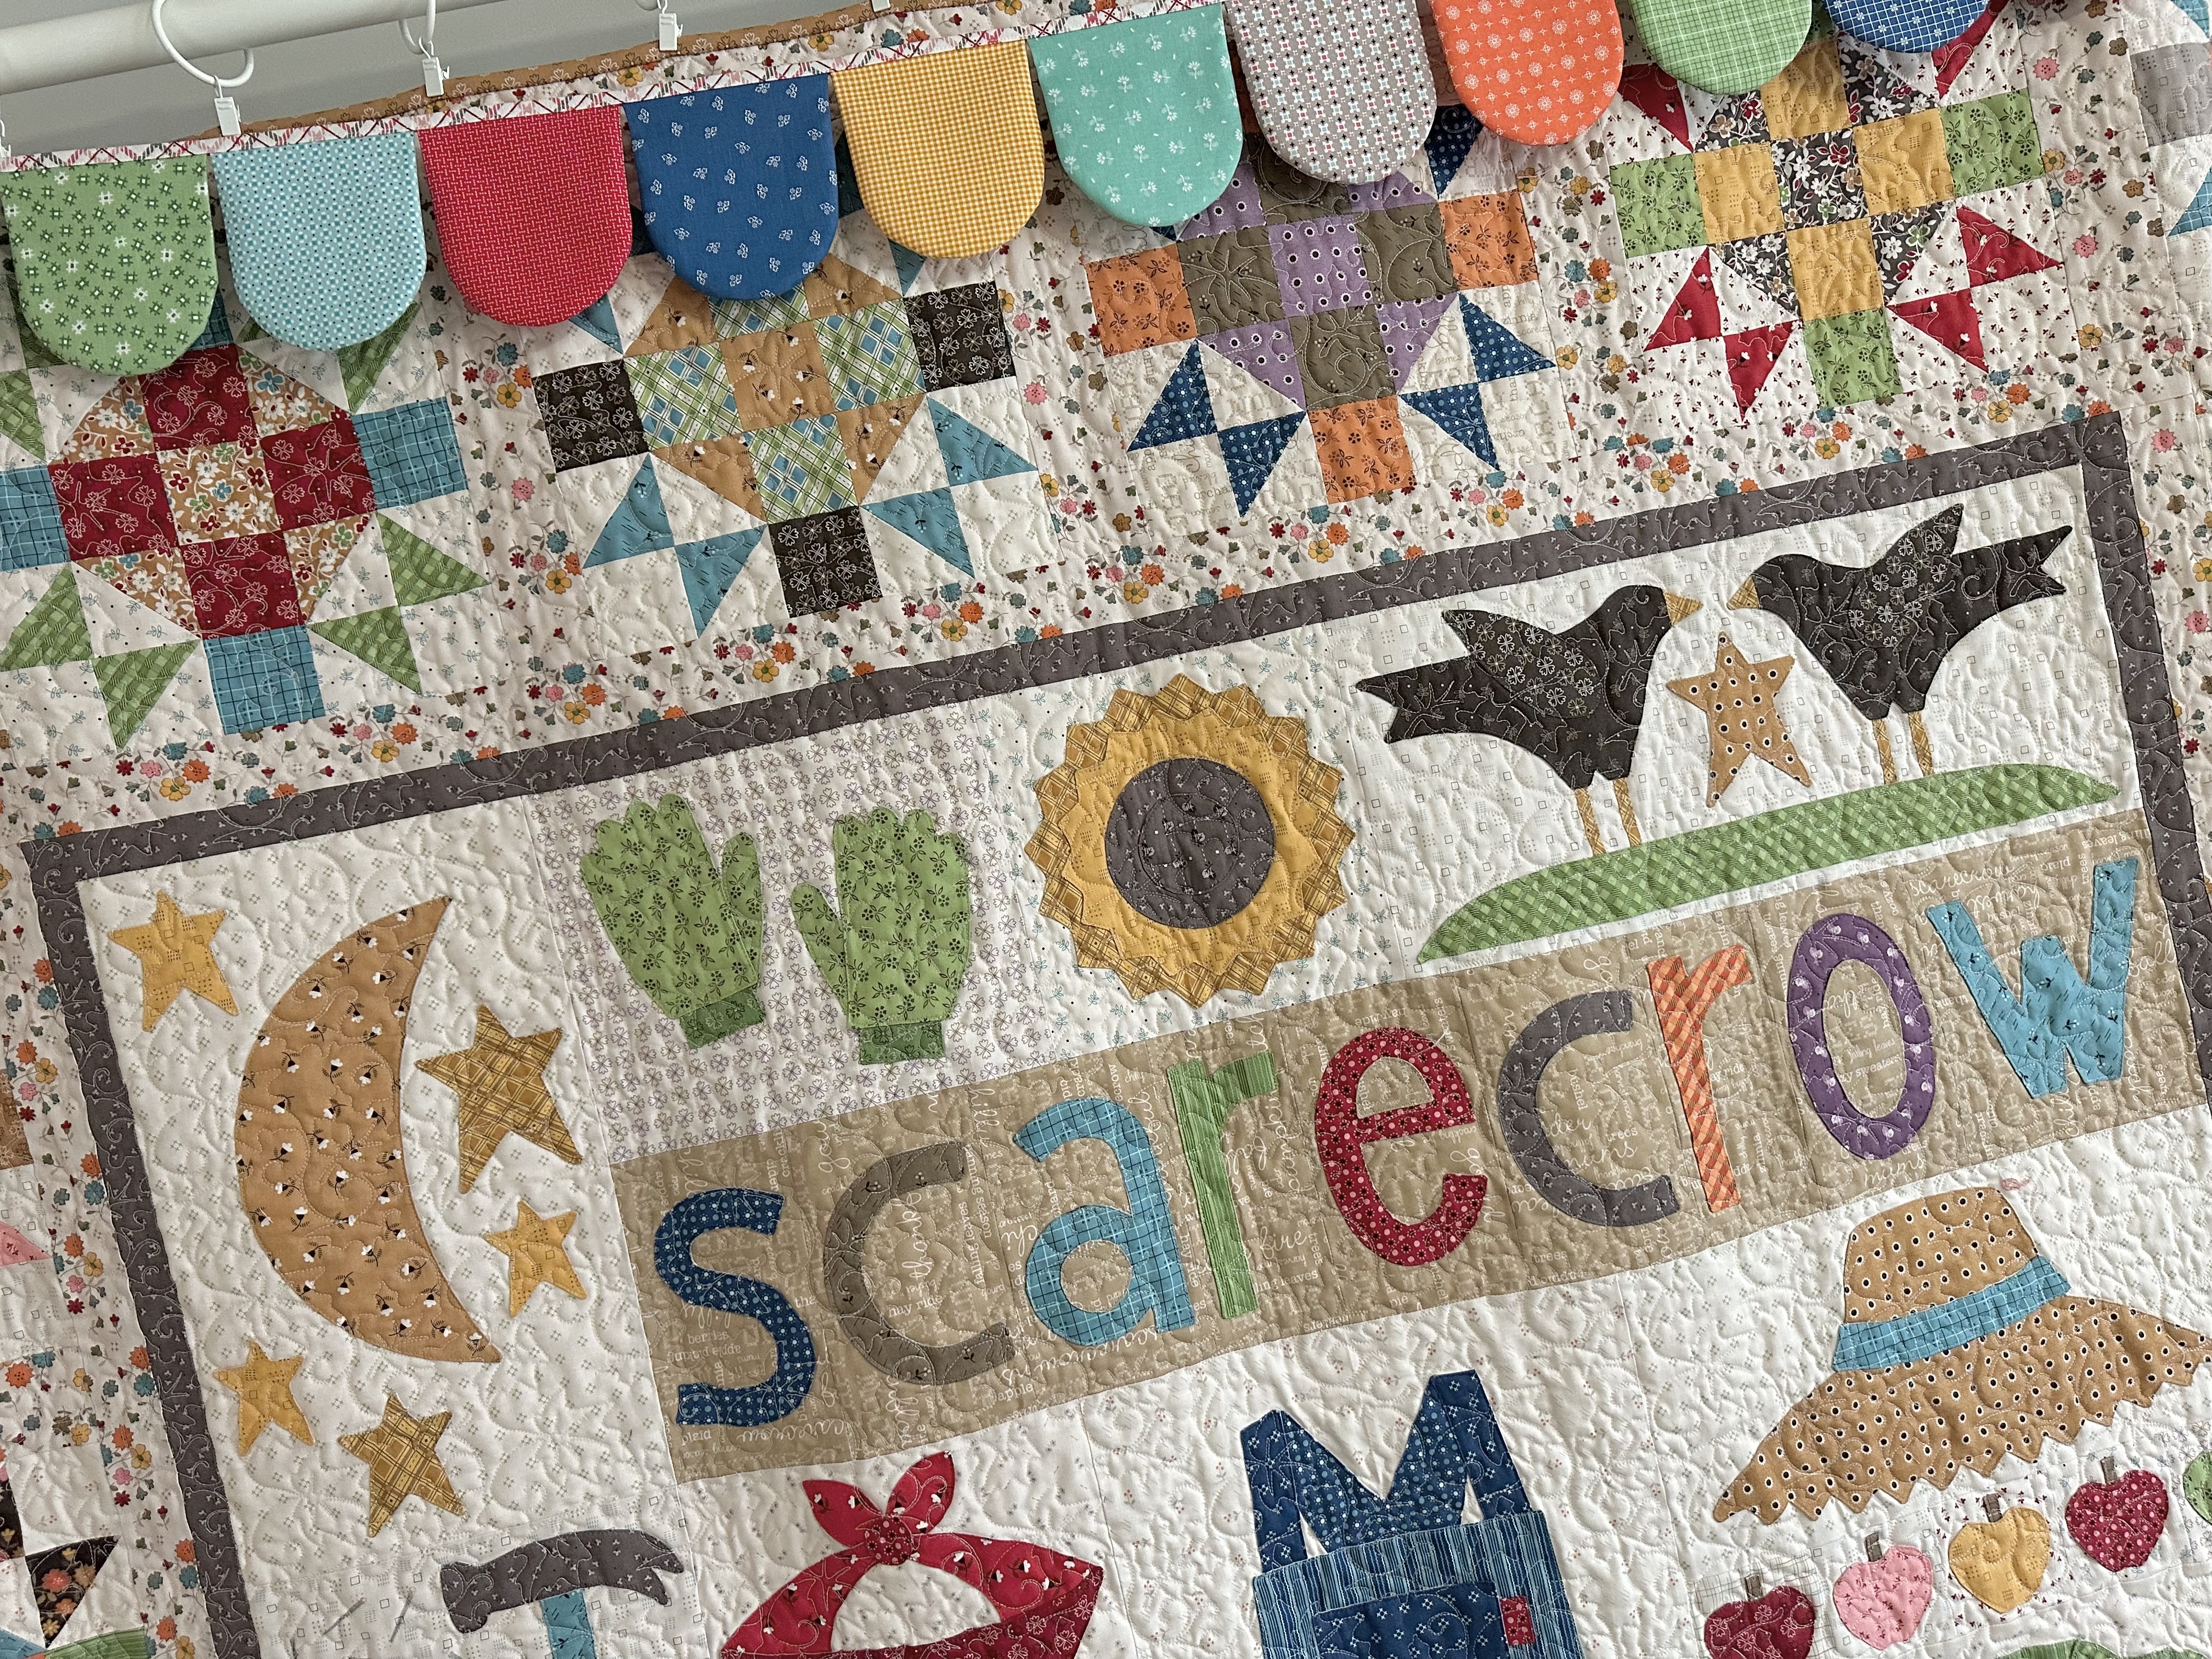
We are making the
How to Build a Scarecrow Quilt
74" x 86"

.jpeg)
.jpeg)
The quilt is made with my fabric
collection called AUTUMN:)
I hope that you all have all
received your
fabric kits by now...
and that we are all ready to begin!!
If you still need one ...
just do a quick google search for
"How to Build a Scarecrow
Quilt Kit"
to find shops who still have some left.

I detail all of the supplies
that you need to make the quilt in my
Bee Prepared post right here on my blog.
I have already posted the
post which not only details
all of the supplies needed but
explains how this sew along works.
I have also given the links there
for the free PDF Download
of the Sew Along Guide
to download the sew along guide
if you have not downloaded yet.

As per usual for the first block in my
new fabric collection Sew Alongs
that FIRST tutorial is a video.
Because I now have my own
I have posted the
Crow Block
Tutorial there.
to visit my channel and watch the
tutorial and I hope that you love it!
Pretty please leave me a comment
over there and let me know:)
If you like what you see
and my other videos there...
click on subscribe and click on the bell
to be notified whenever
I post another tutorial:)

these border blocks to get us started!
if you haven't watched it yet:)

"MOON and STARS BLOCK"
for that tutorial


"GLOVES - SUNFLOWER and
SCARECROW WORD BLOCKS"
for the tutorial

"TOOLS- BANDANA and
GUNNY SACK BLOCKS"
for that tutorial

for that tutorial

"OVERALLS"

for those tutorials

Remember that cutting each block is easy
because of the sew along guide
that is provided for you.

detailed for you in the
sew along guide for your convenience!

Pumpkin Block
all cut and traced:)

Hay Block is cut and ready for piecing:)

READY - SET - SEW!!

After sewing... trim the seam allowances.
You will need to clip the
inner curves and or cleavage areas
in all of the shapes except the
center front pumpkin oval before turning.

Shaped and pressed and good to go!
Now let's sew the hay together.

Use a 1/4" seam allowance...

And press your seams open so that your

block will lie as flat as possible.

Now let's add the easy corner triangles.
You can use the Seams Sew Easy Guide
or mark your squares like this.

Add them to each top corner.

Trim off the excess...

And press the seams open:)

Add the background to the sides and press seams open...

Now we can add the top and bottom...

And press those seams open as well.

Nice and flat!
Now let's go to the work table and add
the baling wire on with Sue Glue!

pinning and gluing process
for each step of the way.
Here we go!

Grab your pencil and measure in
1 3/4" from the side of the hay ...

and mark a line.

Now measure in 1 1/4" from
the TOP side like this...

And mark another line.
Repeat for the right side.


Now lay down a thin strip
of glue and place your "wire"
The marked line is on the
left side of the wire.

Top is trimmed even...

And bottom has some hanging over
for folding under and glueing...

Like this.

Repeat for the other side.

Fold one end under of the
shorter pieces and glue down.

I placed mine like this where it
joins the longer pice on the front...

And then fold over the top to
line up with the top of the hay seam.

Pin into place...

And Sue Glue:)
Now we can glue baste our pumpkin!


I glued the 3 sections together first
and then placed it onto the hay
about 3/4" in from the right side
and about the same hanging down
from the bottom of the hay.
Pin into place...
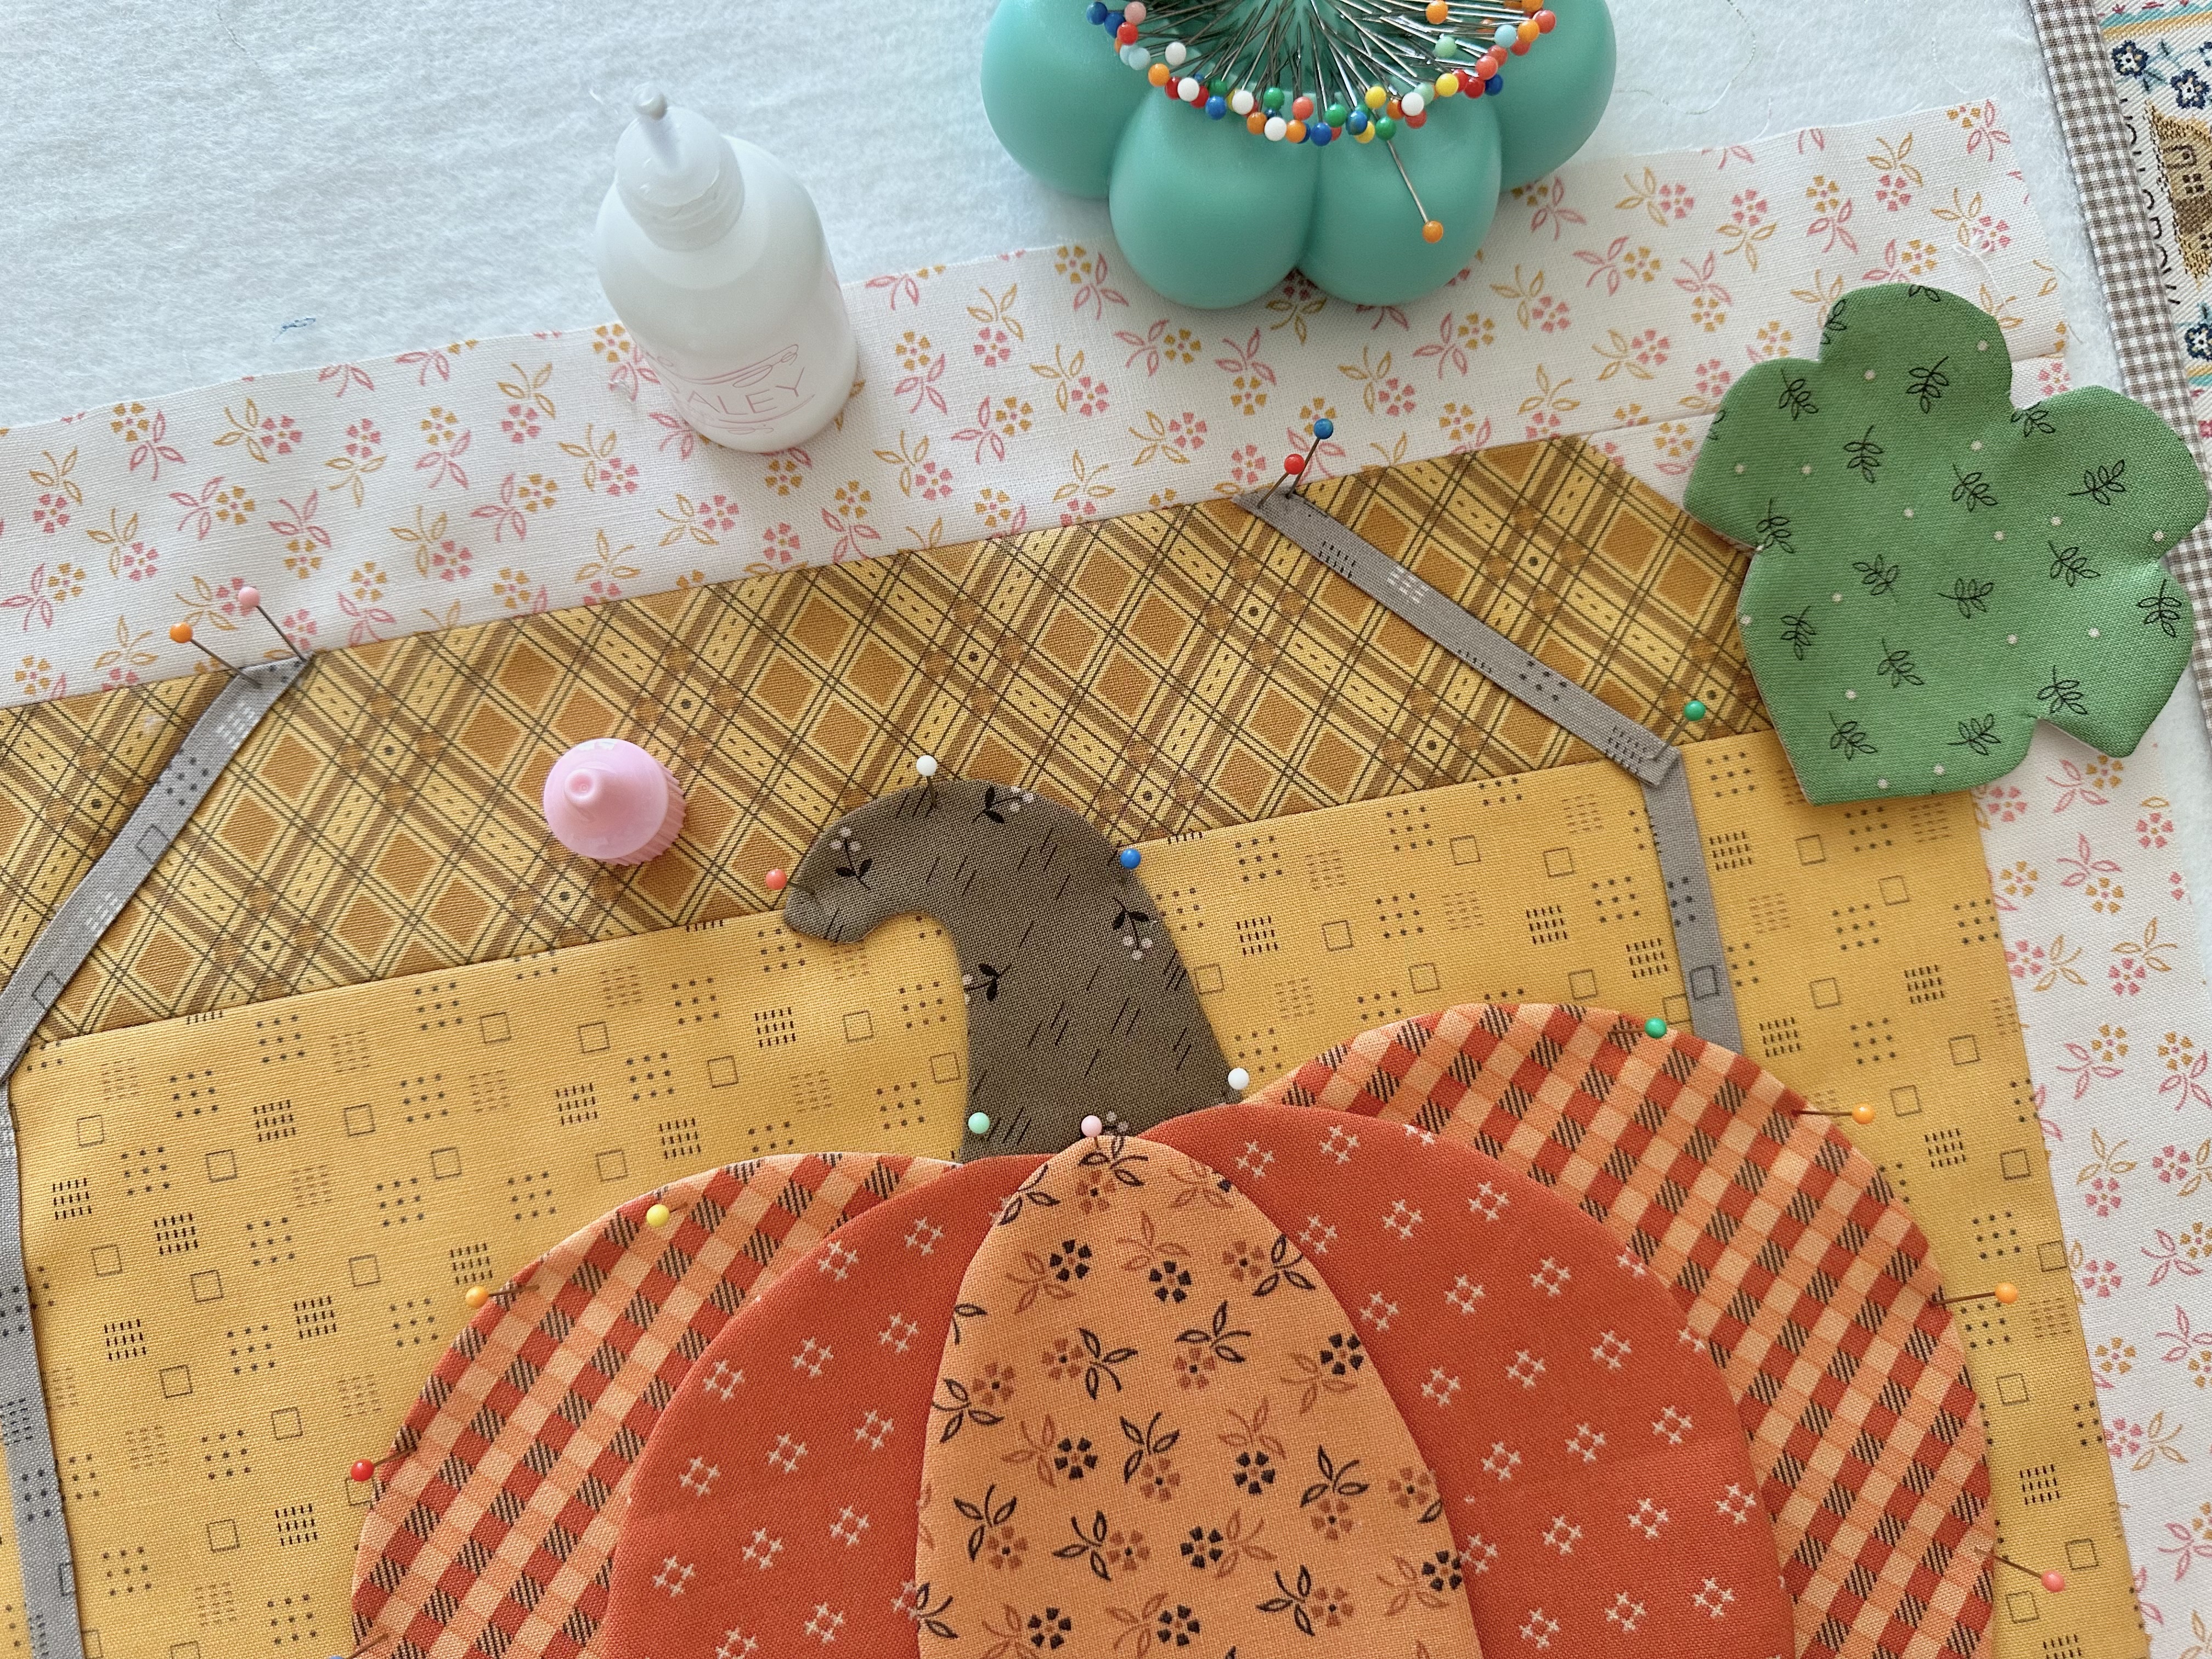
but before you glue tuck the stem down...

And then add the leaf.

Now you can glue it down for applique.

So cute!
Because there is quite a bit of
applique on the pieced block
(Meaning the pumpkin)
I did go ahead and have you cut the
background strips around the hay larger
than needed so that you can
trim down after appliqué is completed.

Use the 12 1/2" and the 15 1/2"
Trim-It Rulers
before you sew into the quilt:)
I hope that you enjoyed week seven and
all of my tutorials for these blocks:)
Now we have ALL of the blocks completed!!
Now I can only fit six of the
border blocks on my design wall:)


I'm sew excited to get this quilt
all put together!

I've got my fabrics for the sashings
and borders and binding all ready to cut...

And the guide for the order in which to
sew the blocks together into sections...

And how to complete the top for quilting!
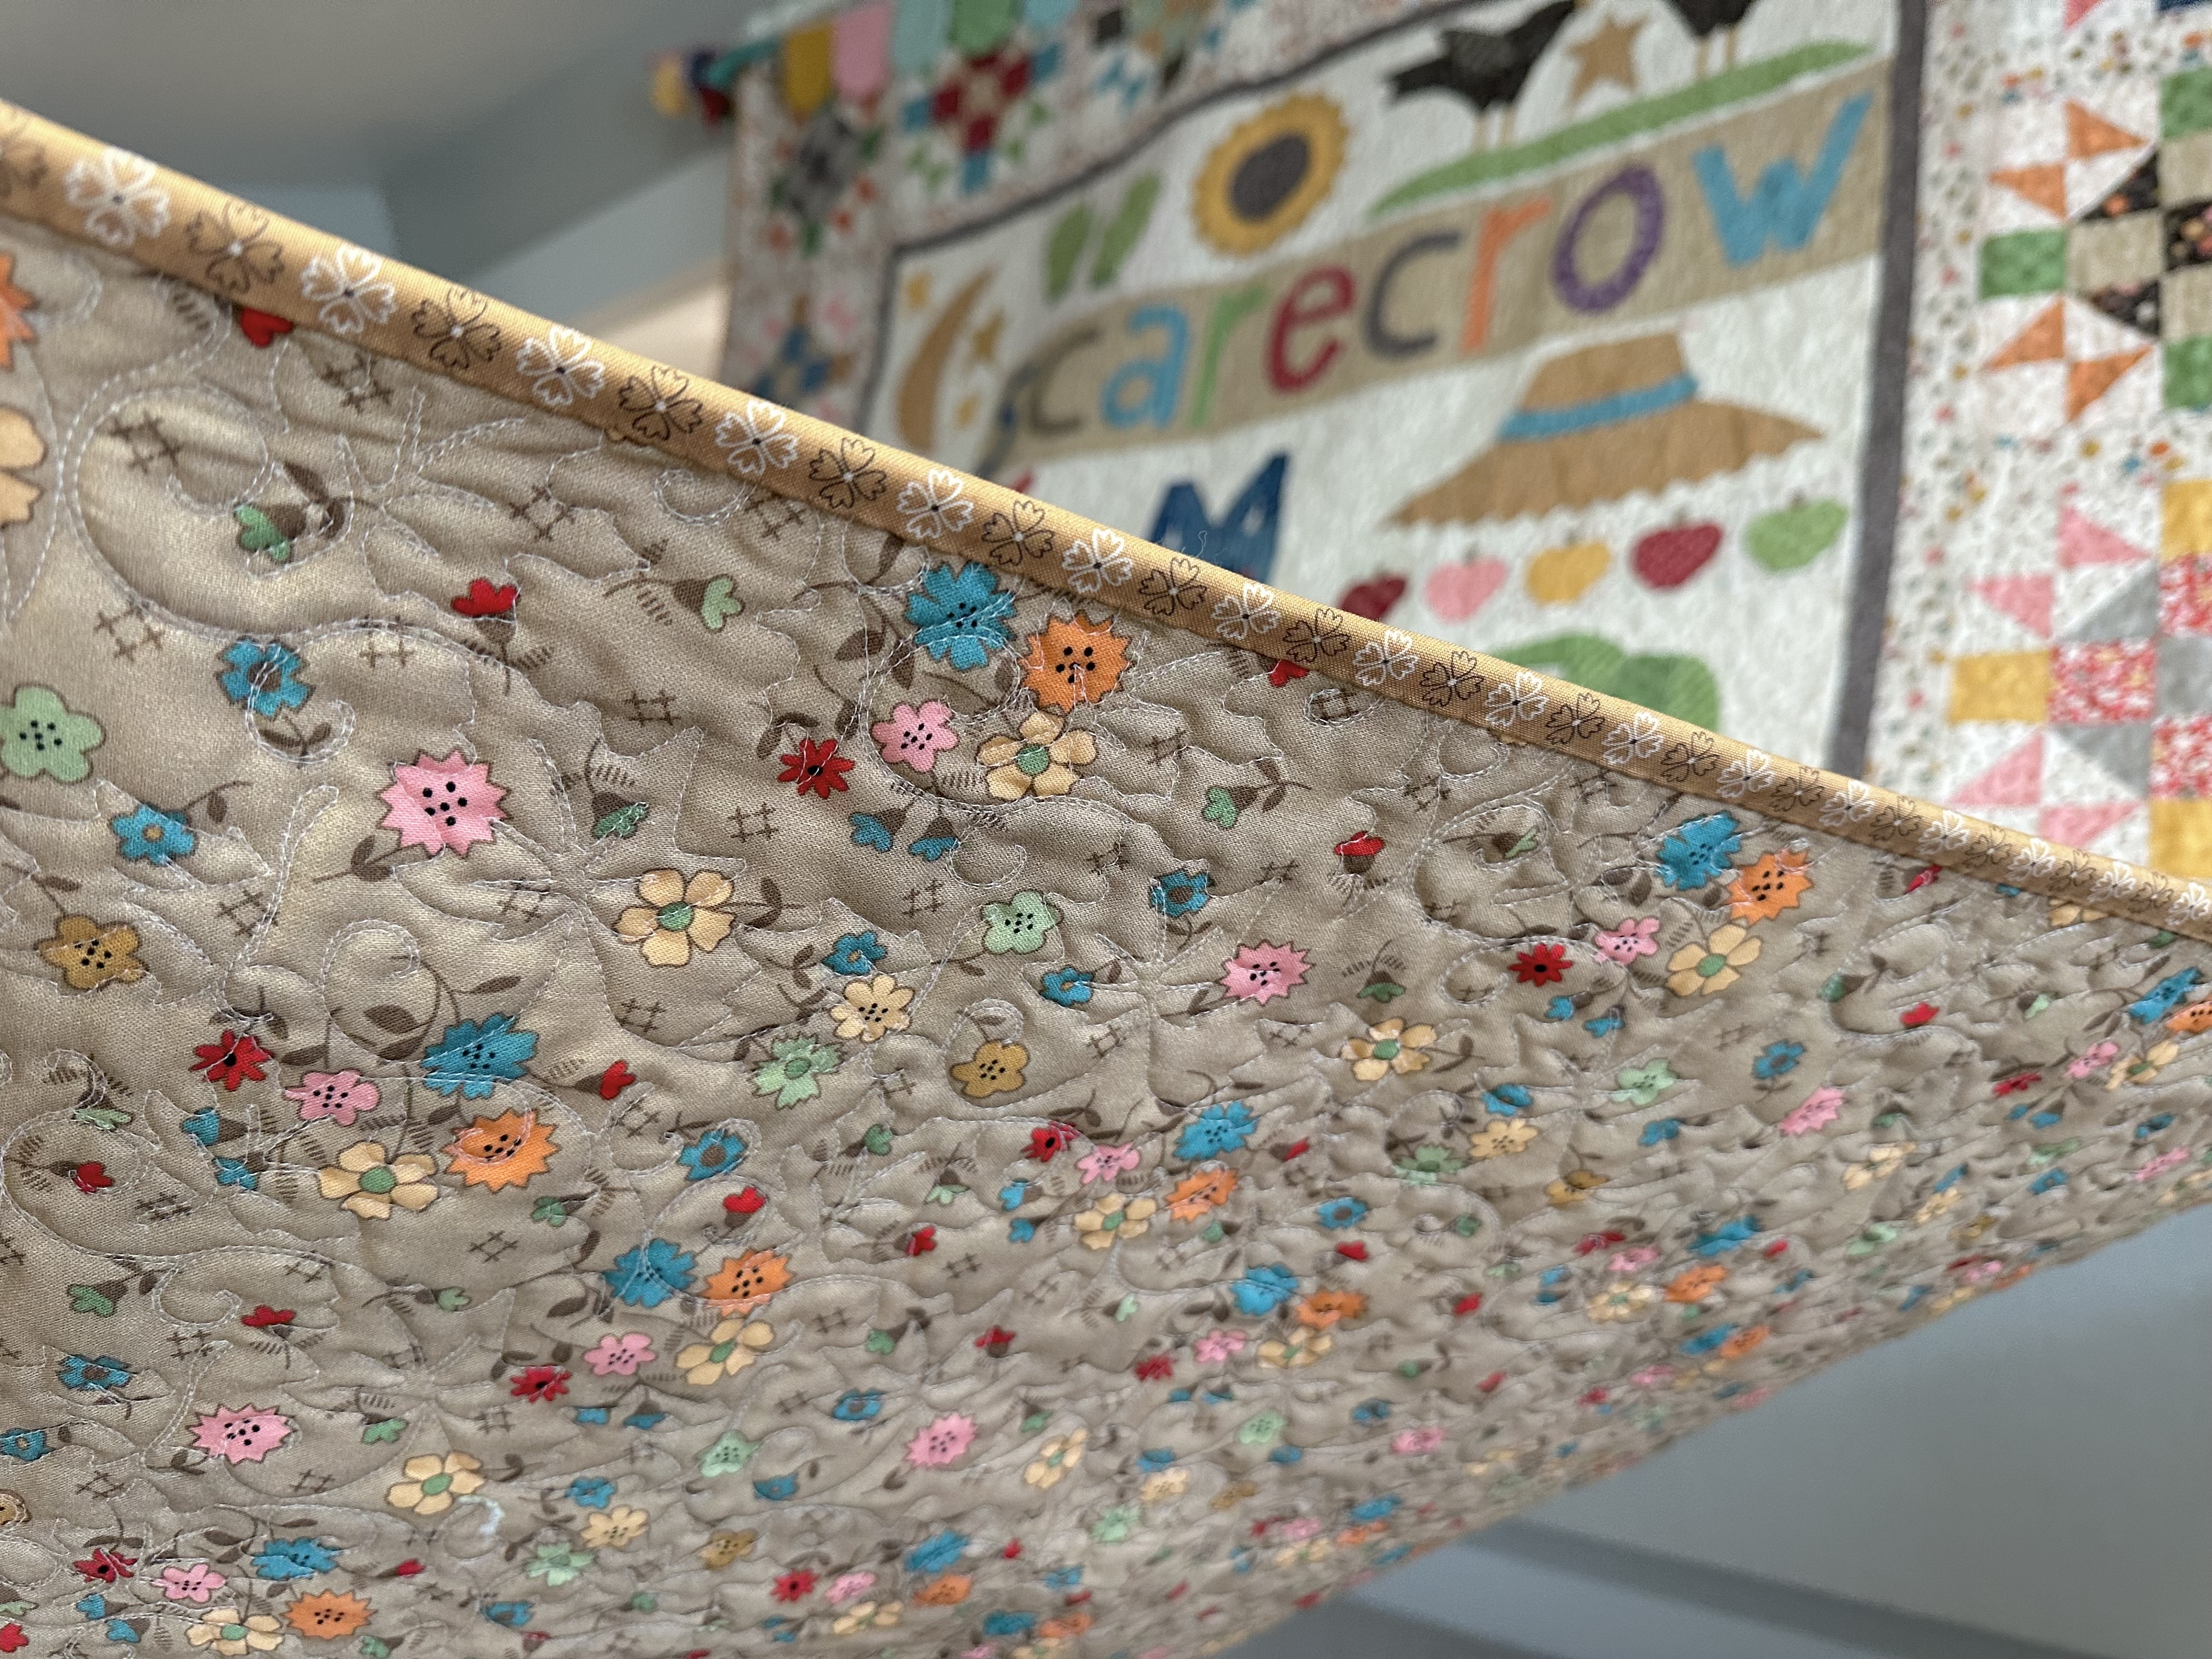
Now that the AUTUMN wide backs are
here I was able to get my quilt
all quilted and bound
and all I need to do is sew the buttons
back on and I can display it
for Thanksgiving:)
YAY!!
I took a bunch of photos to show you the details and I hope you love it
as much as I do.
At the end of this post
I have even more photos to show you
of a fun bonus project that I did too!


Thank you sew much
from the bottom of my heart
for joining me in the...

How to Build a Scarecrow
Sew Along
xx
Lori
Okay now for the bonus project!
I used the same Sew Simple Shapes
from the quilt to make a scarecrow
banner that I'm hanging on my front door.
Remember the extra bonus sew simple shape
that I told you about in the beginning?
We I used it for the head in this banner
which is why I designed it and
included it in the set.
I think it's sew fun and I hope
that you enjoy my photos and that
you are inspired to do the same thing!
By the way...these photos were
taken before my banners
were quilted and bound.
Yes...I did say banners because I made a snowman one too using the
Let's Make a Snowman set of SSShapes.
Enjoy!!!


2 comments:
Lori! I loved seeing your preview of your new book Prairie Home Quilt Book quilts trunk show. And I love that this dropped during July since July 24th is Pioneer Day in Utah! I reserved my copy. Love your work.
Lori, I think you should name your new filming spot with the white cabinet behind you with a sign that says Lori's Loft! Just sayin'!
Post a Comment