

Let's Make a SNOWMAN
the big finish!

Welcome Quilty Friends!!
Today is the big finish for the
LET'S MAKE A SNOWMAN
SEW ALONG
If you are just joining us
and want to know everything
about this sew along and
making this quilt
for my "BEE PREPARED" blog post.

We are making the
LET'S MAKE A SNOWMAN Quilt
which finishes at
75" x 87"
It consists of 22 pieced quilt blocks
for the border which surrounds
the applique blocks in the center
of the quilt.
(There are a few other blocks
that are also pieced)

To make the applique blocks
we are using my
Sew Simple Shapes called of course...
Let's Make A Snowman!


The collection that we are using
for the quilt is...
HOME TOWN HOLIDAY!!
Home Town Holiday was designed by me...
and produced and distributed
to quilt shops everywhere
by the amazing
If you would like to know everything about
HOME TOWN HOLIDAY
to view the entire storyboard...
to see all of the fabrics close up
and to view the notions and ALL of
the patterns that coordinate with it:)

I did a video tutorial
on my YouTube channel for week one:)
I showed you how to make the hat
and one of the letters and
gave you tips along the way.
I also chatted about stitching the
appliqués by machine or hand
and about quilting over the
Sew Simple Shapes.
to watch the video and please
leave me a comment and a like!
and then
to read my week one blog tutorial as well.

for the above week two block tutorial

During Week Three we did
all of the above blocks.
for the tutorials

for all of these
tutorials for week four:)


for all of these tutorials for week six:)

for the week seven tutorials:)

I'm so excited about today's post!!
Because after finishing and trimming up
all of the applique blocks
it's time to sew them together
into sections...
the cutting and diagrams for doing so are
of course in the sew along guide.
I took pictures of mine
and put them on my
design wall to show you:)


I think that all of my sections
look so super cute together!

All of my border blocks
are all sewn and ready too!


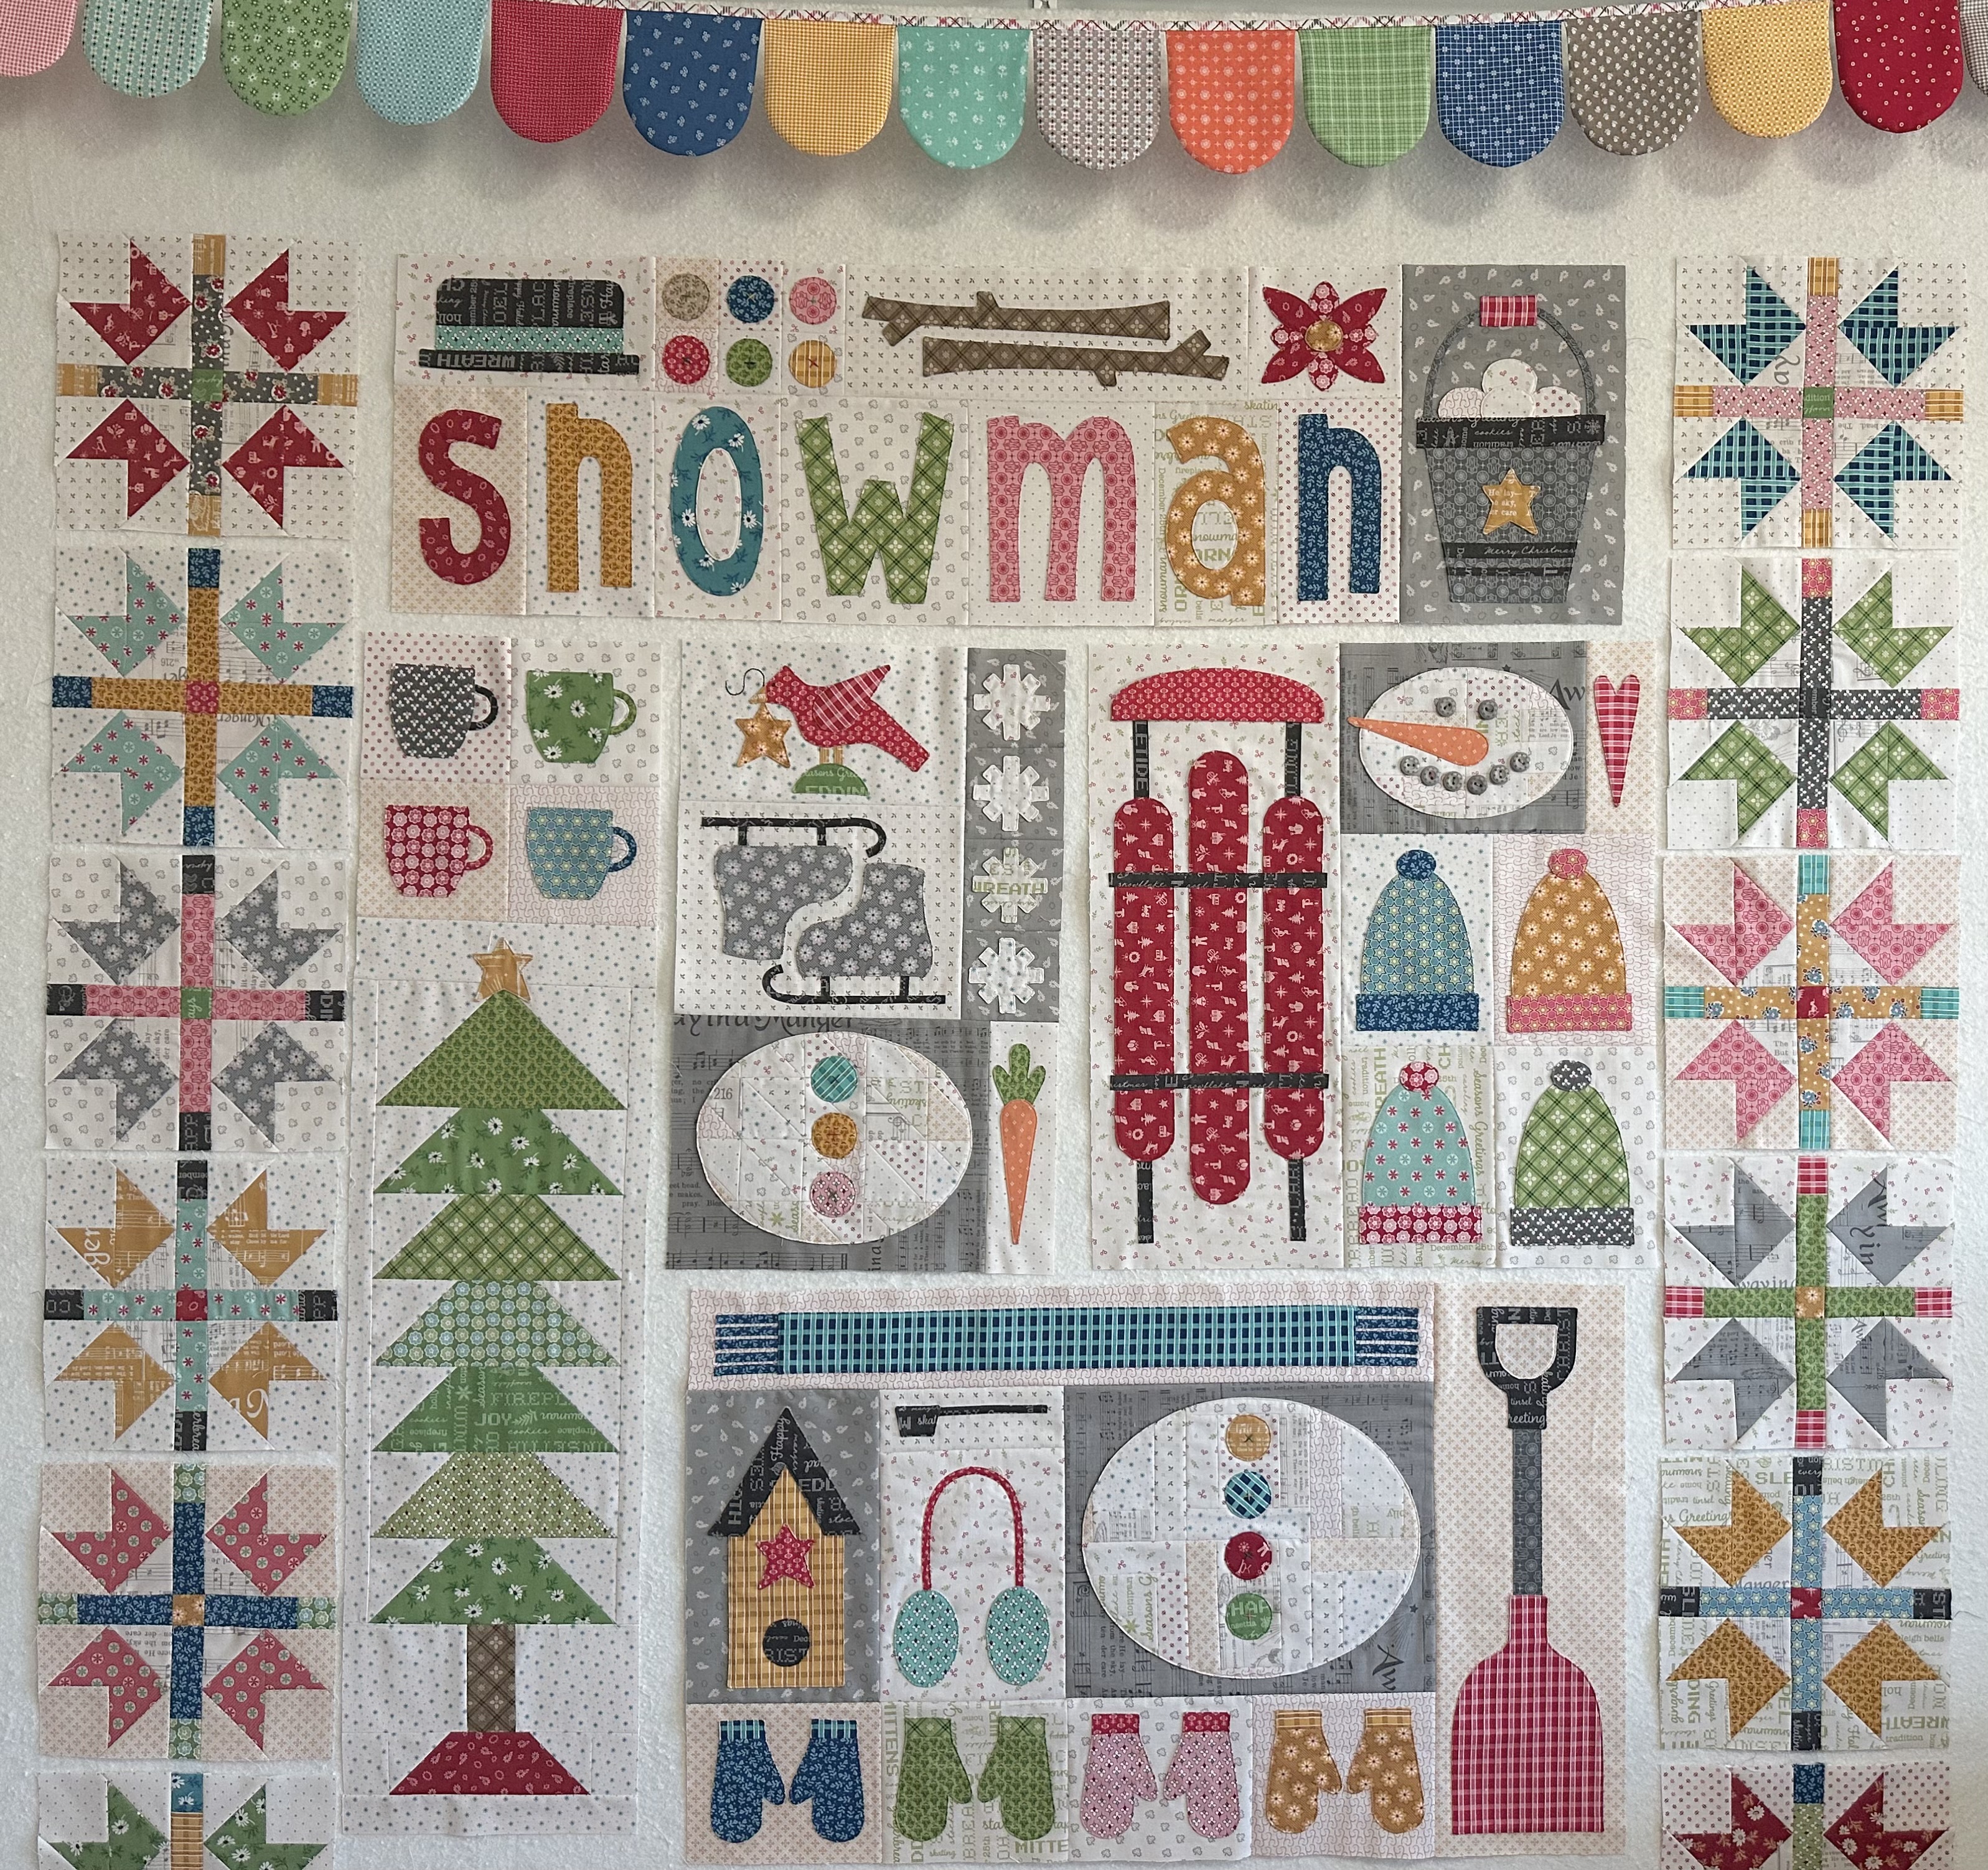
add so much to the design of this quilt
and do their job nicely
of "bordering" the appliqués.

Here are all of my fabrics
for the sashings, borders and binding
and also the LETTUCE Vintage Trim
to tuck inside the binding:)

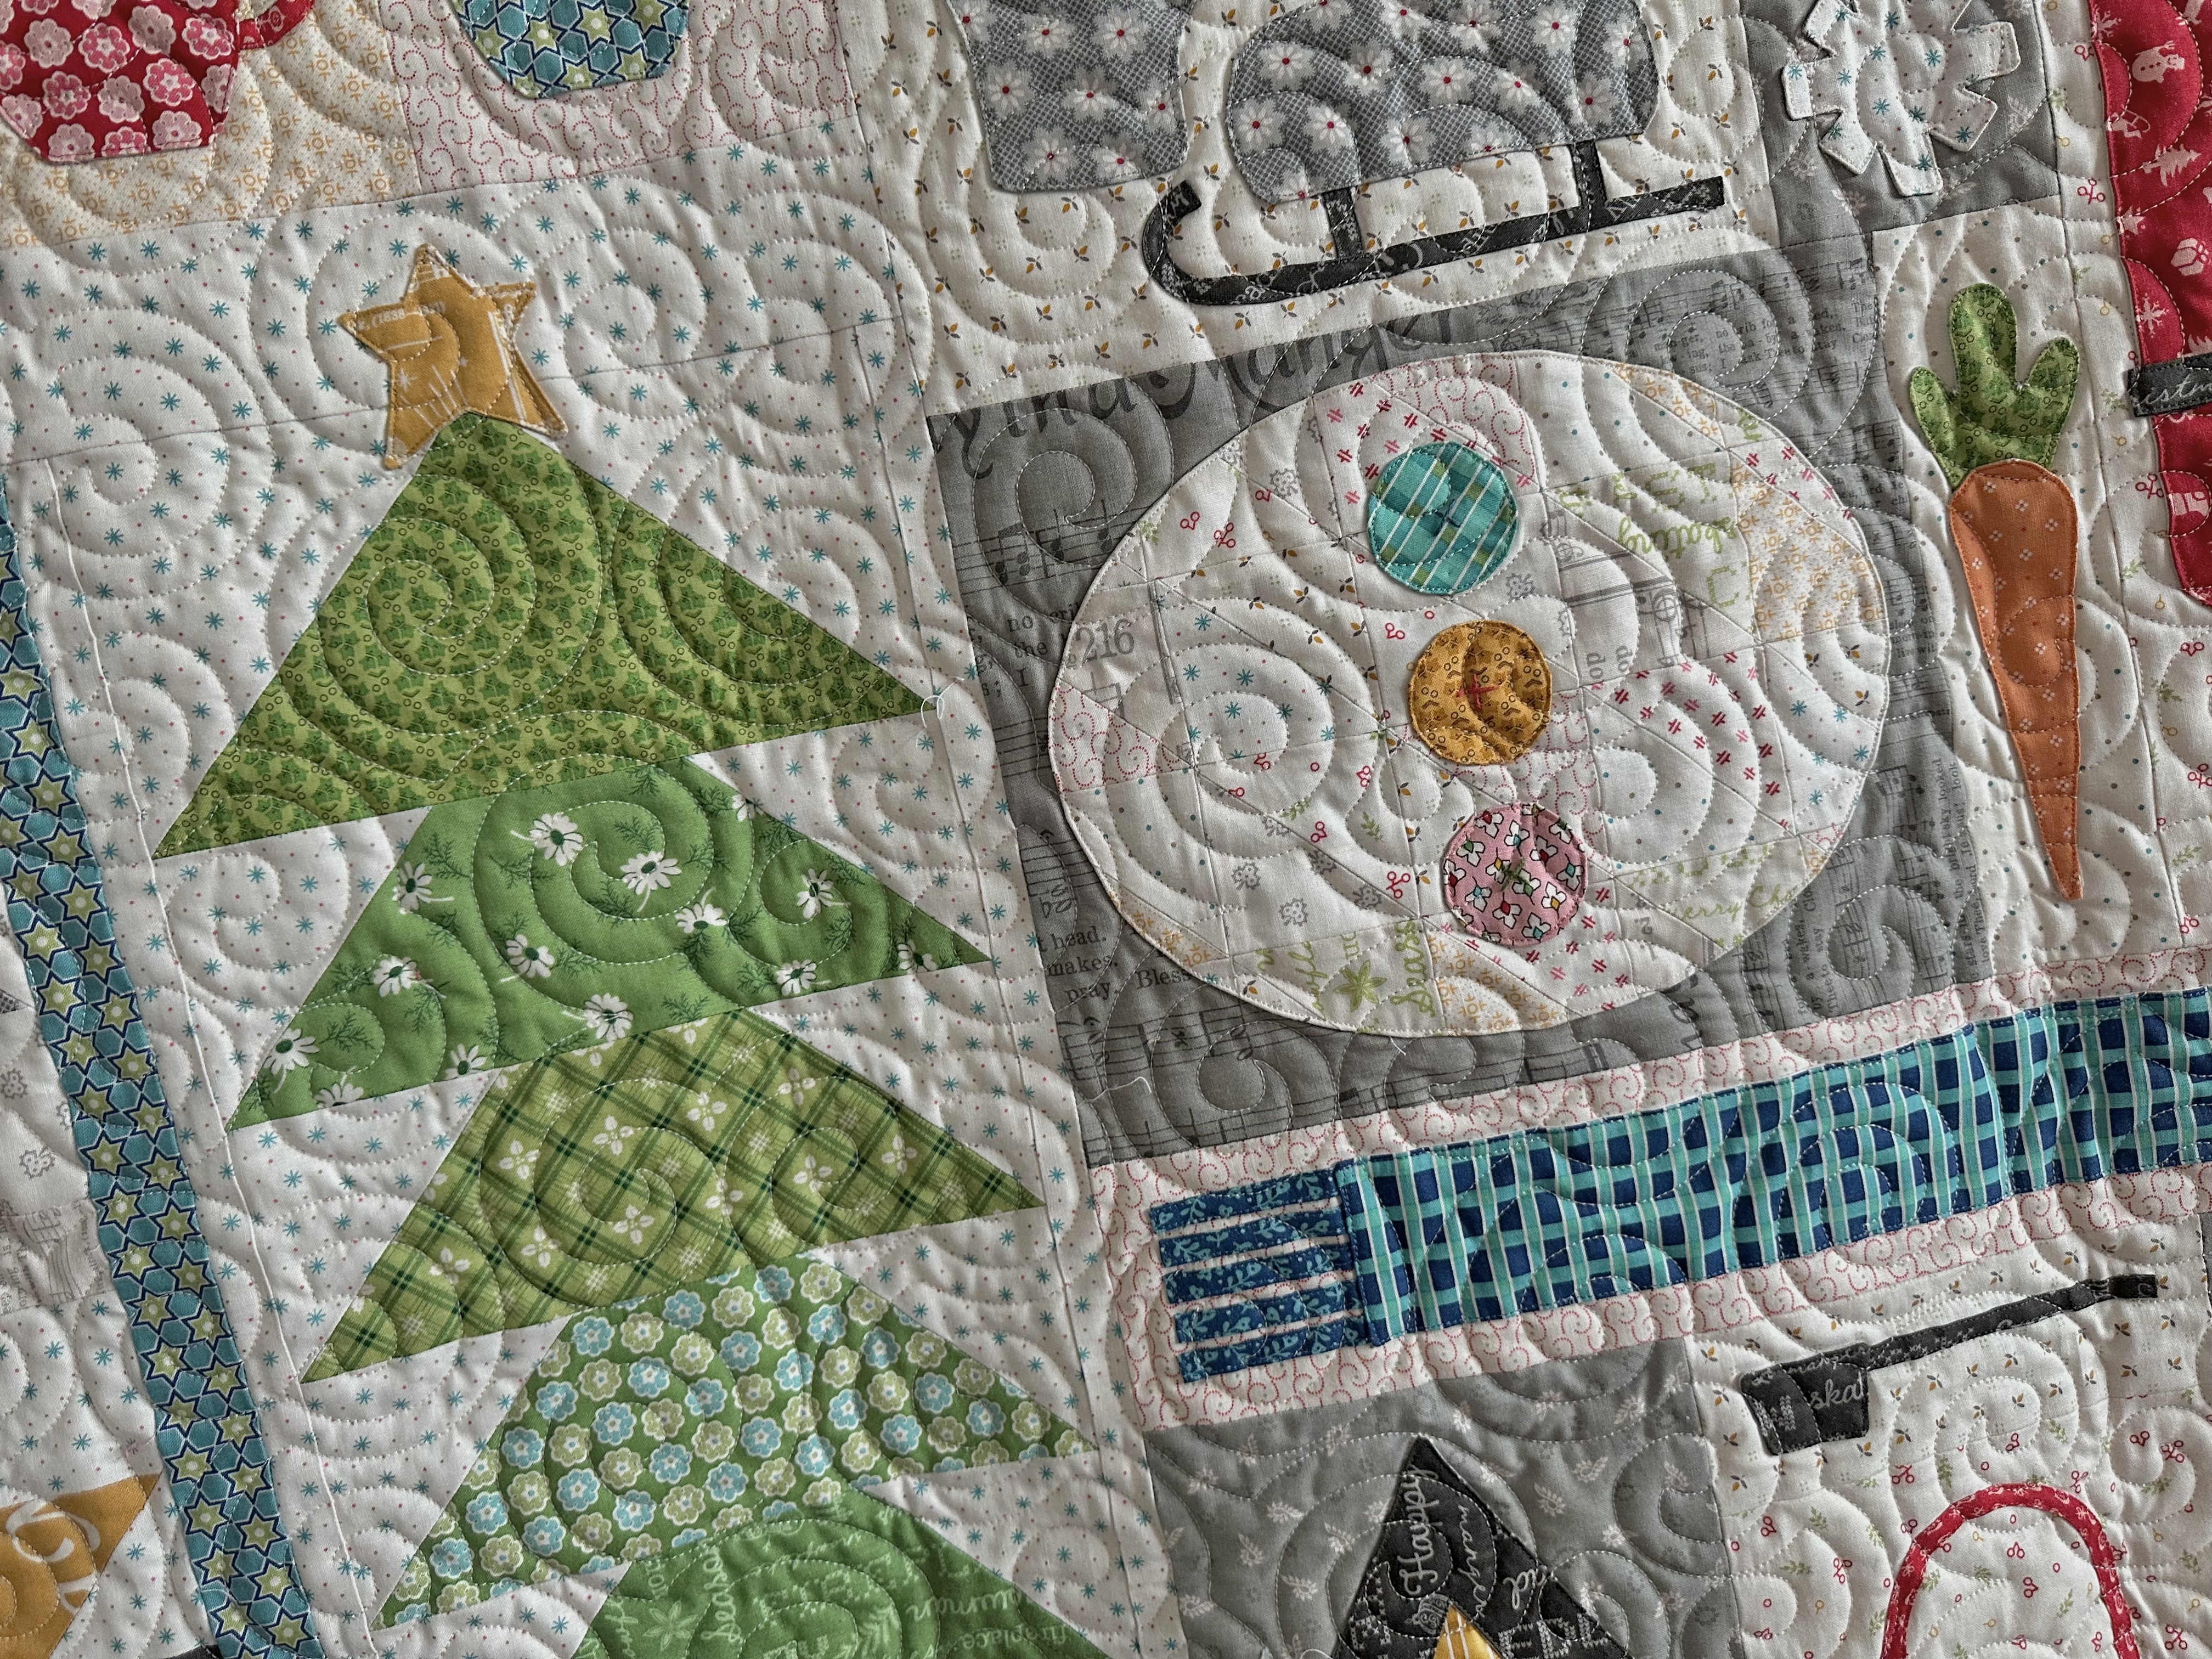
The wideback fabric arrived
and my quilt came back from
the quilter and I took a bunch
of photos so you can see what
it looks like quilted and bound!!
I love how it turned out and I
hope that you did too!!
Here we go....


Also...
remember those trees
that I showed you on my YouTube?
I made a table topper and the tutorials
are on my YouTube channel.
for the center block tutorial
called CHAPEL STEPS:)

And last but not least is the
fun project that I said
last week that I would show to you:)

I made a snowman!

I used all of the
Sew Simple Shapes from the set...
the exact same ones used for the
same shapes in the quilt
and the exact same way
that I showed you how in the tutorials
except now I put them all
together to form the snowman!
I'm going to trim the background
about 3-4 inches past the snowman
and quilt it...
Afterwards I'll bind it and
hang it on my front door
as a quilted door banner:)
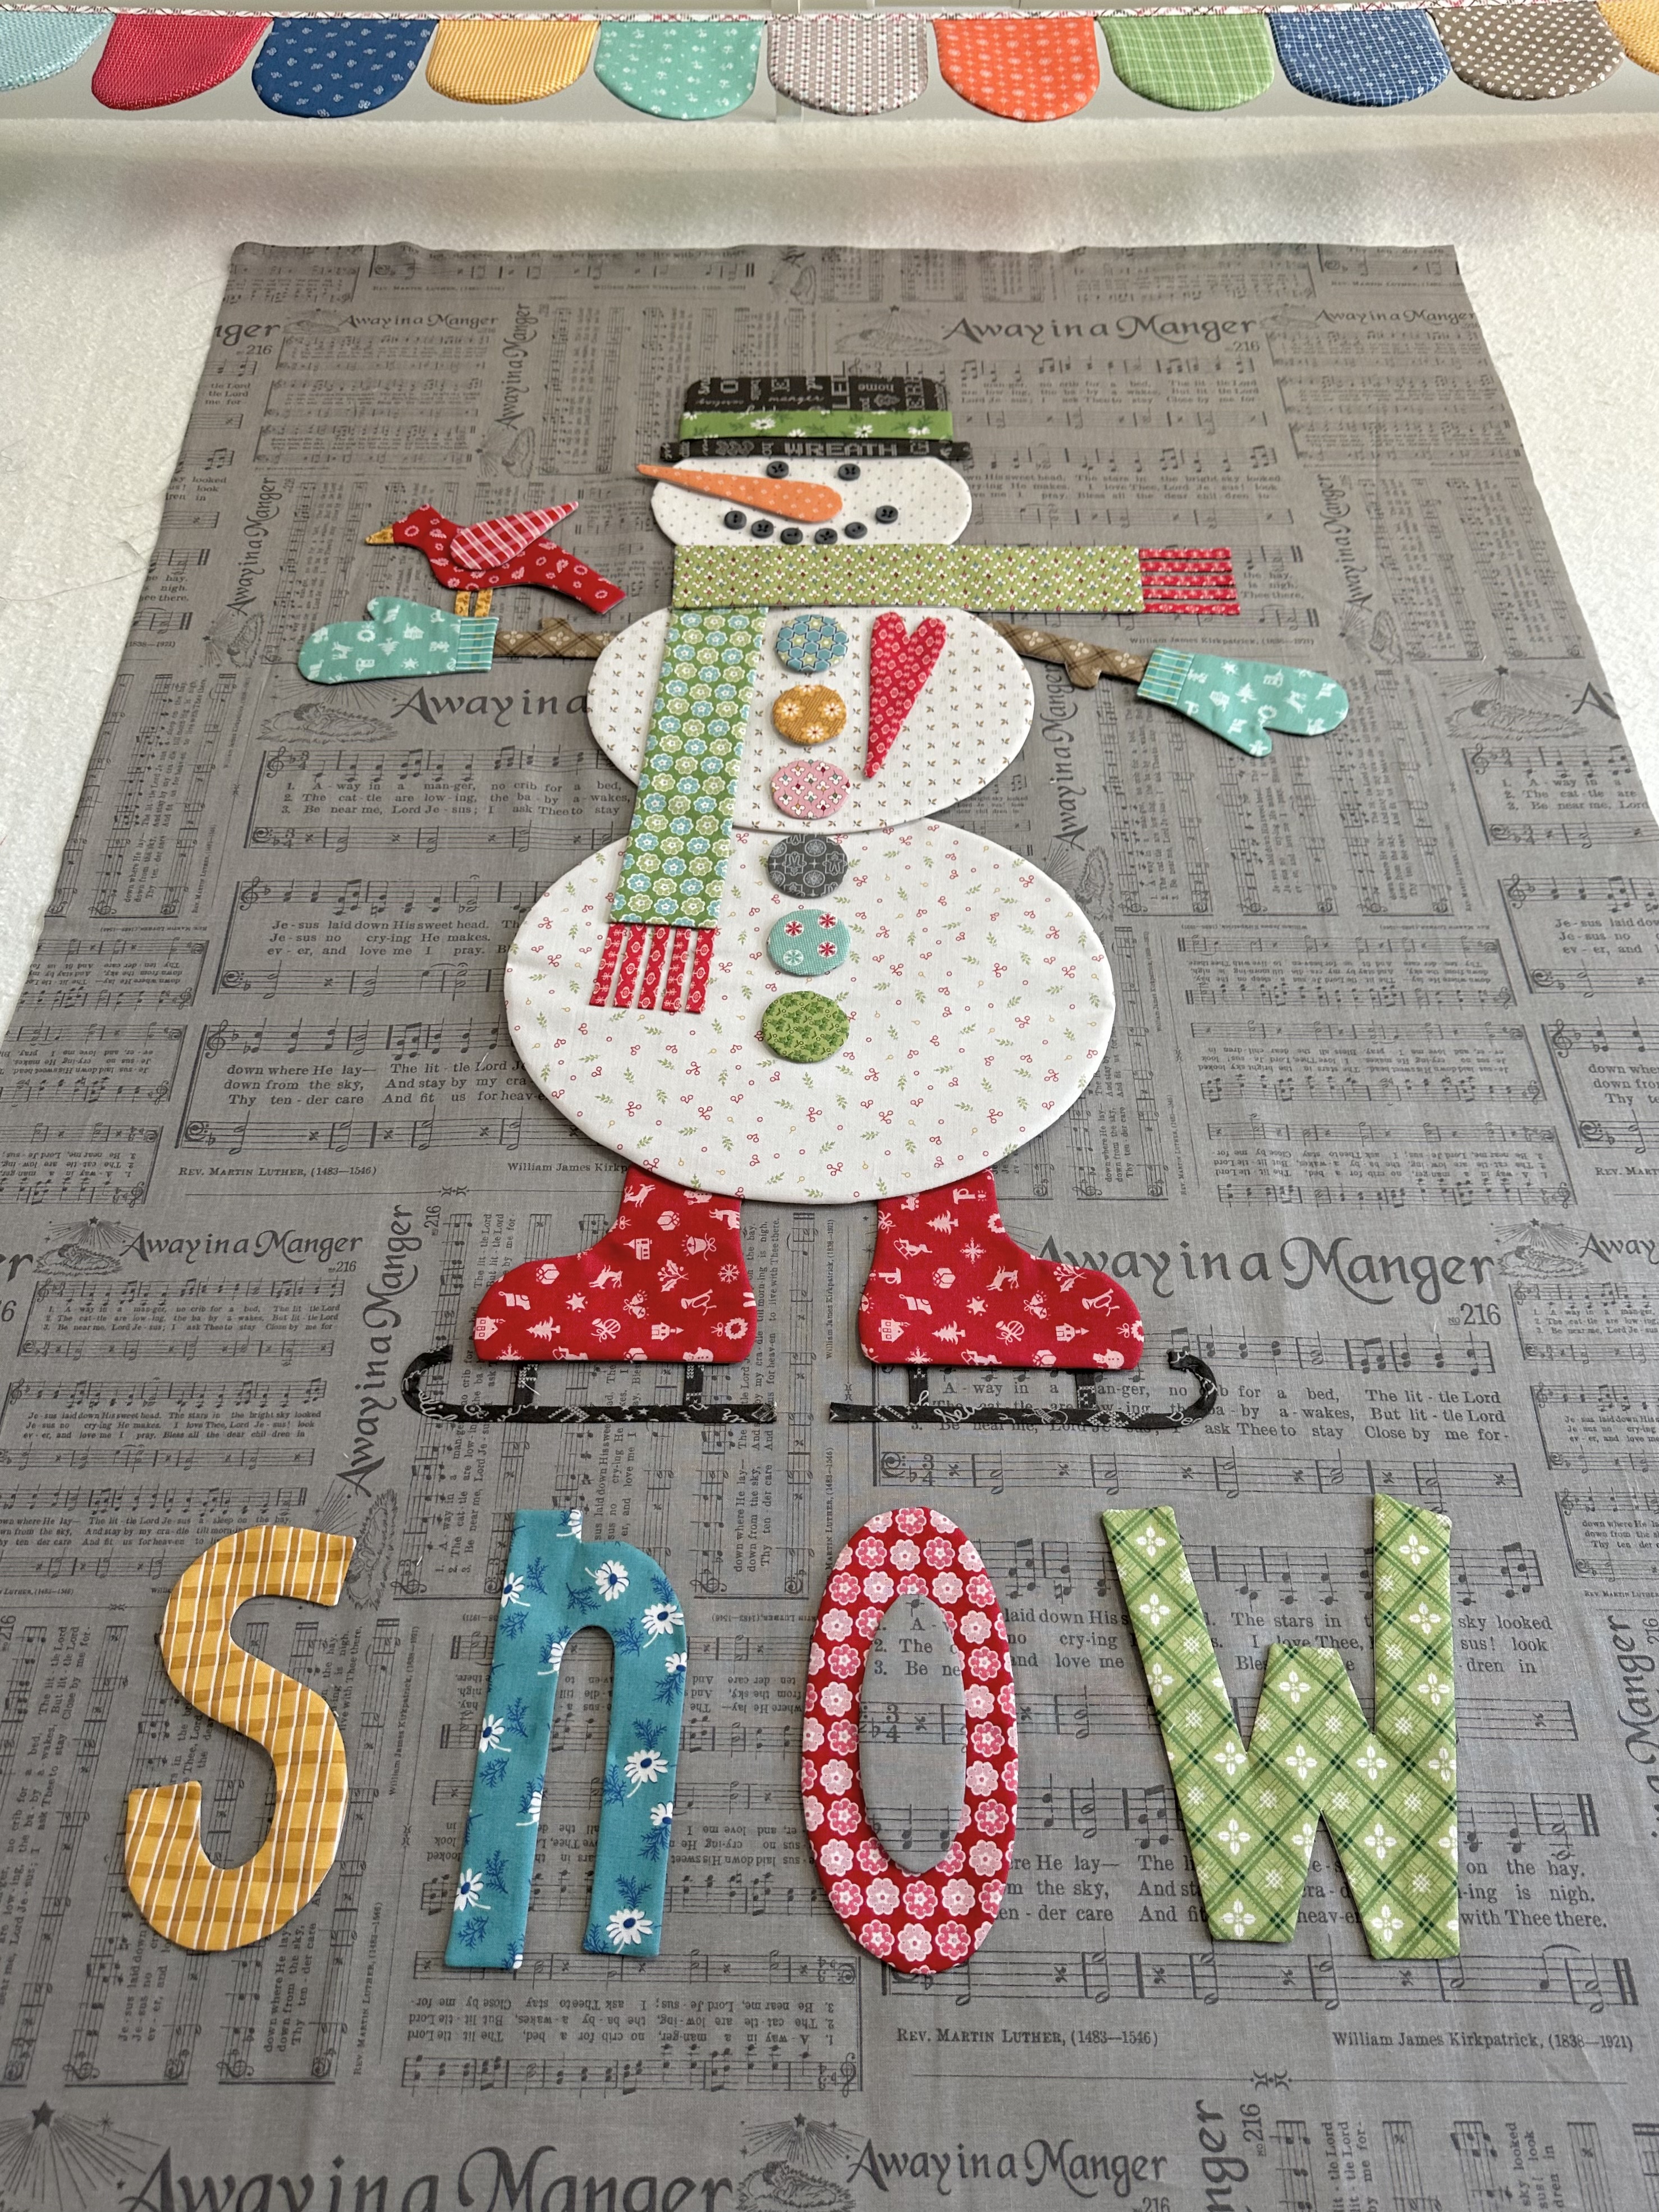
I think he will be sooo cute
hanging out on my door all winter long:)
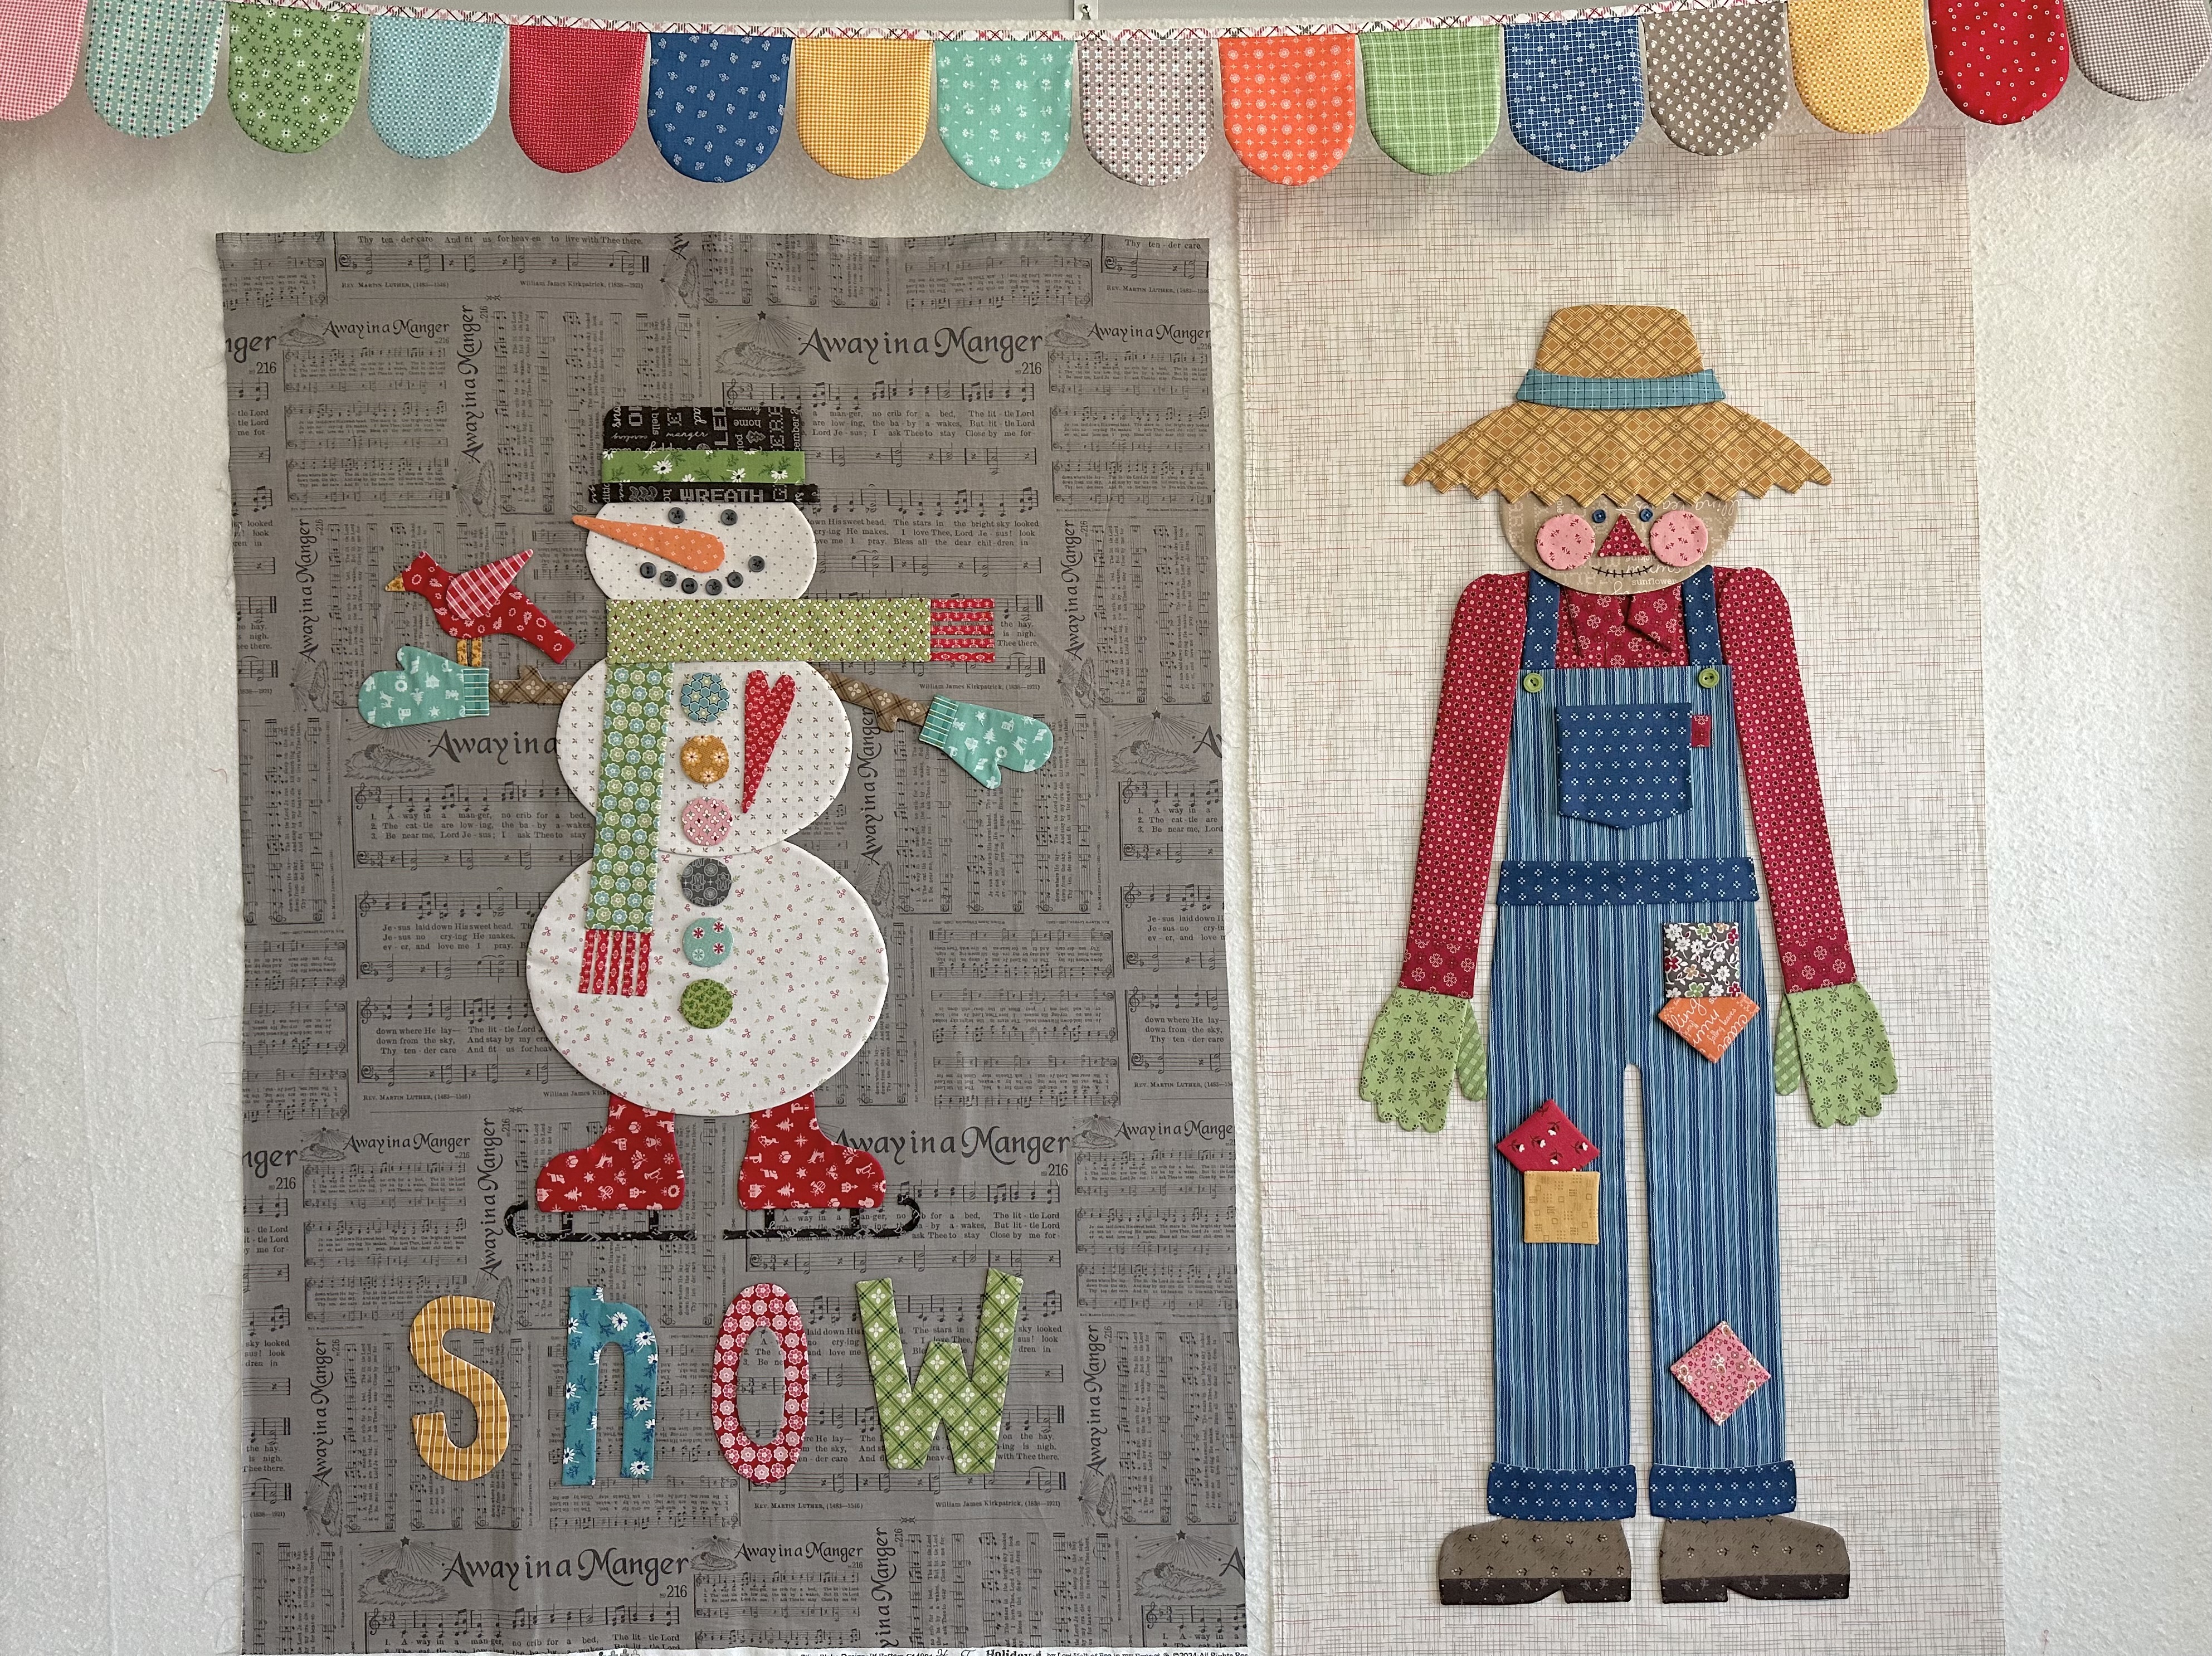
I also did the very same thing
with my How to Build a SCARECROW
set of Sew Simple Shapes.
I making him into a door banner as well
and will hang him on my front door ASAP!!
Thanks sew much for doing
this sew along with me!!!
Up next will be...
this quilt...

Flower Basket Sampler

And you're invited!!
spring fabric collection
that will come in December called
PIECE AND PLENTY
It will start the end of January 2025
It will start the end of January 2025
but look for my BEE PREPARED blog post
the first of the year:)
Sew with you soon,
xoxo
Lori
