Monday, September 11, 2017

Bee Happy Sew Along - Week Three!!


Hello cute people:)

YaY!

It's week three already.

If you are just joining us...
you can view all past Bee Happy block tutorials 
and info about joining the sew along 
by scrolling down and looking on
 the right side bar of my blog.

Just click on which post 
you would like to read!


After this weeks blocks 
you will be able to sew 
Row 1 of the Bee Happy Quilt together:)

That makes me happy!


This little cutie pie Bluebird block 
goes in Row 4 but the tutorial
 is today because...
 the other Bluebird is in the Mason Jars Block 
for this week...
 and I thought it would be easier
 to do them together.


He is easy peasy to make...
just a few pieces of fabric and two
 Sew Simple Shapes...
D-5 and D-17.


After sewing the Bluebird...
You will need to clip the
inside curve like this.
I clipped about 6 times.


This is how I cut the interfacing
 in the back so that I could turn him easier:)


I pin basted him and then traced on the embroidery for his
 beak, eye and legs.

I usually don't draw my stitching lines
 on the solid piece edges
 when I'm just doing a running stitch ...
but I wanted to show you how easy
 it is if you are someone
 who wants lines to follow.


I like to use all 6 strands of my
 Aurifloss 
for this because I really like the texture that it adds.


After doing the wing embroidery...
I pinned it into place for appliqué.


The eye is a french knot and the legs and beak are a backstitch...
once again...all 6 strands.


After he is completed...
trim him up to 4 1/2" square:)

Set him aside in your
 "Fun and Done" 
until you get to Row 4!


Now lets move on to the 
Mason Jars Block:)


You will need Sew Simple Shapes 
D-1  D-5  D-6  D-7  D-9 
 D-12  D-17  D-26  D-27
and of course all of the Mason Jar Block fabrics 
from the cutting instructions.

Run the two 5/8" wide bias strips 
through the 1/4" bias tape maker.


Cut a 1" wide strip from the small gingham and run it
 through the 1/2" bias tape maker
 for the Jam Jar Lid.

Cut a 1 7/8" wide strip from the large gingham 
and run it through the 1" wide bias tape maker for the 
center of the aqua jar.


All for bias strips are ready!...
I had you cut the green stem on the bias
 and you can press a curve
 into it later when
 it's time to baste it.


Let's start with the jar
 that holds the daisy.
It's 1" shorter than the template
 so draw a line 1" from the bottom line.


This new line is your sewing line
 to make the jar shorter.


Glue baste the 1" wide gingham strip across the center of the jar like this.
Place the interfacing onto the fabric for sewing.


Now for the Jam Jar...
it's shorter than
 the template as well...
 by 1 3/4".
Draw a line 1 3/4" from the bottom line.
This is your new sewing line.


Pin baste and sew all of the four jars.


Trim them like this:)


Do 3 clips in all inner curves 
on both sides of each jar.


Cut the X in the interfacing ...
turn...shape and press.


Now to sew the rest of the appliqués:)


These three pieces have cleavage areas 
that will need a clip:)


And of course the bluebird
 has an inner curve...


The Honey Jar Top has 5 cleavage spots...


And the daisy has inner curves:)


All sewn...trimmed and clipped! 
Now cut the interfacing for turning:)


Here are a few photos 
to remind you how to do the daisy from my previous tutorial.


YaY!
All turned...shaped...and pressed.


Baste the Mason Jars 1/2" 
up from the bottom edge of your background. 
Center the four jars across the block...the red jar should be about 1 1/4" from the side edge...as well as the aqua jar on the other side.


Cut your green stem about 2" long and press a curve in it like this.


Tuck it under the top of the jar and glue baste it down.
Pin baste the daisy on top like this.
The top of the daisy is about
 1" from the top edge.


Stitch your flower center before appliqué.


Also stitch your Honey label 
and the tie on the top before appliqué.


There is an embroidery pattern for the scallops 
around the gingham on page 8 
of the Sew Along Guide.


Close up:)


Next up is to baste the heart 
and the cute little banners.

The yellow banner is about 1/2" 
from the top edge of the fabric.


Now for the Jam Jar:)

Glue baste the lid like this.


Do the stitching on the blue bird wing and the label on jar before appliqué.


Yes...I used all 6 strands:)


Cute!


Trace the legs and beak on the background.


Applique:)


YaY!

You now have a cute Mason Jars Block:)
It should measure 8 1/2" x 16 1/2" which is what I had you cut it...
so that means no trimming down.

Now you can sew your
 Row One together using the
 diagram on page 3 of your guide.

Tune in next week 
and we will start on Row Two. 

And remember...
Bee Happy!
xx
Lori


Monday, September 4, 2017

Bee Happy Sew Along - Week Two!!


Welcome to week two of the 
Bee Happy Sew Along


I have loved seeing a lot of photos in various stages of progress on my

Thanks so much for using the hashtag 
#BeeHappySewAlong

If you are just joining us...
Look on the right sidebar of my blog here until
 you see the posts about this sew along so far.
Just click on each one in order
 to get the free pattern and to 
find out about a kit and the supplies needed.


The first block tutorial for today are the
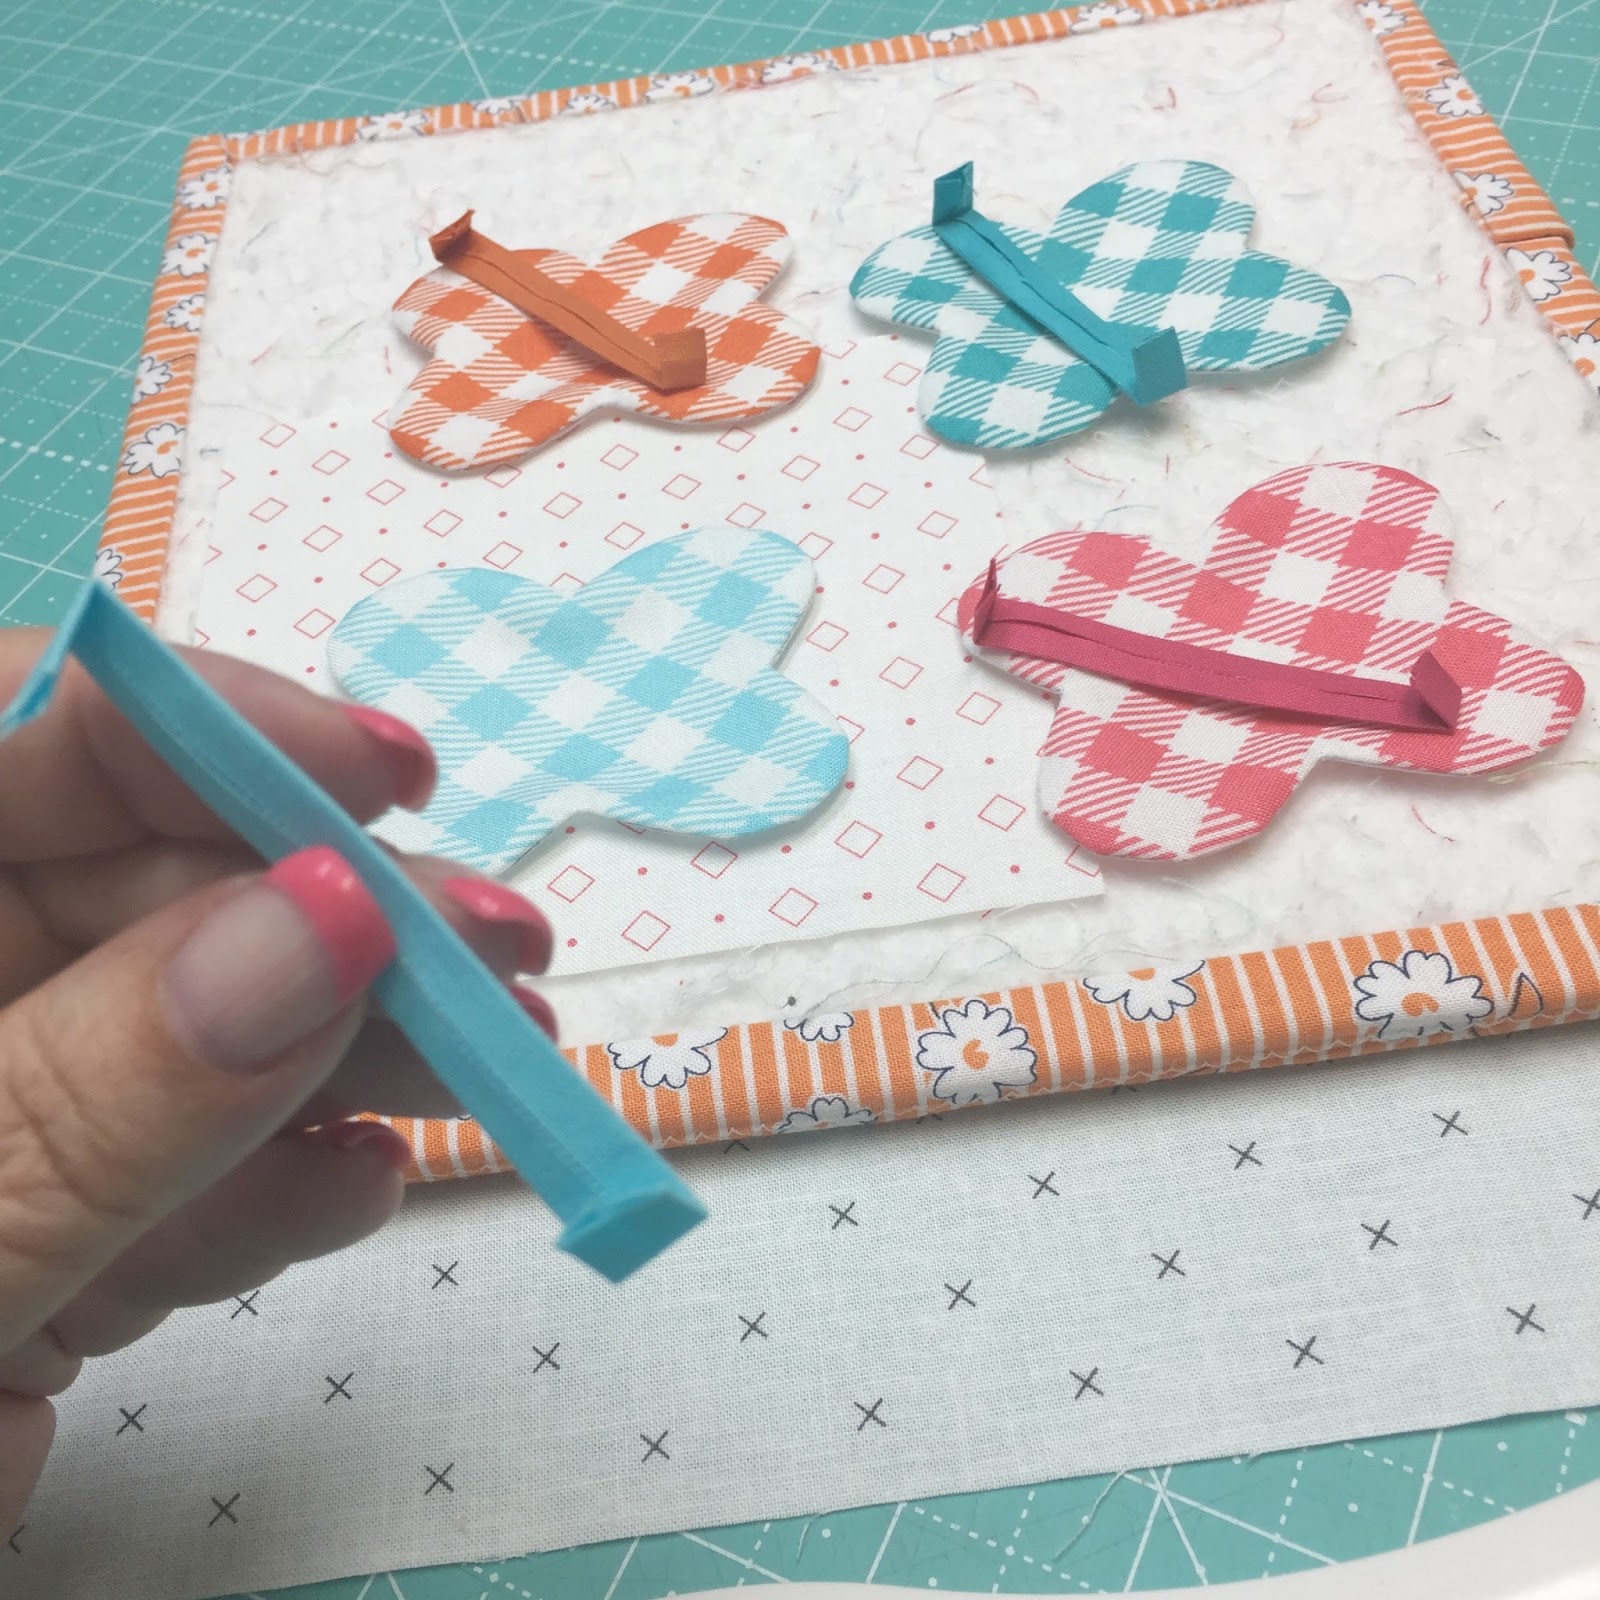
 Butterfly and the Butterflies Block:)


You will need D-13 Sew Simple Shape. 
Here are the fabrics that you have already cut for the blocks.

Run the four 3/4" strips that I had you cut
 from solids through the 3/8" bias tape maker
 just like I showed you in the video last week.


After sewing and trimming...
clip the 4 cleavage areas on each butterfly once...
all the way to the stitching line but not through it:)


Turn...shape and press the butterflies.
Press under the ends of the 
butterfly bodies so that they 
each measure about 2 1/2" long.


Pin and glue baste into place...
and trace the embroidery lines for the antennae found 
on page 9 of the sew along guide.

The bottom of the 3 butterfly bodies should measure 
about 3/4" up from the bottom edge of the fabric...
and about 1" up from the bottom edge 
of the single butterfly block.


After appliqué and embroidery is complete...
Trim the single Butterfly Block down to 4 1/2" square.


You don't need to trim down this 
Butterflies Block
 because it has been cut to unfinished size per the instructions in the guide.
It should already measure 4 1/2" x 10 1/2" at this point:)


***NOTE***
I know I've said this several times before
 but it worth repeating!
Remember that all of the square blocks 
in the quilt are cut a little larger 
to allow for trimming down with square rulers.
This is my favorite way...but,

Because there are not rulers
 in all of the rectangle block sizes...
All of the rectangle blocks in the quilt
 are cut to unfinished size...
ready to sew 
into the quilt after appliqué and will 
NOT need to be trimmed down.
Just be careful and treat them gently 
so as not to fray the edges.

On page 3 of the sew along guide...
(see photo above)
all of the block measurements given are 
FINISHED SIZE
 which means after they are sewn into the quilt....
as always...
each unfinished block measures
 1/2" larger than a finished size 
to allow for 1/4" seam allowance
 on all four sides:)


YaY!
Fun and Done Pile...
here it comes!


Next up...
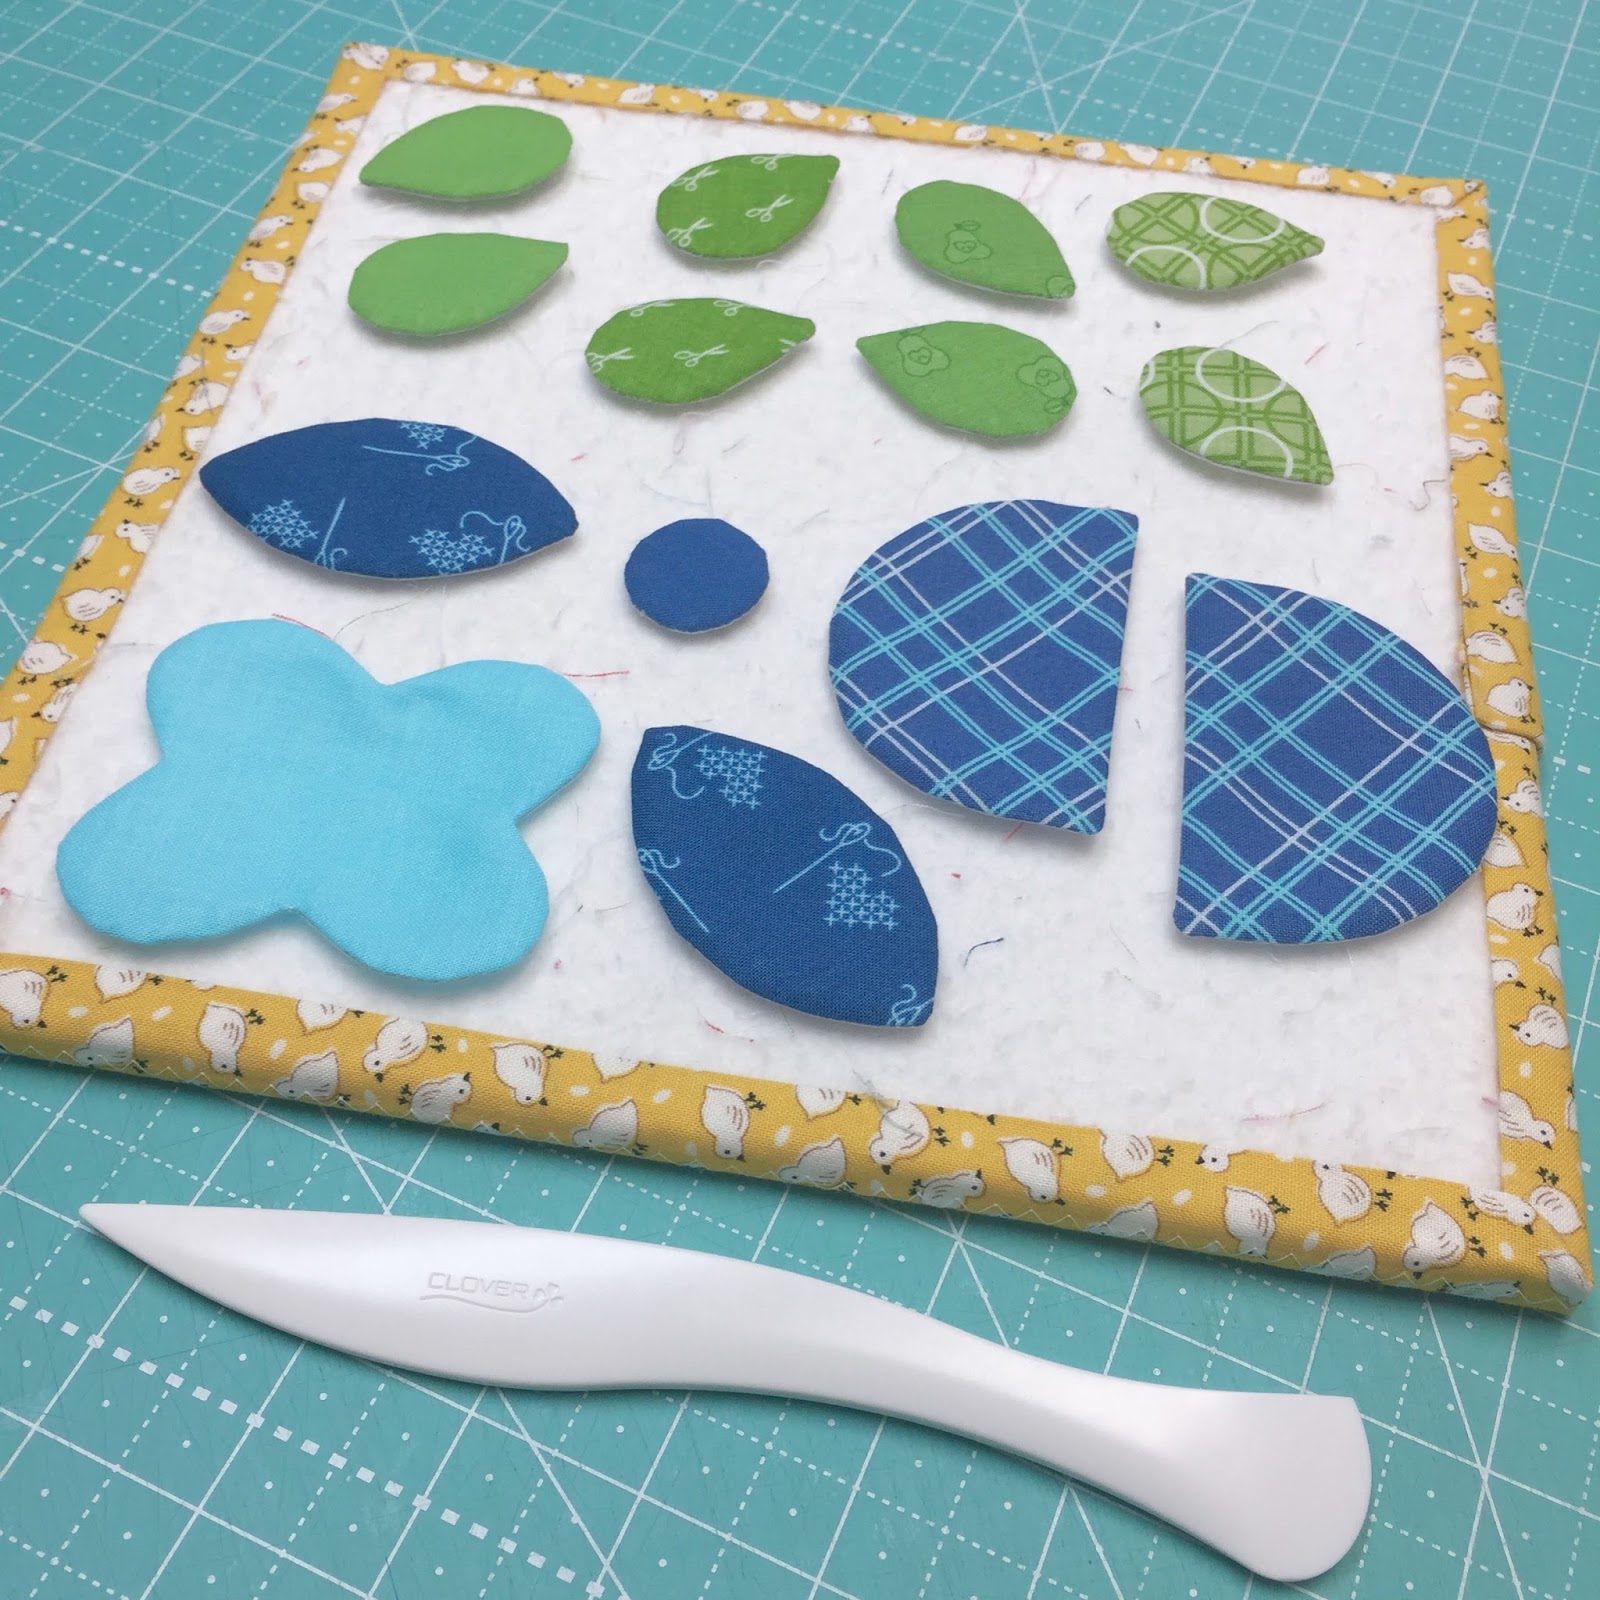
 the Blue Flowers Block.


You will need 
D-20 - D-23 - D-5 - D-1 
Sew Simple Shapes....
and again the D-13 for the center flower:)
Run the 5/8" wide stem through the 1/4" bias tape maker.

Press your background fabric in half both ways
 for centering when basting the pieces.


Don't forget to clip the cleavage areas on the aqua flower. 
No clipping needed on the other pieces.


Turn...shape and press!


I glue basted my 10" long stem 
right down the center fold of my background fabric
 and pinned the aqua flower in the center... 
and then pinned the navy flowers.
They are about 1 5/8" from the outer edge as in photo above.


The leaves are about 5/8" in 
and the aqua flower is about
 3/4" in from the side edge.


Now pin the center of the navy flowers and the center circle on the aqua flower...
UNLESS..
You are going to embroider 
around the solid fabric edges...


Do that first BEFORE 
you pin them down to appliqué.


Your unfinished block should measure 
4 1/2" x 16 1/2" at this point 
and is ready to sew into the quilt!
But first...
put it in your Fun and Done Pile:)


The last tutorial for today...
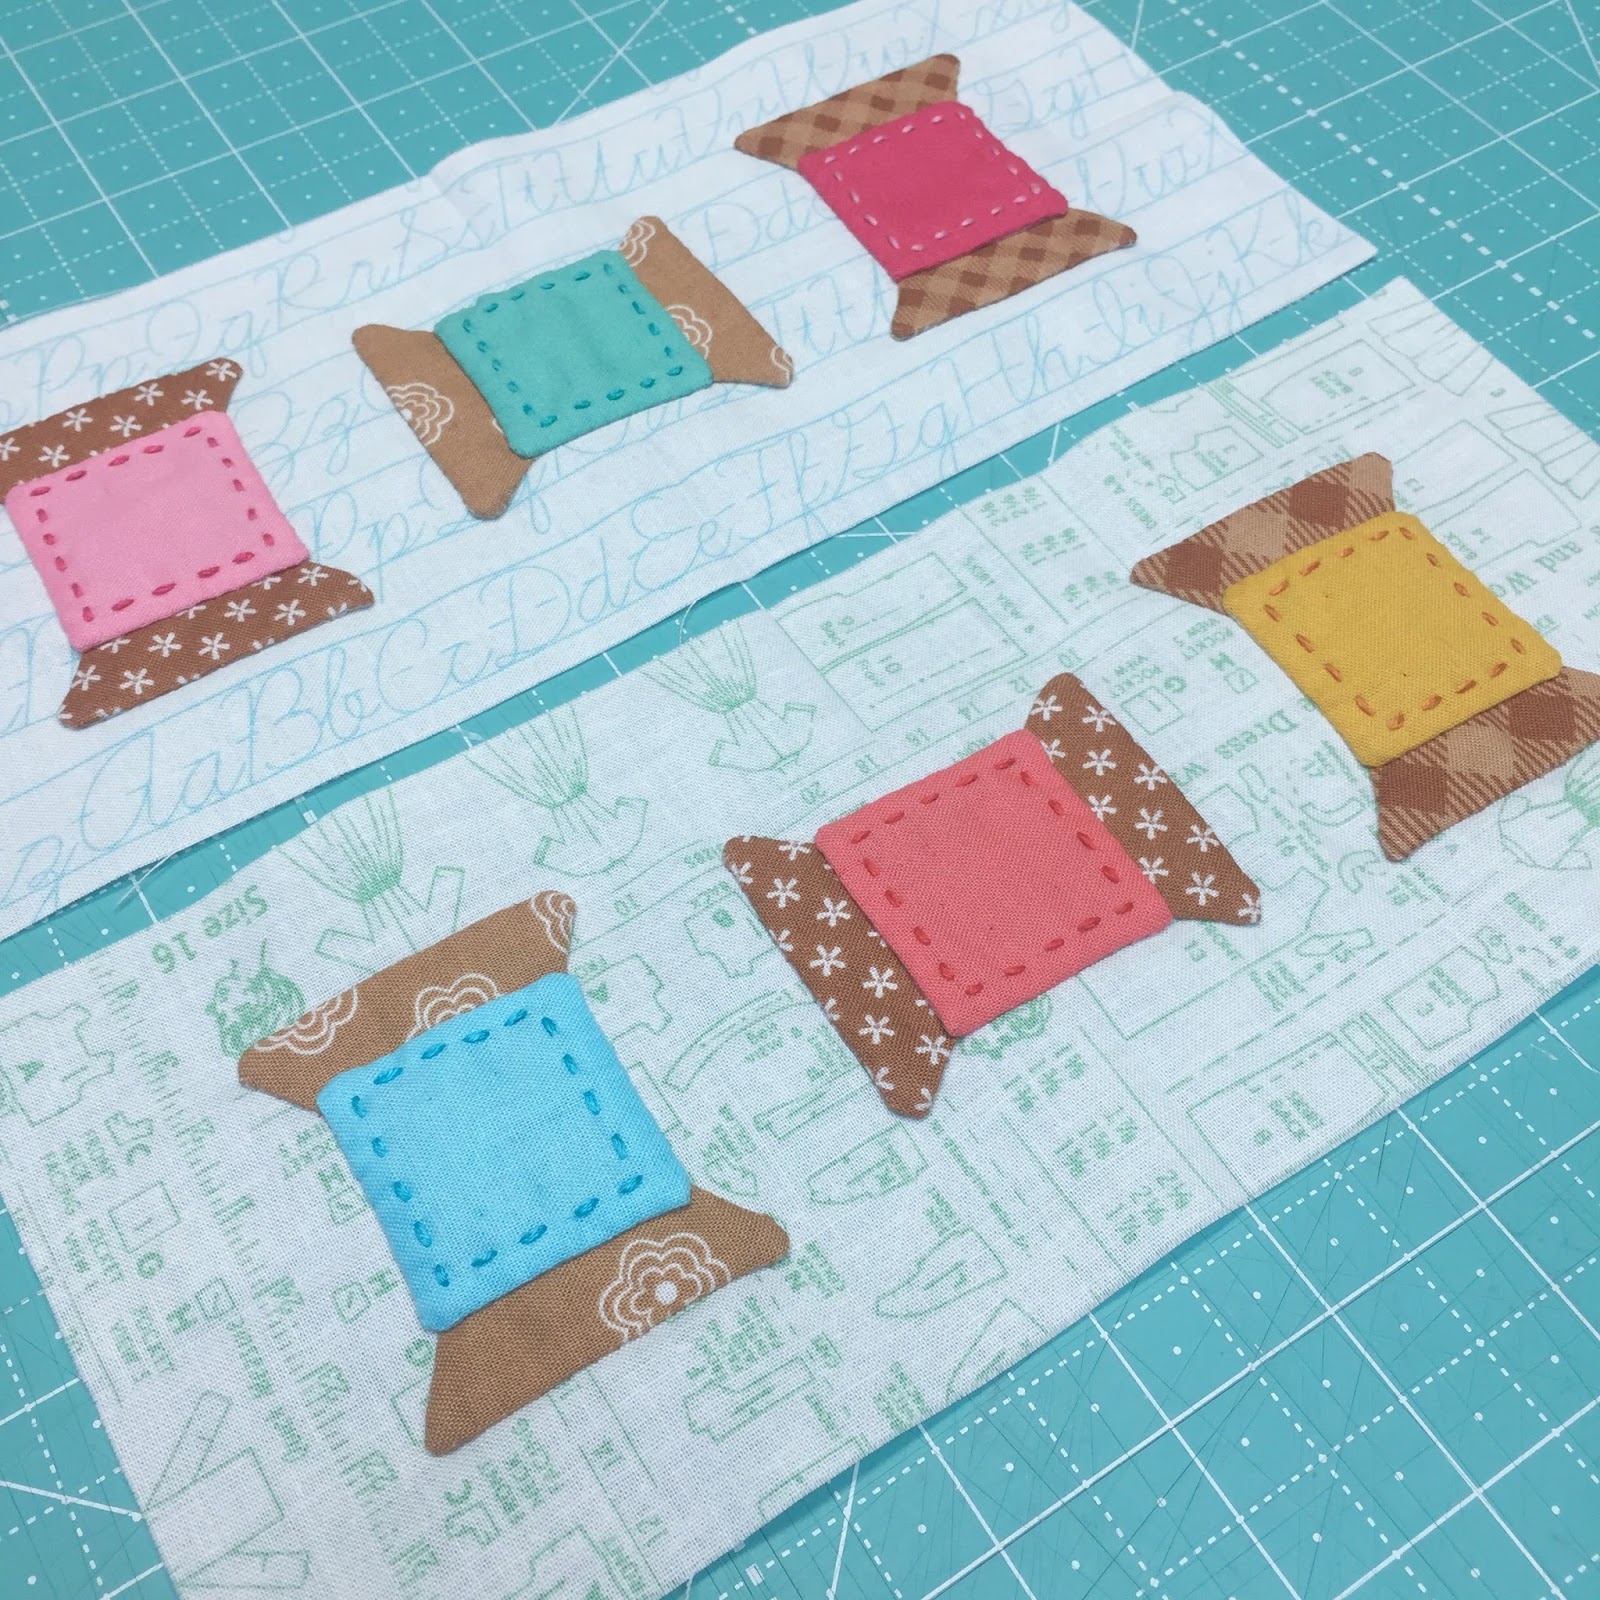
Spool Blocks

***NOTE*** 
I used solid fabrics
 for the thread on the spools 
and so I embroidered a running stitch
 around the edges before I appliquéd:)


You will need 
D-21 and D-6 
Sew Simple Shapes 
for these blocks:)


The spools have four cleavage areas 
that will need to be clipped after sewing.


I did not cut an X in the spools ...
just one straight cut for turning.


Turn...shape and press!


Press your background fabrics in half both ways for centering.
Pin the sideways spool in the center and then pin the upright spools 1" in from the top and bottom edges and 1 1/4" in from the sides.


YaY again!
Two more blocks for the Fun and Done Pile.

Each Spool Block should measure 
4 1/2" x 10 1/2" at this point.


We are making progress!

If you haven't 
been able to start yet...
no worries!
Like I have said before...
this is not a race and everything 
will remain on my blog.

It's so important to just enjoy! 
Take the time needed first 
and get all of the cutting completed 
as per the sew along guide.

After that...
it's super easy to 
BUZZ right along with each block.

Tune in next week for more tutorials.
Until then...
BEE HAPPY!
xx
Lori


Related Posts with Thumbnails