

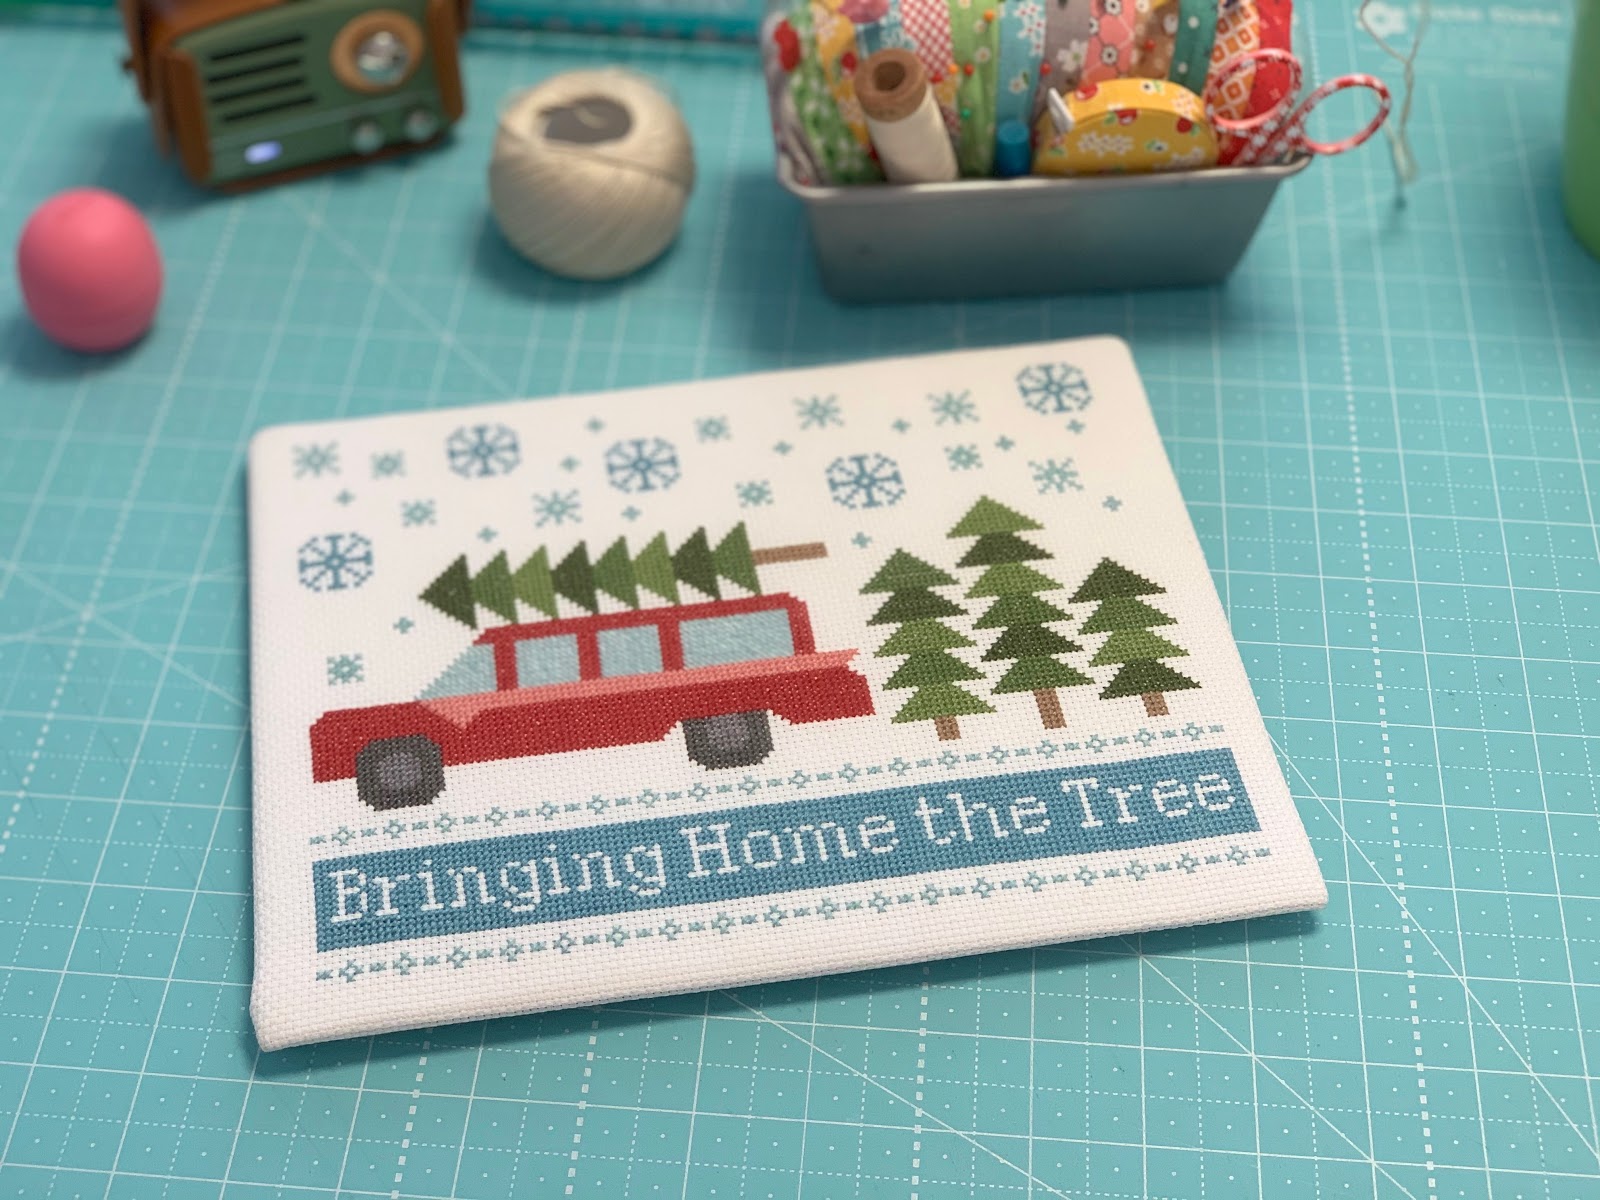
Today I want to share my latest
cross stitch pattern with you...

I designed it to go with my quilt
by the same name
Bringing Home the Tree

And you can find that
quilt pattern in my book

The same amazing company
It's Sew Emma
who publish my quilting books
also publish my cross stitch patterns!
They are hosting a Stitch Along
for Bringing Home the Tree.
to read all about it!

Lately I've had a lot of people
ask me how I frame my cross stitch.
I've posted tutorials and taught this
over the years but because
I'm now designing my own patterns
I have had a lot of different people
ask me who are not quilters...
and are new to my blog and so
I thought this would be
a great time to show you again!

First of all I use acid free mat board
and cut it the same size
as the frame opening...
then I place a piece of cotton batting
on that cut the same size.
This frame happens to be an 8" x 10"
so that's exactly what I cut
my batting and mat board.

I lightly glue the batting
in each corner of the mat board using
Aleene's Glue
because it's acid free.
You can get the mat board sheets in the
framing section of places like
Hobby Lobby, JoAnns or Michaels.
I just use an old rotary cutter blade
and a quilting ruler to cut mine.
You could use a craft knife or whatever
you are most comfortable with.

I use the "lacing method" because I
prefer not to glue my cross stitch down...
even with acid free glue.
I don't want to damage my piece and
I also like the freedom of being able
to change my mind if I want to later
by "unlacing" my stitch and
finishing it another way.
I have cross stitched for many years
and you would be surprised how often
I have done this with a piece
after the way that I finished it
goes out of style or I just
simply want to refresh it!

I use cotton crochet thread
because it's strong and I don't have to
worry about it breaking
during the lacing process.
I always use a doll needle when
using cotton crochet thread...
it's long and has a larger eye
to accomadate the thread.
If you have watched my pin cushion
tutorials you know that this thread
and needle are my favorite combo
when making pincushions as well
so I always keep both on hand.
You can see how I begin in the photo above..
and you can see why it's called
"lacing" because it's pretty much
like lacing a shoe...
back and forth but with
thread and needle.
I use a single strand
and just knot it off when I run out
and thread my needle again and continue.
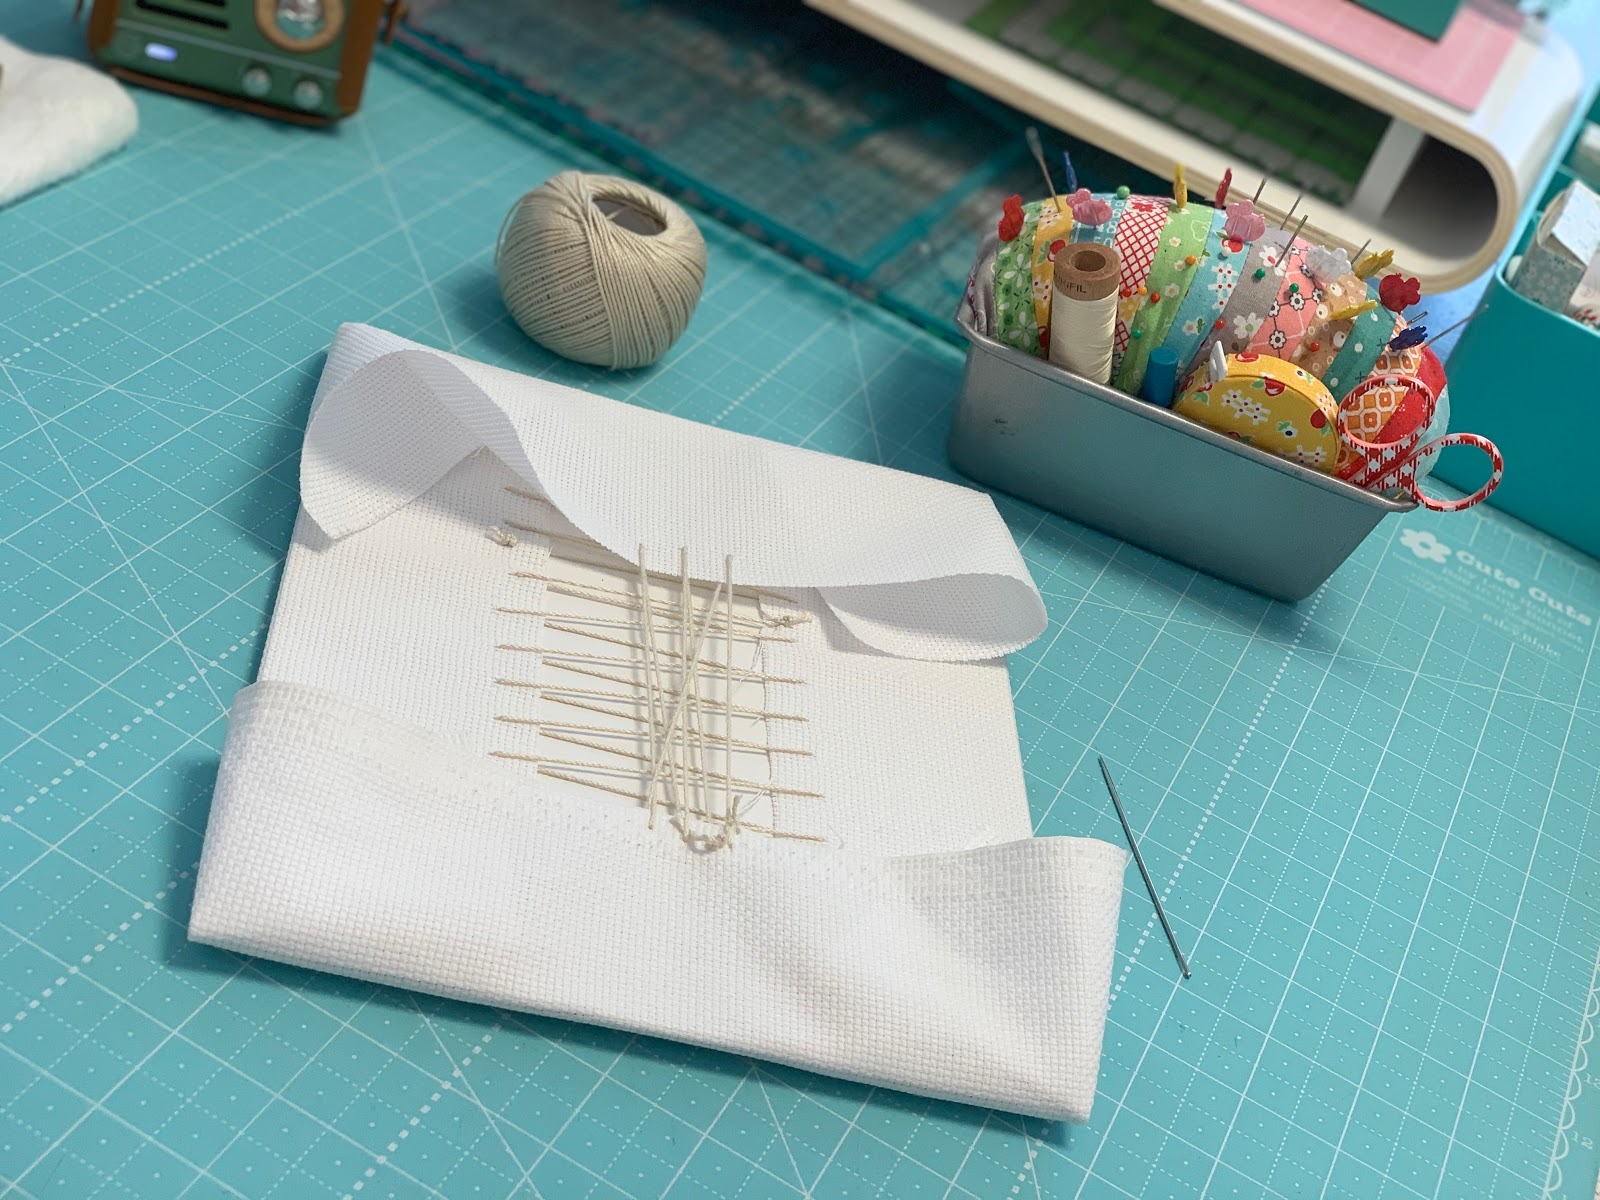
Then I start going the
other direction like this.
Lacing is wonderful because it
allows you the freedom of turning
your piece over and adjusting it
so that your stitching is centering
on the front as you go along.
I adjust it simply by pulling
the cloth and smoothing it with my hands
on the front as I go along.

Once both sides are laced
I start on the opposite corners.
Notice how I fold my corners so that
they don't show on the sides.

I finish up with the
last corners and knot off my thread.
This is how the front looks
and I could even adjust it now
without un doing the lacing.
The lacing is very forgiving and if
you have never done it before
you may be surprised how much
you can adjust it at this point.
This is another reason why
I like to lace it.
This method is used by many and
is also the method that professional
frame shops frame needlework...
it really works great and
with awesome results:)

I place it in the frame and just
use the little metal things
in the back to keep it in place.
Most frames have a bit of adjustment
back there too so that your piece can
slide back and forth if needed.
You can also use glass if it comes with the frame...
I just choose not to because
I love the look and I like to
see the texture of the stitching.
Later on down the road
if you ever feel like you need to
give it a "dusting"...
there always the vacuum attachment
that will do the trick!

It looks great in a frame alone
but you can always add a bow
or greenery because its Christmas!
Because we are makers we all love to embellish and decorate right?
I've used the same "recipe" that
most of us use to decorate
all things like
wreaths...gift baskets...
shelves...mantles...tabletops:)
for the seasons as well as
embroideries and cross stitches.
The simple recipe is:
Ribbon + Flowers/Greenery
I like to use several ribbons
with different textures
and sizes and colors and I usually
do the same for the flowers or greenery.
Sometimes depending on the season
I'll add things like
acorns..flags...hearts or snowflakes:)
To me when embellishing something
either large or small...
scale is everything.
To those of you who have been asking me
how to know when how much is too much...
here is my answer:
Do what you think looks cute
for your own project and trust
yourself to embellish it how you like.
But here is what I do
when it comes to embellishing:
I like to use large scaled
ribbons and things for large items...
like wider ribbons...big flowers etc.
And smaller scale for
smaller items like cross stitch
because I do not want to take away
from what I am embellishing...
especially when it's needlework.
I want to keep the focus on the stitching
and the details in the design
and just embellish it without over doing...
being careful to keep it in balance.
I hope this answer helps!

Instead of a flower I used a
snowflake tree ornament...
and used my Farm Girl Vintage
gingham to cover a button for the center.
I use covered buttons alot as you know
and I especially like to use them
for flower centers...
and in this case snowflake centers!
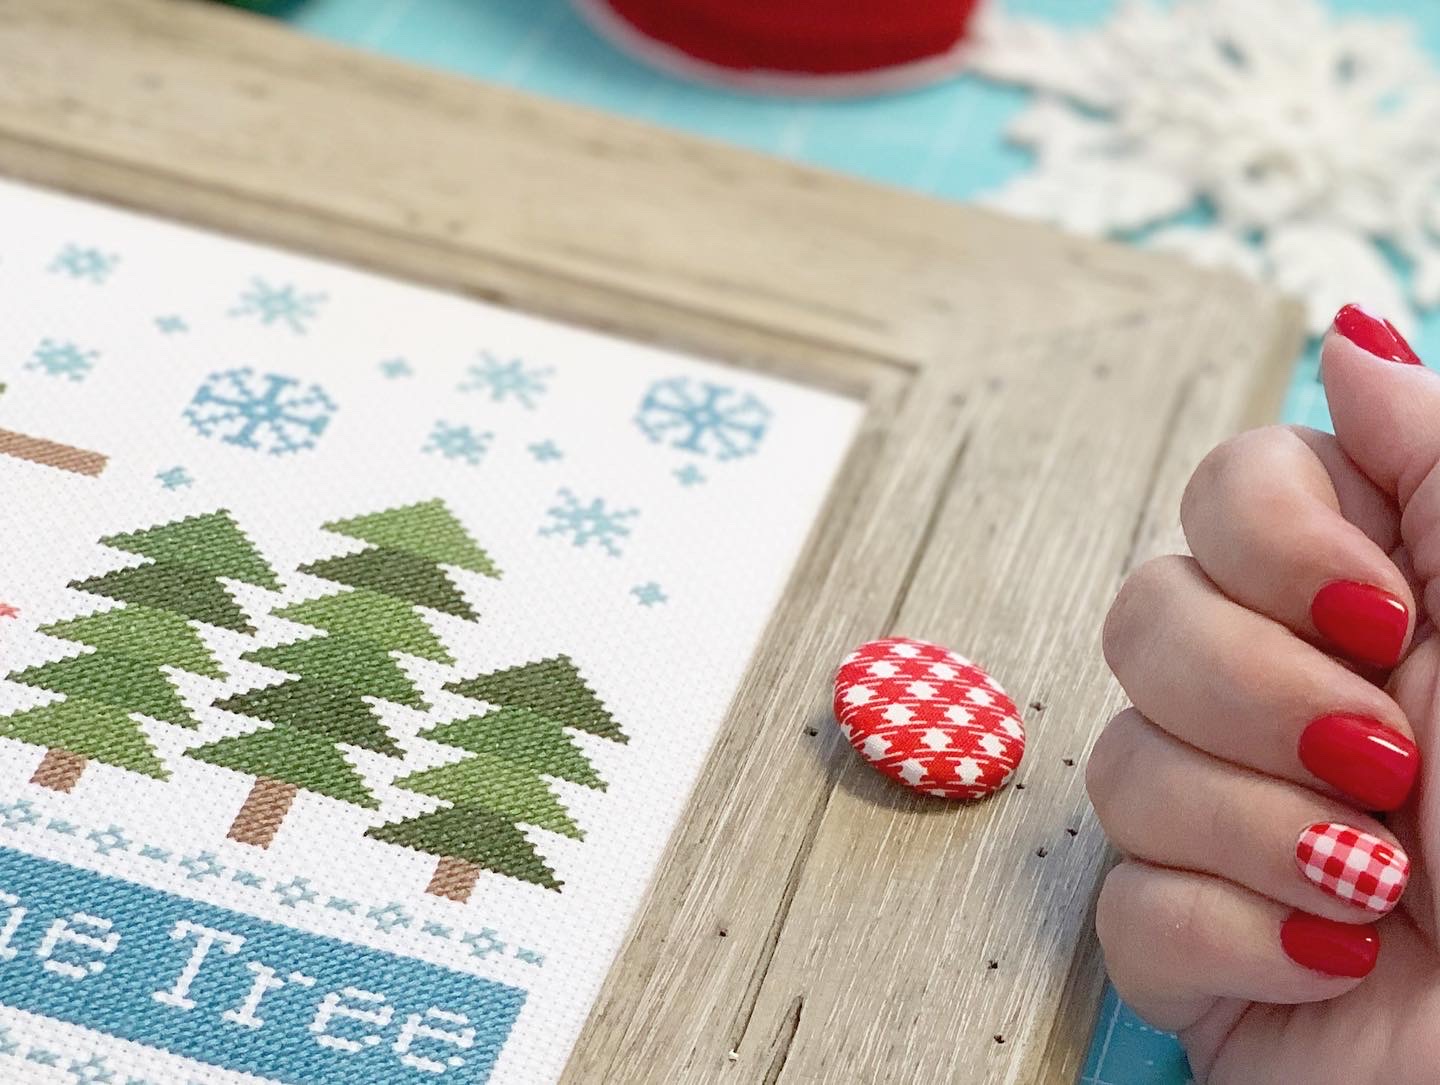
And yes!
My button now match my nails:)haha
I used a glue gun and glued
it to the center of the snowflake.

I glued the snowflake to the
ribbon and then onto the frame.
I just stuck the greenery in there...
no glue needed...easy peasy.
I had the snowflake ornament already
but I'm sure you can get one
at any store during Christmas time.

I got my frame at Hobby Lobby

Here is the price and the SKU number...
use a coupon and it's
really inexpensive for a frame!
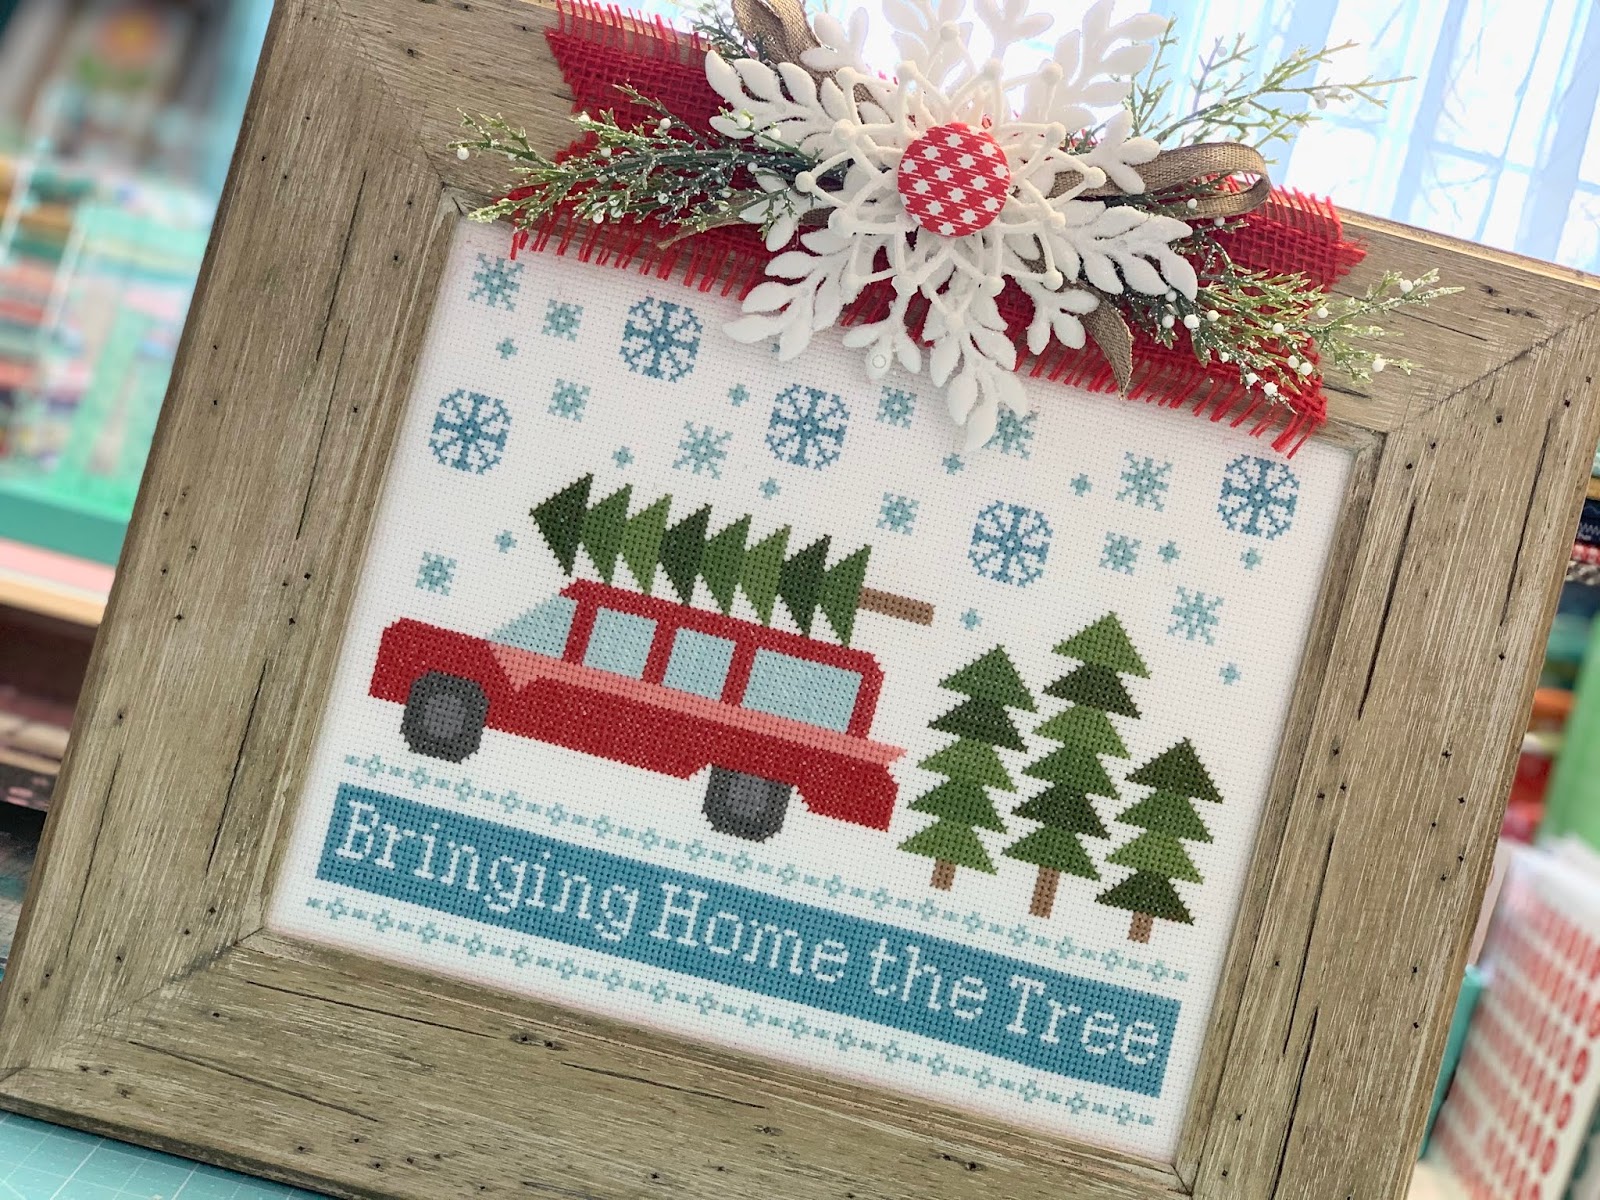
I love how this turned out
and I can't wait to add it
to my holiday decor:)
if you would like to get a pattern
and then
if you would like to join in
on the stitch along hosted by
Kimberly on her awesome
Tune in there every Wednesday morning
for the livestream or watch it later
because it remains there afterwards as well.
Happy Stitching!
xx
Lori

4 comments:
Thank you so much! Perfect timing as I am making a needlepoint for my sister this Christmas. I'm getting far enough along, I'm thinking about the framing. I used to use the adhesive padded boards, but they are impossible to adjust if you are a little off. Thanks again!
Thank You, I will have to try it!
Thank you for the tutorial on prepping your needlework for framing. Do you put it under glass or is the glass not used that typically comes with a frame? If there is no glass how do you do dust your needlework?
Lacing makes me think of those old timey corsets women used to wear. They had to have someone lace them up nice and tight for them. Lovely and yes, I like the less is more embellishing because I've seen some huge HUGE gawdy embellishments that hides part of the stitching and that's a shame.
Post a Comment