

Happy Friday and welcome to my blog
for week four of the...


We are using my new book


And Farm Girl Vintage Fabric

To sew two Farm Girl blocks per week:)

COLD WATERMELON
is up first and can be found
on page 31 in the book.

I have been working on my pile of
Farmhouse Kitchen Potholders
and so I thought I'd whip up a
6" Cold Watermelon Block
so that I could give you a few of my
piecing tips when making my 6" blocks.
As with any piecing...
when making the blocks there are
a few basic rules that always apply:
First one is:
Cut accurately and use an
accurate 1/4" seam allowance
It's simple advice that you
always hear but is VERY true.
About steam and starch:
If you like to starch your fabric
or use steam in your iron then the time
to do both of these is
BEFORE cutting out your pieces.
If you carefully cut your pieces and
then AFTERWARDS you apply moisture
like (steam) and then heat (iron)
your pieces will shrink
because it's 100% cotton...
and we all know that's
just what cotton does:)
Keeping track of pieces when cutting:
I'm sure that you all have
your favorite methods for this
and that is great because we all need to keep pieces organized.
Lately I have been crushing on using my new
I simply put a letter A sticker
on the stack of "A" pieces etc.
I keep them on throughout the entire
process of sewing and pressing.
Yes ...
you can iron over them and
they do not leave a residue:)
They are great for keeping all of
those little pieces organized
and labeled while sewing.

Onto the sewing part...
I always have 2 pieces of fabric
that I have sewn together
under my presser foot.
This has 2 advantages.
First:
When you are feeding small pieces into
your machine the thread will not
"eat your piece"
at the beginning of the seam because
you are feeding it directly after
2 pieces that are already there.
This helps so much!
Second:
By knowing and planning beforehand
what I'll be doing with these squares...
I'm making a quilt at the same time...
I always call these my "BONUS" quilts.
I love multi-tasking!
Next tip when sewing with small pieces
is to make sure that your needle is sharp
so that it glides through the pieces
easily to save on distorting the piece.
This sound so simple but you would
be surprised how much it helps!
Another tip for accuracy is about thread!!
I use Aurifil thread when piecing.
It is a 100% cotton thread which matches up with the fabric I am using.
That's important.
It's a very strong but thin thread and
so it allows less bulk in your seams.
I started using Aurifil 10 years ago
and have never looked back:)

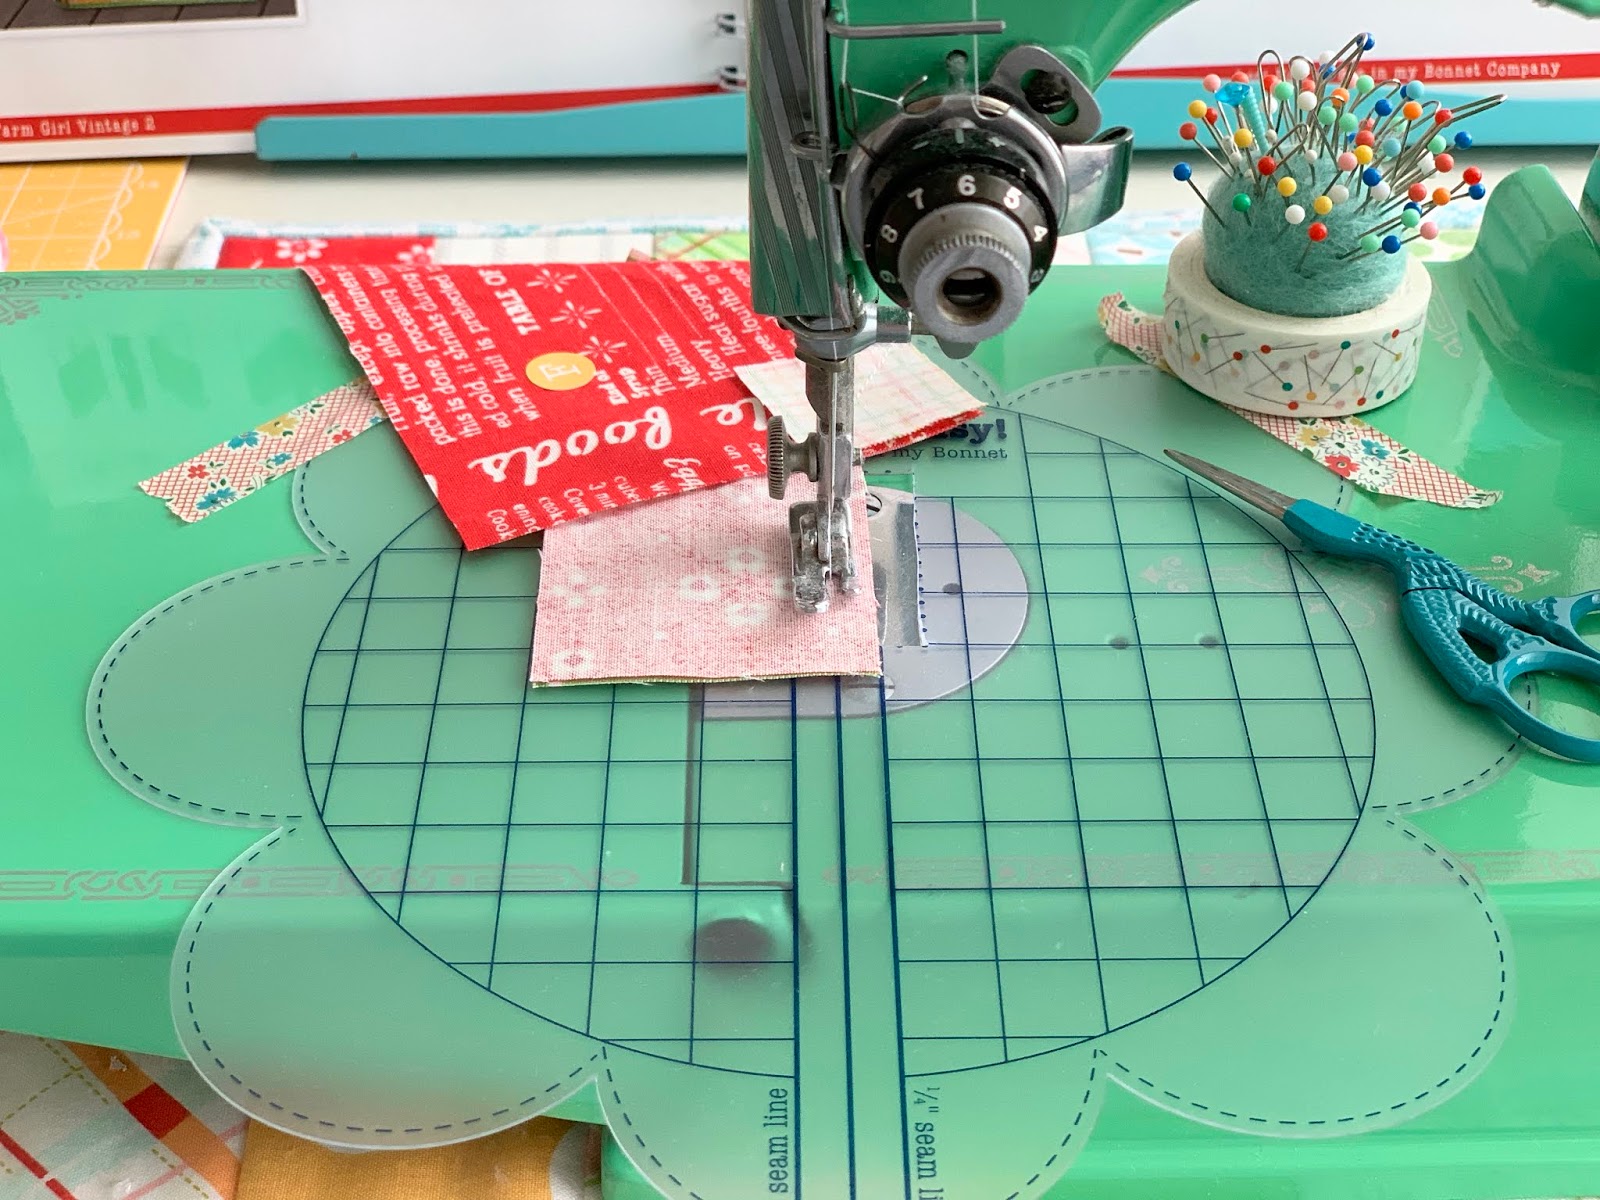
When sewing easy corner triangles
I use my
like this so that I do not
have to mark a sewing line...
it saves time and is super accurate.
I use washi tape to hold it down...
when I change the bobbin I
simply lift it up then stick it back down.

These are the 2 squares
that I had under the presser foot.
I usually put them in a pile to
press later but I pressed this one
now to show you:)
After sewing however many pieces
(I normally sew more than just one
because I chain piece)
then I feed another two squares in
and keep it under there until after
pressing all my the
pieces that I've just sewn.
I just continue feeding these squares
in every time I stop and start.
I've done this and taught this
for years and have always called them "starters and stoppers"
they are now also known as
"leaders and enders"

Two sets of two squares...

I'll eventually sew them into
four patches and I'll show you
in a few weeks what "bonus quilt"
that I am making...it's from the book!
But right now let's talk about
pressing your 6" blocks.

Pressing is an important part when
sewing small pieces so do not
under estimate it's value.
One tip I have for pressing is:
I like to use a wool pressing mat
and a Quilters Clapper.
Both wood and wool absorb the heat
quickly from cotton.
This makes your blocks
flatter after pressing.
YaY!

After pressing I lay my block or section
(in this case the watermelon)
back out onto my design board and
smooth it out and let it
cool completely that way.
Now onto piecing the fork!

Try not to let the small pieces
freak you out lol
Here's the way I look at it:
You just sew them together with a
1/4" seam just like you do a large piece...
it really makes no difference
how much fabric is hanging over
to the left of your presser foot...
it could be 12" or 3/4"...
it just does not matter because
you only need to worry about
the 1/4" seam on the right.
If you have problems holding onto
the small piece to keep it straight
while feeding through the machine
then use a tailors awl or
the point of your seam ripper.
You can see here that I also use my
Seams Sew Easy Guide
for an accurate 1/4" seam.
Some like to sew a "scant" 1/4" seam.
I don't really do that...
I just try to stay as accurate as possible.
I try to cut-sew-and then press accurately and that seems to work out fine.
Remember that this did not
happen overnight for me...
of course it takes practice!
Practice means just
"jump in and do it"
the very best that you can...
with what you have...
with an attitude of learning and fun.
Before you know it
all of these tips
will just come naturally.

When sewing 6" blocks or
even small pieces in a larger block...
I like to press my seams open.
The simple reason why is that
your seams will lie flatter and so
your block will not be distorted.
Speaking of distorted...
be careful to PRESS and not to
"iron back and forth"
because this can so easily
distort your blocks especially
if you have a huge iron and tiny pieces.

Here are my fork pieces.
I use the Clapper when pressing pieces too...
not just when the block is completed.

When sewing pieces that have angles
that need to line up like the handle
onto the fork bottom...

I use my DOUBLE PINS
They are thin enough so that you can
sew over them if you need to.
It's just one pin but
it's like placing two pins
on either side of the seam at the
same time so that it doesn't slip
out of place when going
through your feed dogs.
They work amazing!

6" COLD WATERMELON Block
is done and ready to be
made into a pot holder.
I really don't use them much for that
but more for decor in my kitchen:)
I often hang them on a clothesline
that's across my bay window
and switch them out for the seasons.

Here's the back of my 6" Block.
I hope my tips and tricks on sewing my
6" Farm Girl Blocks have helped you!
I do all these things when sewing all of
my 6" blocks from all of may books.

Let's move onto the next block
for this week.
CORN and TOMATOES
is on page 34 of the book.
This is a good example of a few
of the blocks in the book that
are easy to switch up a bit...
so let's talk about some
Quilty Math real quick!
If you look at the block
you can see that the corn is
EXACTLY one half of the block
and the tomatoes are the other half.
I drew them up this way on purpose
because I love the way they
look together but they can
also be fabulous on their own!
This means that I can make a block
with two ears of corn
and I can also make a block
with four tomatoes
Remember my Fresh Pears Block in book one?
Same thing:)

So that is exactly what I did...
cut two more blocks to add
to my Pot Holder collection.
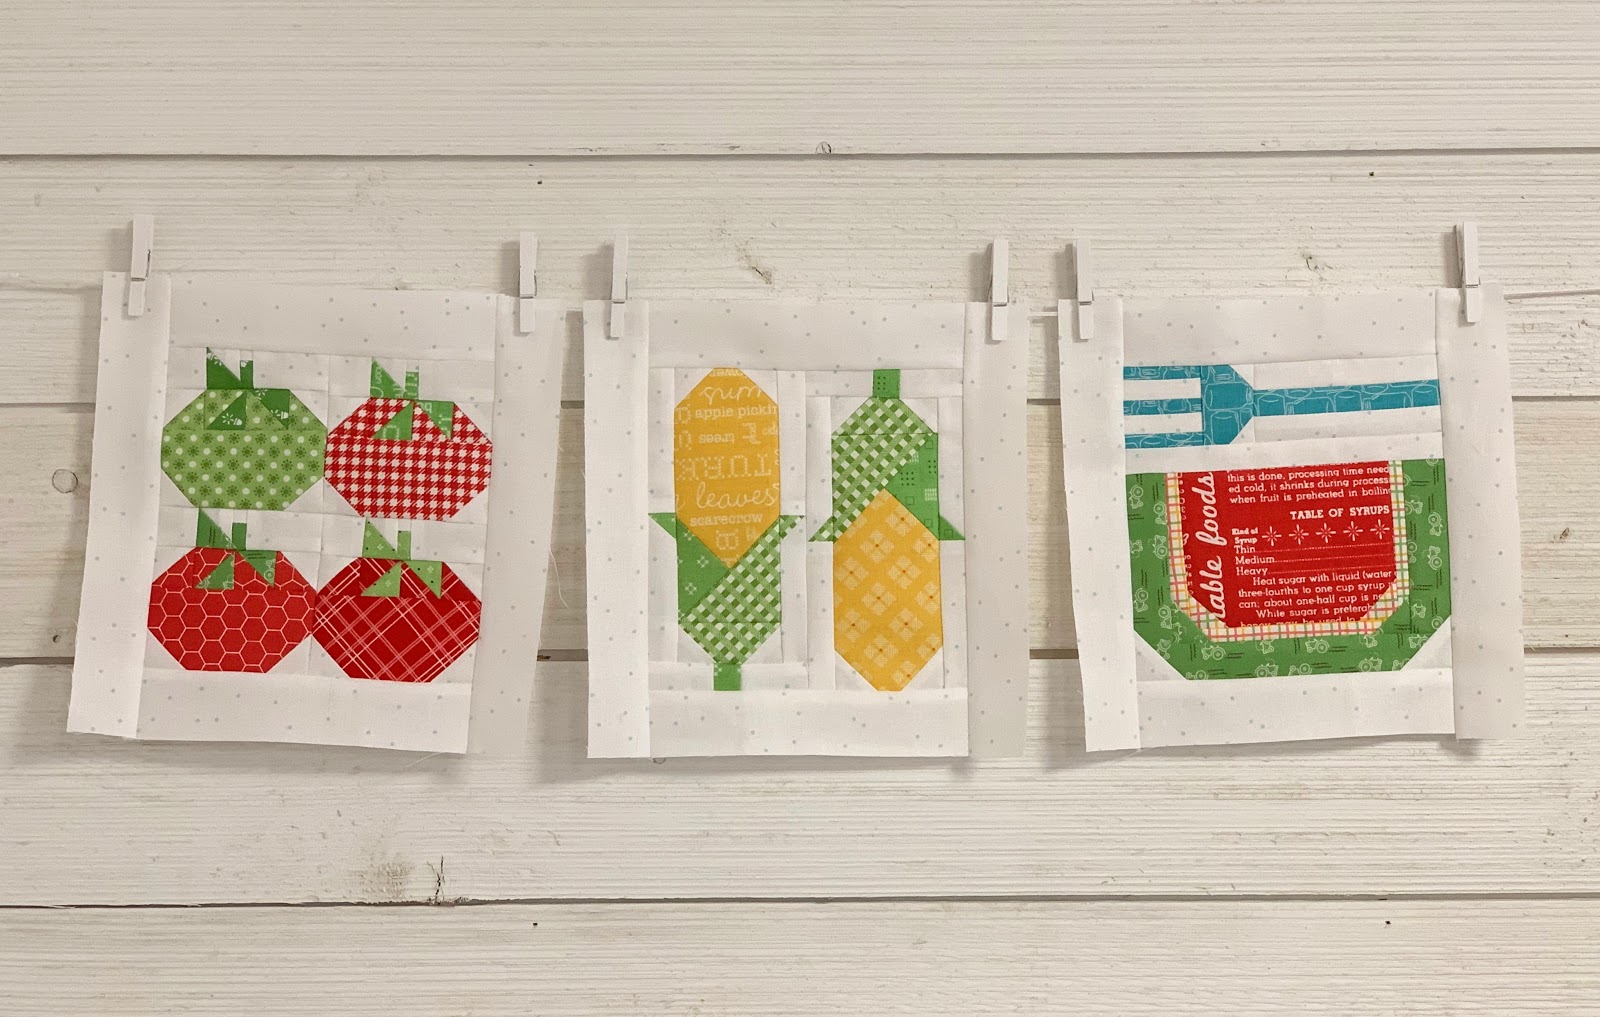
I decided to add a green tomato in
and I also used some pieces from my
Autumn Love Fabric collection for these blocks:)

When sewing these...
I just followed the same directions...
twice for the corn and
four times for the tomatoes:)
Easy peasy!

I love the way they turned out and I
thought you might like to see them too!

Thanks for joining me this week...
please continue using the hash tag
when posting your blocks.
They are so fun to see!
If you are making your quilt exactly
like mine then you will need to
make the Cold Watermelon in 6"
and the Corn and Tomatoes in 12"
To make it easy to remember make sure
to download and copy
the easy reference chart.
to get it.
I'll see you right back here
next Farm Girl Friday for
2 more Farm Girl Blocks!
xx
Lori

3 comments:
Love the mix and match part of the blocks you designed. Thank you also for all the tips in sewing these little 6" blocks together. Love your seams sew easy guide and use the larger Riley Blake Sticky dots to fasten them down. Always enjoy sewing your lovely blocks!
I love your Seams So Easy Guide - but am so glad I read this about what to do about keeping is down after the glue dots won't stick anymore - use washi tape, brilliant. It's been a struggle after cleaning my bobbin case and pretty much keep the guide on my machine all the time. (I actually have 2 - one for my home machine and one for my retreat machine). Thanks so much for making it a time saving tool and cute at the same time!
Lori,
Thank you for your instructions! I’ve been sewing a long time and need to be reminded of the basics! You are so generous in sharing your knowledge with us. Humm, thinking I need that wool pressing mat.
Post a Comment