
Hello there and thanks for stopping by!
Last Monday was the end of our
But I still have a few things
that I want to show you like this
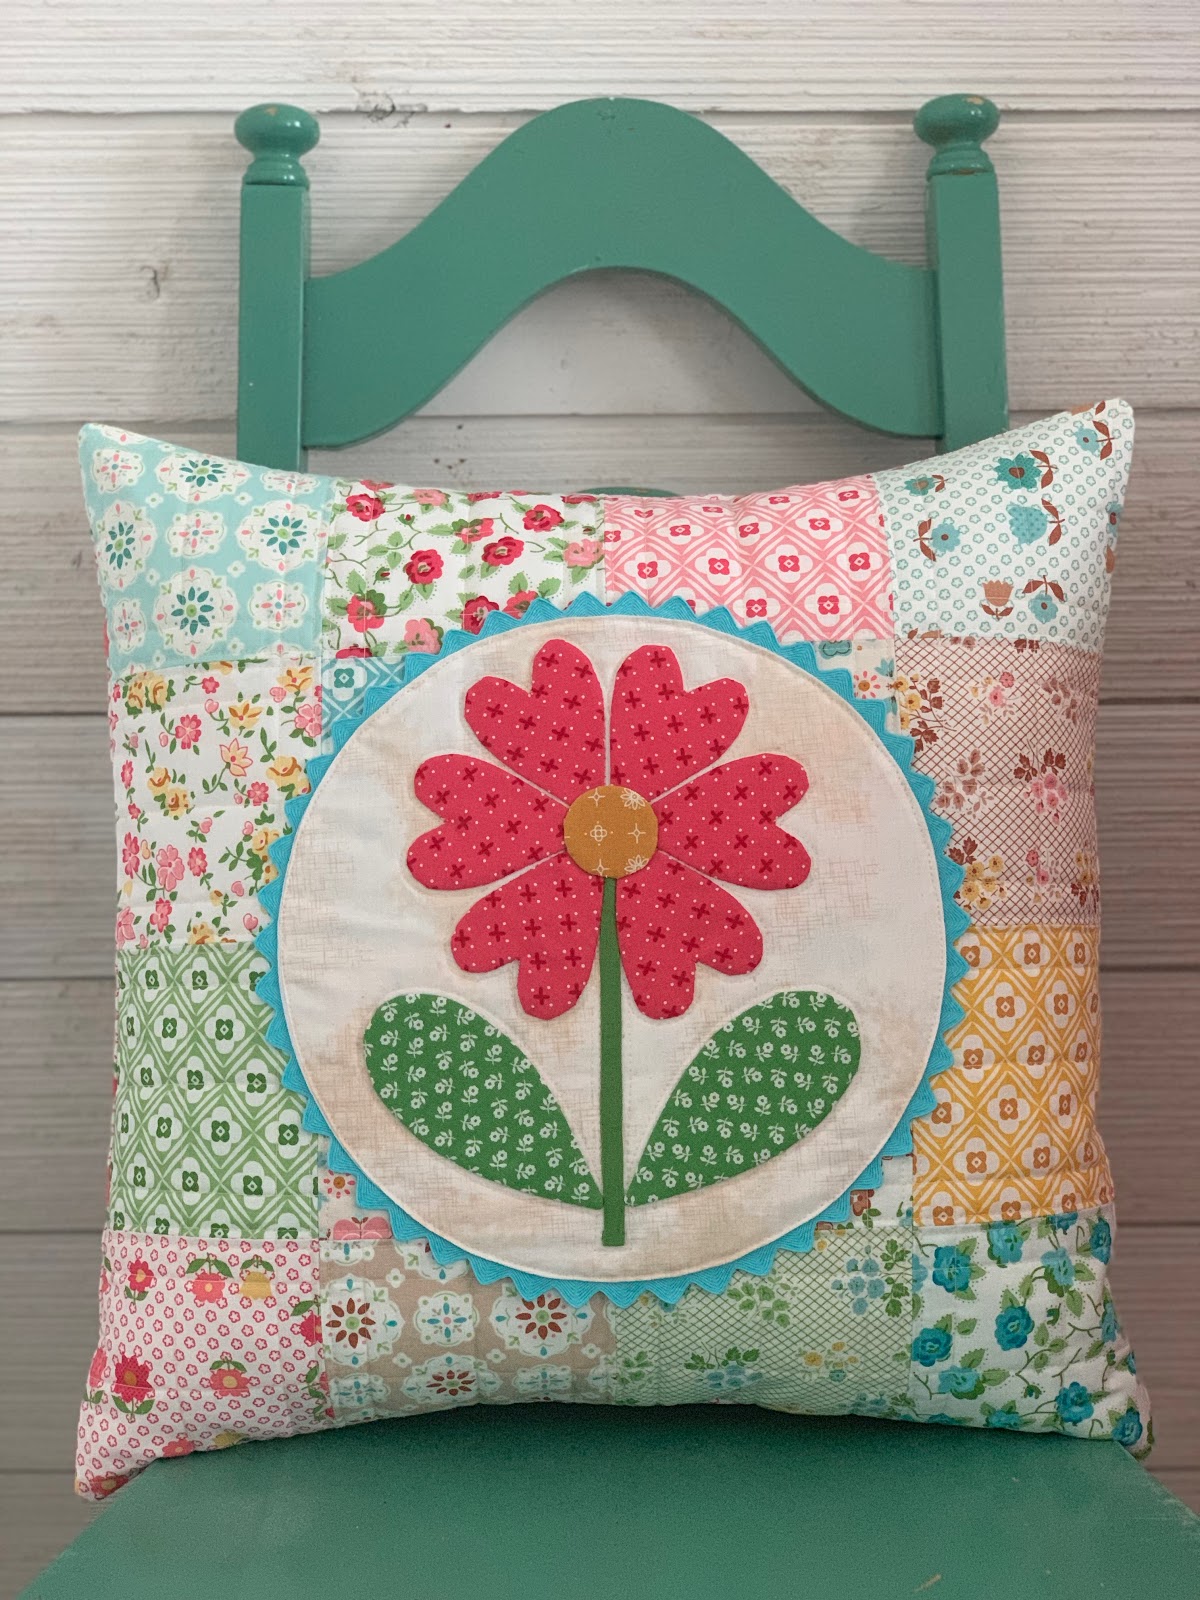
Granny Flower Pillow!

There are several projects that I
want to do with my Granny Chic fabric
and I still want to show you
what I'm doing with the
extra surprise template...
hopefully that will be next week
because I ended up
making this pillow first:)
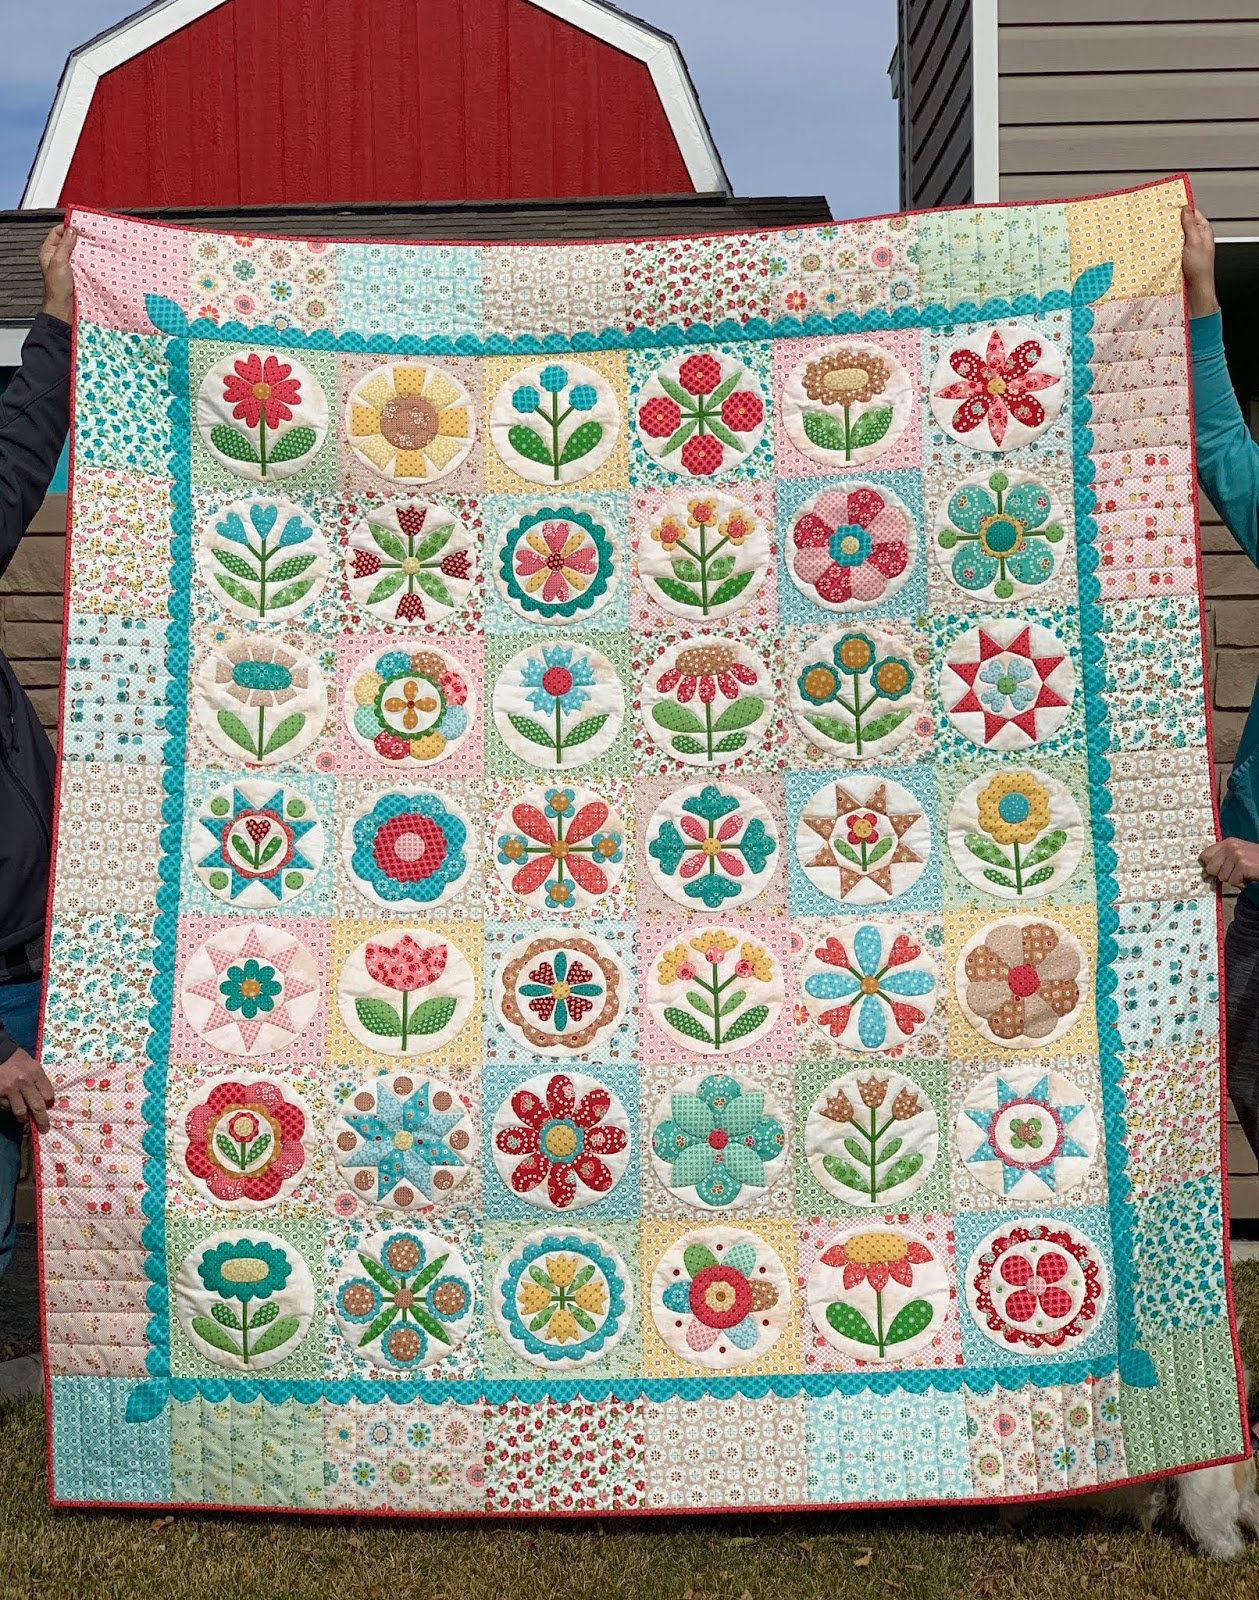
You could make this pillow
with any of these
42 Granny Flower Blocks
from the Granny's Garden Quilt...

But I chose to make mine using
Granny Flower Block #1...
who knows which one I'll choose next
because this one turned out
just how I wanted it to
and I would love to make even more:)
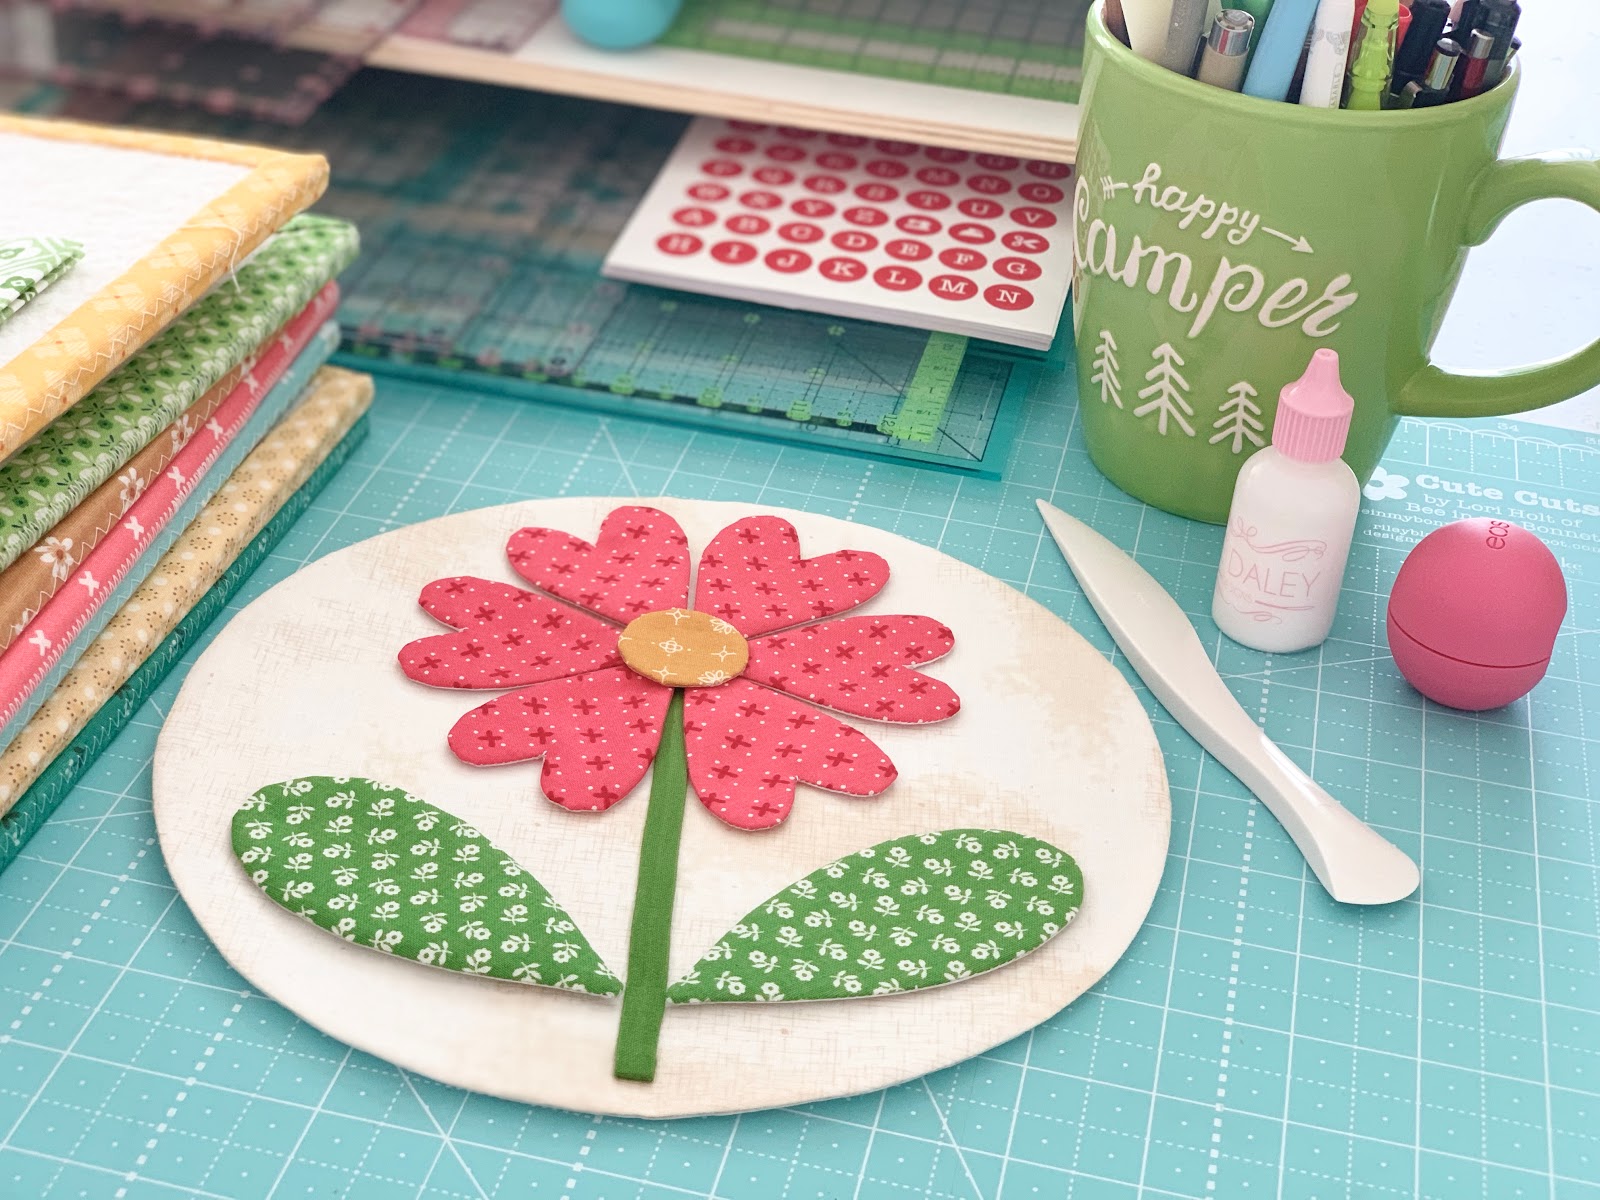
First step in making this pillow
is to prepare your block for appliqué.
If you need a reminder of
how I did this block
to watch the YouTube tutorial.

After I glue basted...
I hand appliquéd the flower
to the background circle.
That is all the handwork that I did...
the rest is all by machine:)

For the body of the pillow
I cut 16 - 4 1/2" squares
and sewed them together like this.
Then I cut a piece of batting
and a piece of backing fabric
(that will go inside the pillow
not for the back of the actual pillow)
I cut them a few inches larger
than the pillow top and quilted it.
I used a walking foot and
just straight quilted it...easy peasy.

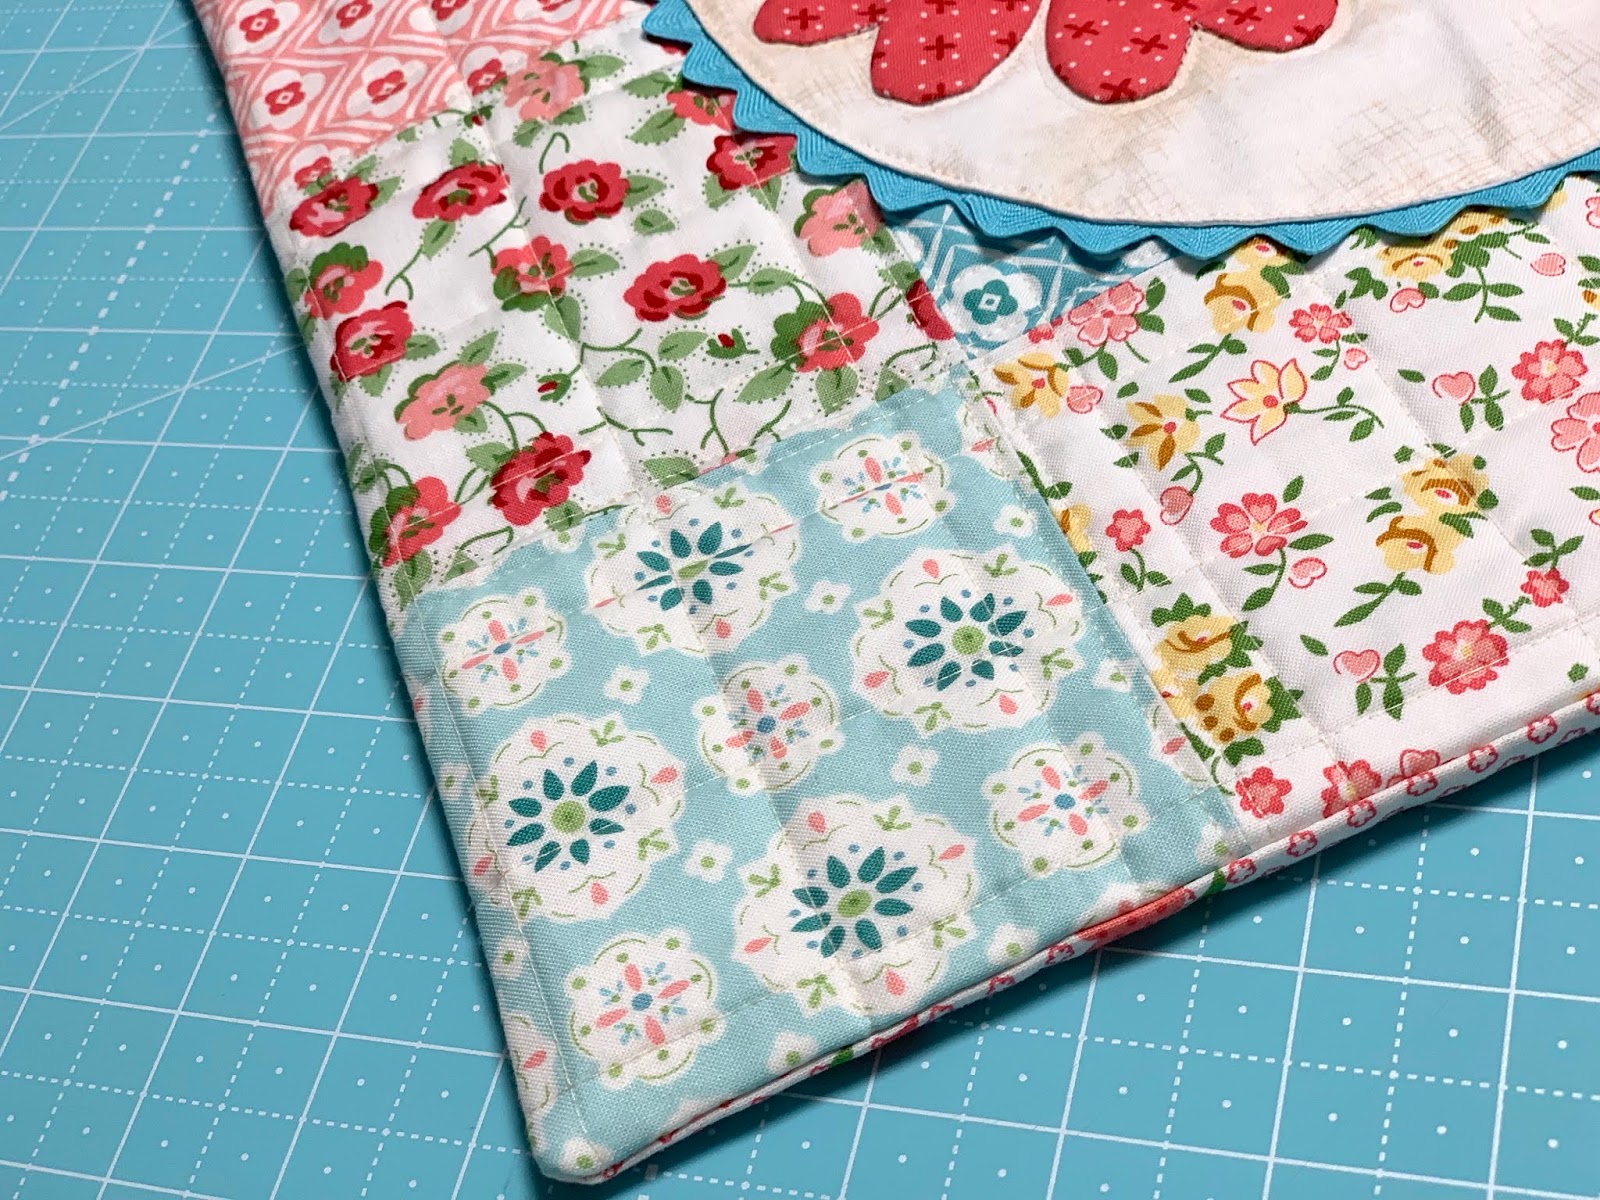
After quilting ...
I glue basted the
Granny Flower Circle
in the center.
I thought it looked like it
needed a little something
and so when that happens...
I usually add my Vintage Trim!

I used my Sue Glue and glued my
Large Vintage Trim
around the edges of the circle...
Then I machine quilted the whole circle
onto the center just inside
the edge with matching thread.
I caught the other half of the
Vintage Trim that was tucked underneath
the circle while simply quilting
around the edge of the circle
and that's all I needed
to sew the Vintage Trim down.
I also quilted around the flower and the leaves and all around the stem.

Then it was time to
sew the back onto the pillow.
I simply sewed it with
right sides together and
turned right side out afterwards.
Here's a close up of how
I ended the Vintage Trim.
If you are worried about fraying
just add a little Fray Check on the end:)

I always sew an envelope back
when I make my pillows...
because I like to switch them out often.
Of course you can make your back
the way that you like best.
Now for the pillow form!

The pillow finishes at 16" so you could
use that size of pillow form
but I like to use one size up because
I like my pillows plump and firm.
I used an 18" form for mine.

I hope you make one or two
Granny Flower Pillows too...
they are so sweet and would
make the sweetest gift.
I just may have already
made a few for giving!
Thanks for the visit and
I'll chat with you again soon:)
xx
Lori

4 comments:
This pillow is so pretty! Love the idea of applique over cute patchwork fabric squares. Now you opened up another whole box of ideas :)!
I love this Lori! I just can't keep up with your creativity. Thank you for sharing yourself and your talents with us.
You are so talented Lori. The pillow is sew pretty, you have a very creative mind...❤ it !
So sweet and pretty..
Post a Comment