


"NEEDLE BOOK BLOCK"

Welcome to week nine of the
"MY HAPPY PLACE"
Sew Along!
Join me here each week
when I will be doing tutorials
on the blocks for the quilt.
I will be posting each Monday
right here on my blog
and you can follow my tutorials
any time during the week that
is convenient for you.

For this sew along...
We are making the
My Happy Place Quilt
74" x 88"

The quilt is made with my newest fabric
collection called STITCH...


If you are just joining us
and need a fabric kit...
just do a quick google search
to find out which quilt shops
may have one left for you.
Simply type in
"My Happy Place Quilt Kit"
to find one!

As all of my
Sew Simple Shapes Sew Alongs go...
We are using the shapes
for the pattern of this quilt
and of course the Sew Along Guide and my tutorials each week.
The set of shapes that we are
using for this quilt are called
MY HAPPY PLACE
I have already posted the
post which details all of the supplies
for the sew along and how it works.
I have also given the link there
for the free PDF Download
of the Sew Along Guide
to read that post.

This week we are making
two appliqué blocks.
The Needle Book Block and the
Floss Block.
Grab your block kits that you
have already cut
as per the sew along guide
and let's get started!!

The Sew Simple Shapes
for the Needle Book Block
that you will need:
1 - L8
1 - L10
1 - L13
1 - L14
Trace your 2 rectangles onto your
Sew-In Interfacing as per the
instructions on page 11 of the guide.
You will also need to
have your background cut:
12" x 21"
and you will trim it to
10 1/2" x 19 1/2"
AFTER
it is appliquéd:)
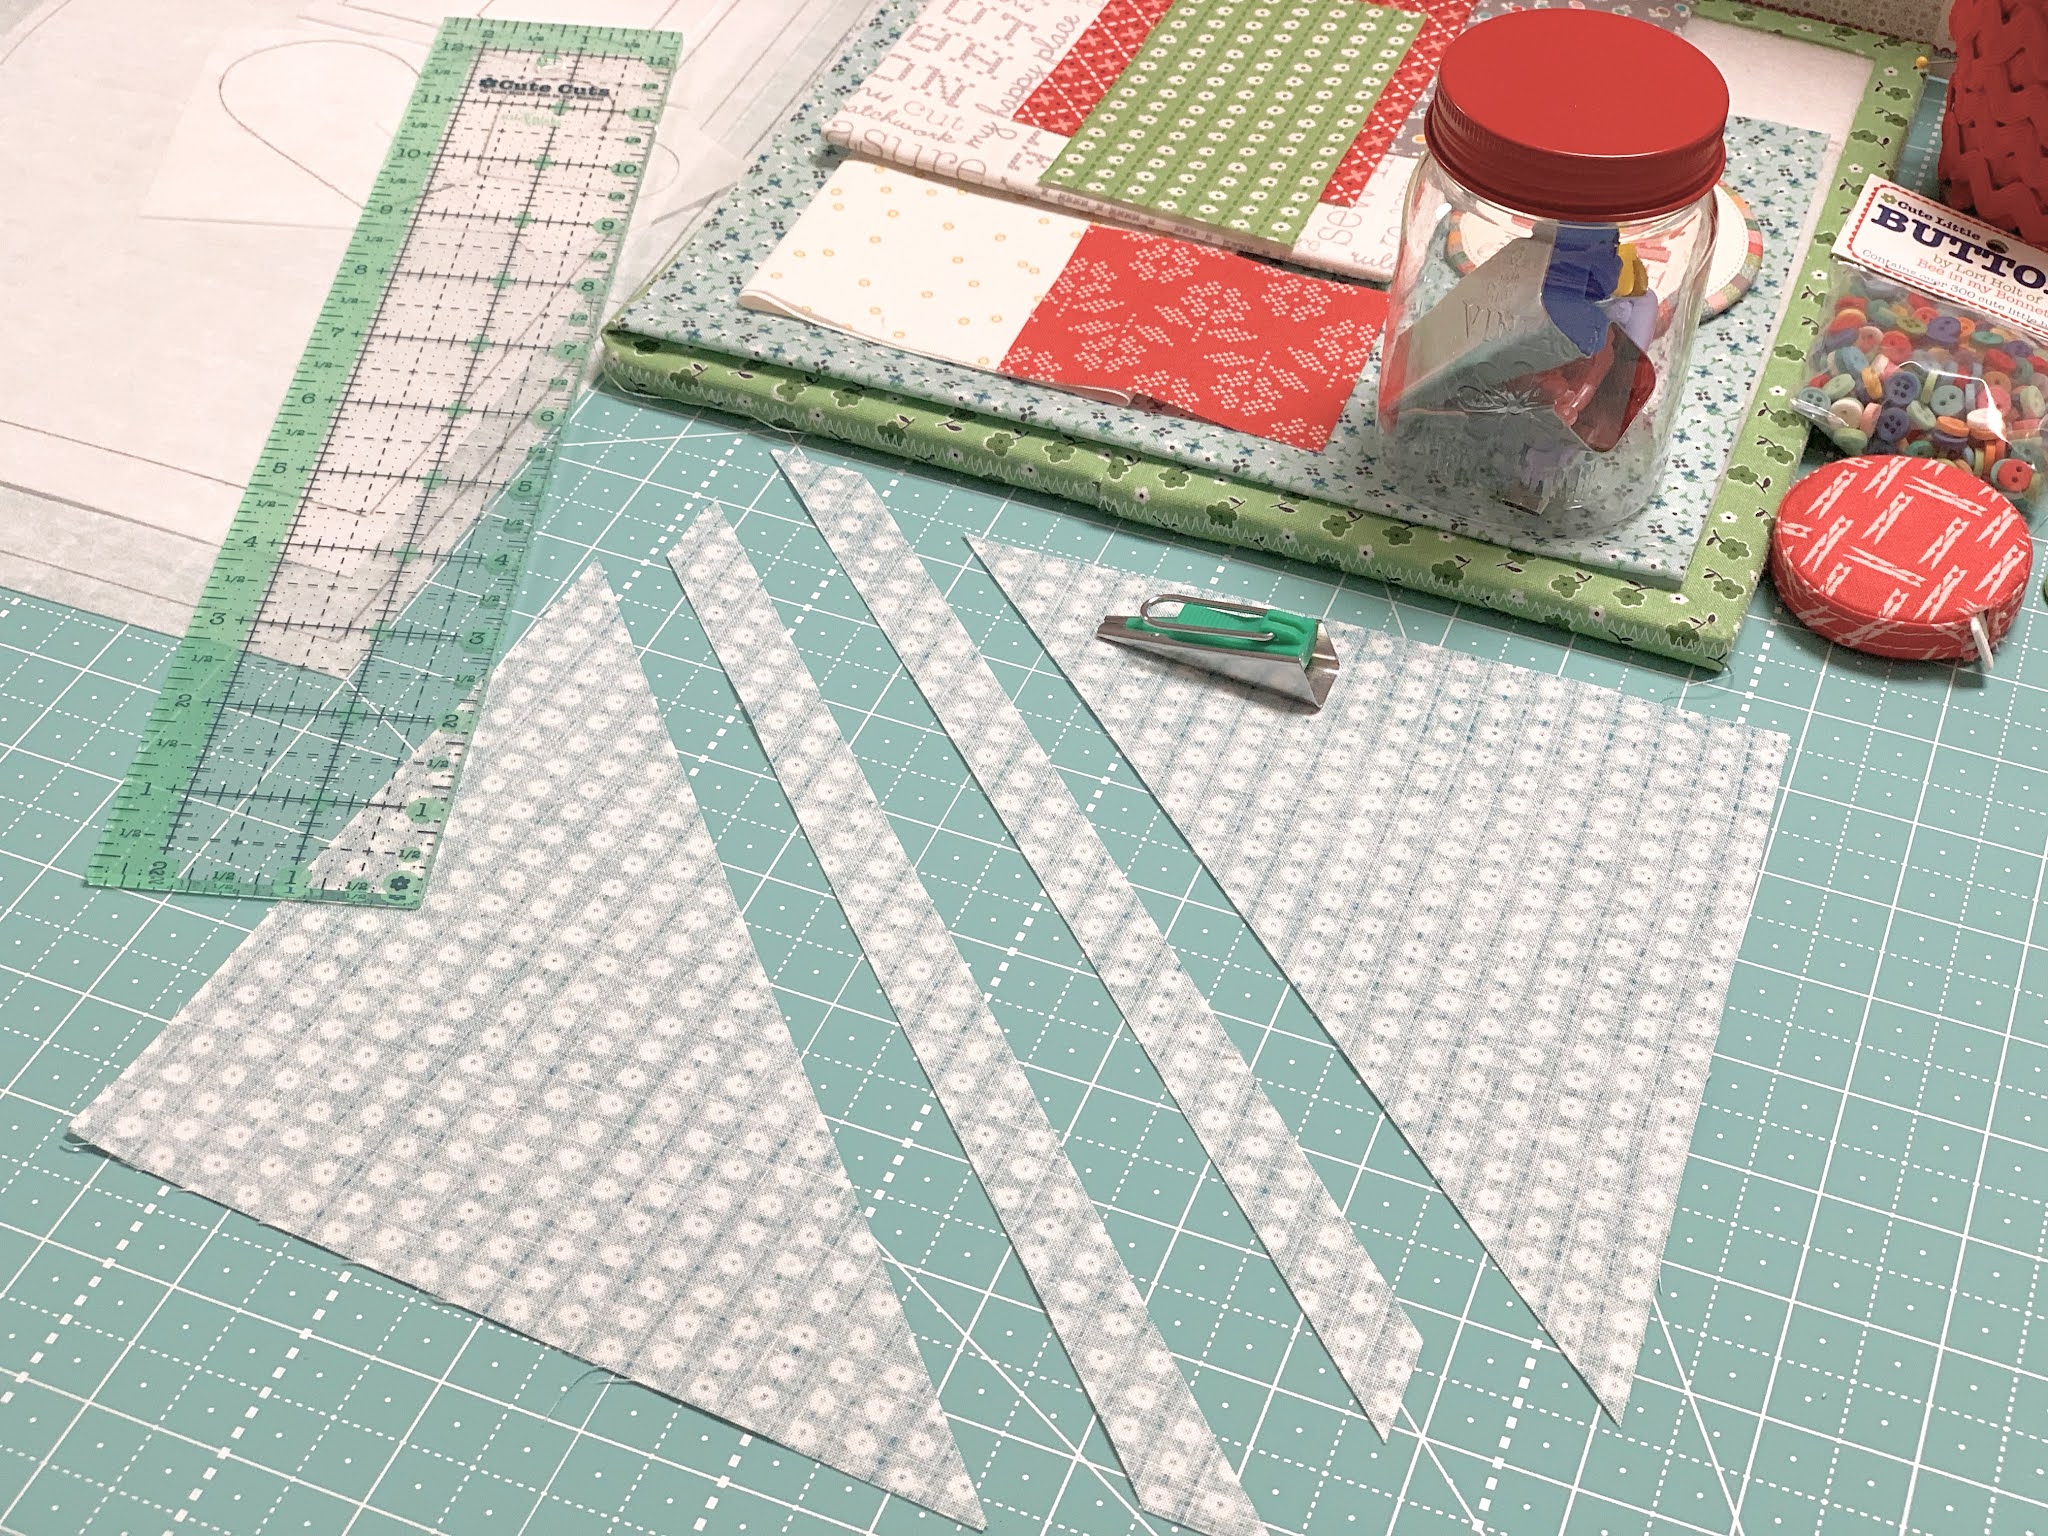
Cut the two 5/8" wide strips
from corner to corner like this.
(I turned my fabric to the wrong side
for this photo so that you could see it)

We cut these strips on the bias
because they will need to curve
as you are running them
through the 1/4" maker:)

Time to stitch!

After trimming you will need to
clip the cleavage
at the top of the hearts.

Shape and press:)

Use the embroidery guide to trace
the pins on and embroider
them as per instructions.
Lightly draw three lines 1/4" apart
in the center of the needle book pages.
Do a running stitch on these lines
using the same floss and strands
as called for the pins.

After embroidery....
glue the appliqués onto the pages.
Next step is to sew on the buttons...
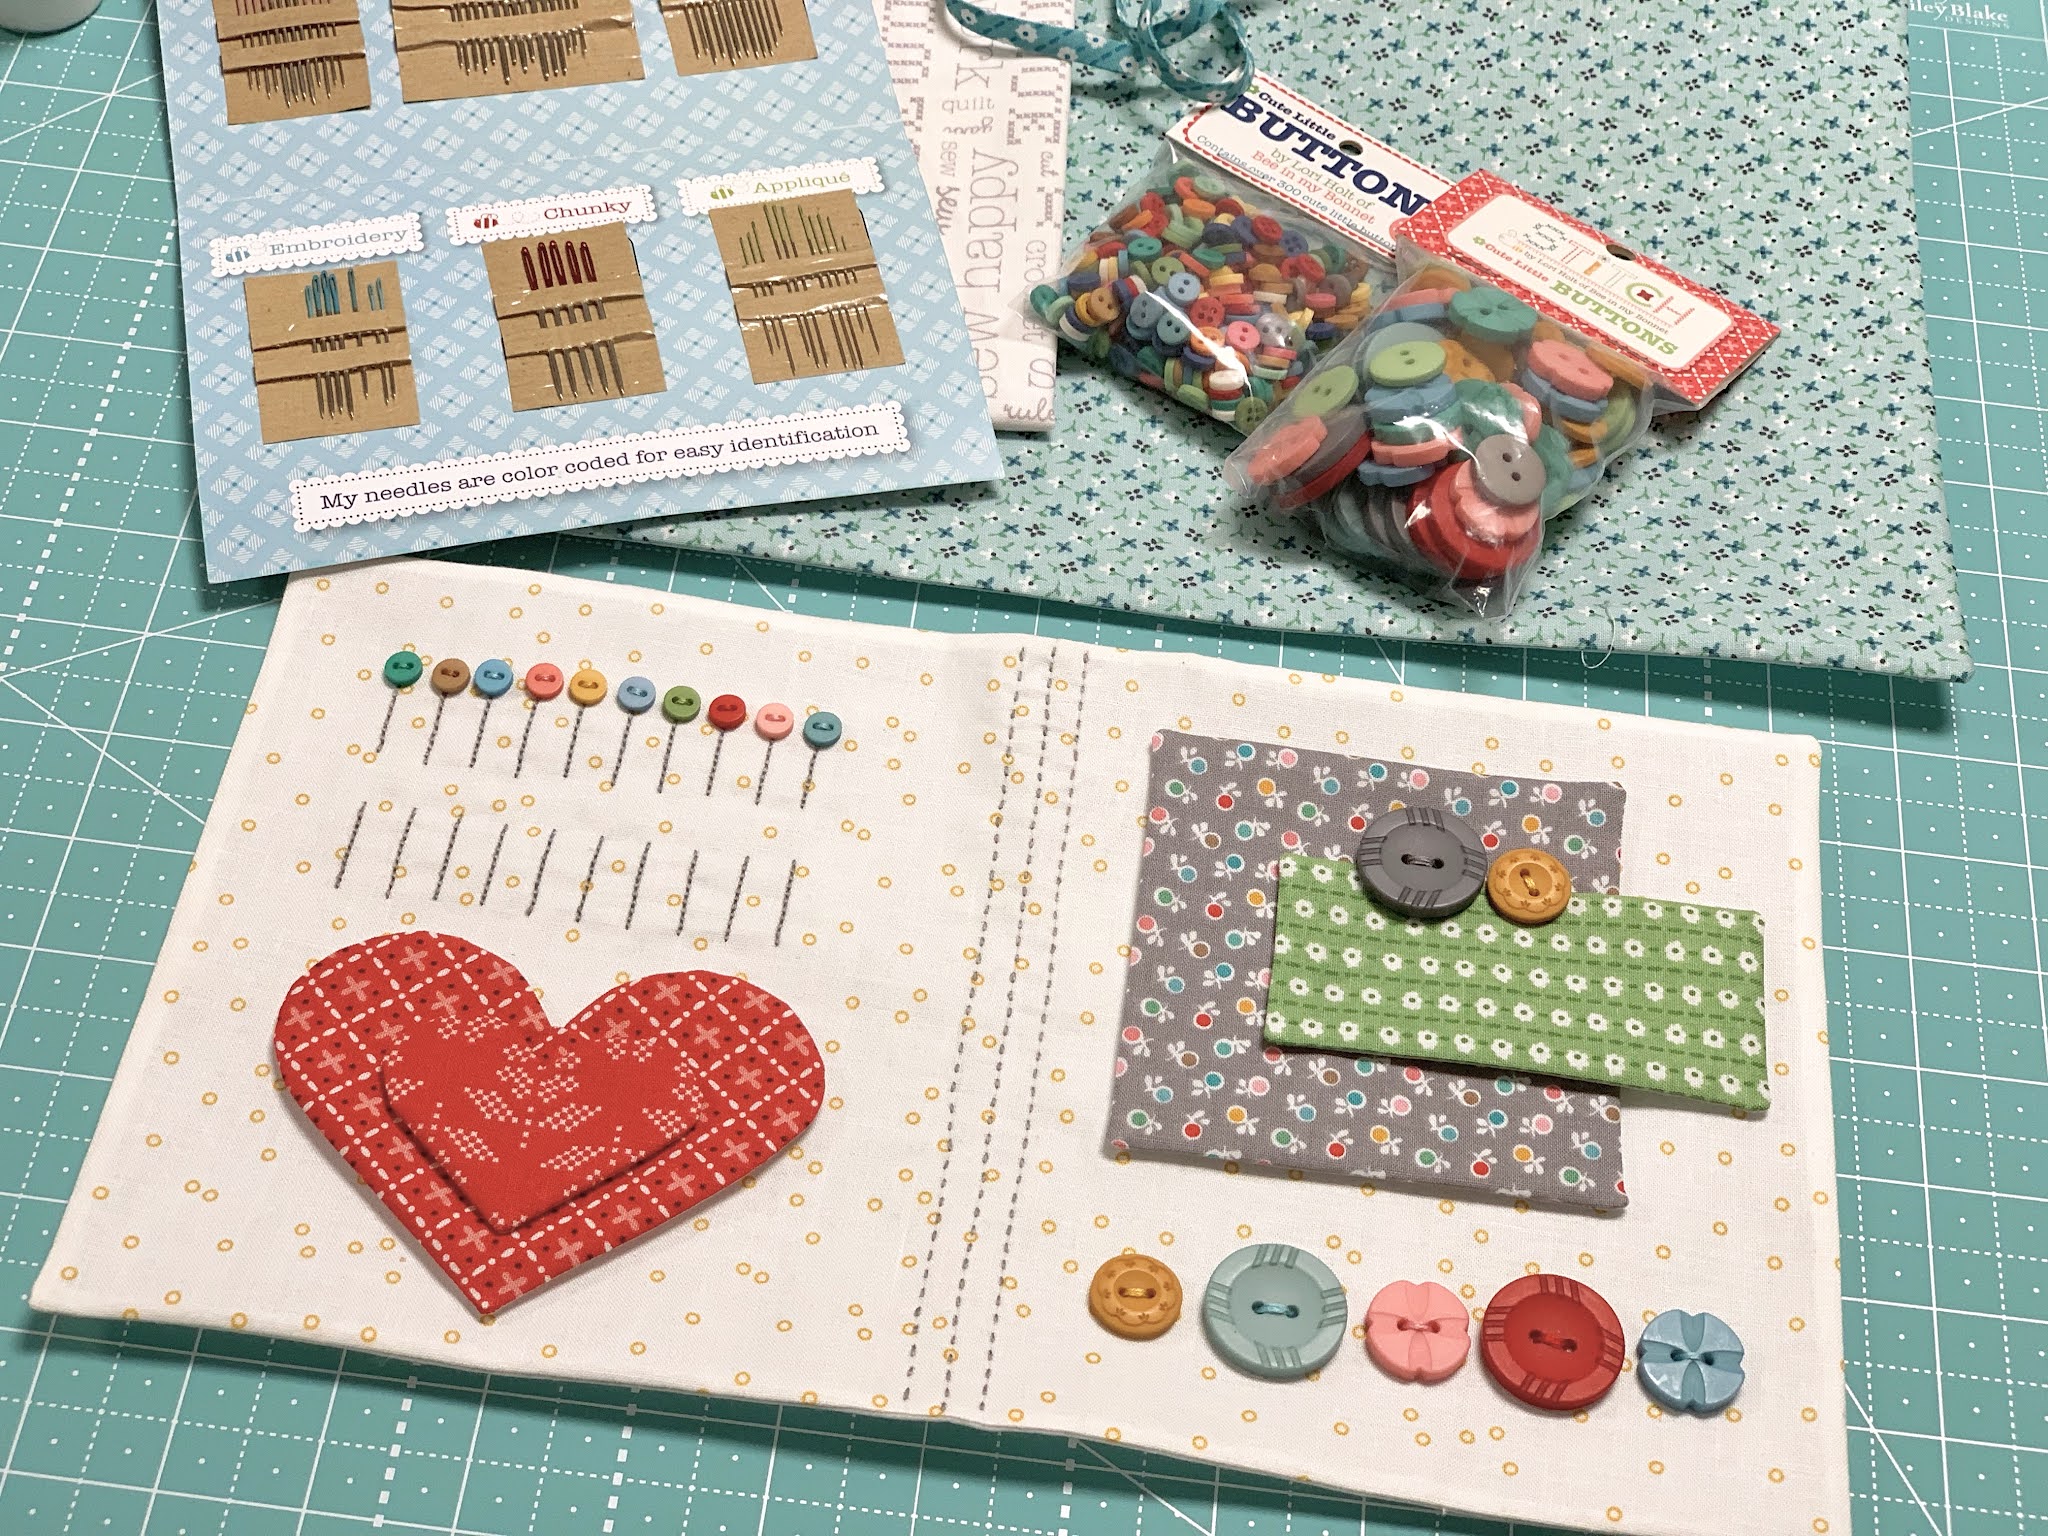
Like this!

Now layer them onto the background
and glue baste everything into place.
I pressed the ends of the
needle book ties under by 1/4"...
Because you cut them on the bias
it makes it easier to
manipulate them into a curve.
The width of the needle book
including the ties
should measure about 17 1/2" wide.

All ready for appliqué!
P.S. after my quilt is quilted and
bound I'll take one of my larger
Nifty Needles from my book
and place across the small heart:)

"NEEDLE BOOK BLOCK"
should measure 10" x 19"
after it's sewn into the quilt...
but after applique you will need to
trim down the background
to the unfinished size of
10 1/2" x 19 1/2"

The Sew Simple Shape
for the Floss Block
that you will need:
9 - L24
You will also need to
have your background cut:
9" x 21"
and you will trim it to
7 1/2" x 19 1/2"
AFTER
it is appliquéd:)

You will need to sew the
5 pieces of fabric for each
skein of embroidery floss
together before sewing
to the interfacing.
First step is to take the rectangle
from each print and sew the gray rectangles
to each side using an
accurate 1/4" seam allowance
and press your seams open.
The squares will be added on to each end afterwards...

Like this!
Now you can see how the gray labels
will line up with your traced shape:)

All sewn:)

This is what the back
looks like after it's sewn.

Now for trimming...

And clipping right where
the pieced fabrics meet...

View of the other side.
So basically you are clipping
to the thread and not past it...
right between your seams:)

This is how I cut my
interfacing for turning.

And what it looks like turned
before I shape it!

After I shared it I used my
Quick Press Seam Roller
to quick press those edges down nicely...

And then another quick press with
the iron and the Quilters Clapper on top:)

Super cute!

Now I'll just chain piece
and prepare the
remaining eight skeins for the block
in the exact same way.


Ready for laying out onto
the background fabric!
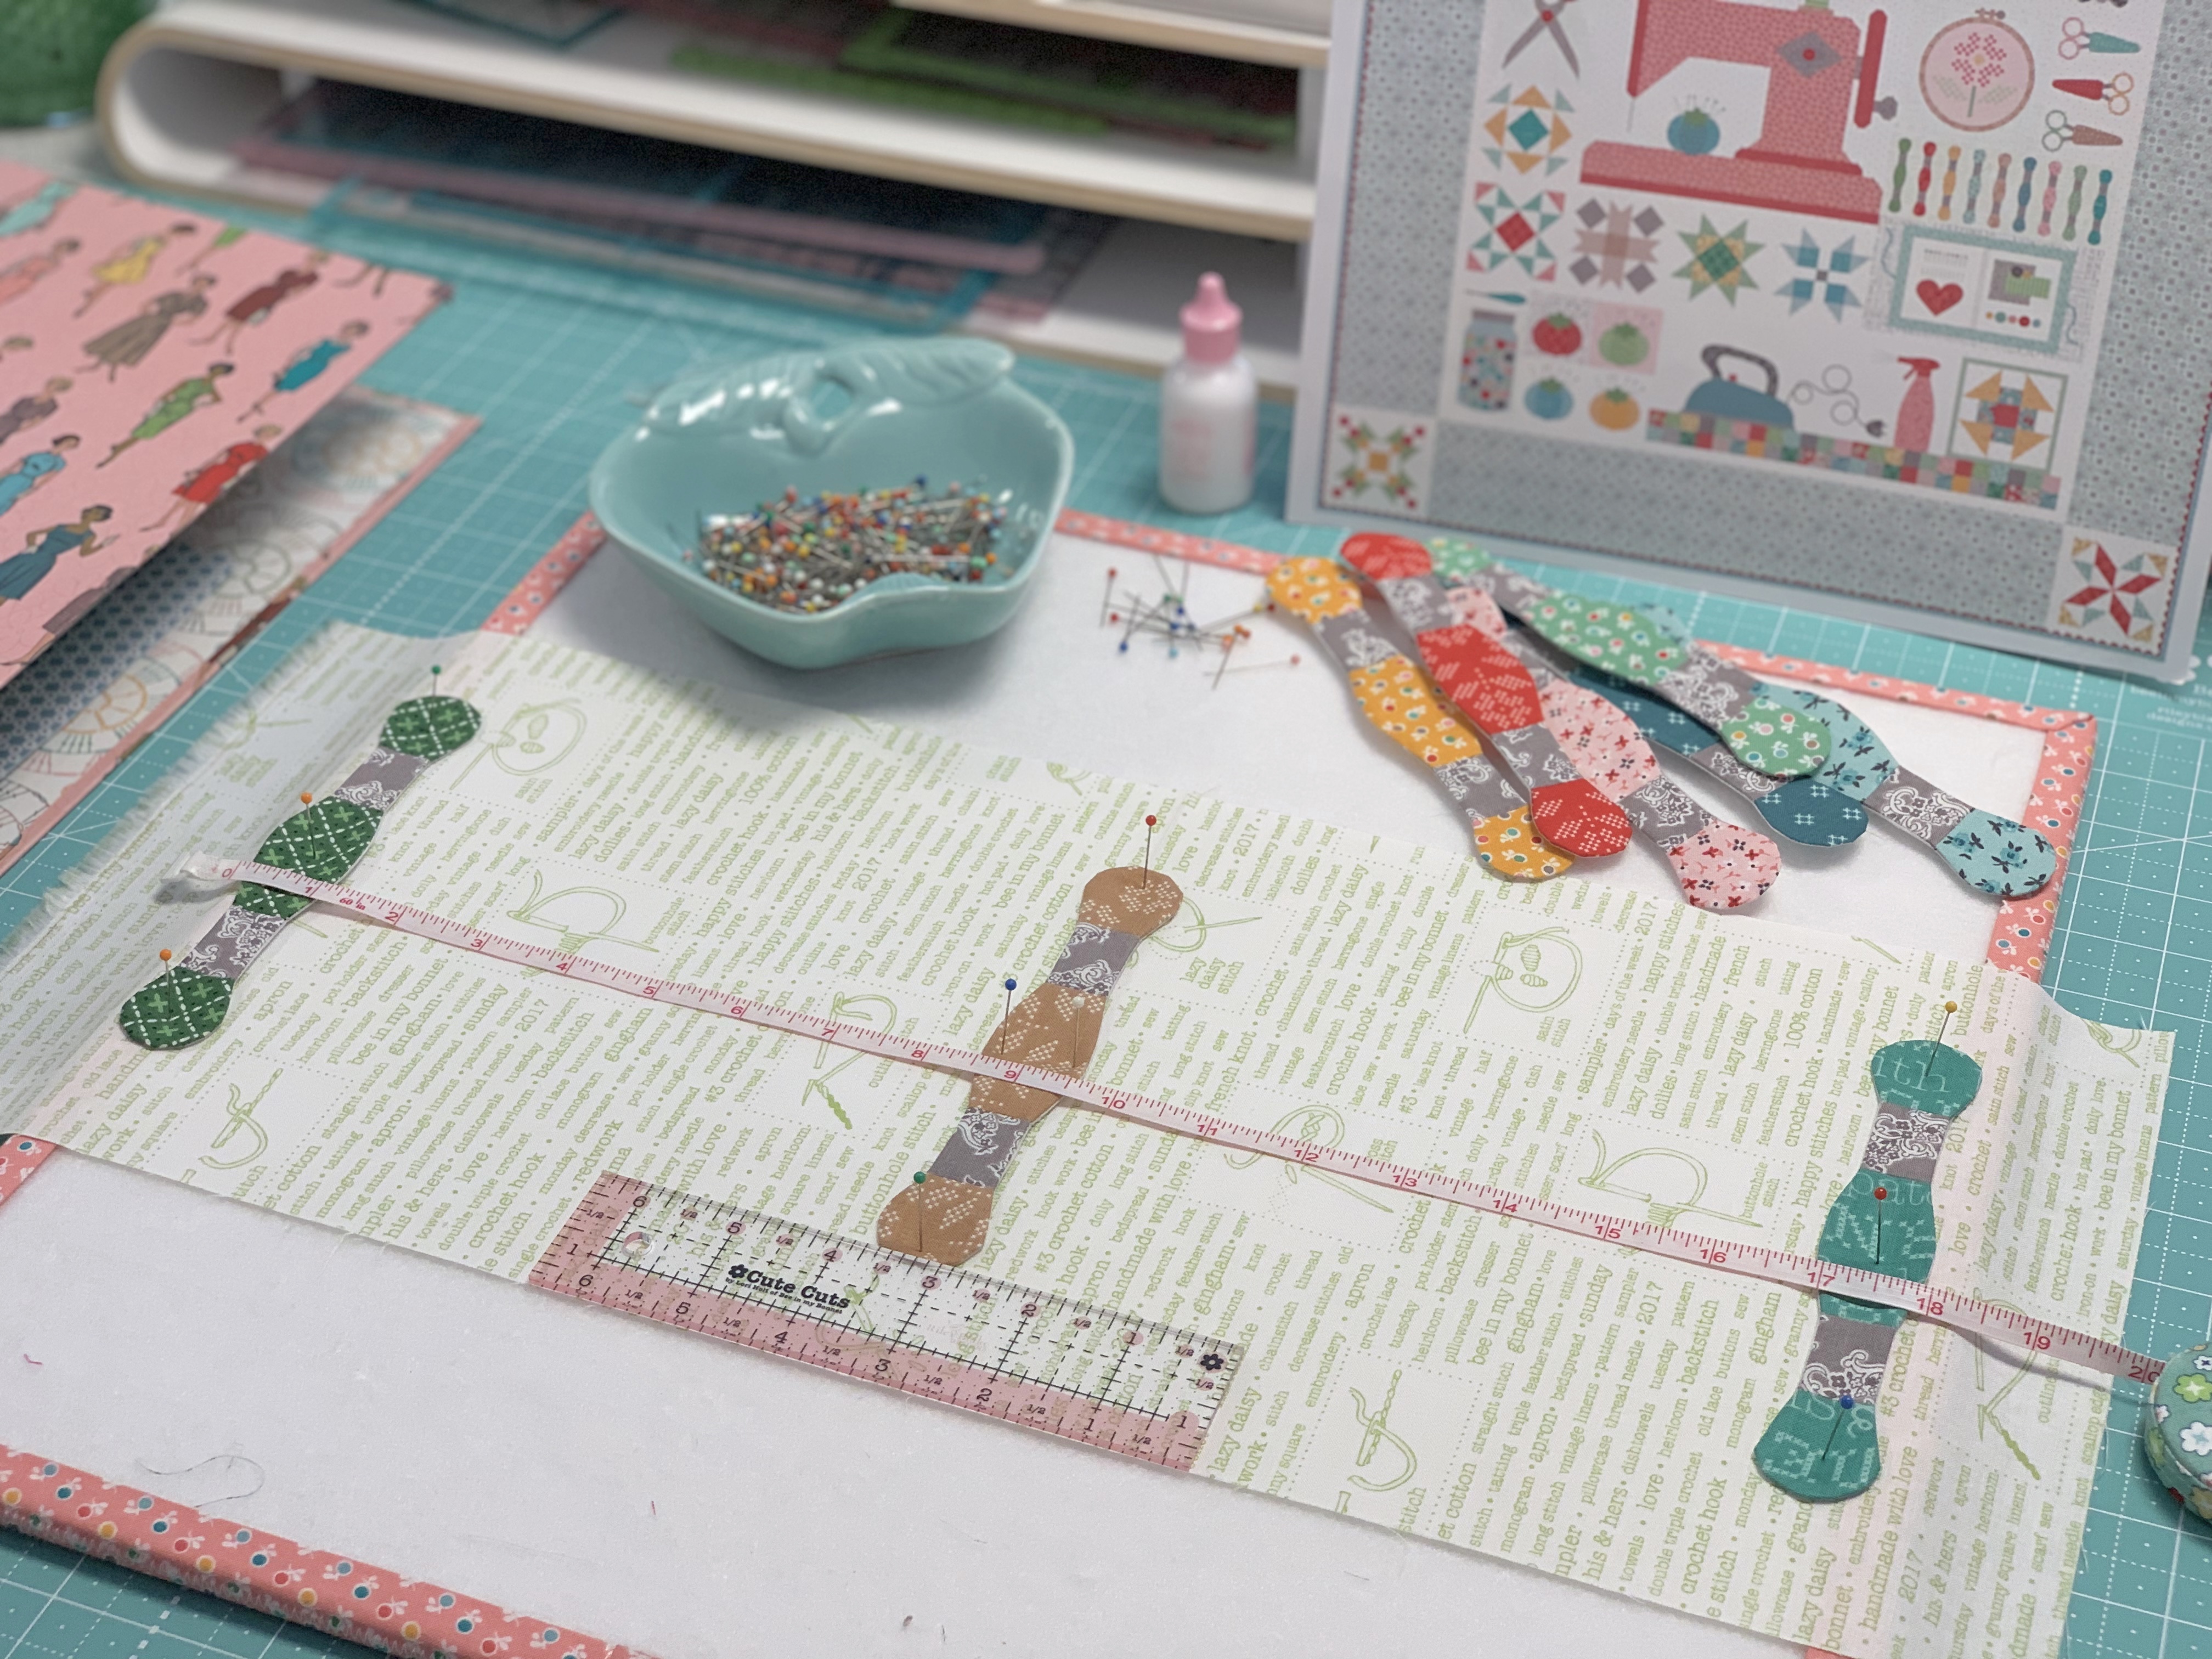
Start first by pressing your
background fabric in half
so that you have a crease
to center the first skein onto.
Measure up 1 1/2" from
the bottom to place it
(and all of the others too)
Now place your measuring tape
onto the center skien on the
9" mark and pin the two outside
floss skeins
on the 1" and the 18" marks...
so that all of the skeins together
will not measure more than 18" wide.

Still using rulers to
measure 1 1/2" up from the bottom...
place the 3 skeins onto
EACH side of the center one
and you are good to go!
Pin them all and glue baste into place.
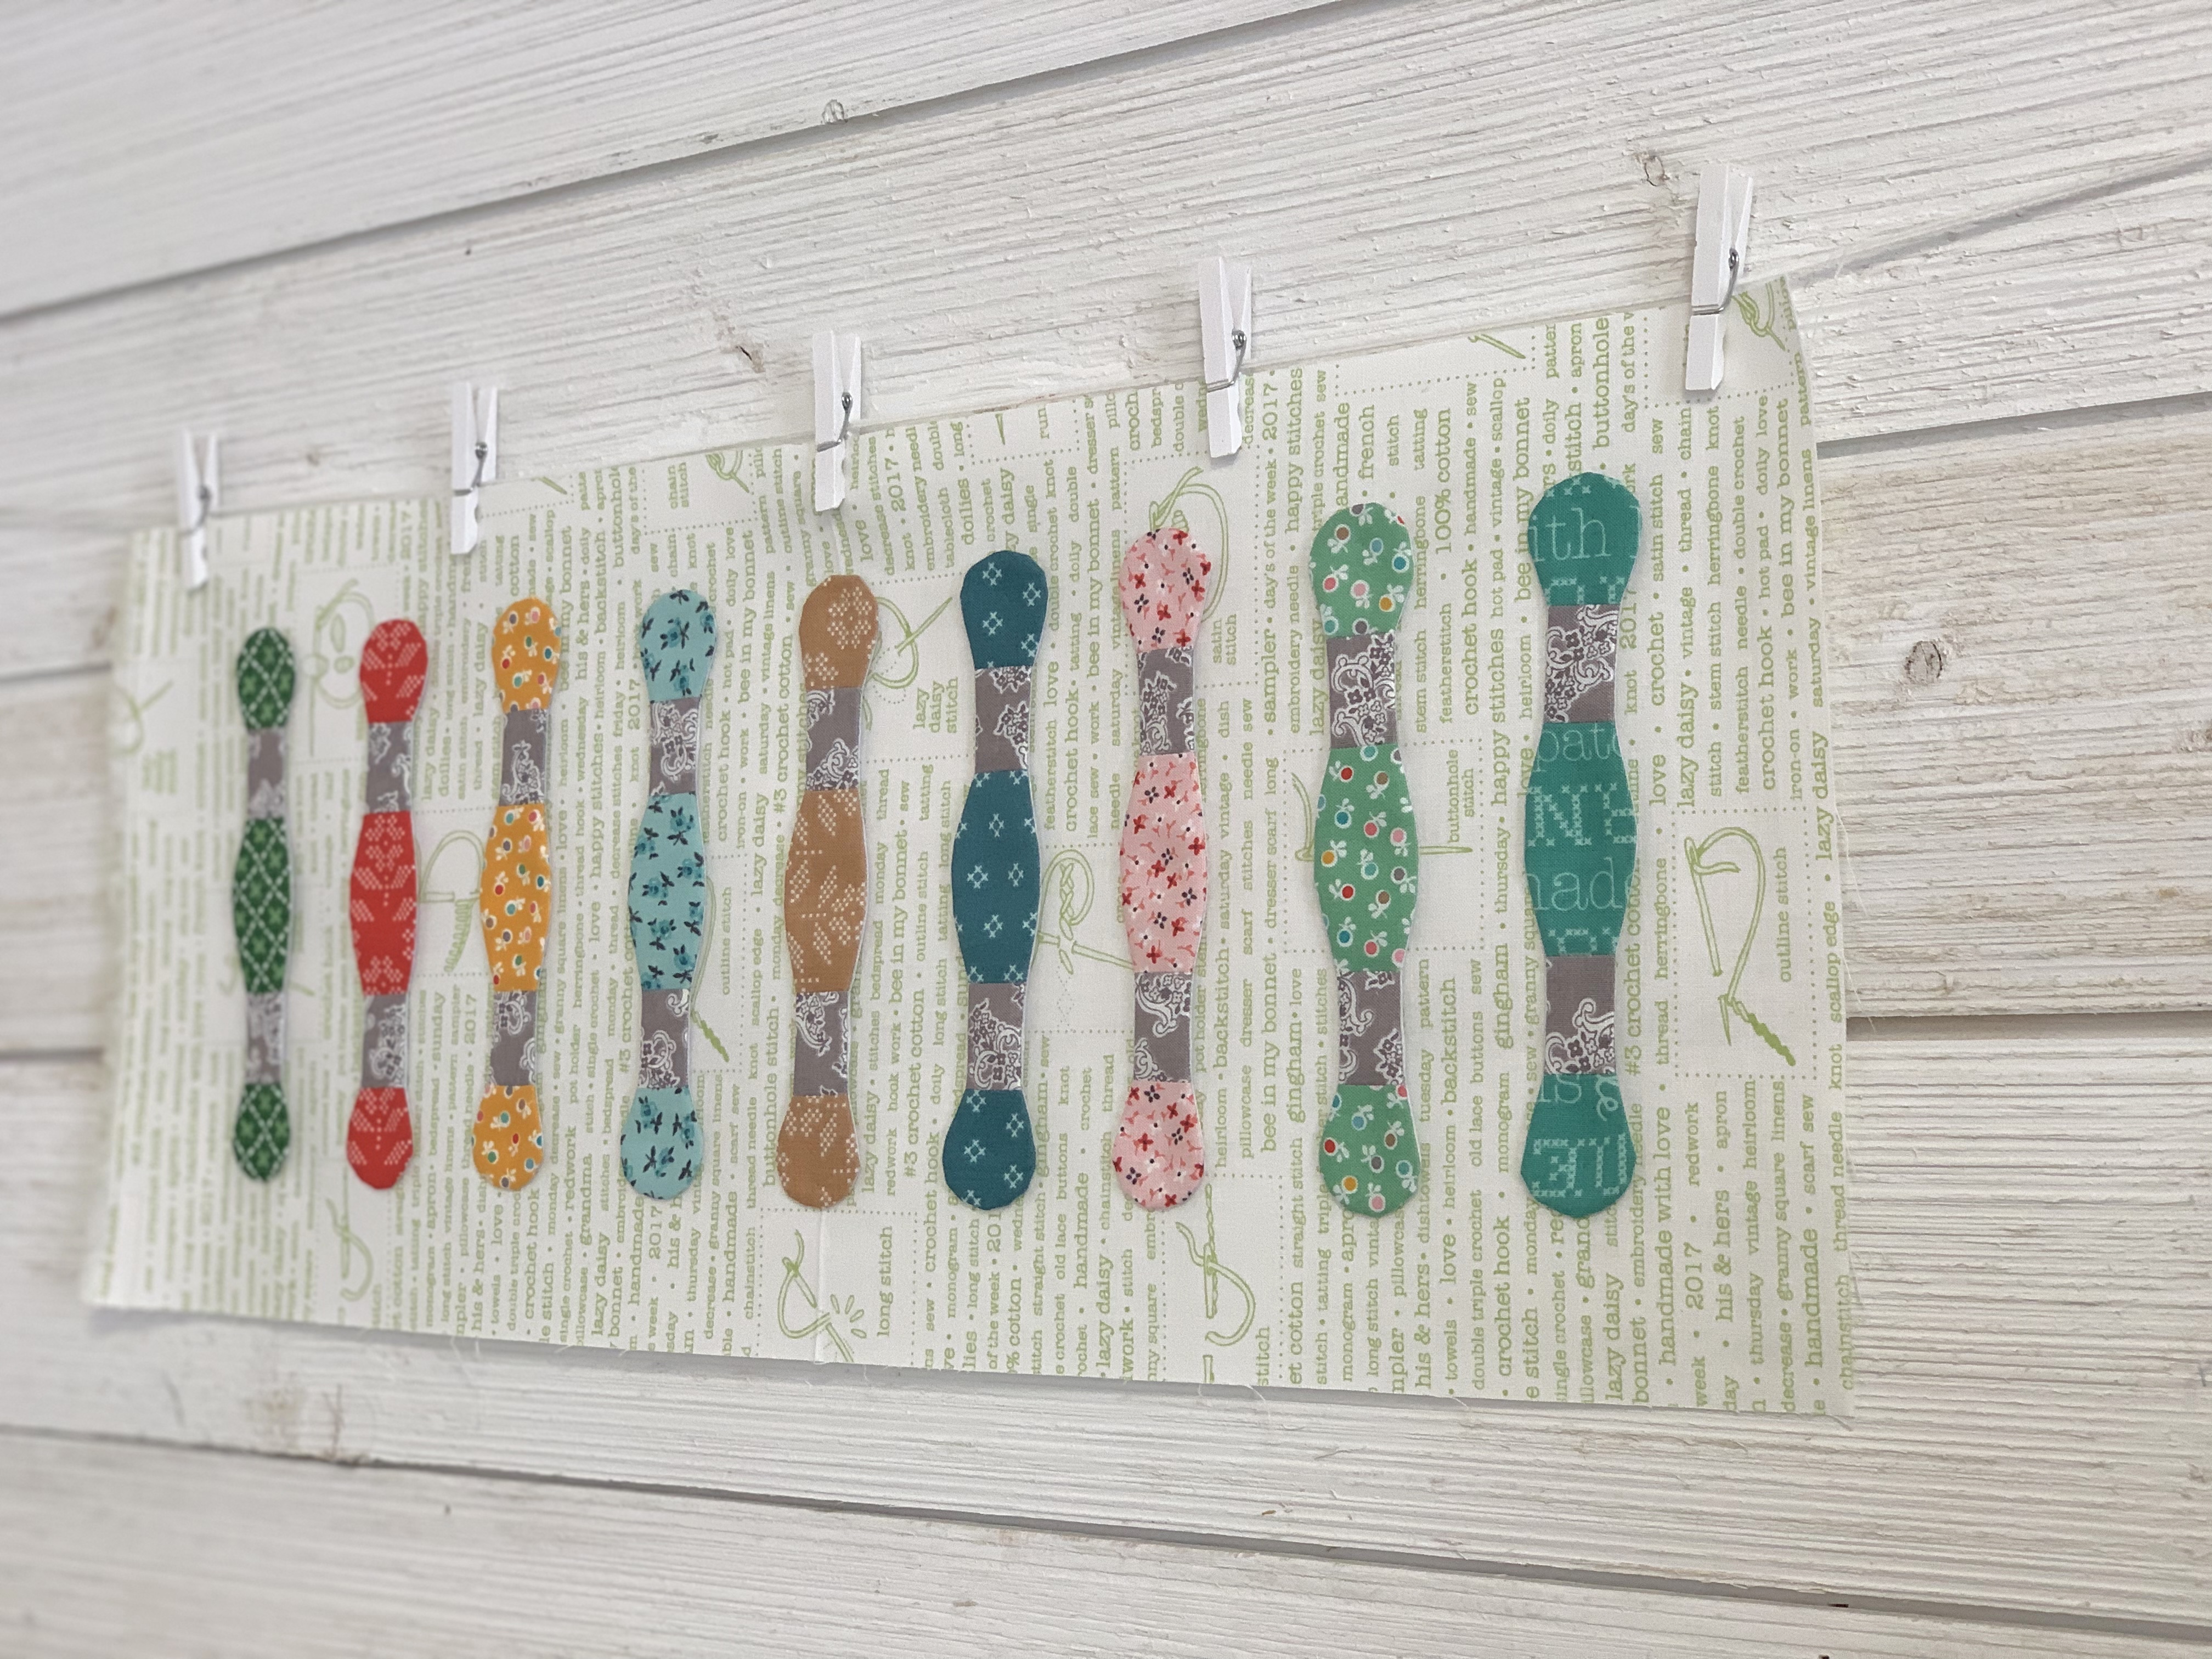
Ready for applique!

After applique
I'll trim this block down to
7 1/2" x 19 1/2"
It will finish at 7" x 19"
when it's sewn into the quilt:)


I love how these two blocks look together!
I hope you have fun making them
and I'll be right back here
next week for more:)
xx
Lori
**************************************


2 comments:
Love these so much!
Happy place indeed. Thank you Lori for streaming sew mich hapiness.
Post a Comment