

Good morning and welcome to
Week Seven
of our Quilt Along:)


We are using my latest book


And using Farm Girl Vintage fabric...

and we are making two
Farm Girl Blocks each week:)
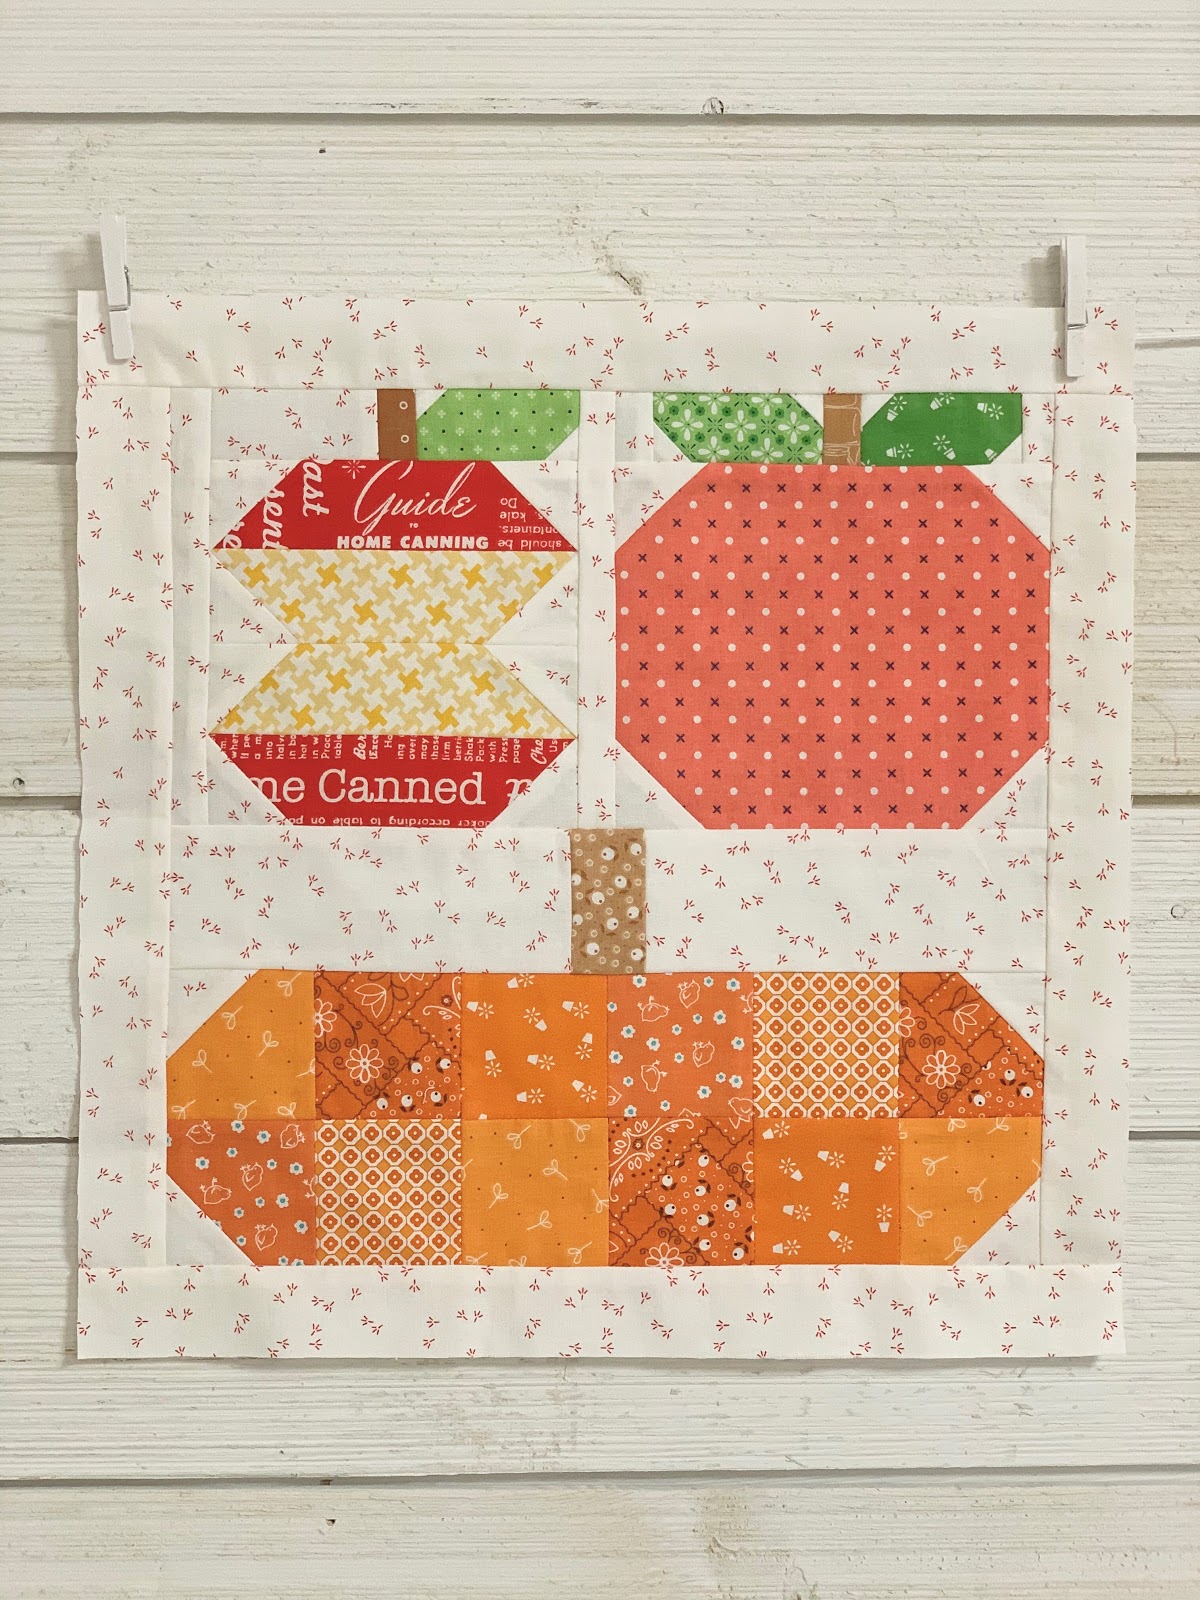
Our first Farm Girl Block today is
FALL HARVEST
and it's on page 47 of the book.
Let's chat about this block for a minute:)
I designed it in a way that you could
also use all three smaller blocks
to create more blocks ny separating them.
For example:
After adding the "D" sashing strips
to the Apple Core it either is
a finished 3" block or a 6".
That means you can make 4 apple cores
and sew them together and it
would be a 6" or 12" block.
Same goes with the peach.
You can make four peaches in one block...
you could make 2 and use a
Fresh Pear Block
from the first book and have a
peaches and pear block together.
You could make the peach into an apple...
just by changing the color of the fabric.
The pumpkin is short and fat...
and two of them stacked on each other
would make a full block.
They would go perfectly with my
Patchwork Pumpkin Block
from the first Farm Girl Vintage Book.
I hope these suggestions give you
some fun ideas for next year
when fall sewing rolls around again!!

The next Farm Girl Block is
FARM GIRL BOOTS
and is on page 50 of the book.
I decided to make a fun little
project using this block:)

I put together this mini to
hang on my wall and it would even make
a cute pillow on one of my benches or sofa.

I made two 12" FARM GIRL BOOTS.
Of course I made them facing in
opposite direction for a perfect pair:)
If you have ever wondered if it's hard
to change the direction of a block...
it's not.
You simply cut it exactly the same
but just lay it out going the
other direction and sew opposite.
Easy Peasy!

My two 12" Farm Girl Boots are completed.
I just need to sew them together now.
They will measure
12 1/2" x 24 1/2"

My books work together very well and
for this little project I used these three.

I used my
and made all of the letters
to spell "Farm Girl" from the 6" size.

Then I grabbed my first
and whipped up a
6" Simple Star Block.

After sewing the letter blocks I added
1 1/2" x 6 1/2" sashing
in-between the letters
(except for between the
"F" and the "a"
I used no sashing)
For the left side of the "F"
I cut a 2 1/2" x 6 1/2"
and for the right of the "m"
I cut a 3" x 6 1/2".
Then I added a 1 1/2" x 24 1/2"
to the top and the bottom.

For this one I cut a 2" x 6 1/2" strip
for the left side of the "G".
The remaining 5 strips are cut
1 1/2" x 6 1/2"
I also sewed a 1 1/2" x 24 1/2"
to the top and the bottom.
Both the "Farm" section and the
"Girl" section should now measure
8 1/2" x 24 1/2"

Farm word goes on the top of the boots...

And the word Girl goes onto the bottom...

I cut 2 strips to add on each side -
1 1/2" x 28 1/2"
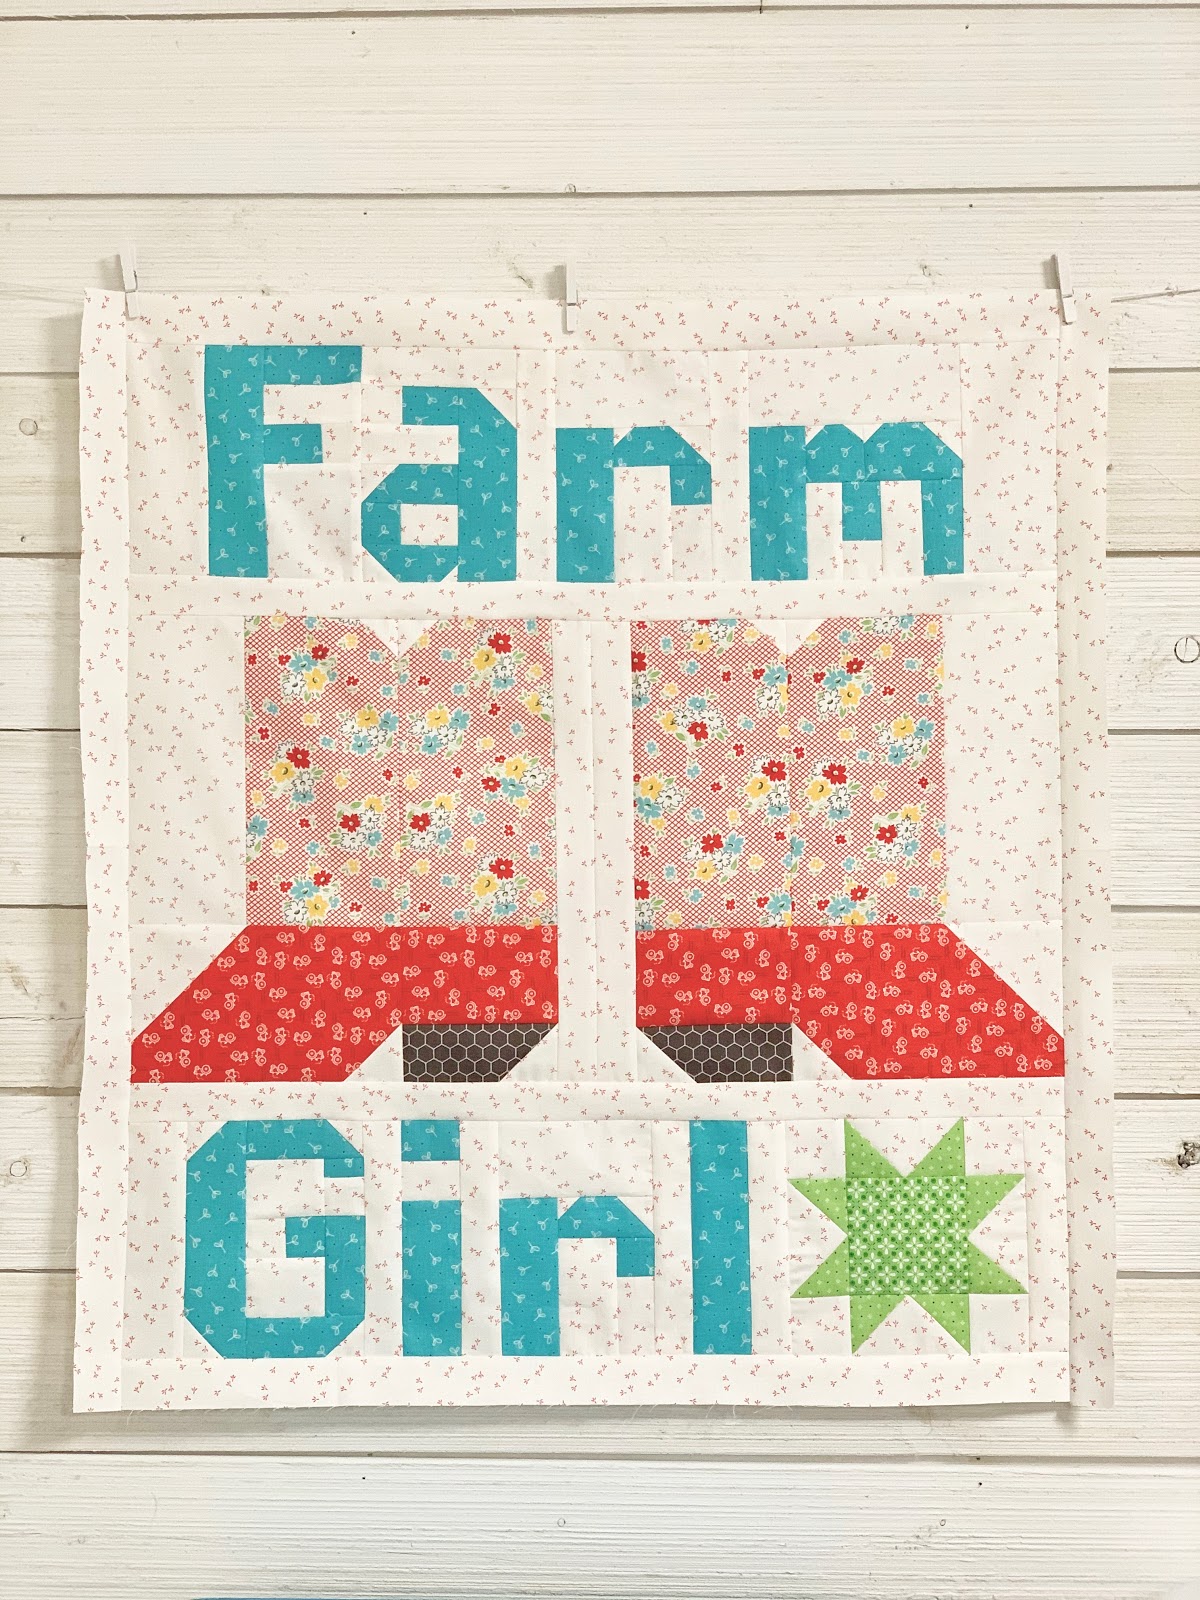
FARM GIRL MINI QUILT
26 1/2" x 28 1/2"
I love how this turned out...
I hope I've inspired you to
make one for yourself or maybe for
a special Farm Girl in your life!!
I'll be right back here next Friday
and we will do 2 more blocks!!
xx
Lori

3 comments:
So super cute! Love how you mix and match and put new wall hangings and other projects together. Beautiful!!
One more day of work and then I can catch up on last week and then onto this week.
Love the ideas to mix in the small blocks.
Appreciate your taking time to do this especially around the holidays.
Love your style!
Post a Comment