

Hello there!
Today I'm so excited to
show you what I'm making:)

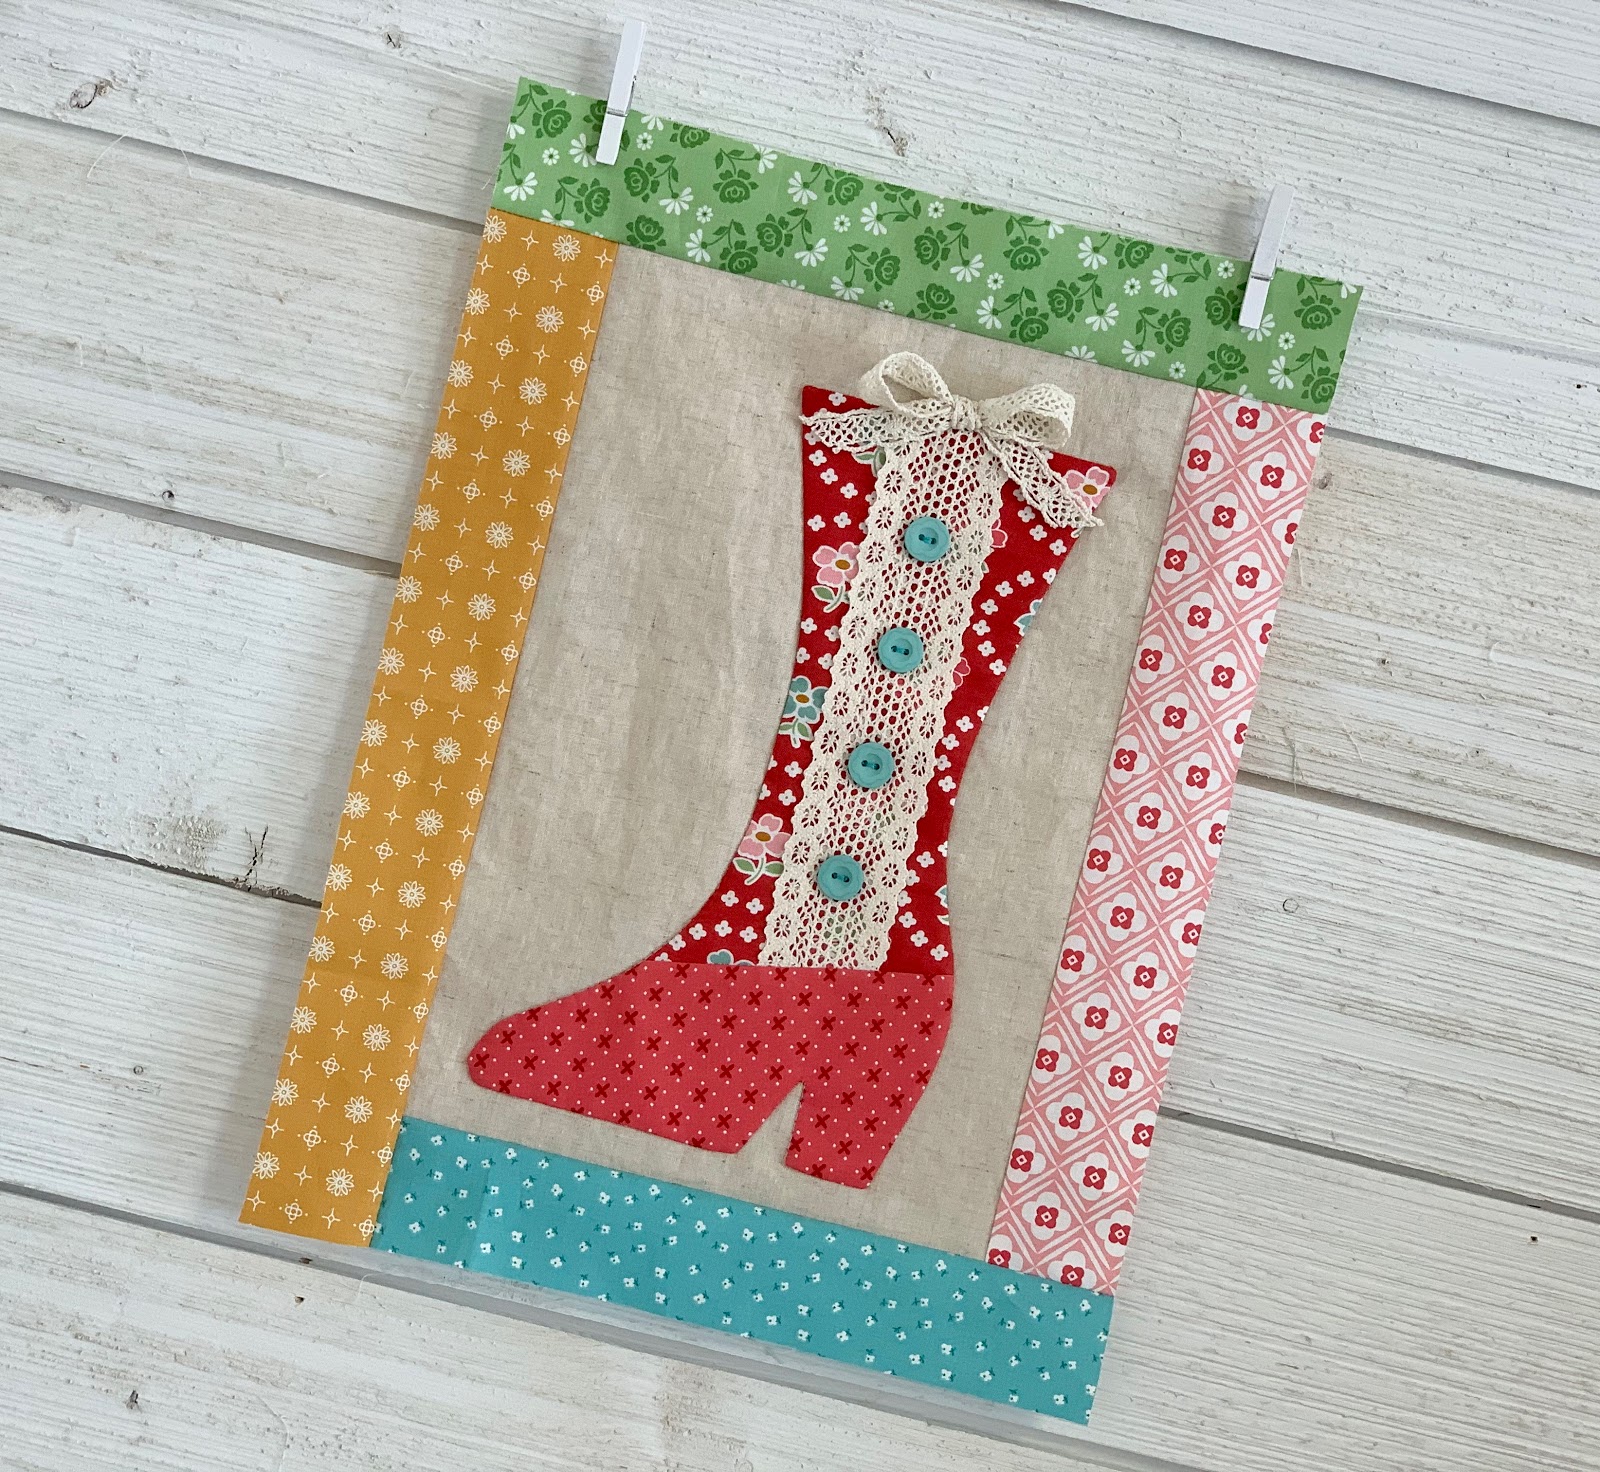
Granny Boots!!!

So you knew this tutorial was coming
because during the
I told you that I was going to do
something with the
I-32 Sew Simple Shape
that I included in the
Well here it is!
I included a granny boot in the set
because I just think it is a
perfect shape for a few
Granny Chic projects!
For this one I'm also using my

And my new 100% Cotton

I cut my interfacing 7" x 11"
and traced the granny boots.
I'm using Natural Linen from Riley Blake
for my Granny Boot appliqués backround.
I cut each background block
8 1/2" x 12 1/2"

I'm skipping ahead just to show you
what the prepared fabric for one
Granny Boot will look like right
before sewing it into an appliqué.
The bottom part of the boot
is slanted across the top and so
I'm going to show you how to do that!

Cut the top piece for the granny boot
7" wide and 10" tall.
Lay your fabric down like this
and put your ruler right on the corner
at the top and at the
bottom left corner of your fabric...
place the ruler on the 1 1/2" line.

Now trim!
Do this to each 7" x 10" fabric
for the top of Granny Boots.

Now you can see the slant along the bottom.
Now measure in 2 1/2" from the
right side and draw a line.
This is the center line for your lace.

I used the widest lace
on the card for this block....

I just lightly glued it down to
keep it into place for top stitching.
The glue keeps it flatter than pins would.
The center of the lace goes
right on top of the marked line.

Top stitch the lace down and
then trim ends even at the bottom.
*NOTE*
I actually cut this piece
7" wide by 9" tall
and it worked out fine but
I thought it would be better to have
a little bit more room in height so
I added and inch when cutting
for all of the rest of the blocks...
which is 7" x 10"

For each bottom piece you will
need to cut 4" tall by 8" wide.
You need a little more room
in width at the bottom for the toe.

I just sewed with a 1/4"
seam allowance like this...

And pressed towards the Granny Boot Bottom.

Now we are back to the original step.
When pinning...
you just want to center the lace...
being able to see through
the interfacing makes that easy peasy!

Now just sew like you normally sew
any of my Sew Simple Shapes...
right on your traced line...
and oversewing by about an inch
to secure the stitches.

All sewn and now time to trim...

And clip all inner curves
and the cleavage area.

This is how I cut my interfacing to turn.

I used the Clover
Point to Point Turner for shaping:)

Place glue on the back....

and glue the Granny Boot onto the background!
You can sew buttons on now
or wait until after quilting.
I'm doing mine now and I just won't
have my quilter quilt down the center.
I used my Granny Chic Aurifil and
Nifty Needles to sew the buttons on.

I tied a bow for the top
out of the medium width Bee Cute Lace...
I think it's sew cute there!
I actually just used a tiny safety pin
and pinned it on there from the back
so that it's easily removed
until after quilting is finished...
or after the borders are sewn on...
Like this!!
I cut strips 2" wide scrappy
Granny Chic strips and sewed them
around my block log cabin style.
I love this block and how it turned out!
Right now my Granny Boot Block
measures 11 1/2" x 15 1/2"

I chose 3 more fabric combinations
and and sewed 3 more Granny Boots
using the wide lace.
I also decided it was easier to
sew the buttons on BEFORE I
applique the boot down to the background:)

Okay... so now I've made 4 boots
with the wide lace down the center...
next I made 4 Granny Boots
using the medium lace down the center...

And I put it on top of a bias strip
of fabric like this!

So remember for the stems
in our flowers in the
Granny's Garden Quilt
we used 1/4" bias tape maker?
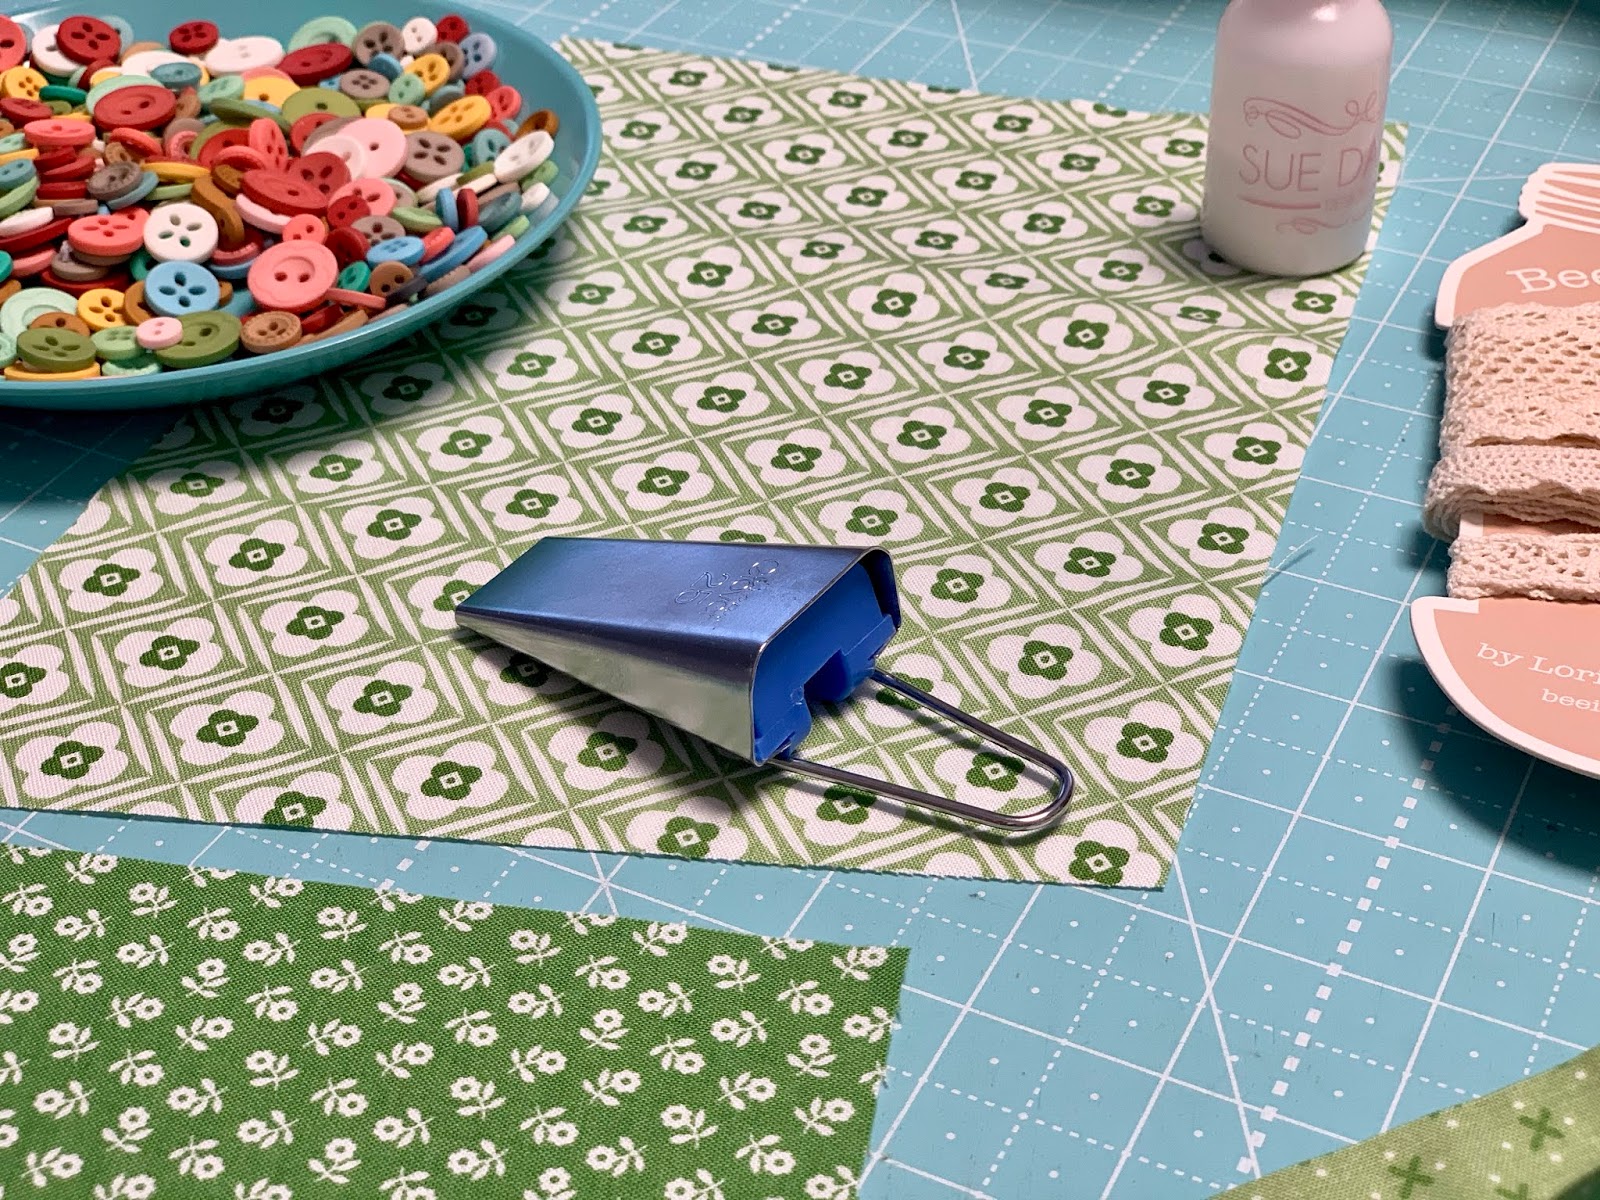
Well for these 4 blocks I used the
1" bias tape maker and
cut my fabric strips 1 7/8".
I ran them through the maker
in the exact same way that
I showed you in week one video
if you need a reminder.

I lightly glued the medium lace down
the center top of my bias strip.
Making these 4 is the exact same way
as the first four...
all fabrics cut same sizes...
just different lace down the center.
I centered it on the line that I drew
2 1/2" in from the right edge
just like I did the first one...
I top stitched by machine
first before sewing the
bottom of the boot on.

Choosing buttons!!

Look how cute:)
These Granny Boots remind me of
a TV show I used to love
when I was a little girl called
Petticoat Junction...
any of you remember that?

Okay...now I've used the
wide and medium lace...
it's time to make 4 more Granny Boots
using the narrow!

And this time I thought it would be
fun to make them scrappy:)

Again...all the fabric pieces are cut and sewn the same...
just different lace prep.
This time I used the 3/4" bias tape maker
and I cut my fabric strips
1 1/4" wide before running it through.

After lightly glueing down the
bias strip down center of
my marked line like usual...
I top smithed the narrow lace
down one side first...

And then the other.
I over lapped onto the bias strip
edge by about 1/8".
Then I just sewed the bottom
of the boot...and sewed them
into 4 more Granny Boots!

Choosing buttons again!

Okay...now to get them all
basted onto their backgrounds:)
I'm making all 12 of my Granny Boots
into quilt blocks
but you can see what a
cute garland they would make...
also they would make adorable pillows...
sew fun!!

All my blocks have borders now...
I put them on my design wall
to see how they look together:)
I'm sure I'll do a little rearranging
and then sew the blocks together.
I'll add a scrappy border as well.
This is going to be a
really fun wall quilt!

I wanted to show you another thing
that you can make with the template...
a Granny Boot Pin Cushion!
I made this one back when I was
testing out my Granny's Garden Shapes
and designing my Granny Chic fabric
and my new lace too:)
I made it using a piece from my
Calico Days Collection.
Both of my Grandma's had pincushions
like these and that was my inspiration!

They put these plastic curtain rings
on the back so they could
hang on the wall and so that's
what I did with mine too!

I added a ruffle to the top of mine
just like they did too:)
I hope enjoyed today's tutorial
and I hope you make some
Granny Boots too!!
xx
Lori

8 comments:
SUPER CUTE! I LOVE IT! I want to make this.
Thank you for all the cute ideas !
This it just TOO CUTE..................
OH MY!!!! You are beyond talented!!!! All I can say is "WOW"! Your Granny Boot is gorgeous!!!!!
You are so talented! I do remember Petticoat Junction too! I'm much older than you though. I have not made any of your quilts...yet. I am doing several of your cross stitch patterns...I'm making the Santa from your Vintage Christmas Ornaments for my Grands...I make them an ornament every year. That Santa is so darn cute and I'm going to finish them like you showed in your video...thank you!
I want to get your Granny Square quilt book for myself for Christmas. I try to get something for myself in each area of 'making' which can be a lot! LOL! So far I have a kit made up for a Christmas xs, and I usually cast on a pair of Christmas socks on Christmas Eve and I want to start your Granny Square quilt...I also crochet and do wool applique....I spend Christmas alone so after I take care of everyone else and make some great goodies....I craft from Christmas to New Years and then some as my birthday is January 4th! LOL! I love your blog posts and I'm trying to go back and read yours from the beginning too. Thank you so much for your great teaching and inspiration!
Thank you. This is great. I hope you are feeling well and enjoyed your Thansgiving. Thank you for all your wonderful ideas.
What a darling creation. So many possibilities. I love the boots!
Thank you for the great Post.
Oh my gosh, this is too cute. I love them.
Post a Comment