

Flea Market Flowers
Quilt Label

Welcome to Week Nine of the

We are using my latest
fabric collection called
Flea Market
It's designed by me ...
and produced and distributed by the amazing
Riley Blake Designs:)

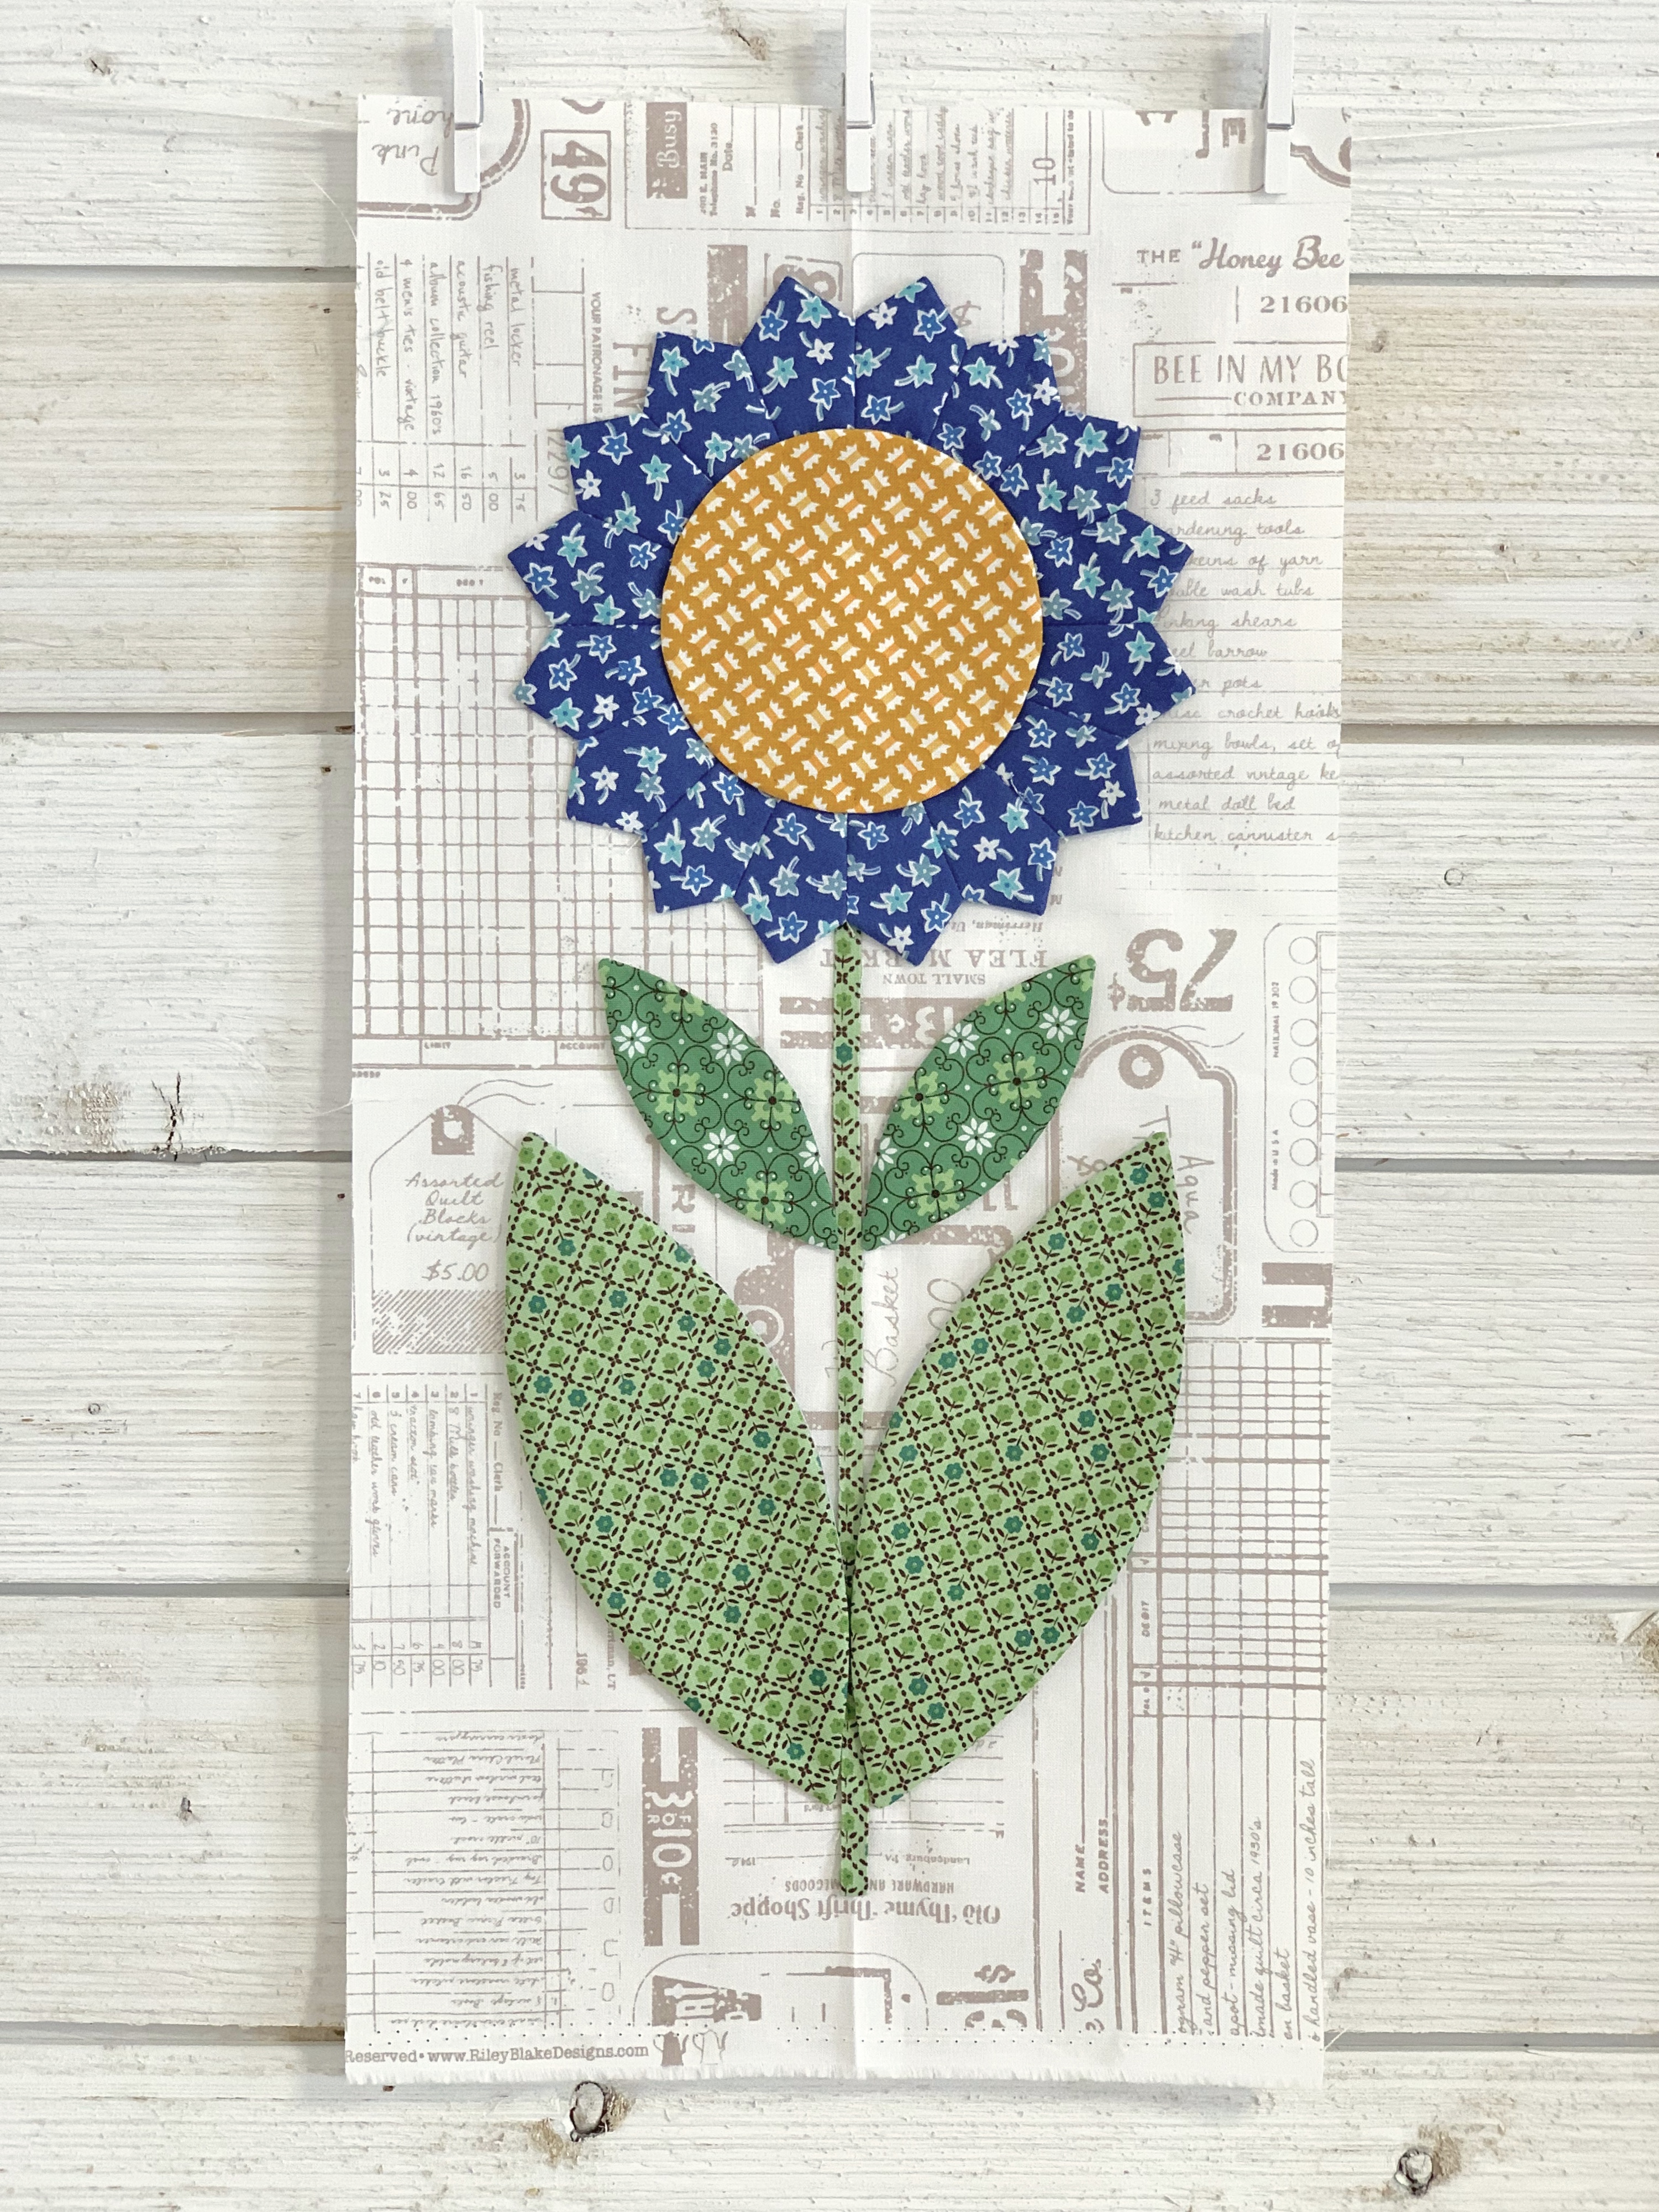
We are making my quilt
FLEA MARKET FLOWERS
76" x 86"

We are using my
PIE RULER
to make all of the flower petals...

This set of my
CIRCLE RULERS
for all of the flower centers...

And we are also using my
SEED RULERS
for all of the leaves in the quilt.

All of the other notions as well as fabric requirements are detailed within the
Flea Market Flowers Sew Along Guide
for the free PDF Download
I also have a "Bee Prepared" blog post
detailing everything that you will
need to know about this sew along...
to go to that blog post
if you have not read it
or you need to be "refreshed"
on any of the information!

As promised...
To kick off week one
I did a video tutorial on my
YouTube channel showing how to make
Flea Market Flower
BLOCK "M"
to go to that tutorial...
so that you can make this cute flower!!

I also did a tutorial during
week one right here
on my blog for
Block "L"
to go to week one and this block tutorial:)
As part of week two
I did the tutorial here for
Block "O"
For that tutorial
BLOCK "I"
is also in the week two tutorial:)

During week three
I did the tutorial for
BLOCK
to go to week three for the tutorial

BLOCK "I"
during week three:)

the tutorial for
Block "K"
for that tutorial
And I also did the tutorial for
Block "J"
during week four as well.

During Week Five I did the tutorial for
BLOCK "F"
to read that tutorial

BLOCK "H"
during Week Five as well.

During week six I did the tutorial for
BLOCK "G"
for that tutorial.

During week seven
I did the tutorial for
Flea Market Flower
Block "E"
for that tutorial:)

During week seven
is the tutorial for
BLOCK "D"...
As well as the tutorial for
Block "C"

During week eight
I did the tutorial for
BLOCK "B"
for that tutorial

"BLOCK "A"
during that same week

I decided to wait one more week
for the big finish so that I could
do this tutorial for this cute quilt label
and also show you how
I trim up my applique blocks.

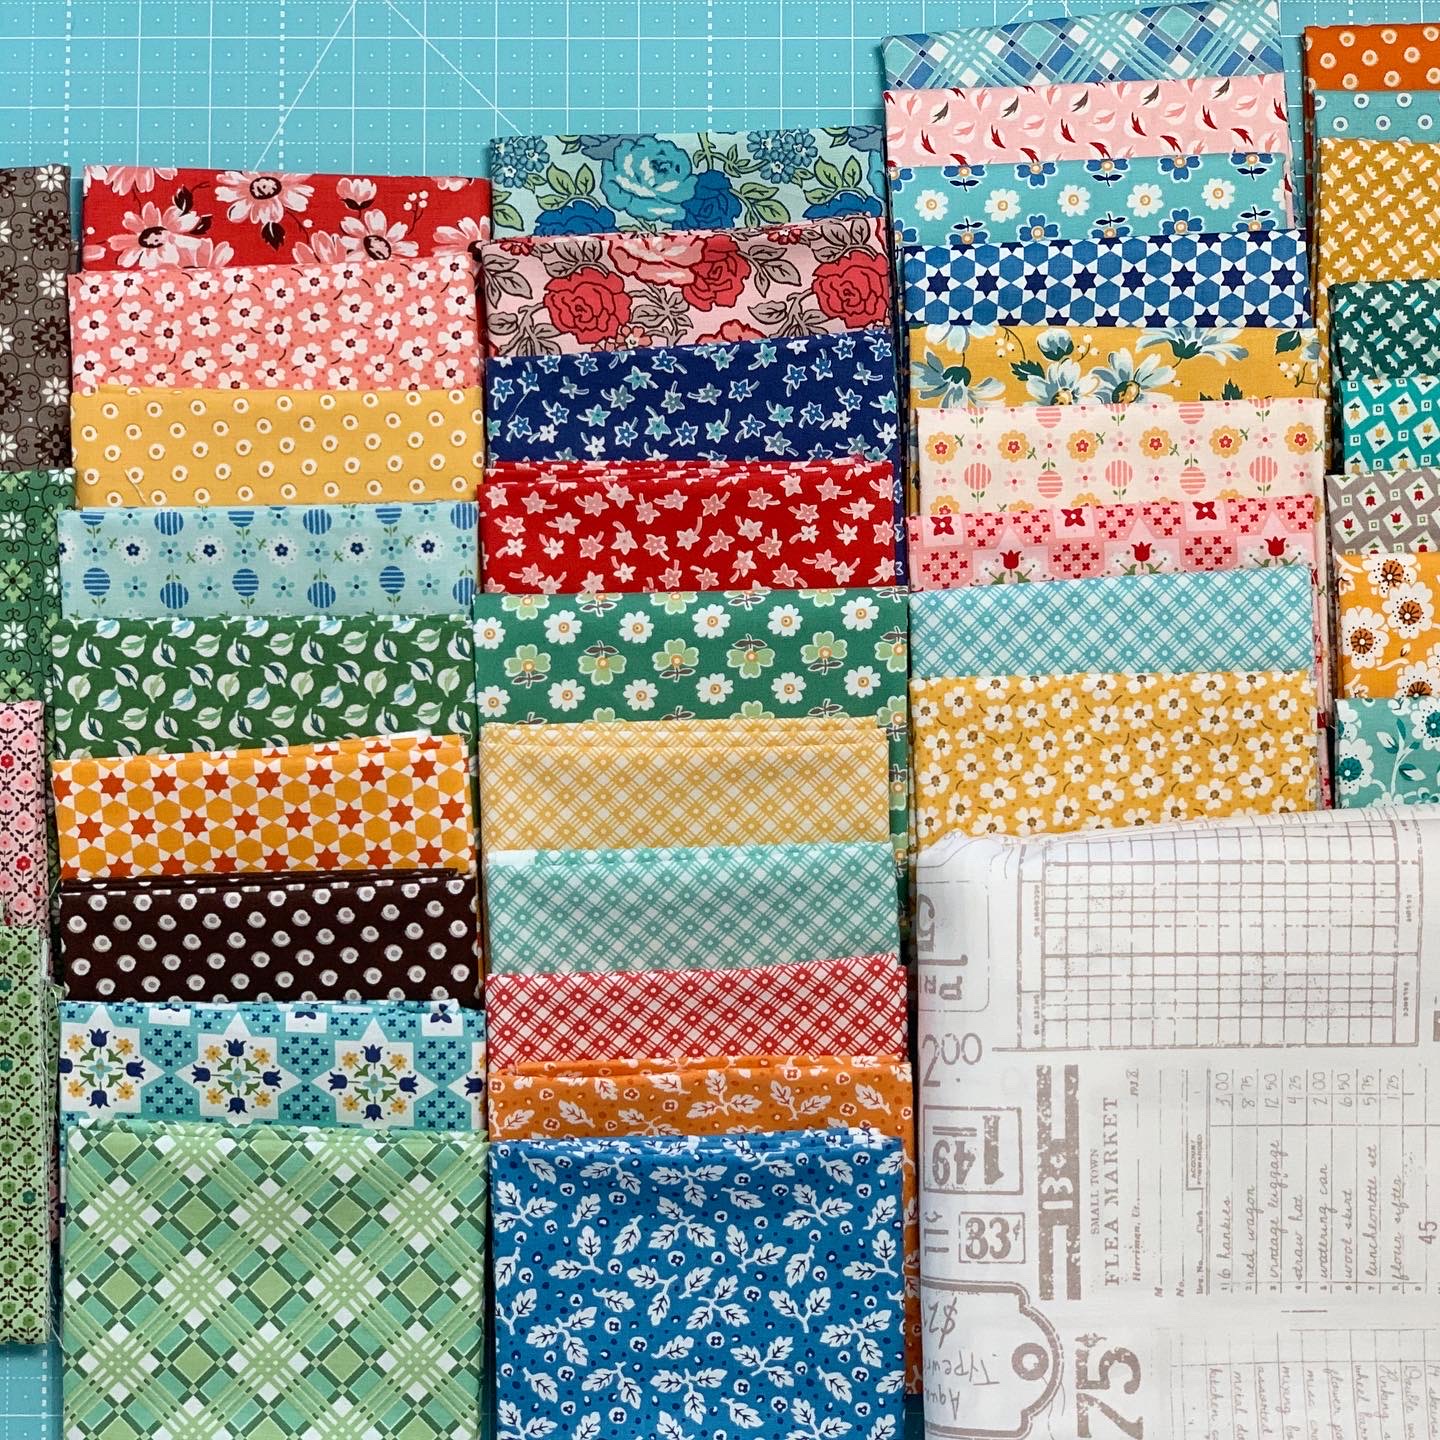
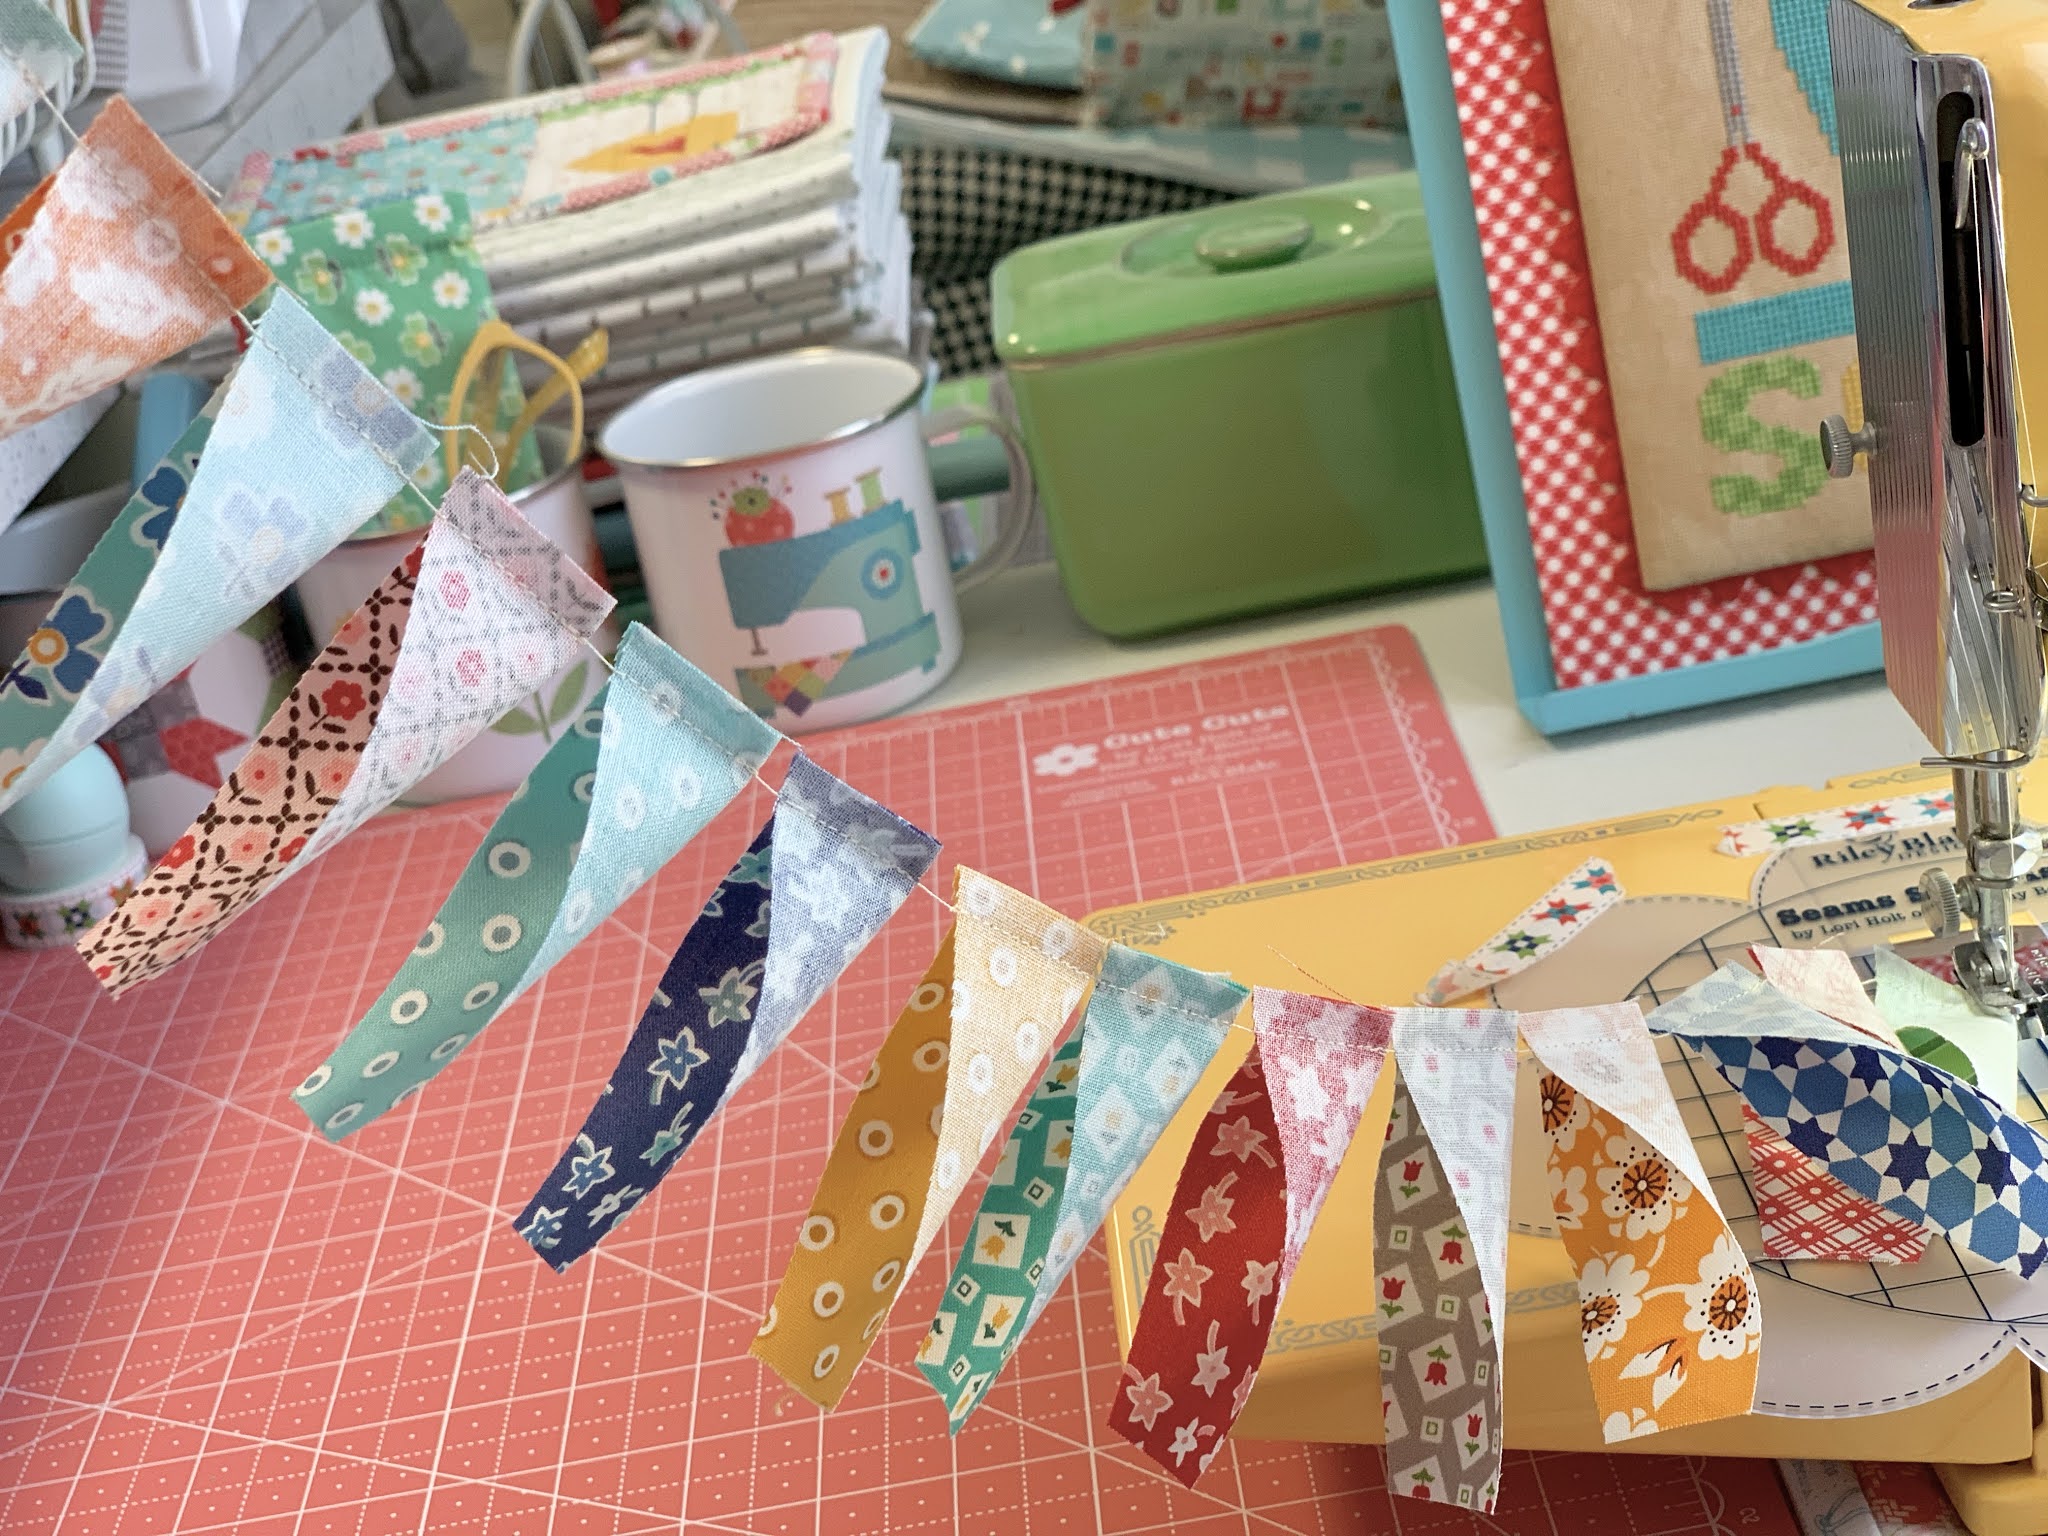
Now that all of my blocks are made...
I trimmed up all of the leftover prints
in the kit into usable size squares
according to my scrappy stash method.
I put the squares into my
leftovers squares bins according to size
and I will use them
when sewing my scrappy quilts.
If you would like to know more
about how and why I do this...
to watch the introduction video
of my SewnYour Stash Series
on my YouTube Channel.

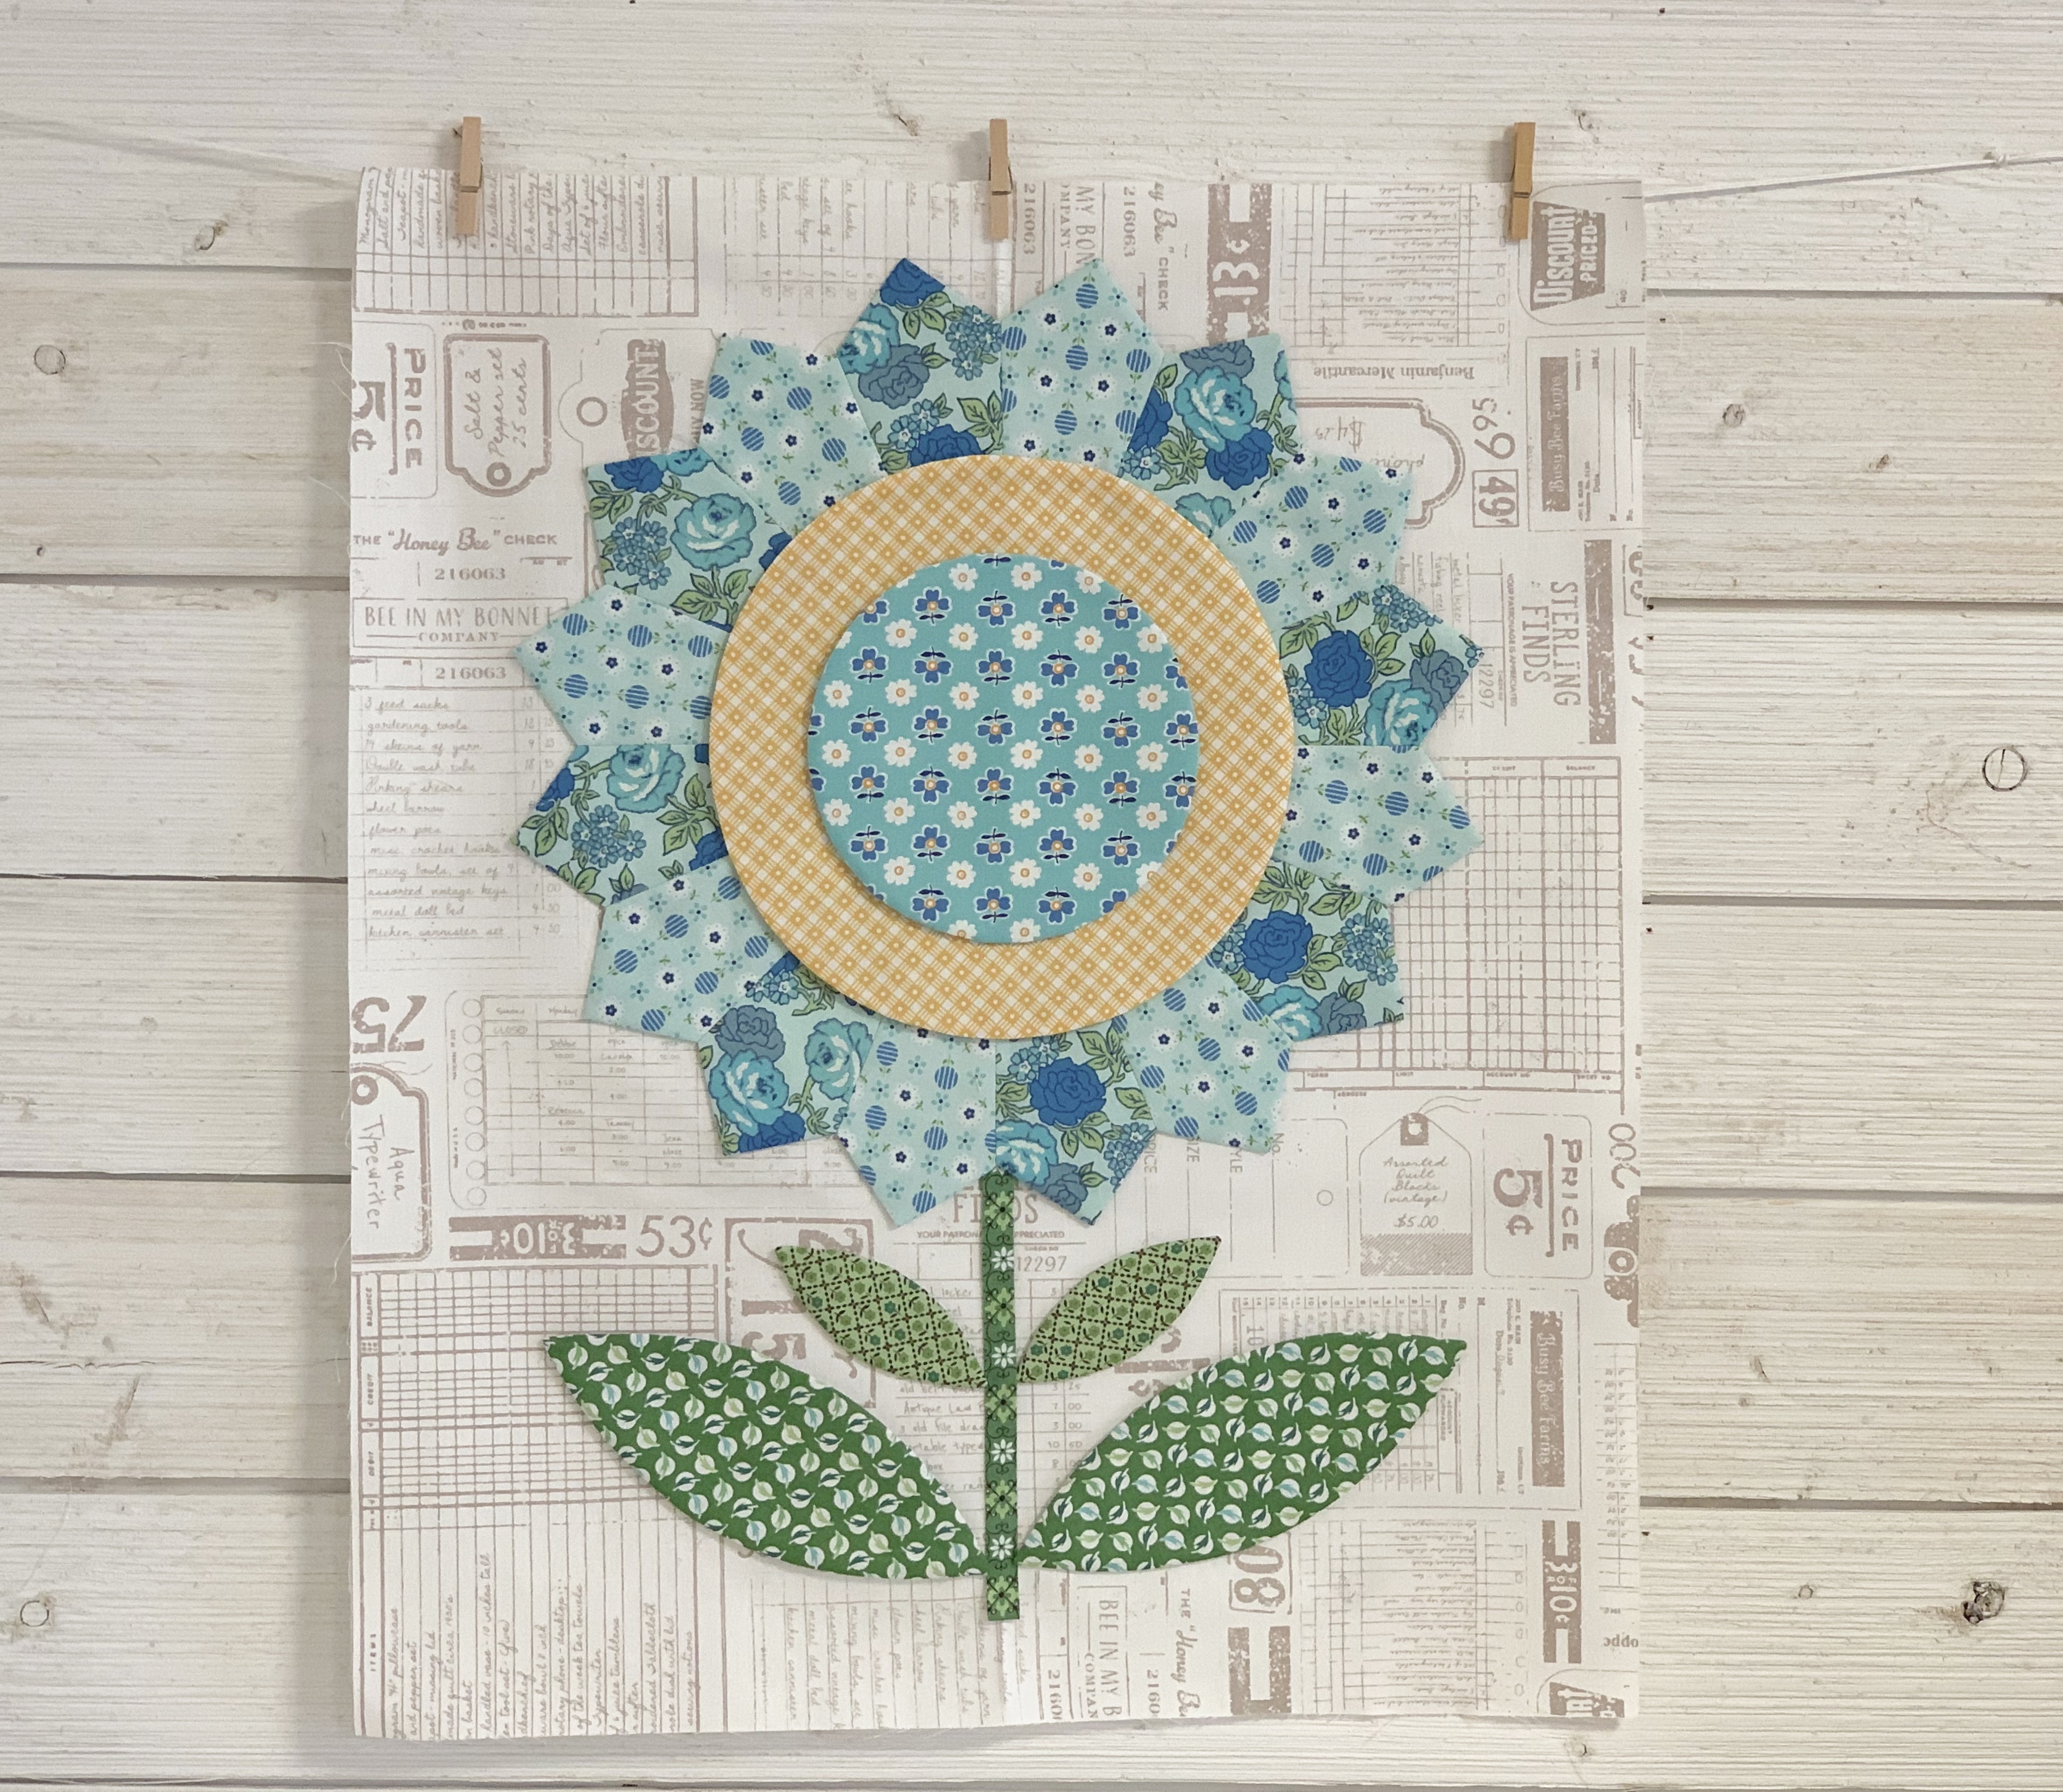
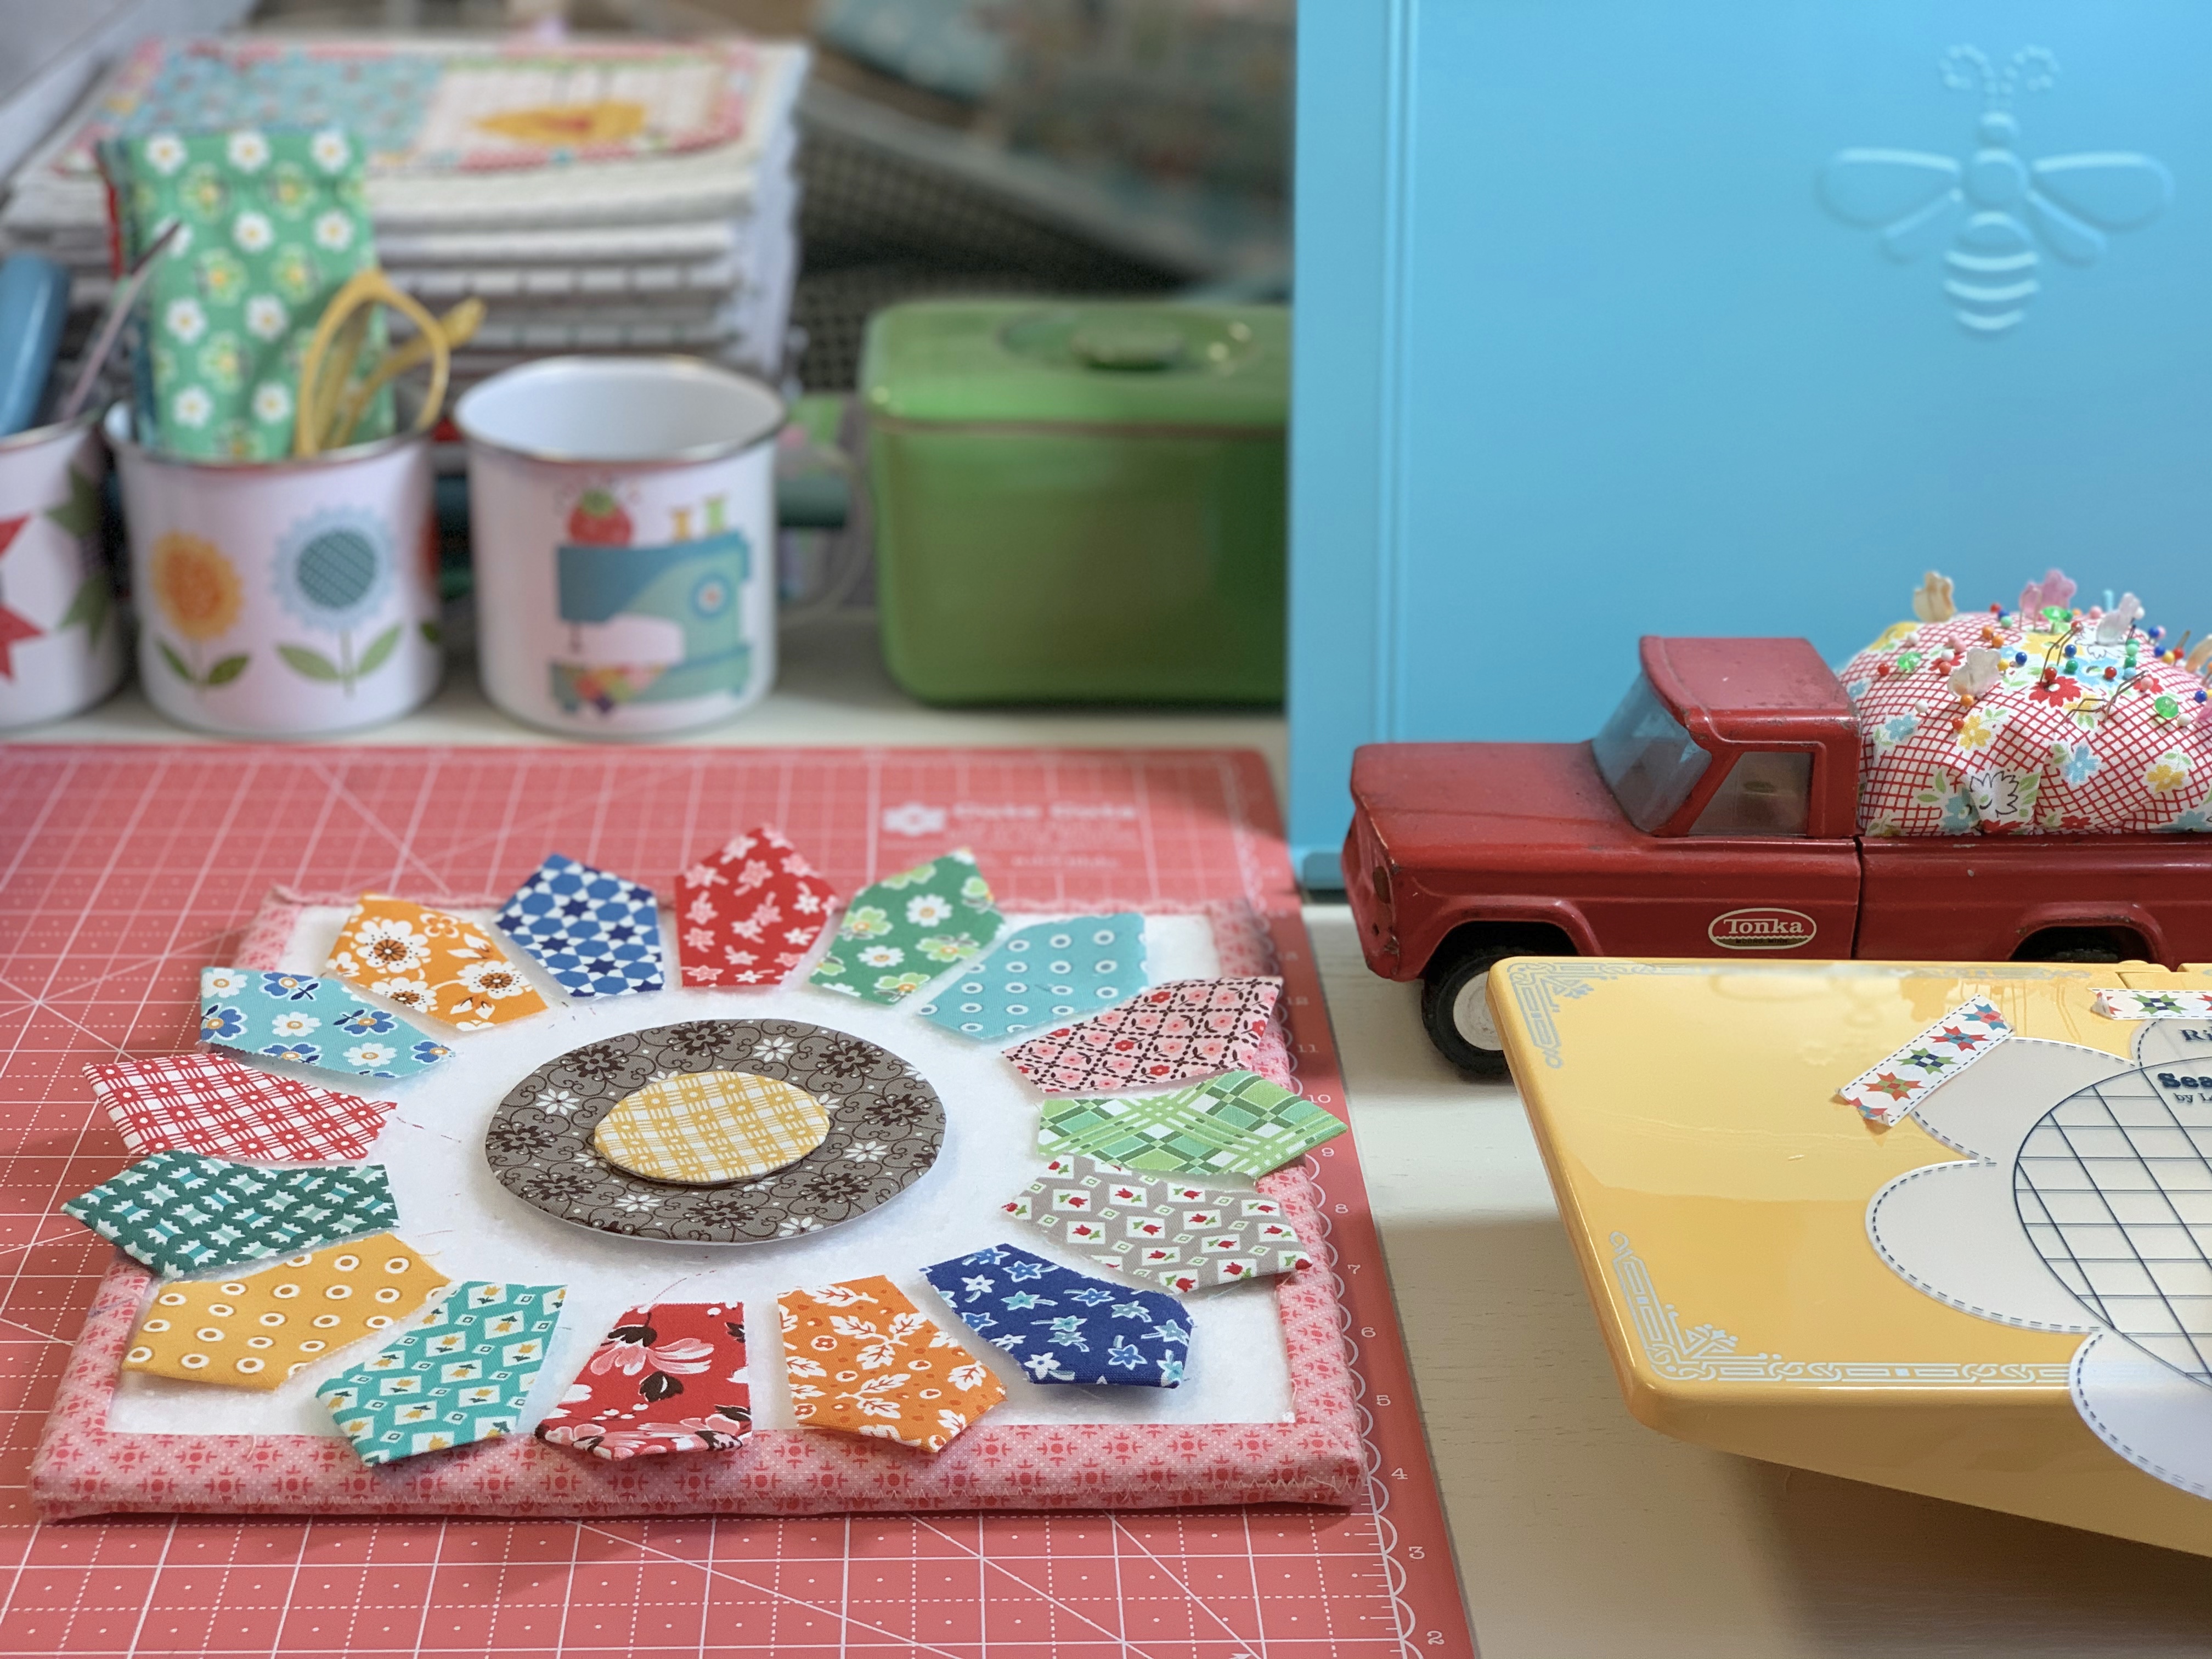
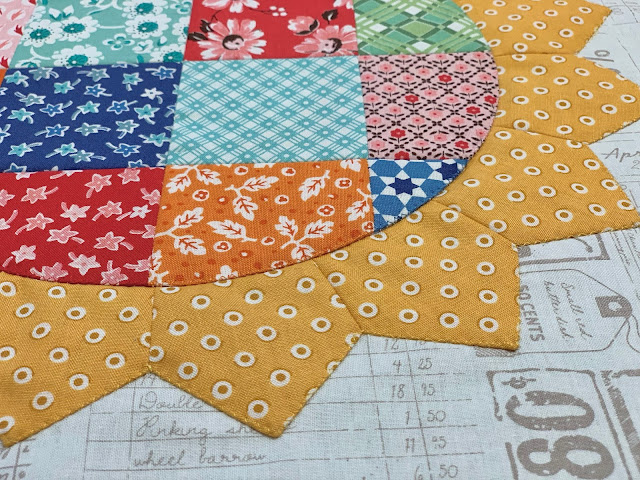
Out of those leftover squares
I chose 16 - 3" squares
from the prints so that I could
make a scrappy happy
7 1/2" Flea Market Flower.
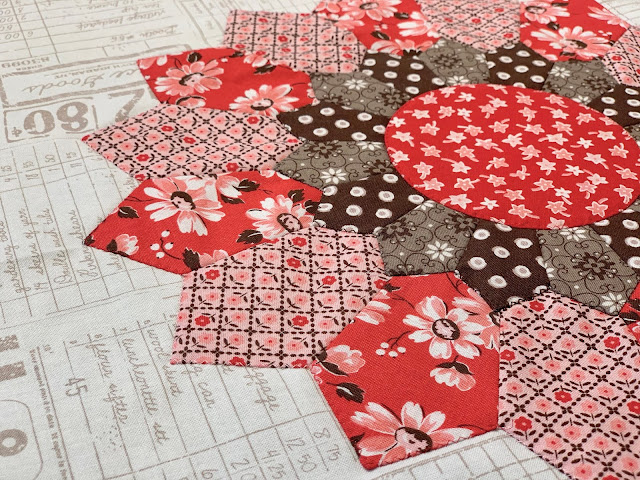
I also grabbed the
leftover 4" circle from Block "D"
and another 2" circle
that I had already sewn.
I wasn't sure if I wanted to use
the smaller circle but I
pulled it out to audition it
when the flower was finished.

I cut a petal from each of the
3" squares like this.
I used the 4" and 7" mark
on the Pie Ruler just like in the guide.

16 scrappy happy flower petals
all cut and ready to sew!

At this point I also traced a circle
from the 9" ruler to use with
CLOUD which is a
Riley Blake Confetti Cotton
that matches my fabrics.


After the flower was sewn
I grabbed a small design board
and pinned it to the 9" circle
as well as pinned the center circles.

After pinning I glued...
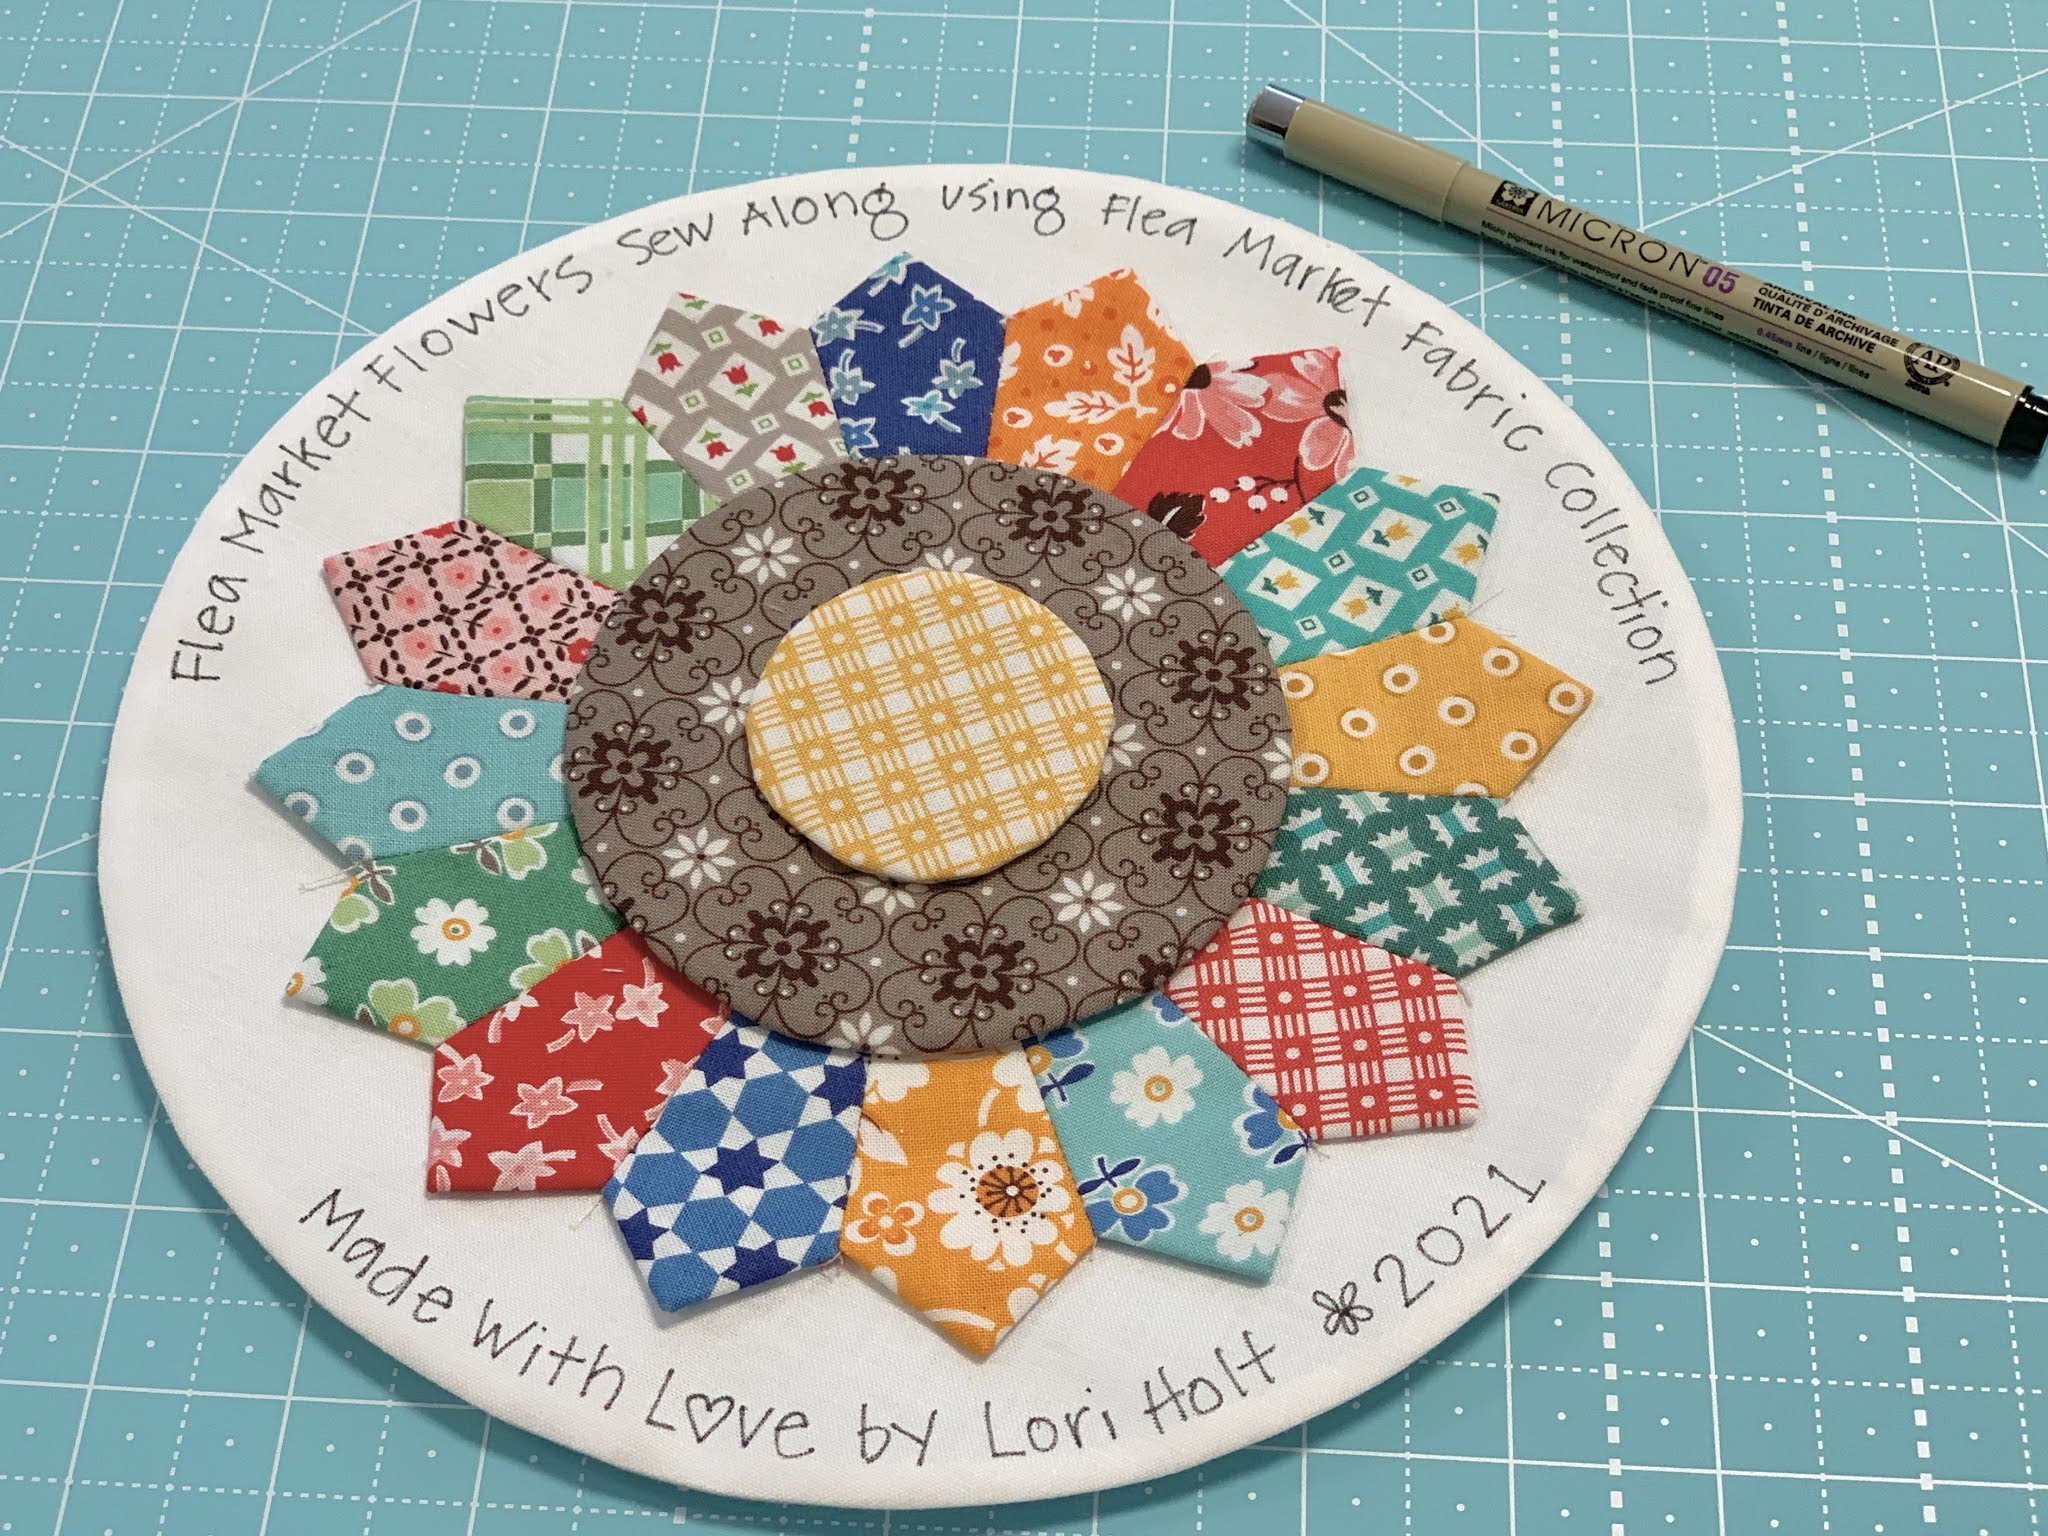
And when it was dry
I used a Pigma Pen
to write on the label.
Pigma pens will not
smear or wash out and
I love to use them on my labels.
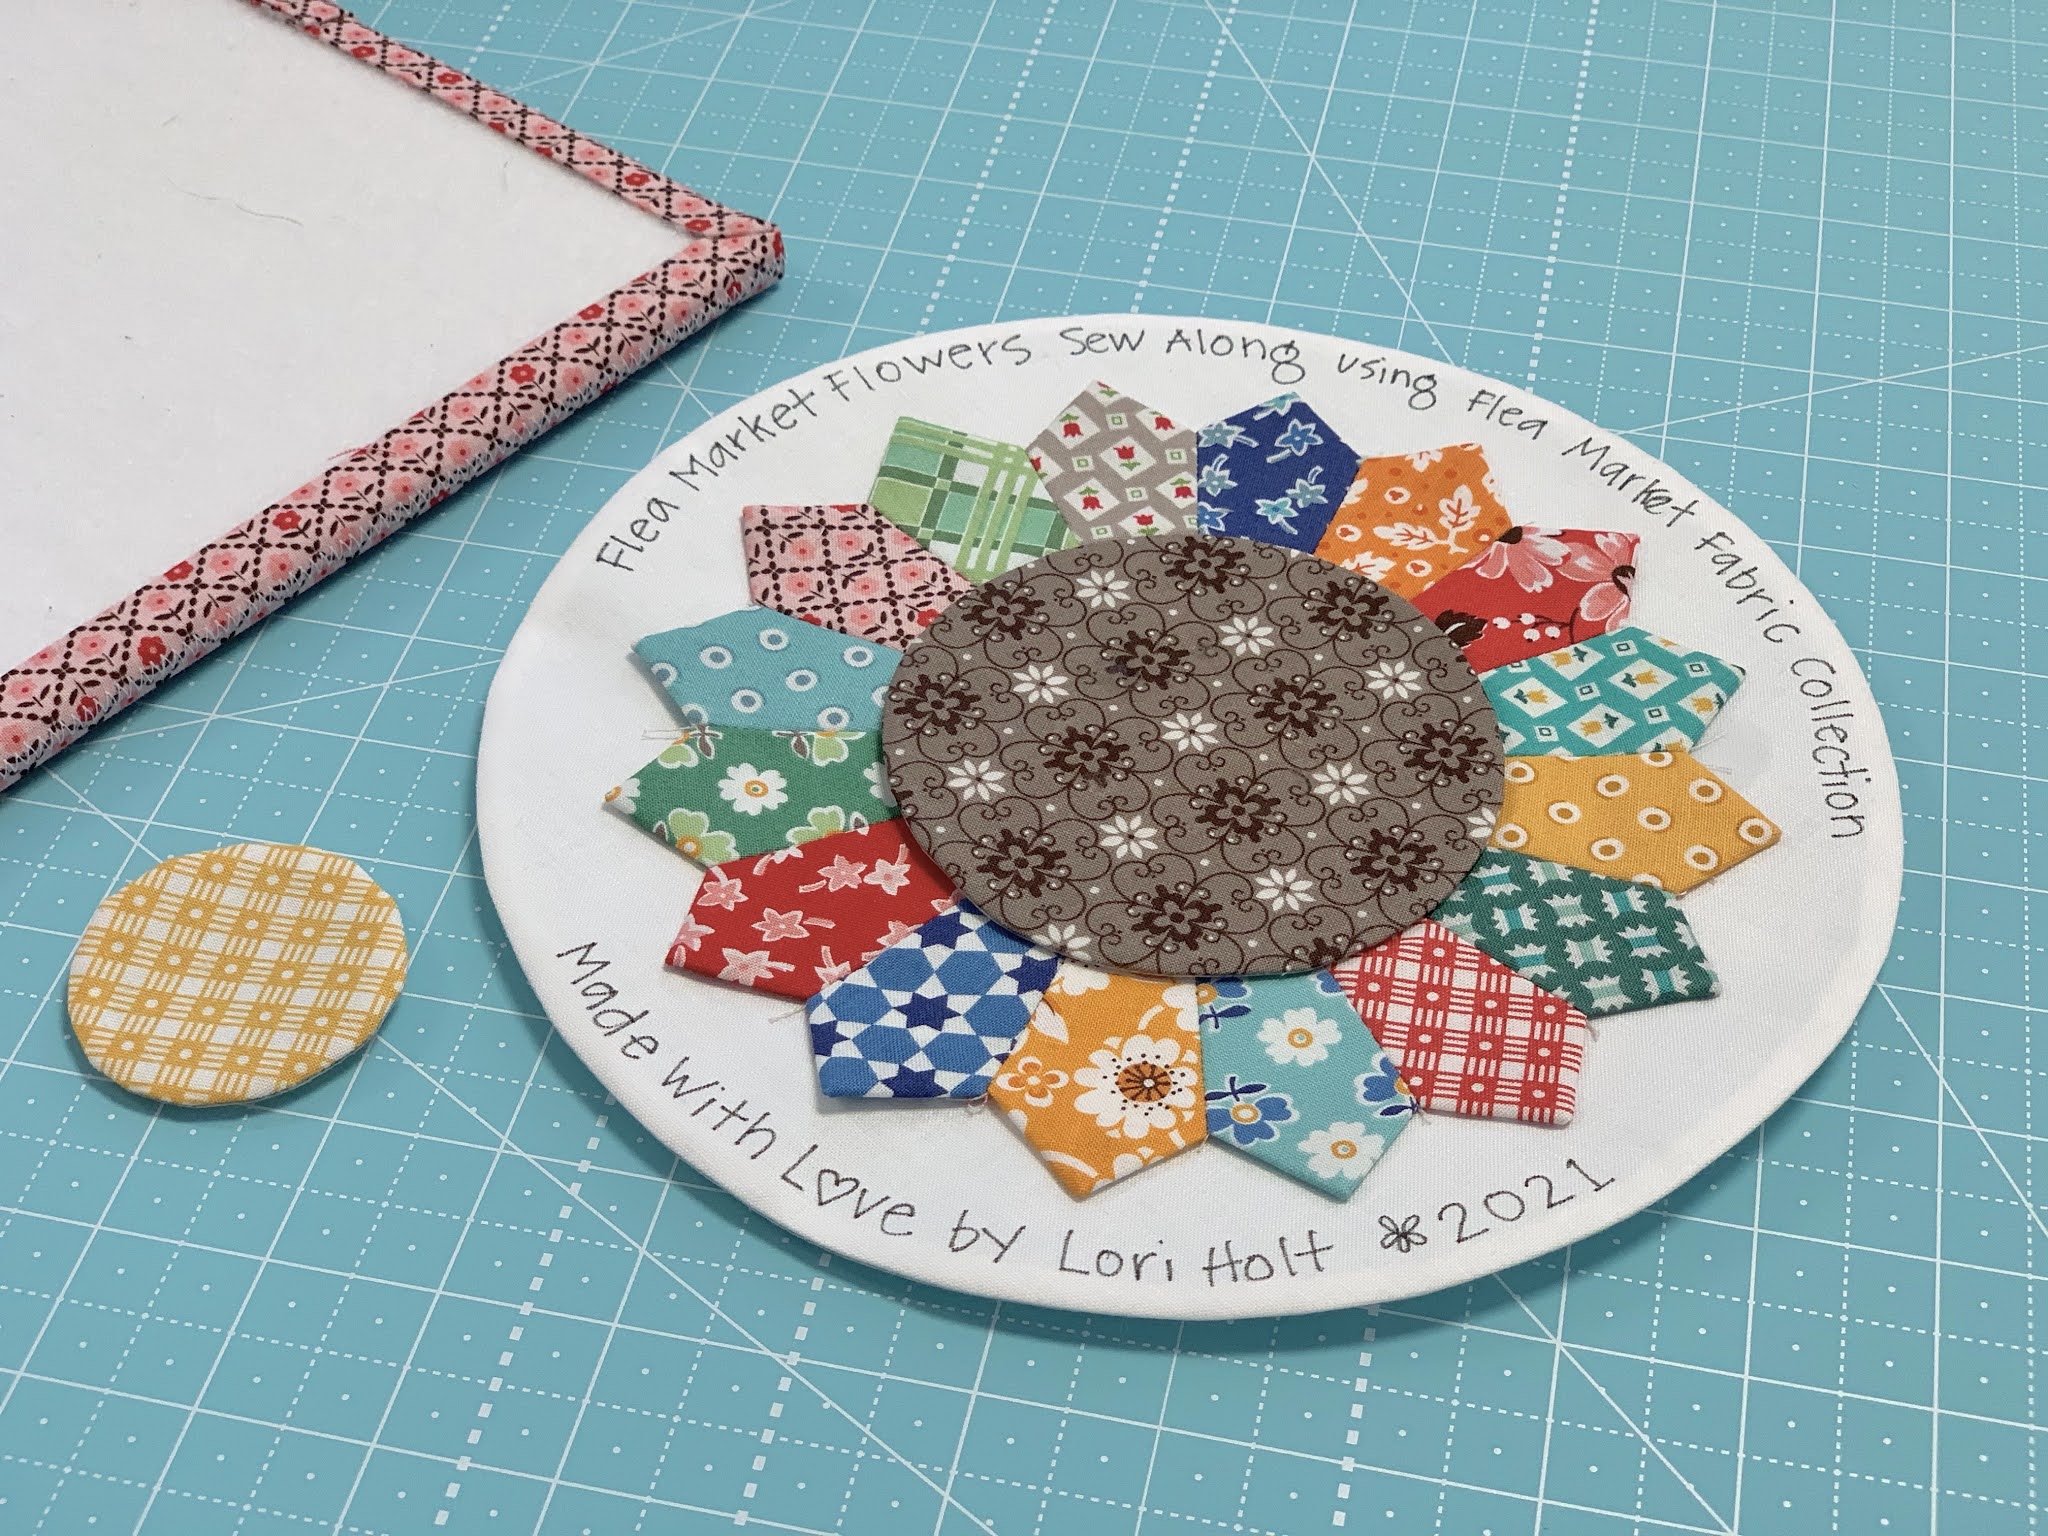
I decided not to use the small circle
in the center after all.
The beauty of using the Sue Glue
is that it was very easy
to simply gently pull it off:)

I love this cute little label!!
I think it's important to
document our quilts as we make them:)

This is what the back of the label
looks like and I will applique it
onto the back of my quilt
either before or after it's quilted.

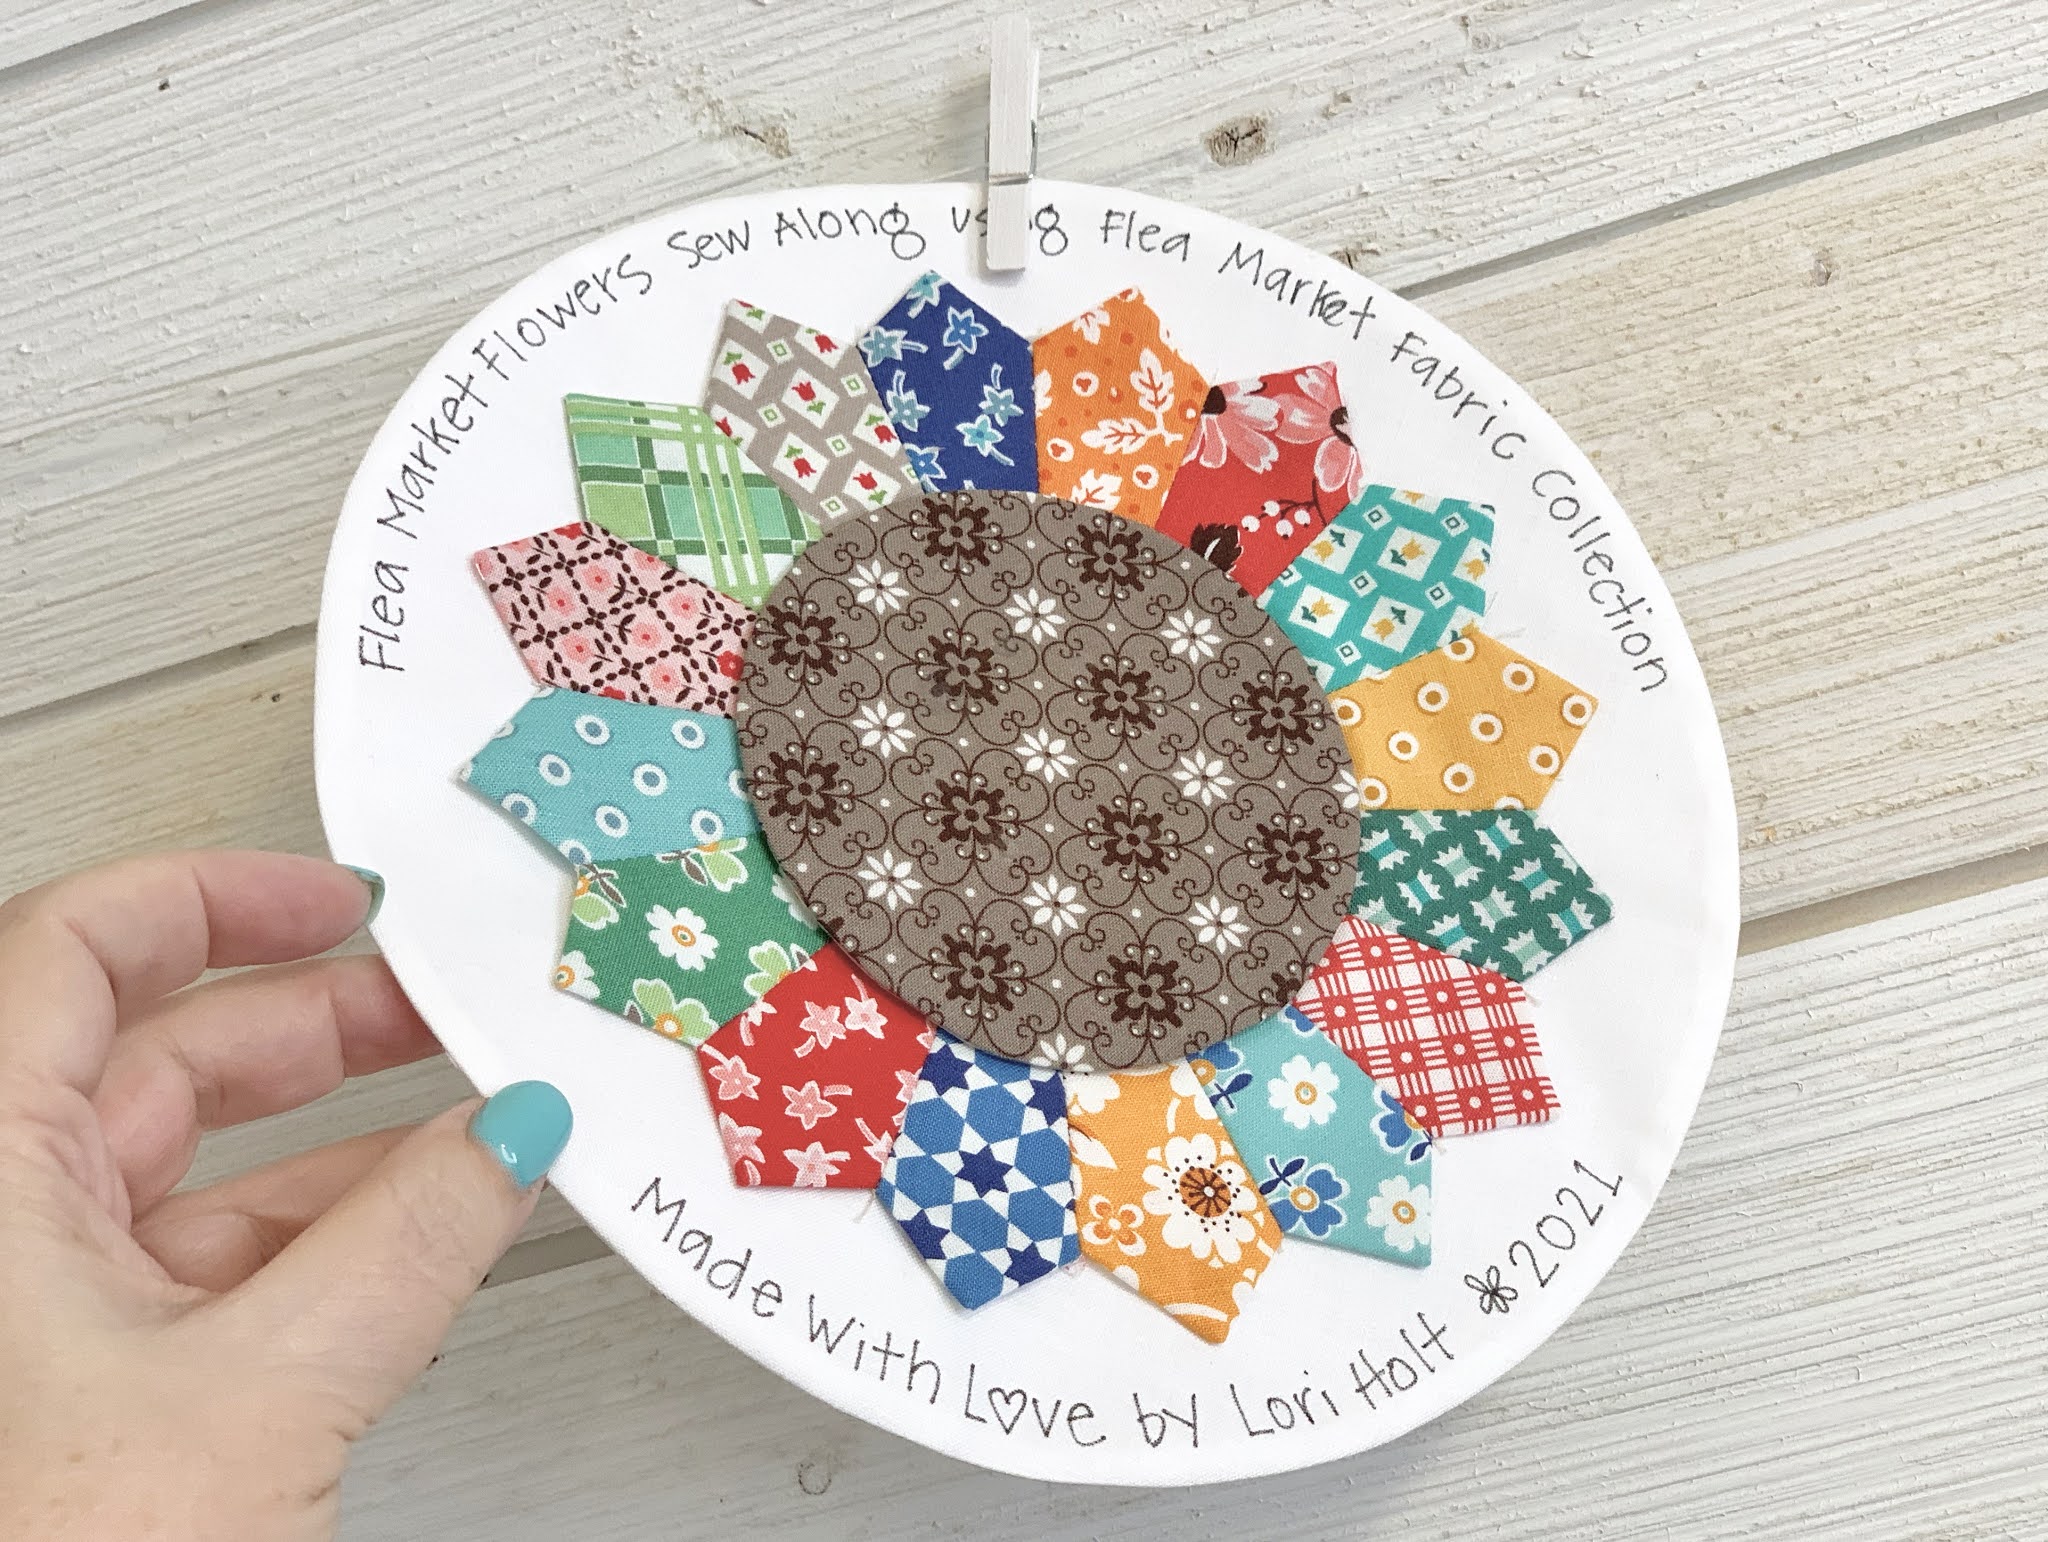

I think my Flea Market Flowers
look really sweet with scrappy petals too:)
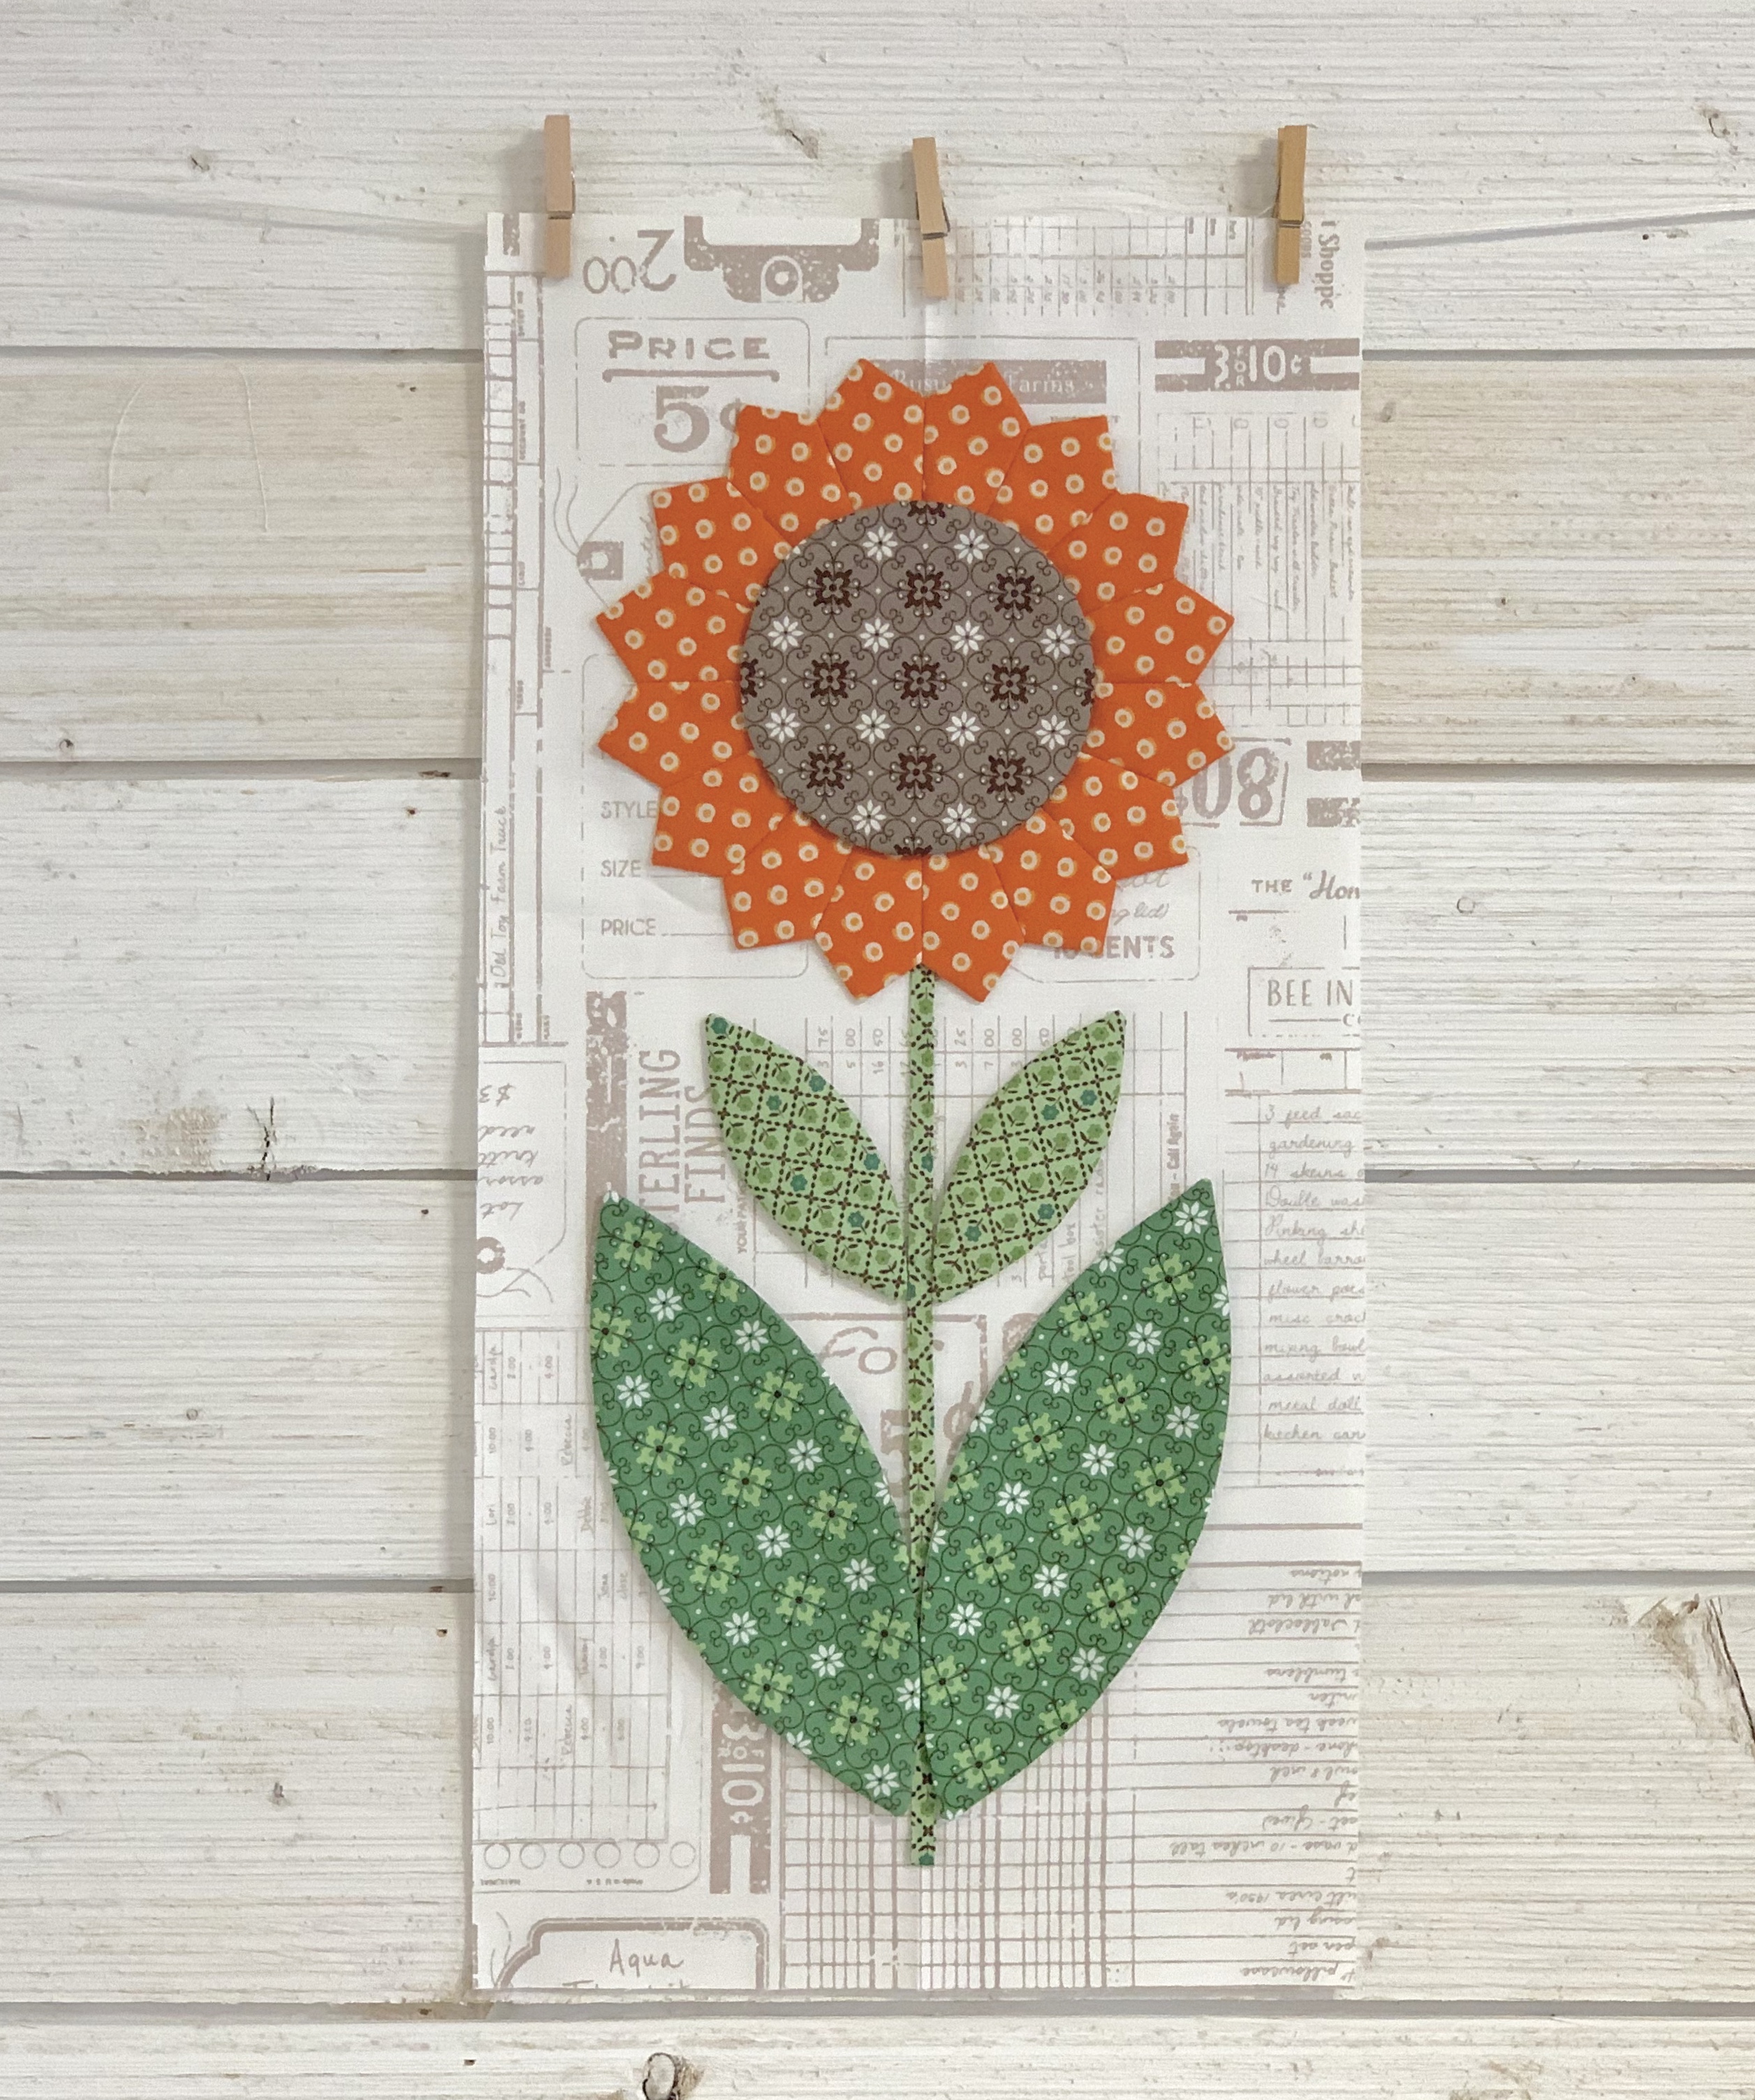
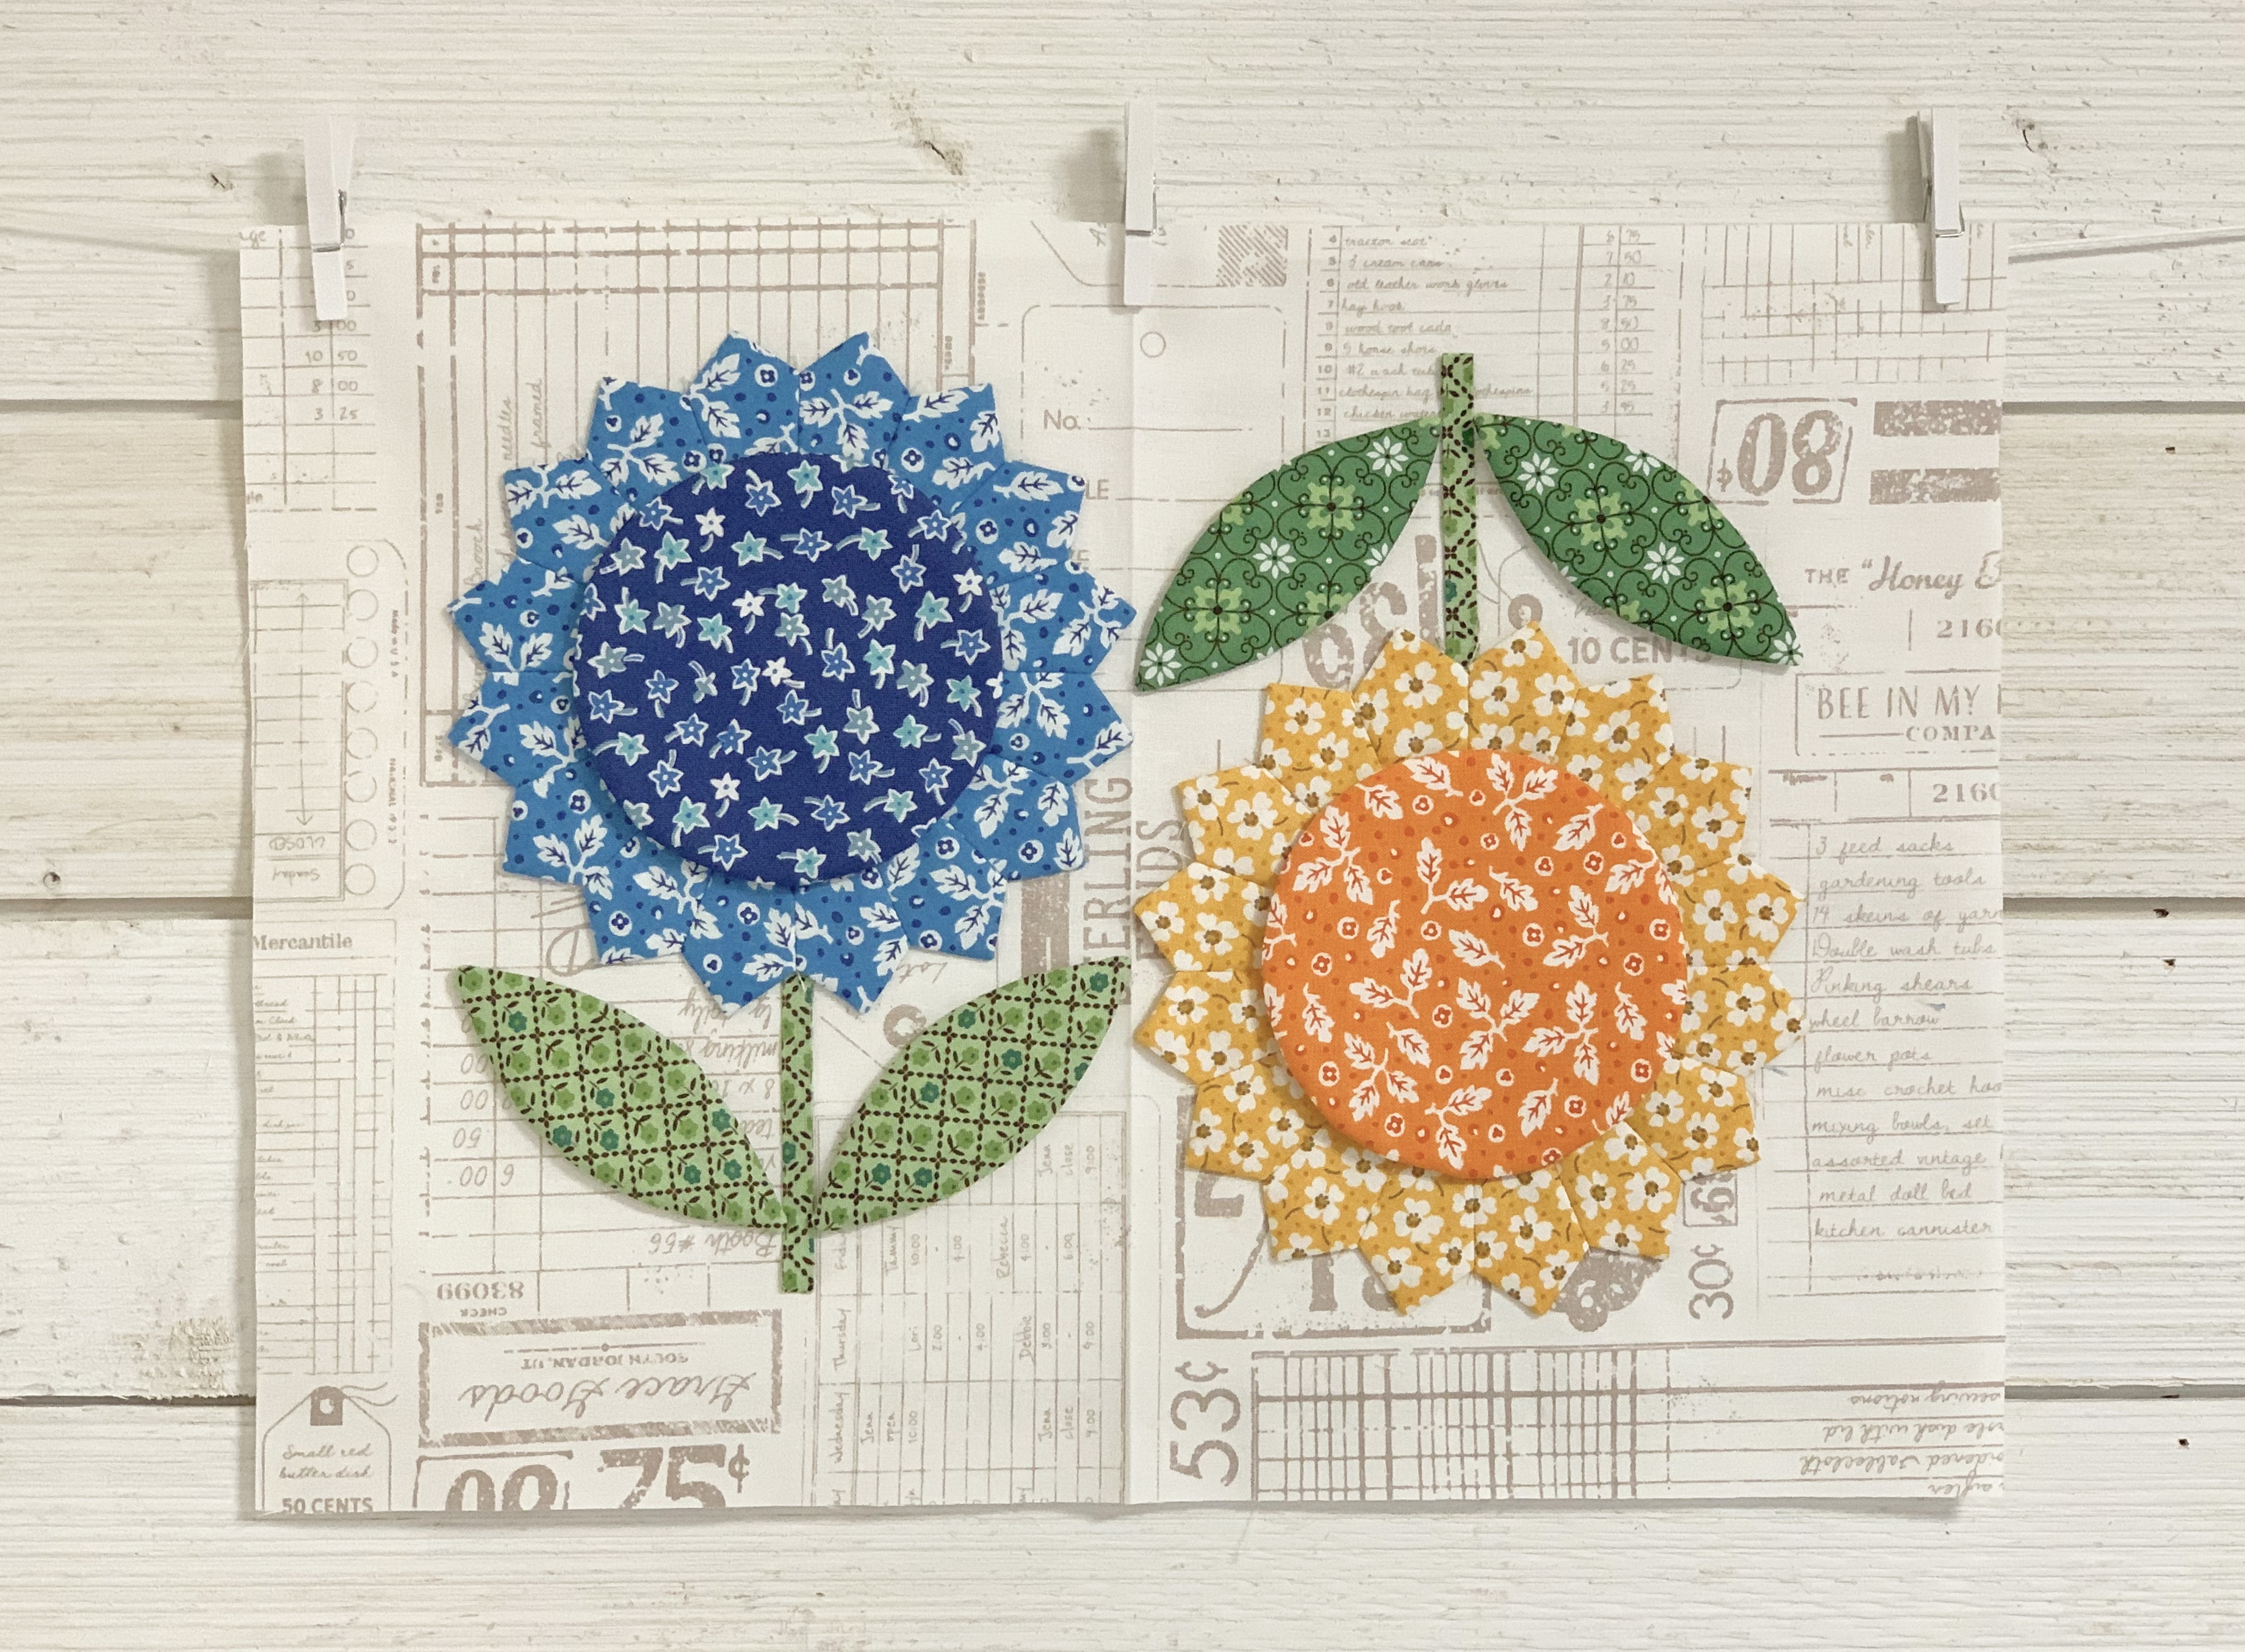
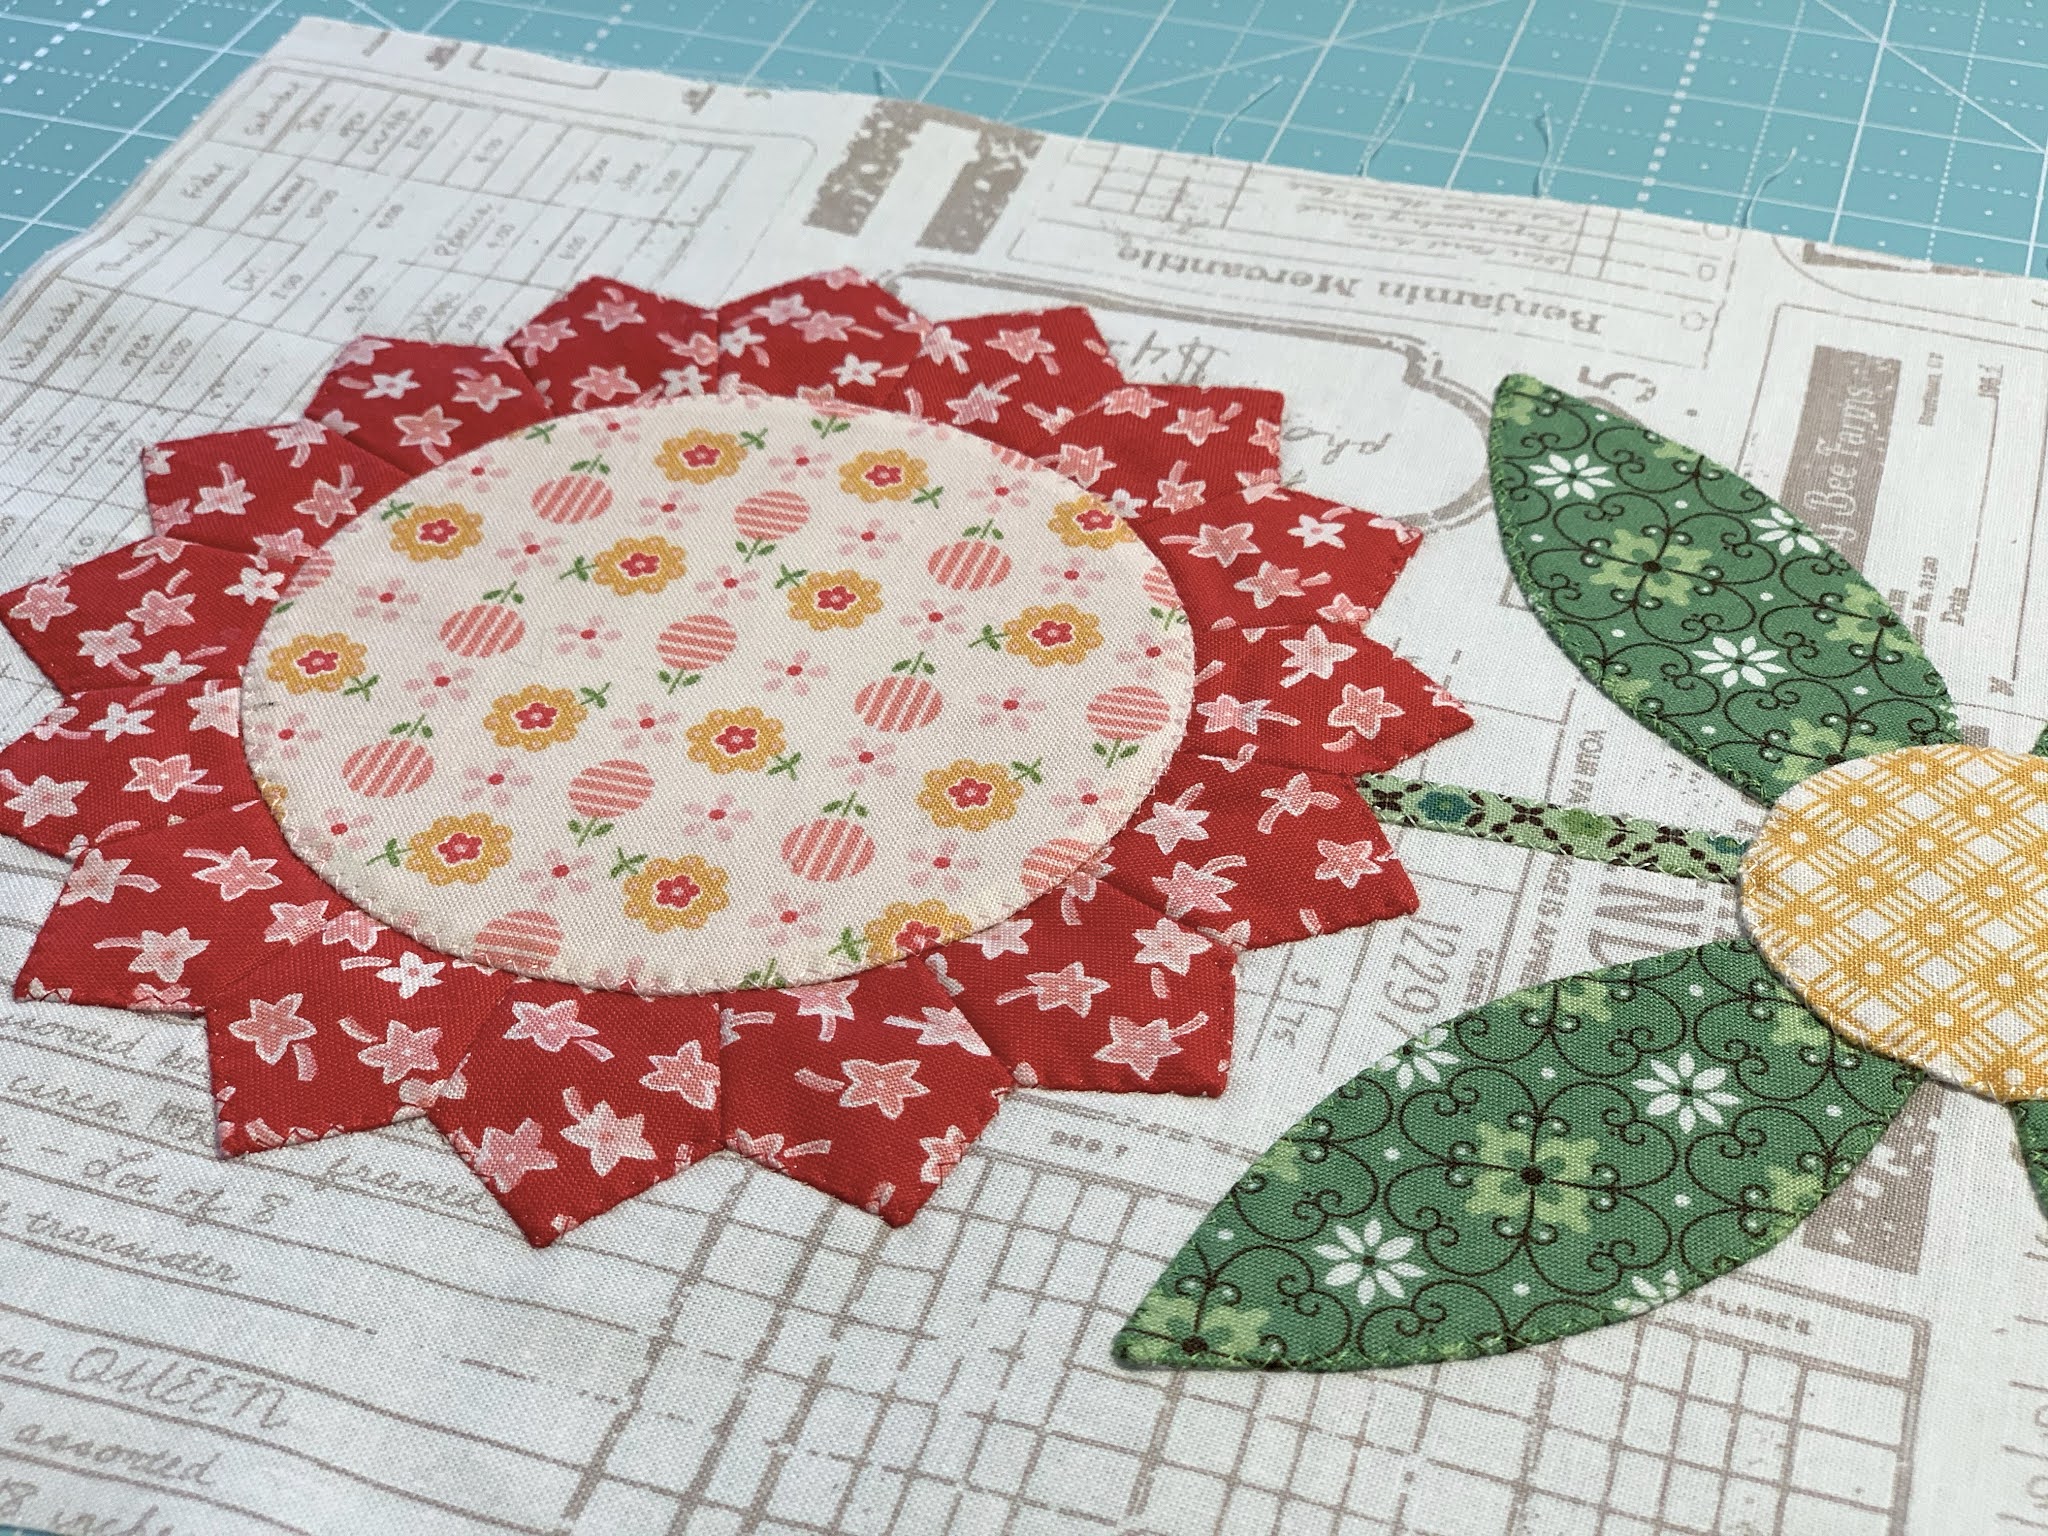
All of my blocks are appliquéd now
and as I said before I decided to
do applique by machine for this quilt.
If you need to watch how I
machine or hand applique
to watch a tutorial that I did
on my channel that shows how I do both.
Now let's chat about trimming up the blocks!

I trimmed up my blocks in order
that I made them and so I
thought I'd show you
block "L" and then Block "M"
from week one of the sew along.

Here is a few close ups of
what the machine applique looks like.

The next thing that I always do
right after applique
and before trimming up
is to press my blocks.
I always press from the back
and I do not use steam.

My go to rulers for trimming
ALL of my blocks in ALL of my quilts
are my Cute Cuts Trim-It Rulers.
I have many rulers in a
variety of sizes to make this job easier.
Here I have pictured these square sizes:
2 1/2" - 3 1/2" - 4 1/2" 5 1/2" - 6 1/2" -
7 1/2" - 8 1/2" - 9 1/2" - 10 1/2" - 12 1/2"
Of course you can use any rulers
that you would like to...
I'm just showing you what I use.
If you have been following all of
my other sew alongs
you already have these sizes:)

trimmed down to 8 1/2" x 18 1/2"
I am starting with the 8 1/2"


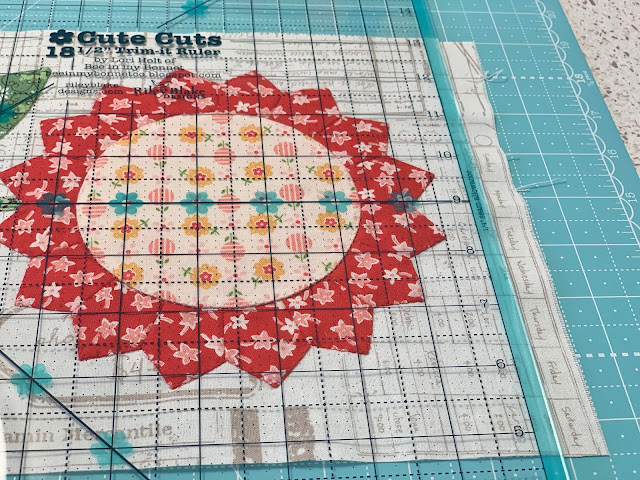


I use the lines on the rulers
to center the design and then
trim down one side first...

Like this...

And turn the block and trim the other side.

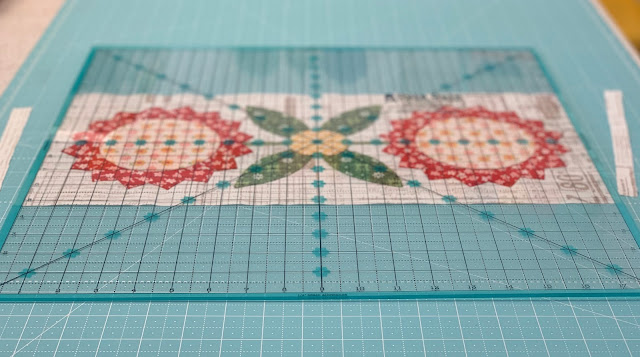
Now that takes care of the 8 1/2"
...now for the 18 1/2".

Here are my larger ruler sizes pictured.
They are 14" - 16" - 18" and 20" square

I grabbed the 18 1/2"...

Used all of the lines
on the ruler for centering...
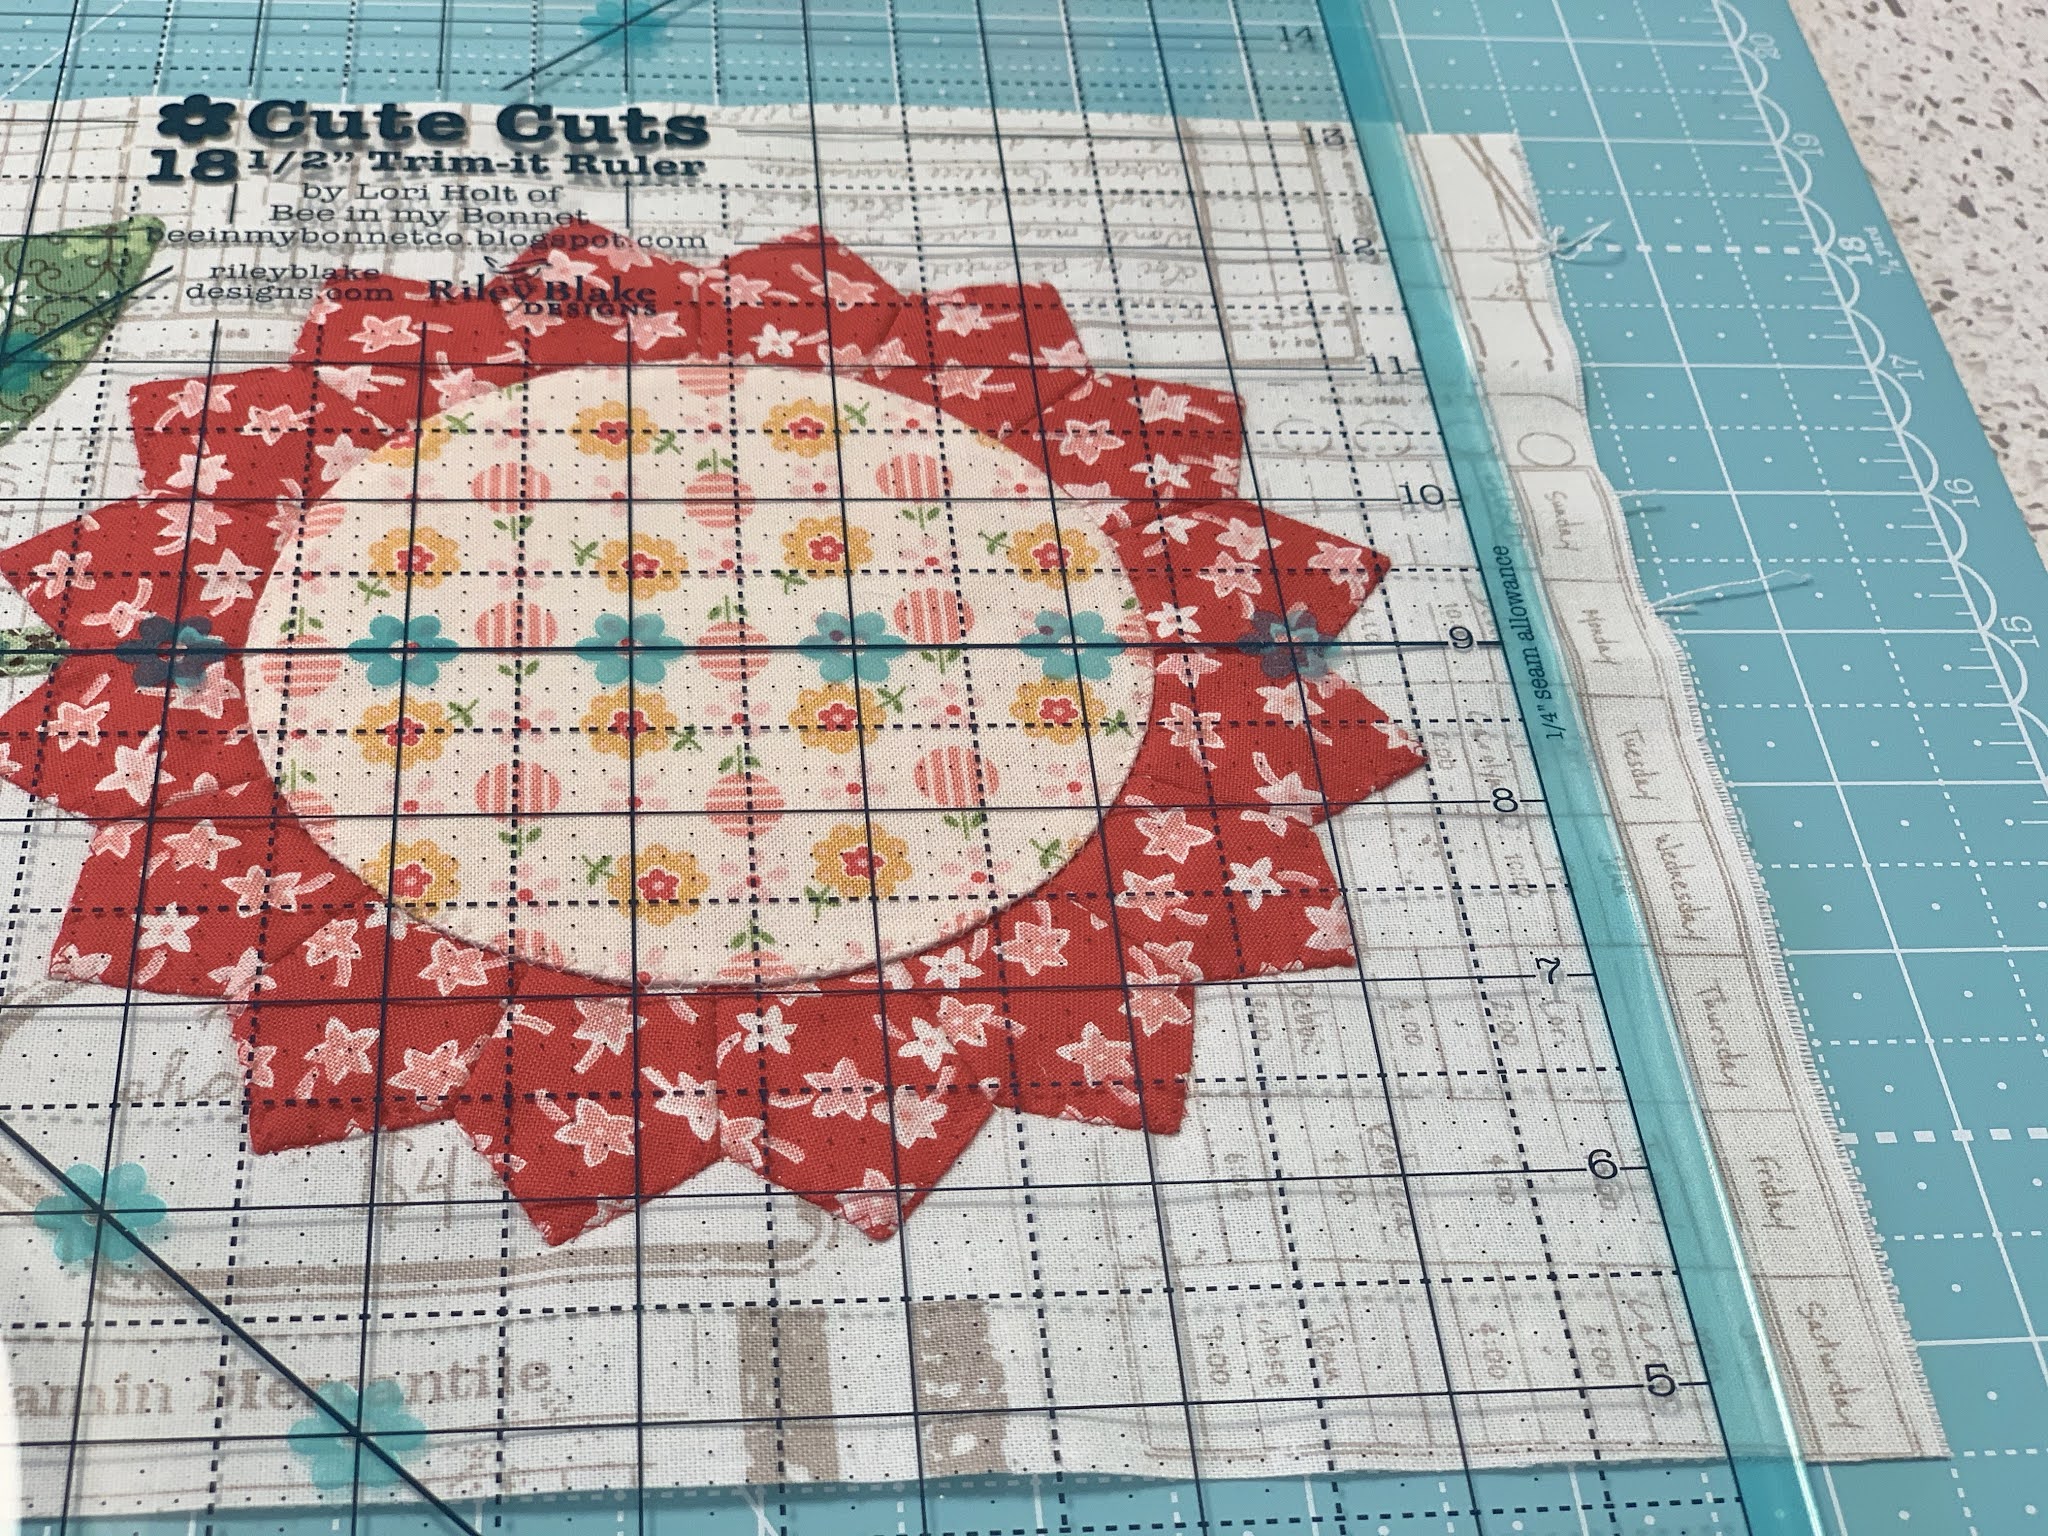


And trimmed off the two remaining sides.

For Block "M" I did the same thing
but using the 18 1/2" and
also the 20 1/2" Rulers.
Remember to press from the bak first.
Here's a close up of the
machine applique on this block.


I used the 18 1/2" Trim-It Ruler first...


And finished up with the 20 1/2".


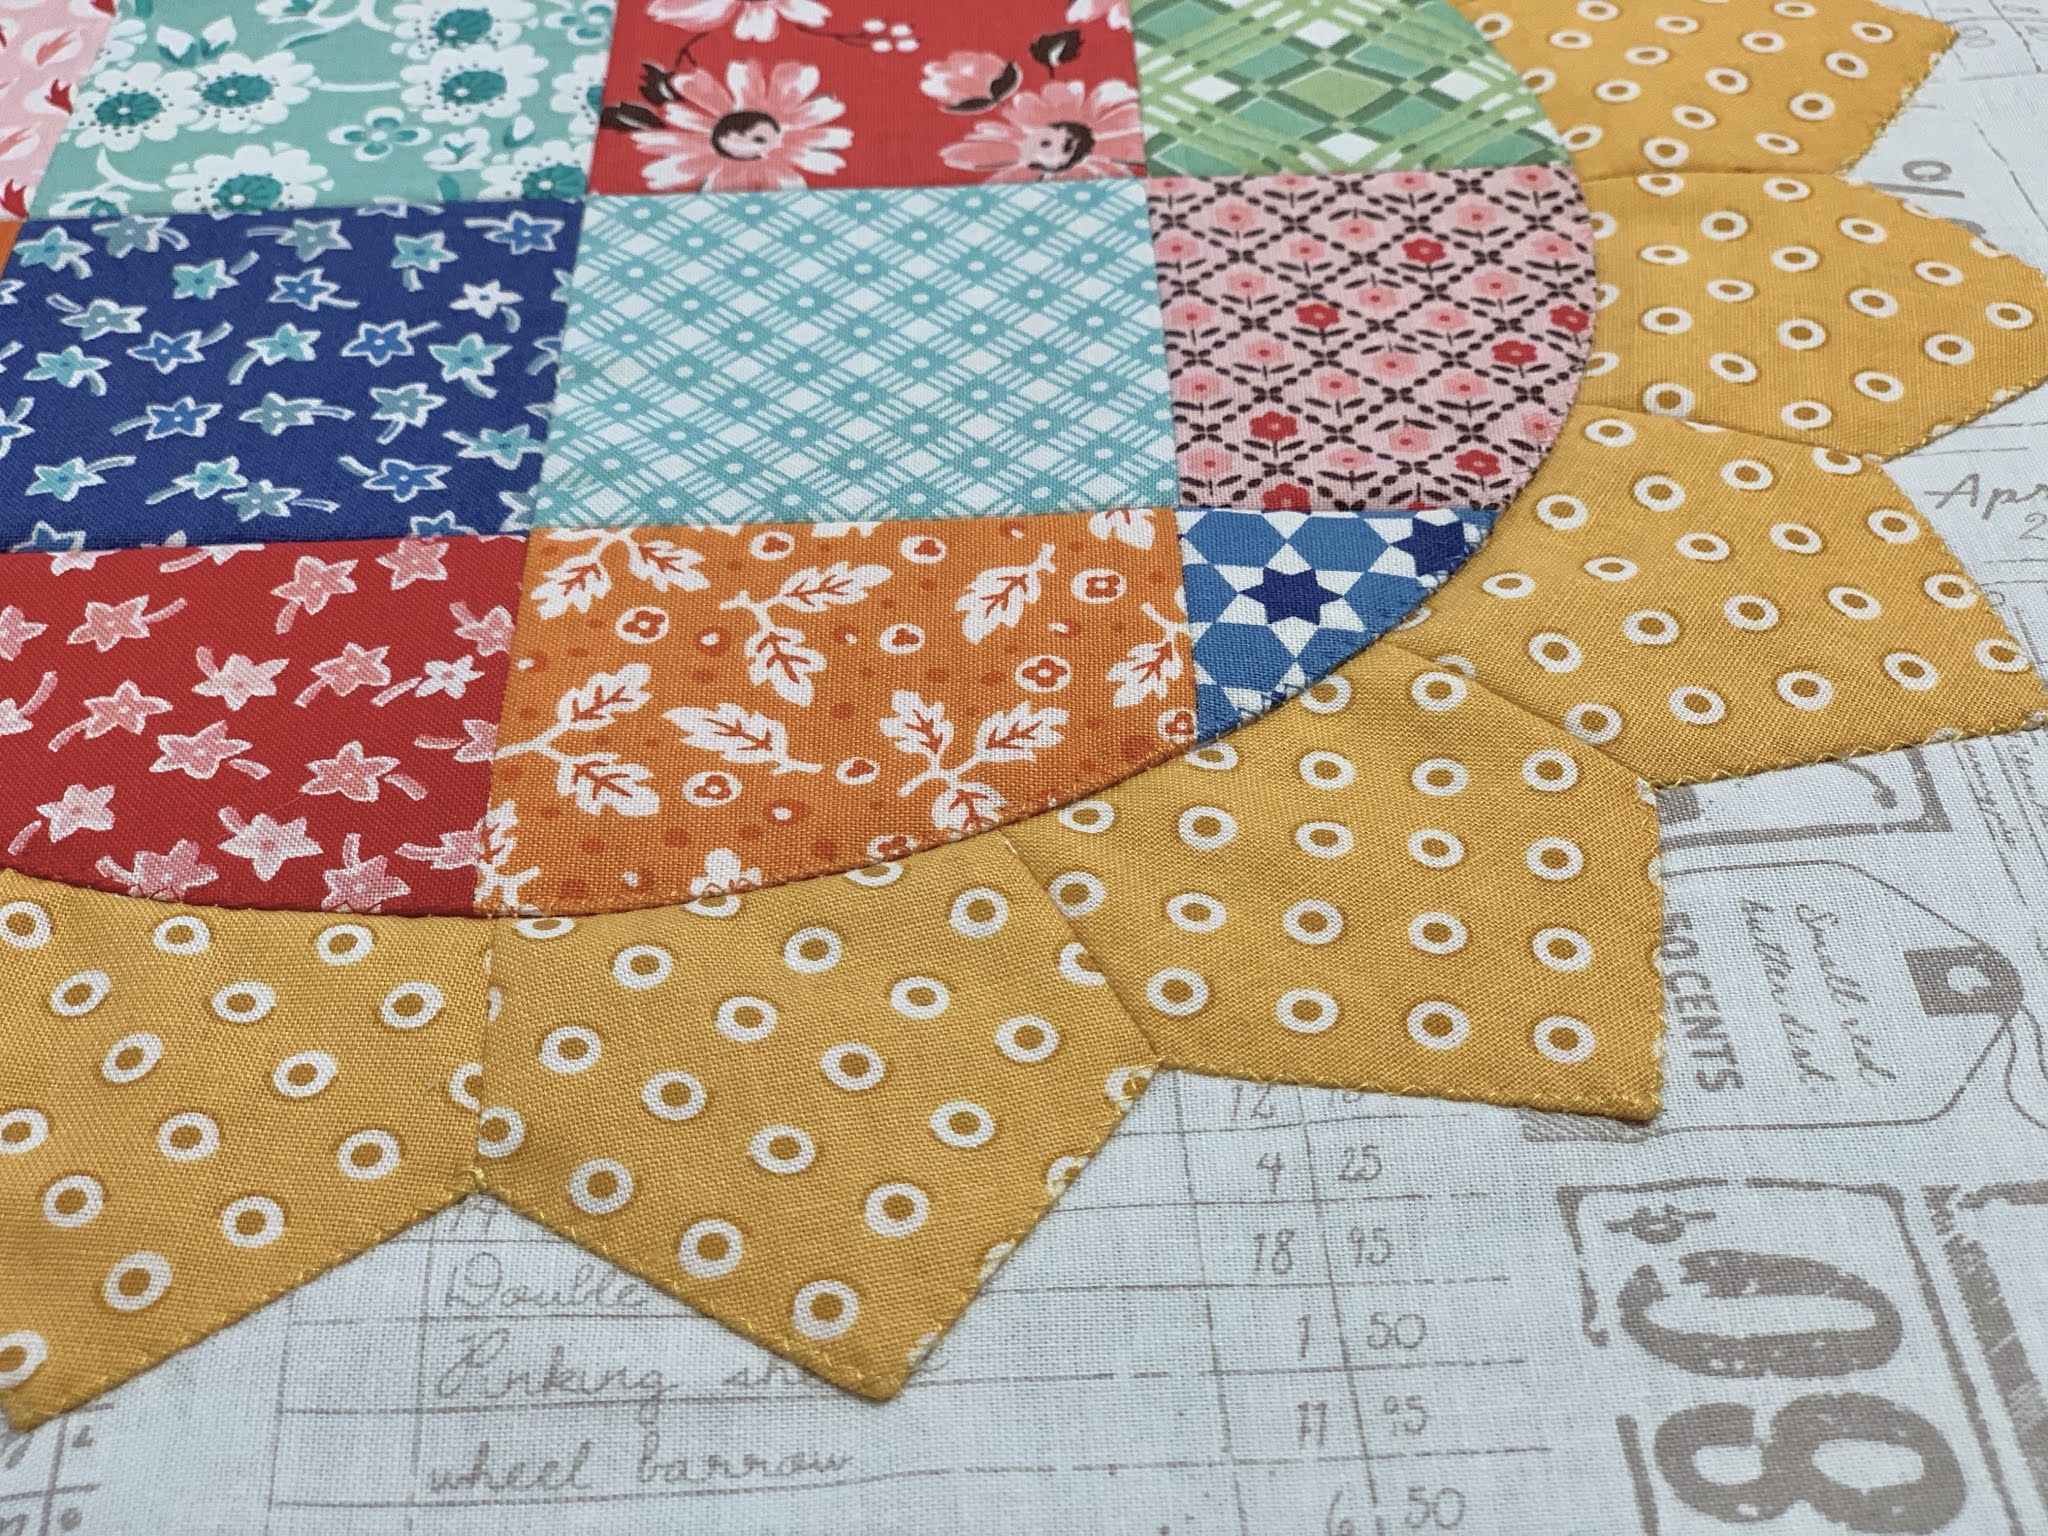
There are 2 blocks only
in the quilt that you
will trim to a square size.
One of them is Block "K"
that you will trim to 14 1/2" square.

Close up of the machine applique;)

Because I have a 14 1/2" Ruler
of course I used it.

I absolutely love using these rulers
because it's so easy to
center everything perfectly.
The aqua lines on the outside
represent the 1/4" seam allowance
so that you can sew exactly
what the block will look like
after it's sewn into your quilt.


EASY PEASY!!!

The other square block is
Block "G"
and because I do not have a
24 1/2" Trim It Ruler (as of yet)
I just simply measure out 12 1/4"
from the center on all four sides
and trim so that it measures
24 1/2" square.
It's not as easy without a
Trim-It Ruler but it works:)
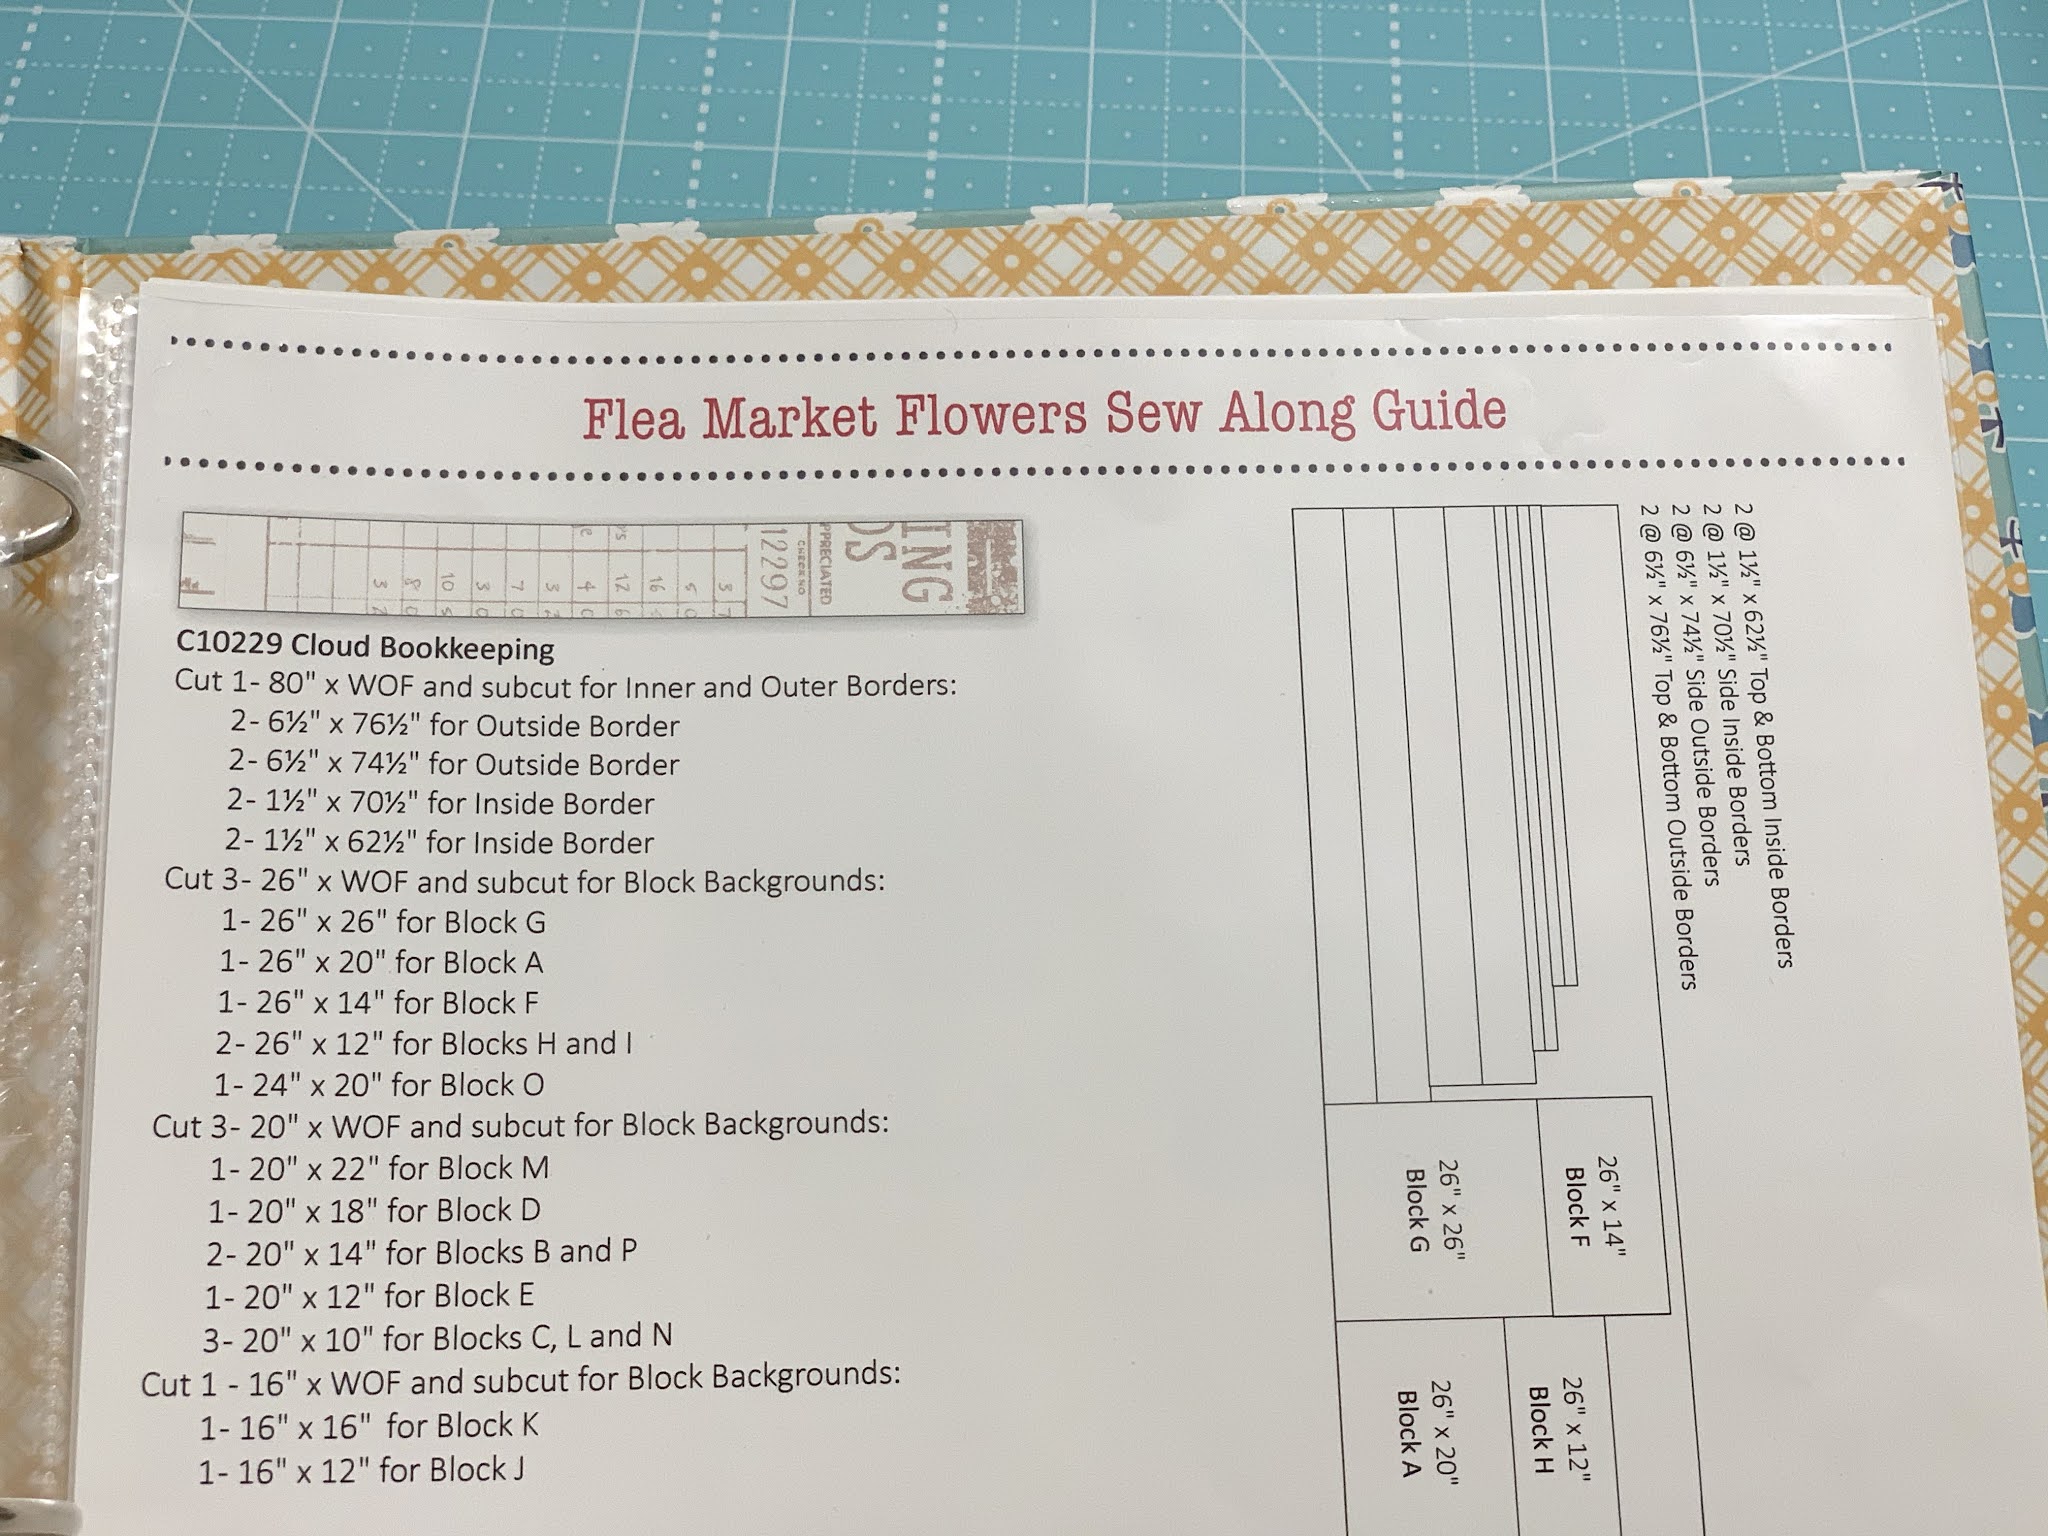
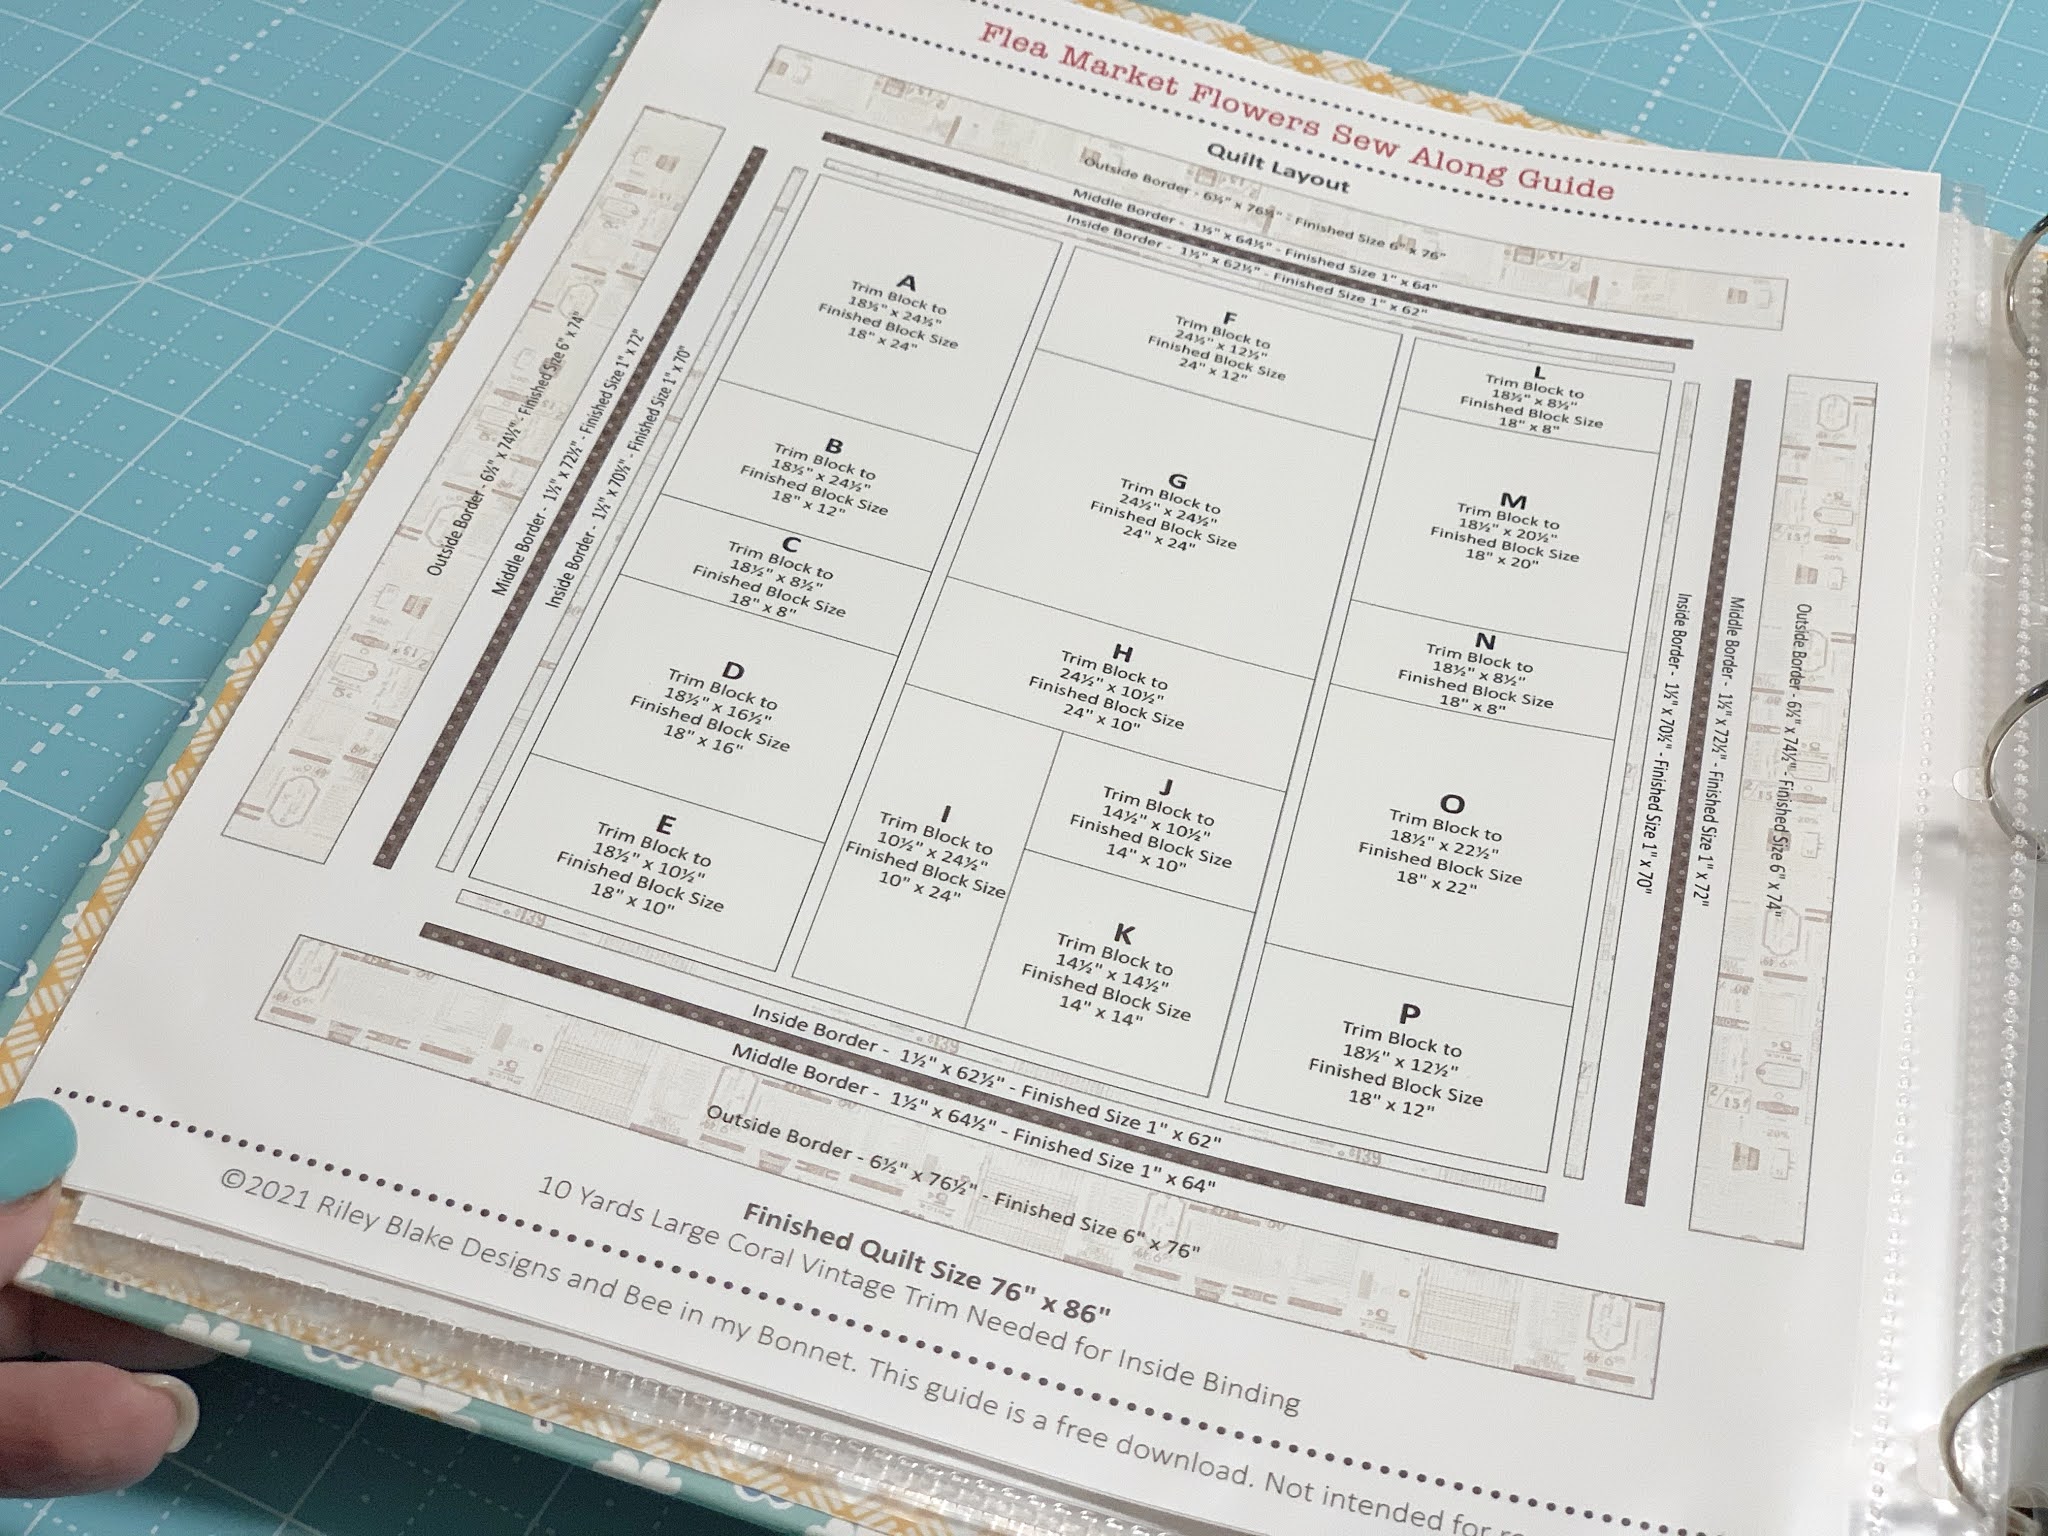
If you have not done so yet...
now is the time to
cut your border fabrics.
All of the cutting
is in the sew along guide...
As well as a diagram of
the order to sew on the borders.

I'm using the Flea Market Roses Wideback
in RED for the back of my quilt.
I love how all of these fabrics
go together and I can't wait to
show you my quilt!!

I'll be right back here next week
for the big finish where I will
have pictures of my quilt
after its quilted!!
Chat with you then...
Lori

3 comments:
Thank you Lori! Just lovely. I appreciate the detailed tutorials🥰
I did it! Thanks to your beautiful fabrics and wonderful tutorials, I kept pace with your weekly blogs. Now my finished top is ready to go to the quilter!
Love the scrappy flower label, it's a fun way to document the fabrics in the quilt.
Post a Comment