
Flea Market Flowers
BLOCK "E"

Welcome to Week Seven of the

We are using my latest
fabric collection called
Flea Market
It's designed by me ...
and produced and distributed by the amazing
Riley Blake Designs:)

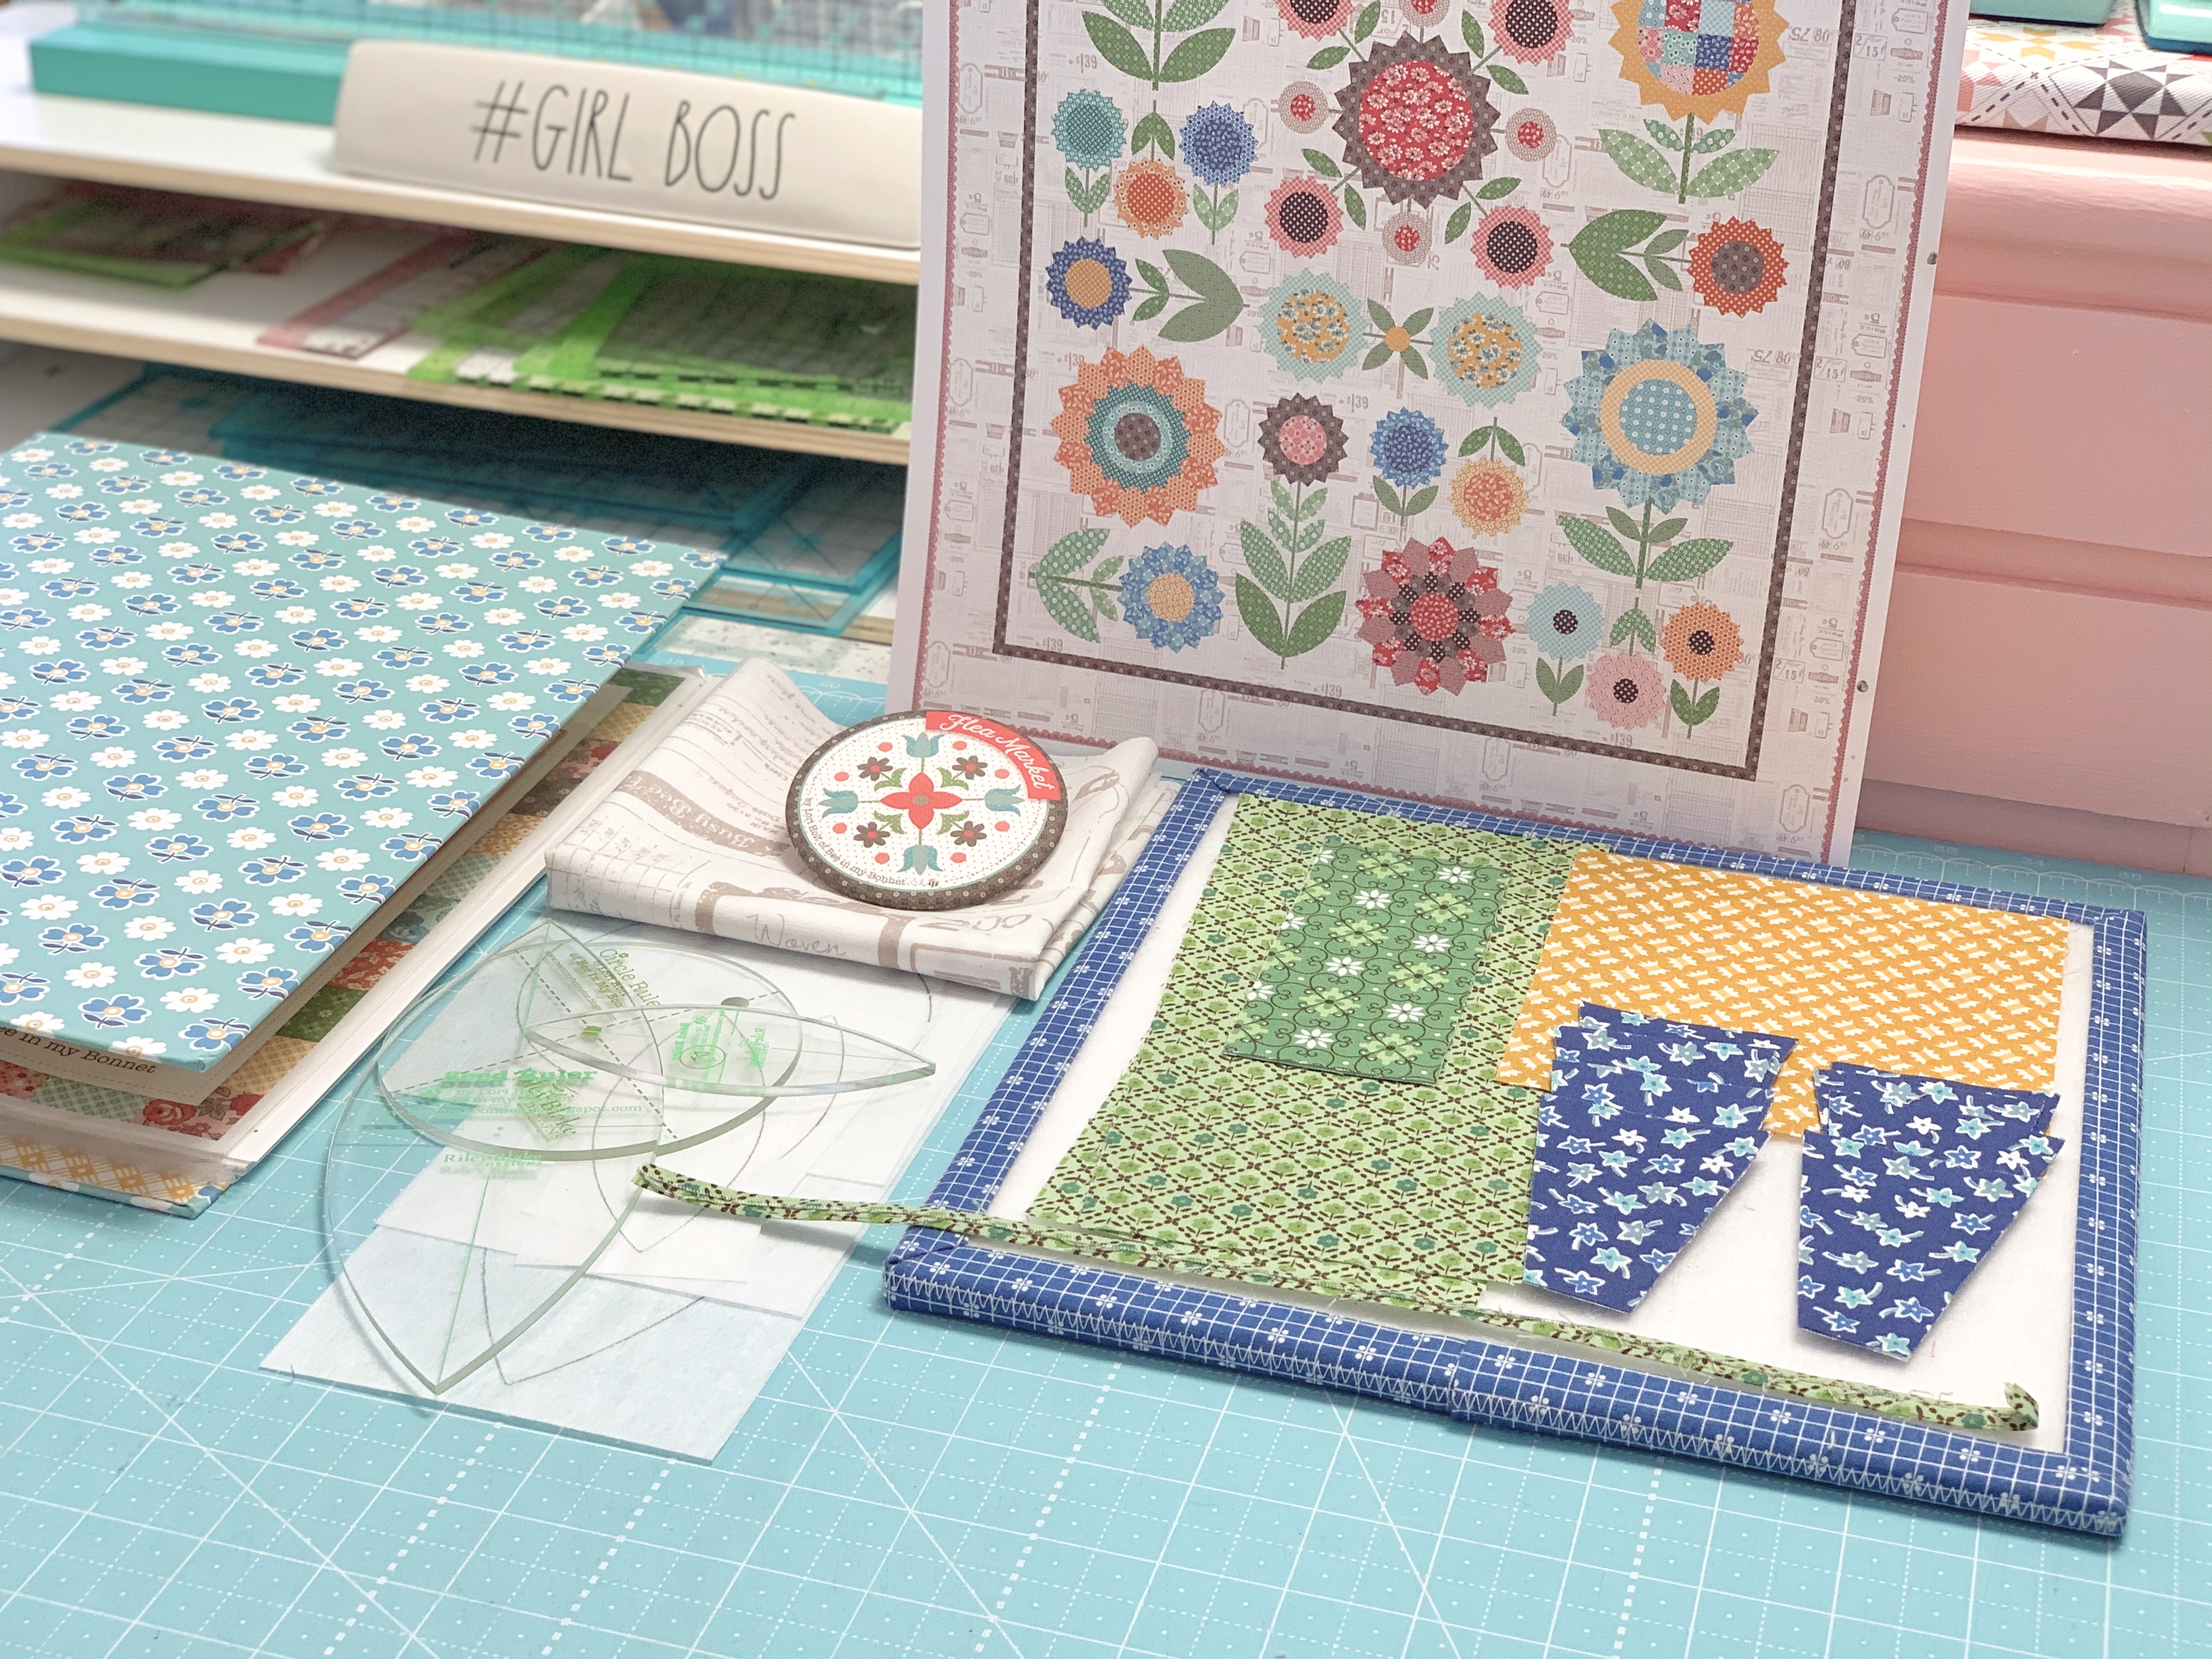
We are making my quilt
FLEA MARKET FLOWERS
76" x 86"

We are using my
PIE RULER
to make all of the flower petals...

This set of my
CIRCLE RULERS
for all of the flower centers...

And we are also using my
SEED RULERS
for all of the leaves in the quilt.

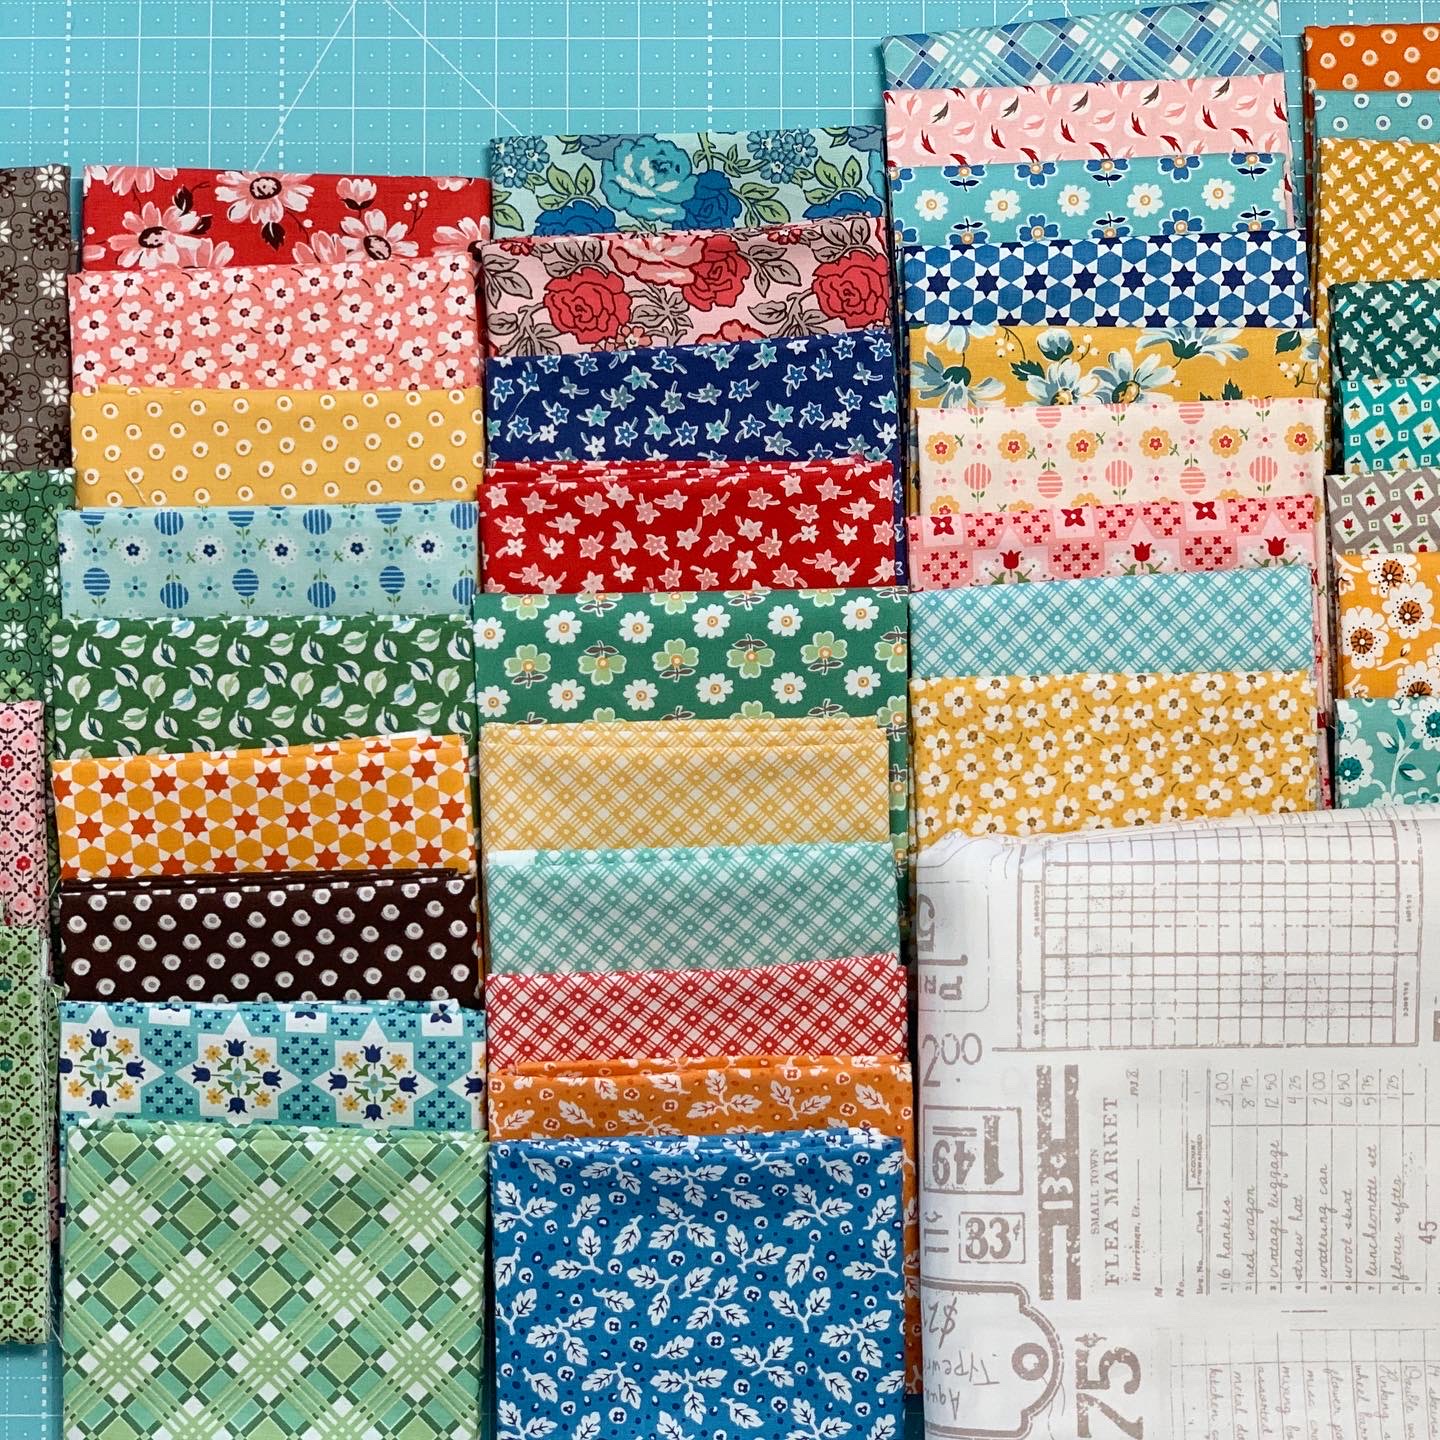
All of the other notions as well as fabric requirements are detailed within the
Flea Market Flowers Sew Along Guide
for the free PDF Download
I also have a "Bee Prepared" blog post
detailing everything that you will
need to know about this sew along...
to go to that blog post
if you have not read it
or you need to be "refreshed"
on any of the information!

As promised...
To kick off week one
I did a video tutorial on my
YouTube channel showing how to make
Flea Market Flower
BLOCK "M"
to go to that tutorial...
so that you can make this cute flower!!

I also did a tutorial during
week one right here
on my blog for
Block "L"
to go to week one and this block tutorial:)
As part of week two
I did the tutorial here for
Block "O"
For that tutorial
BLOCK "I"
is also in the week two tutorial:)

Last week during week three
I did the tutorial for
BLOCK
to go to week three for the tutorial

BLOCK "I"
during week three:)

the tutorial for
Block "K"
for that tutorial
And I also did the tutorial for
Block "J"
during week four as well.

During Week Five I did the tutorial for
BLOCK "F"
to read that tutorial

BLOCK "H"
during Week Five as well.

During week six I did the tutorial for
BLOCK "G"
for that tutorial.

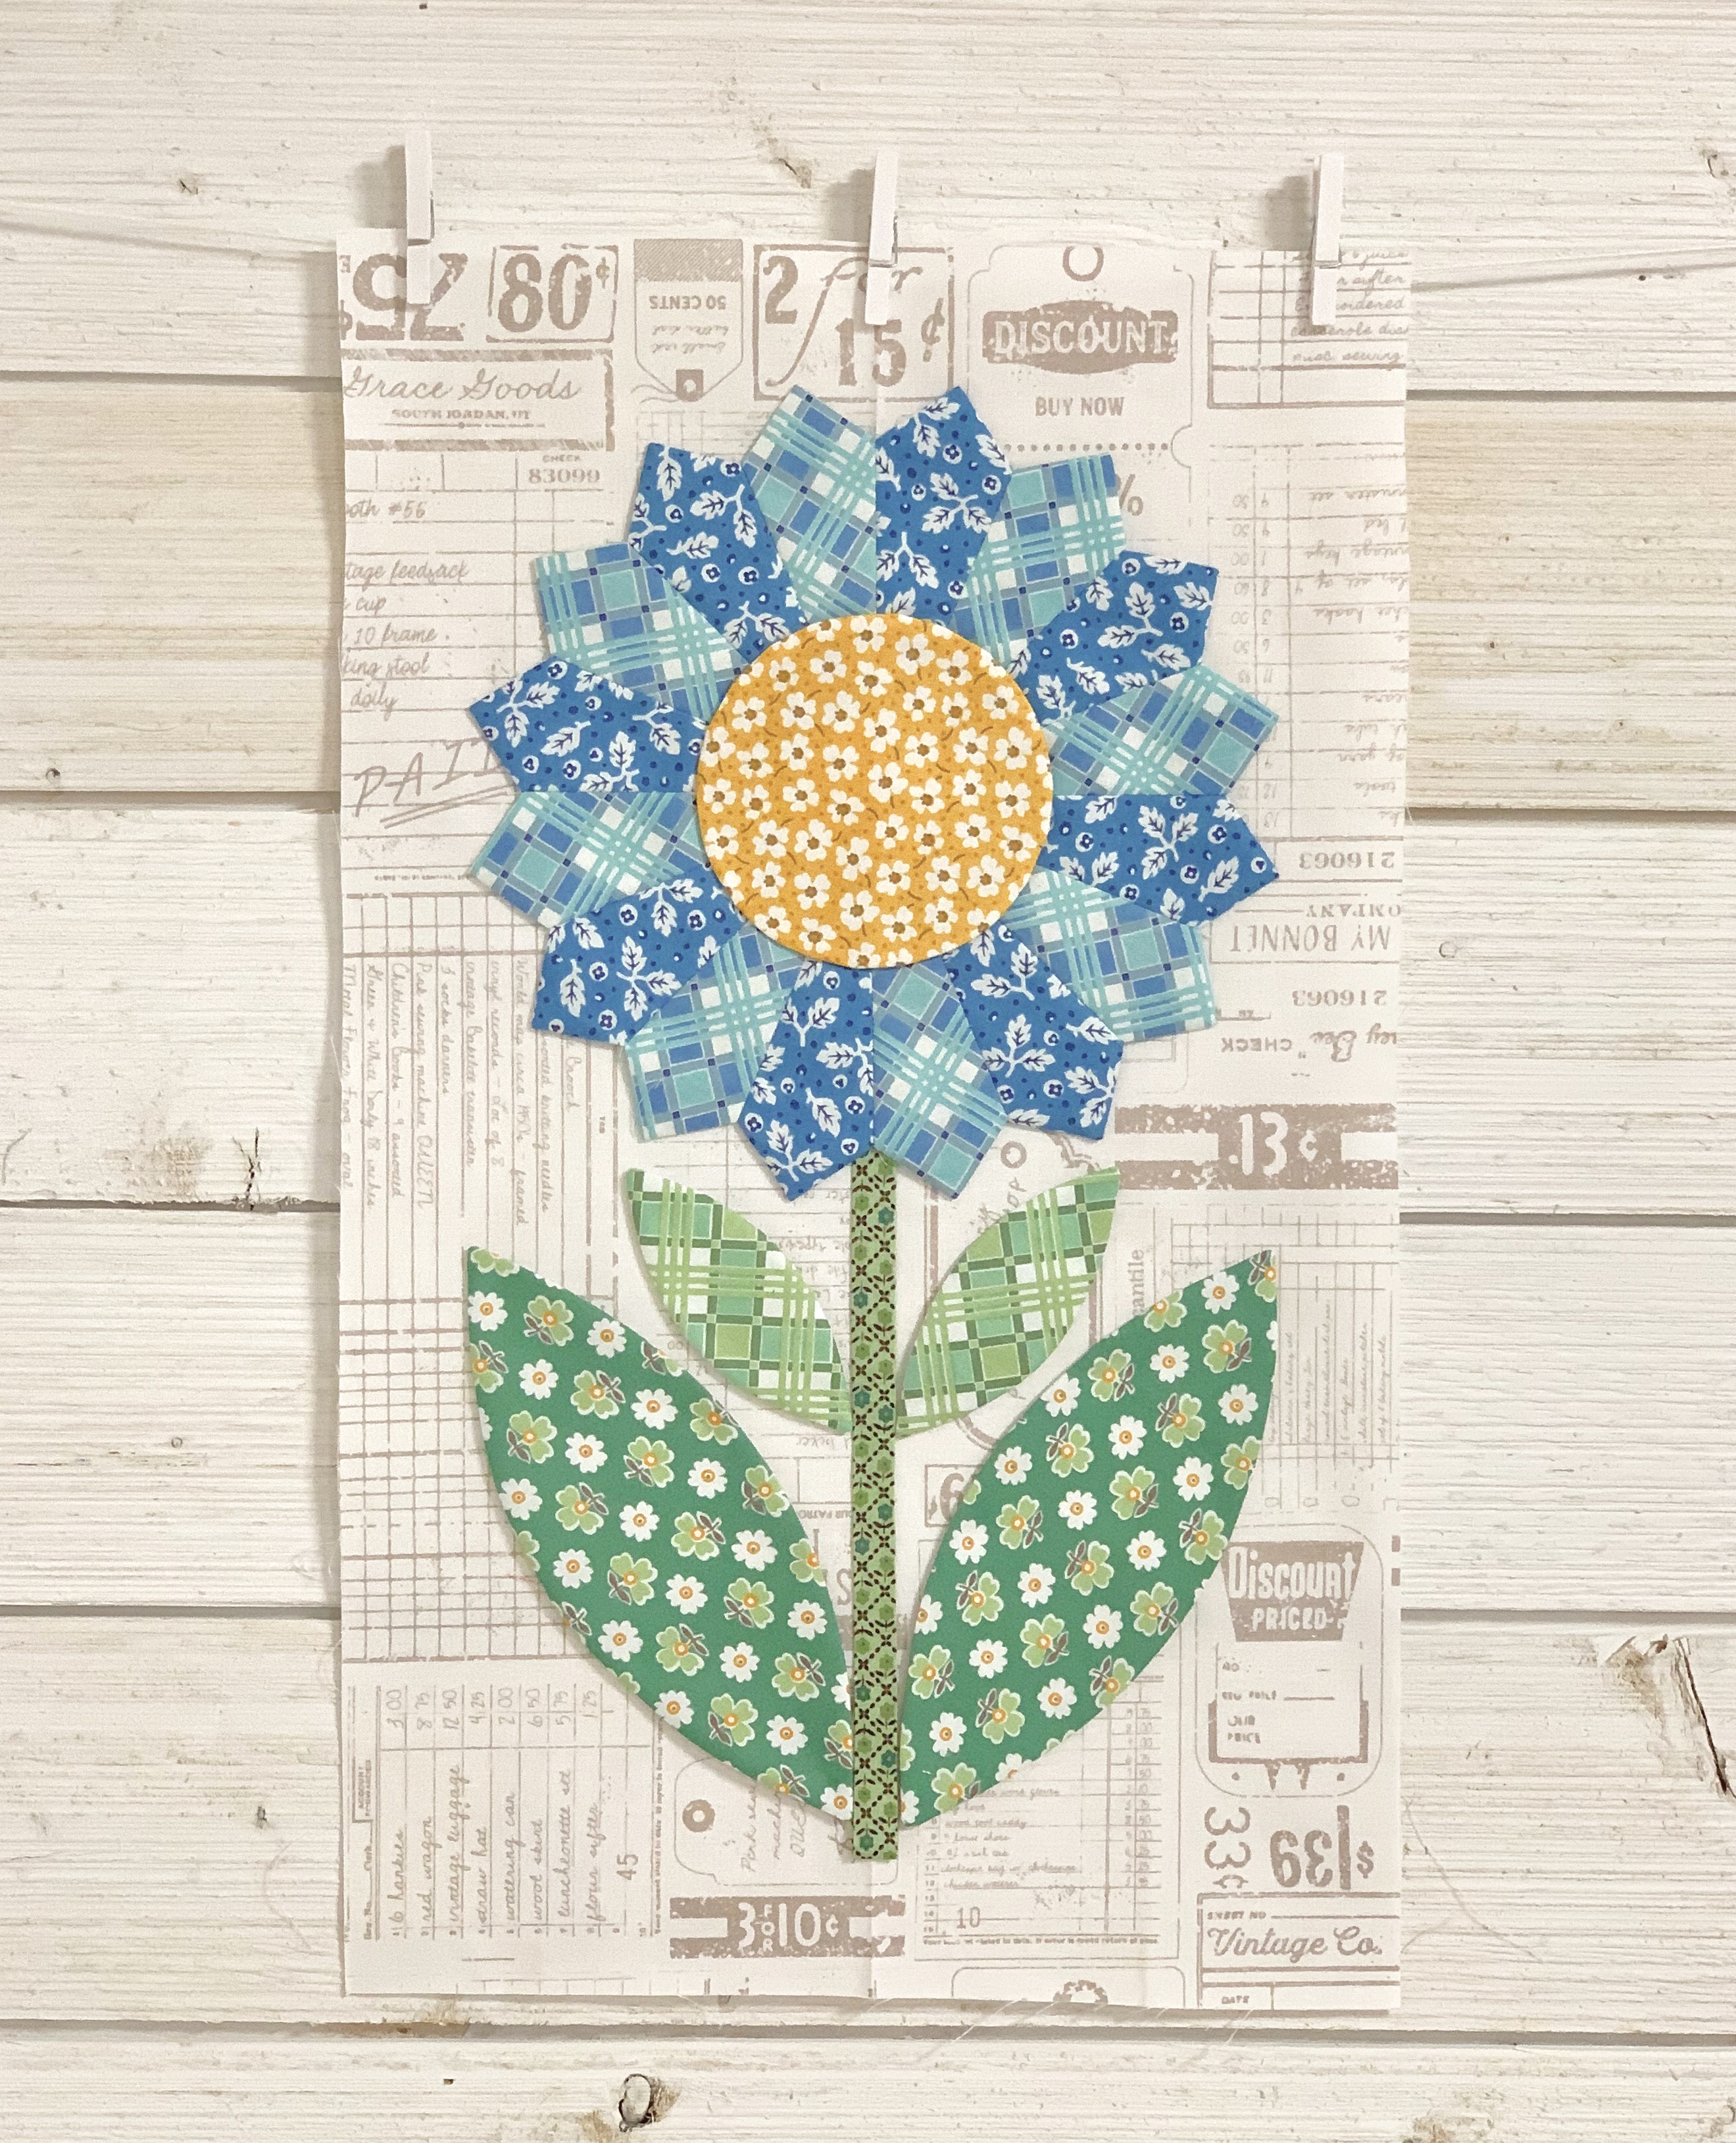
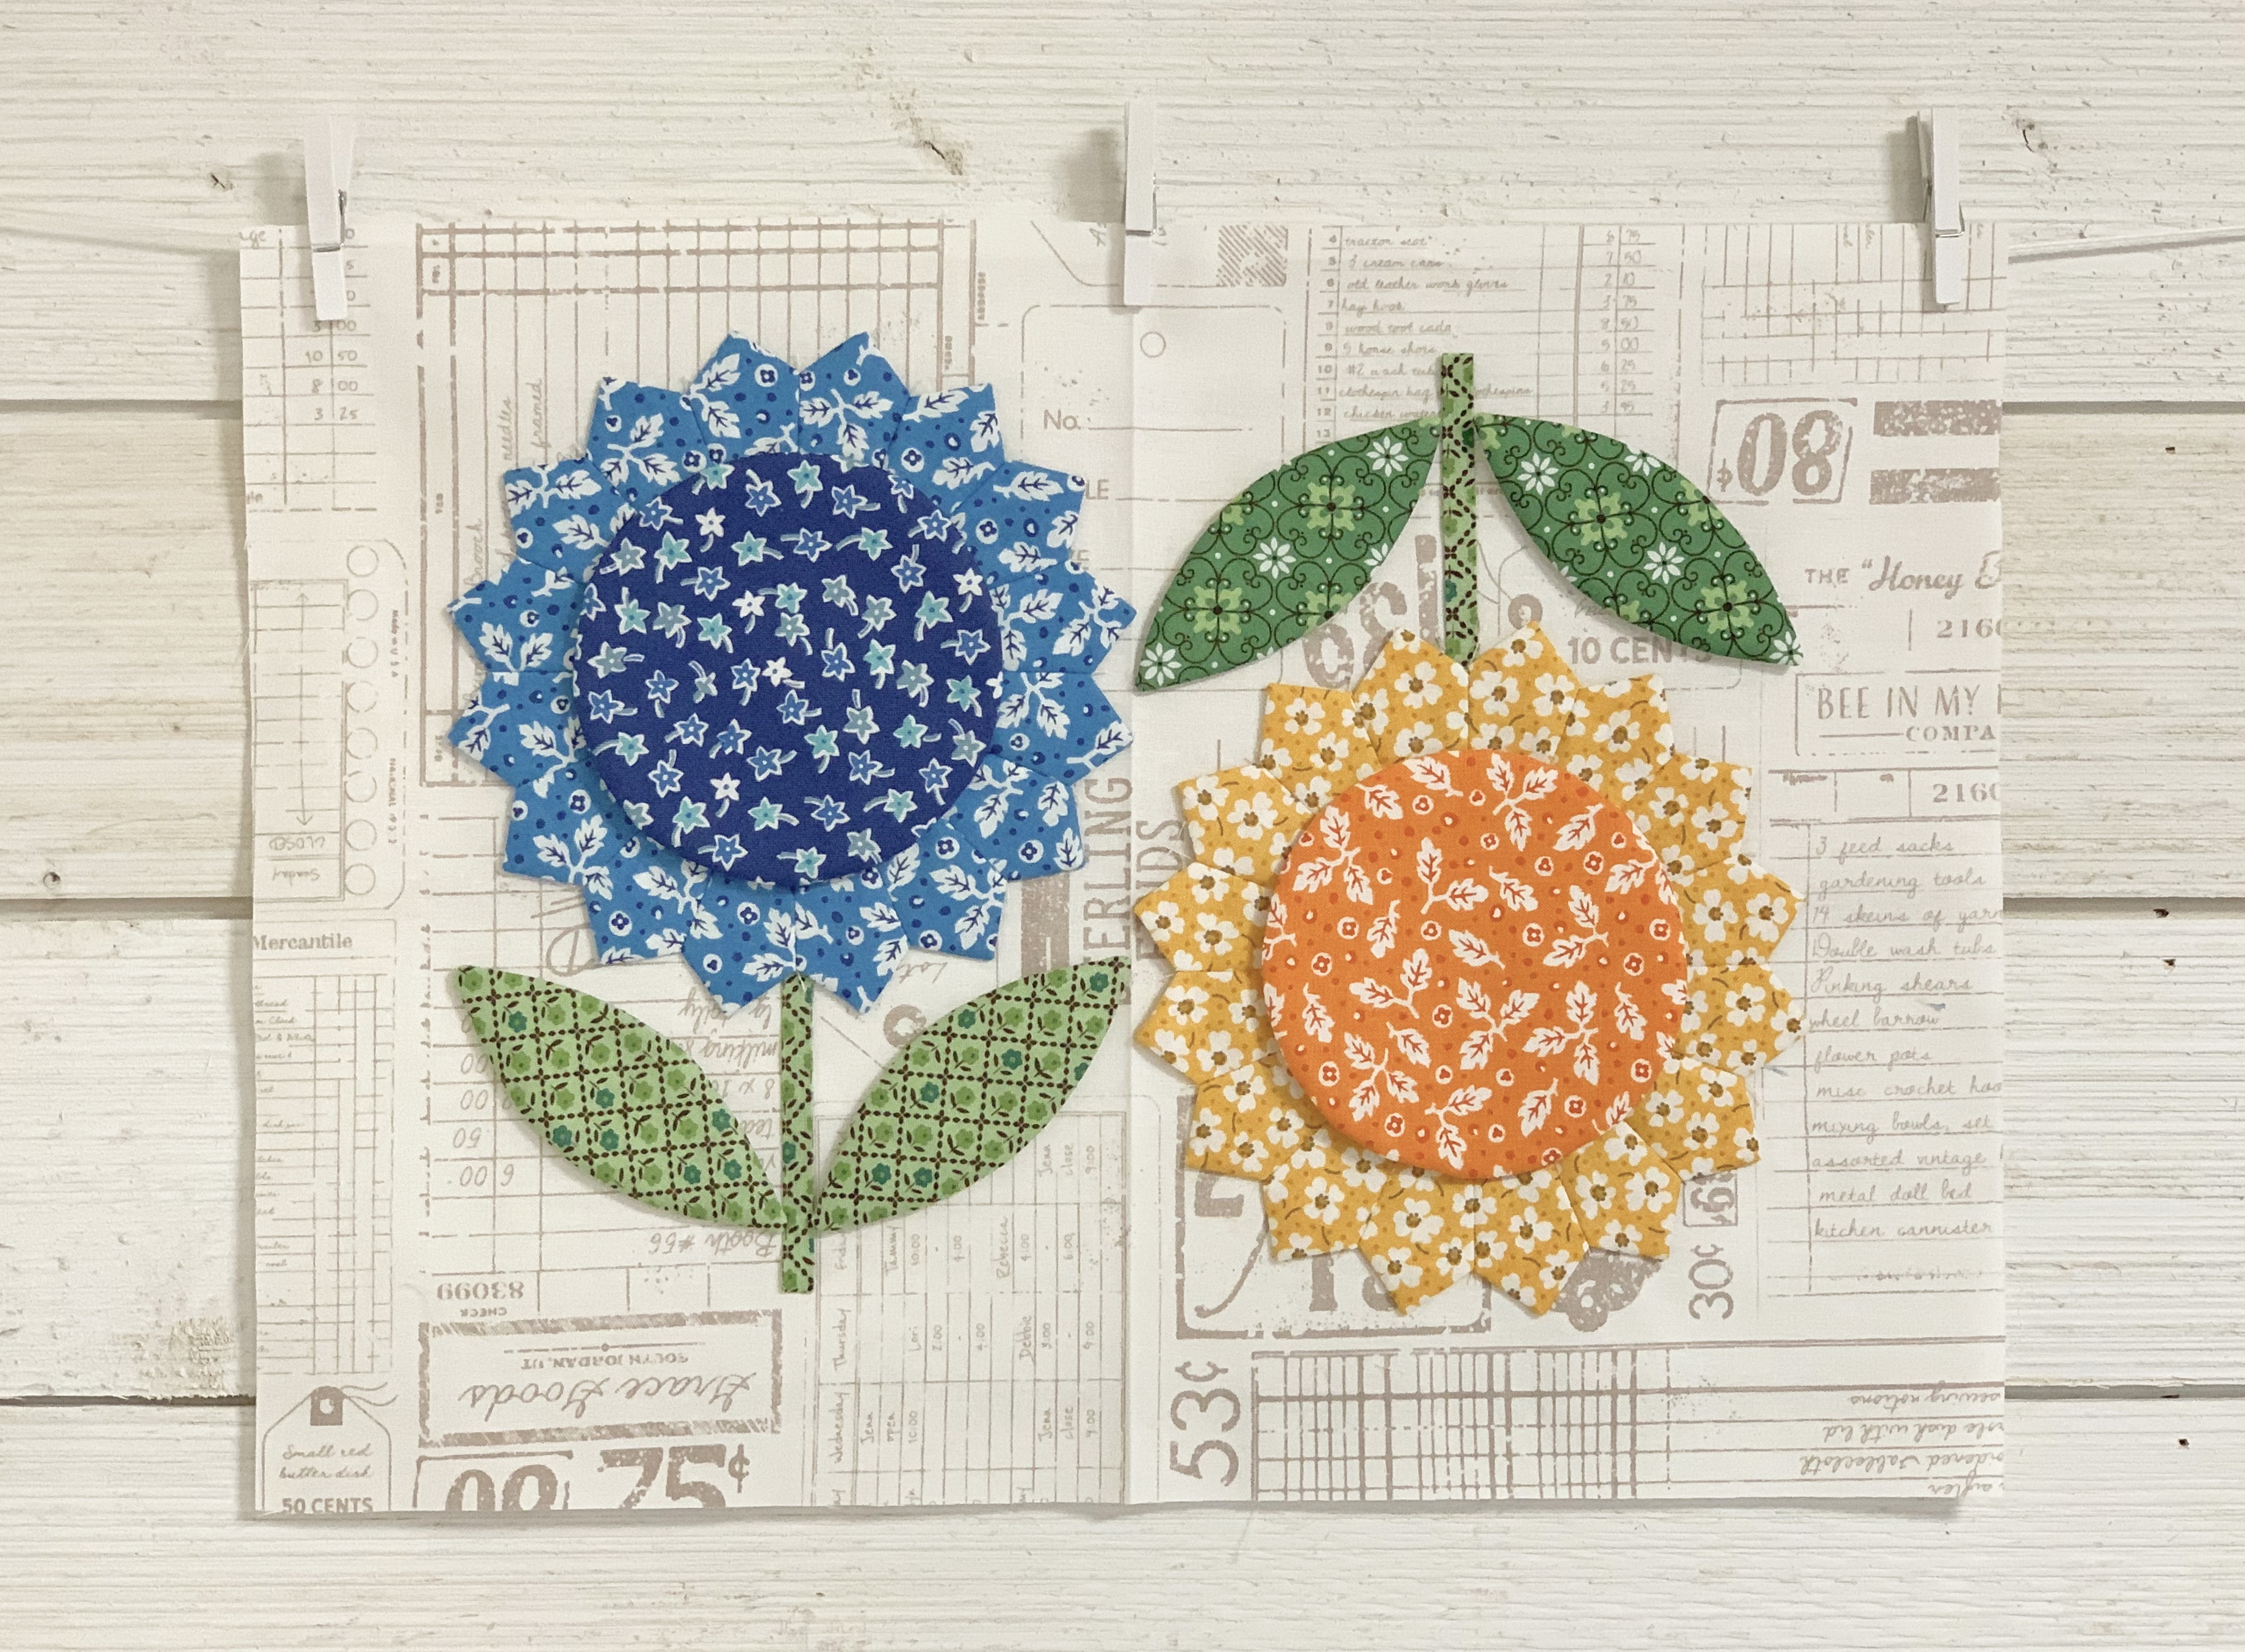
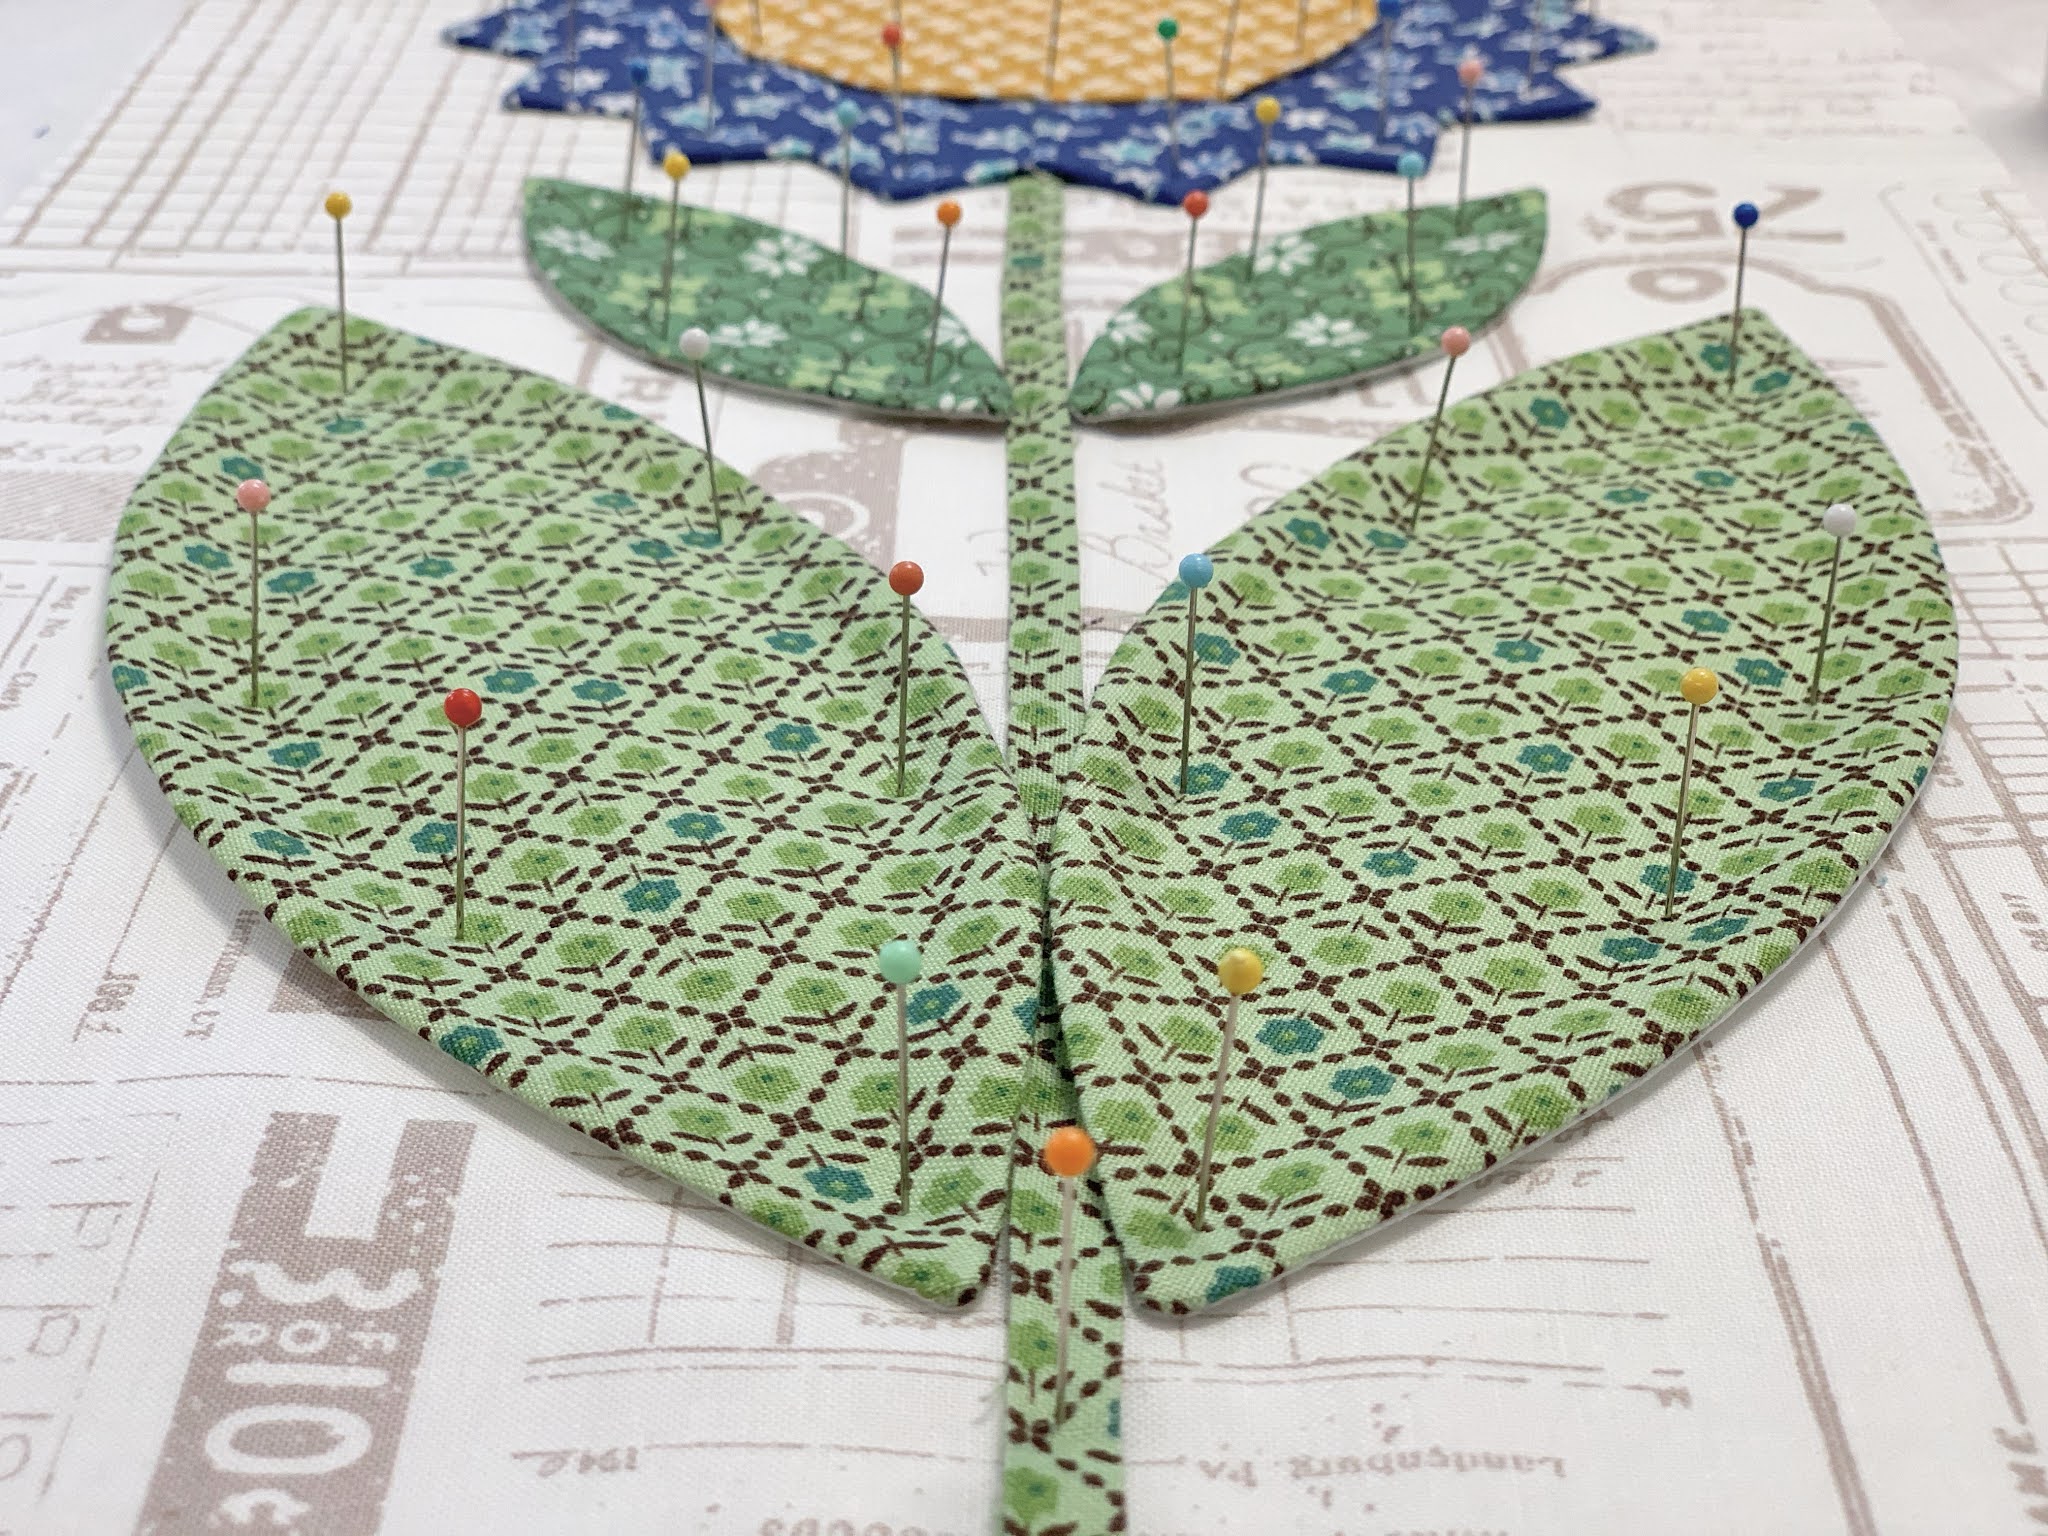
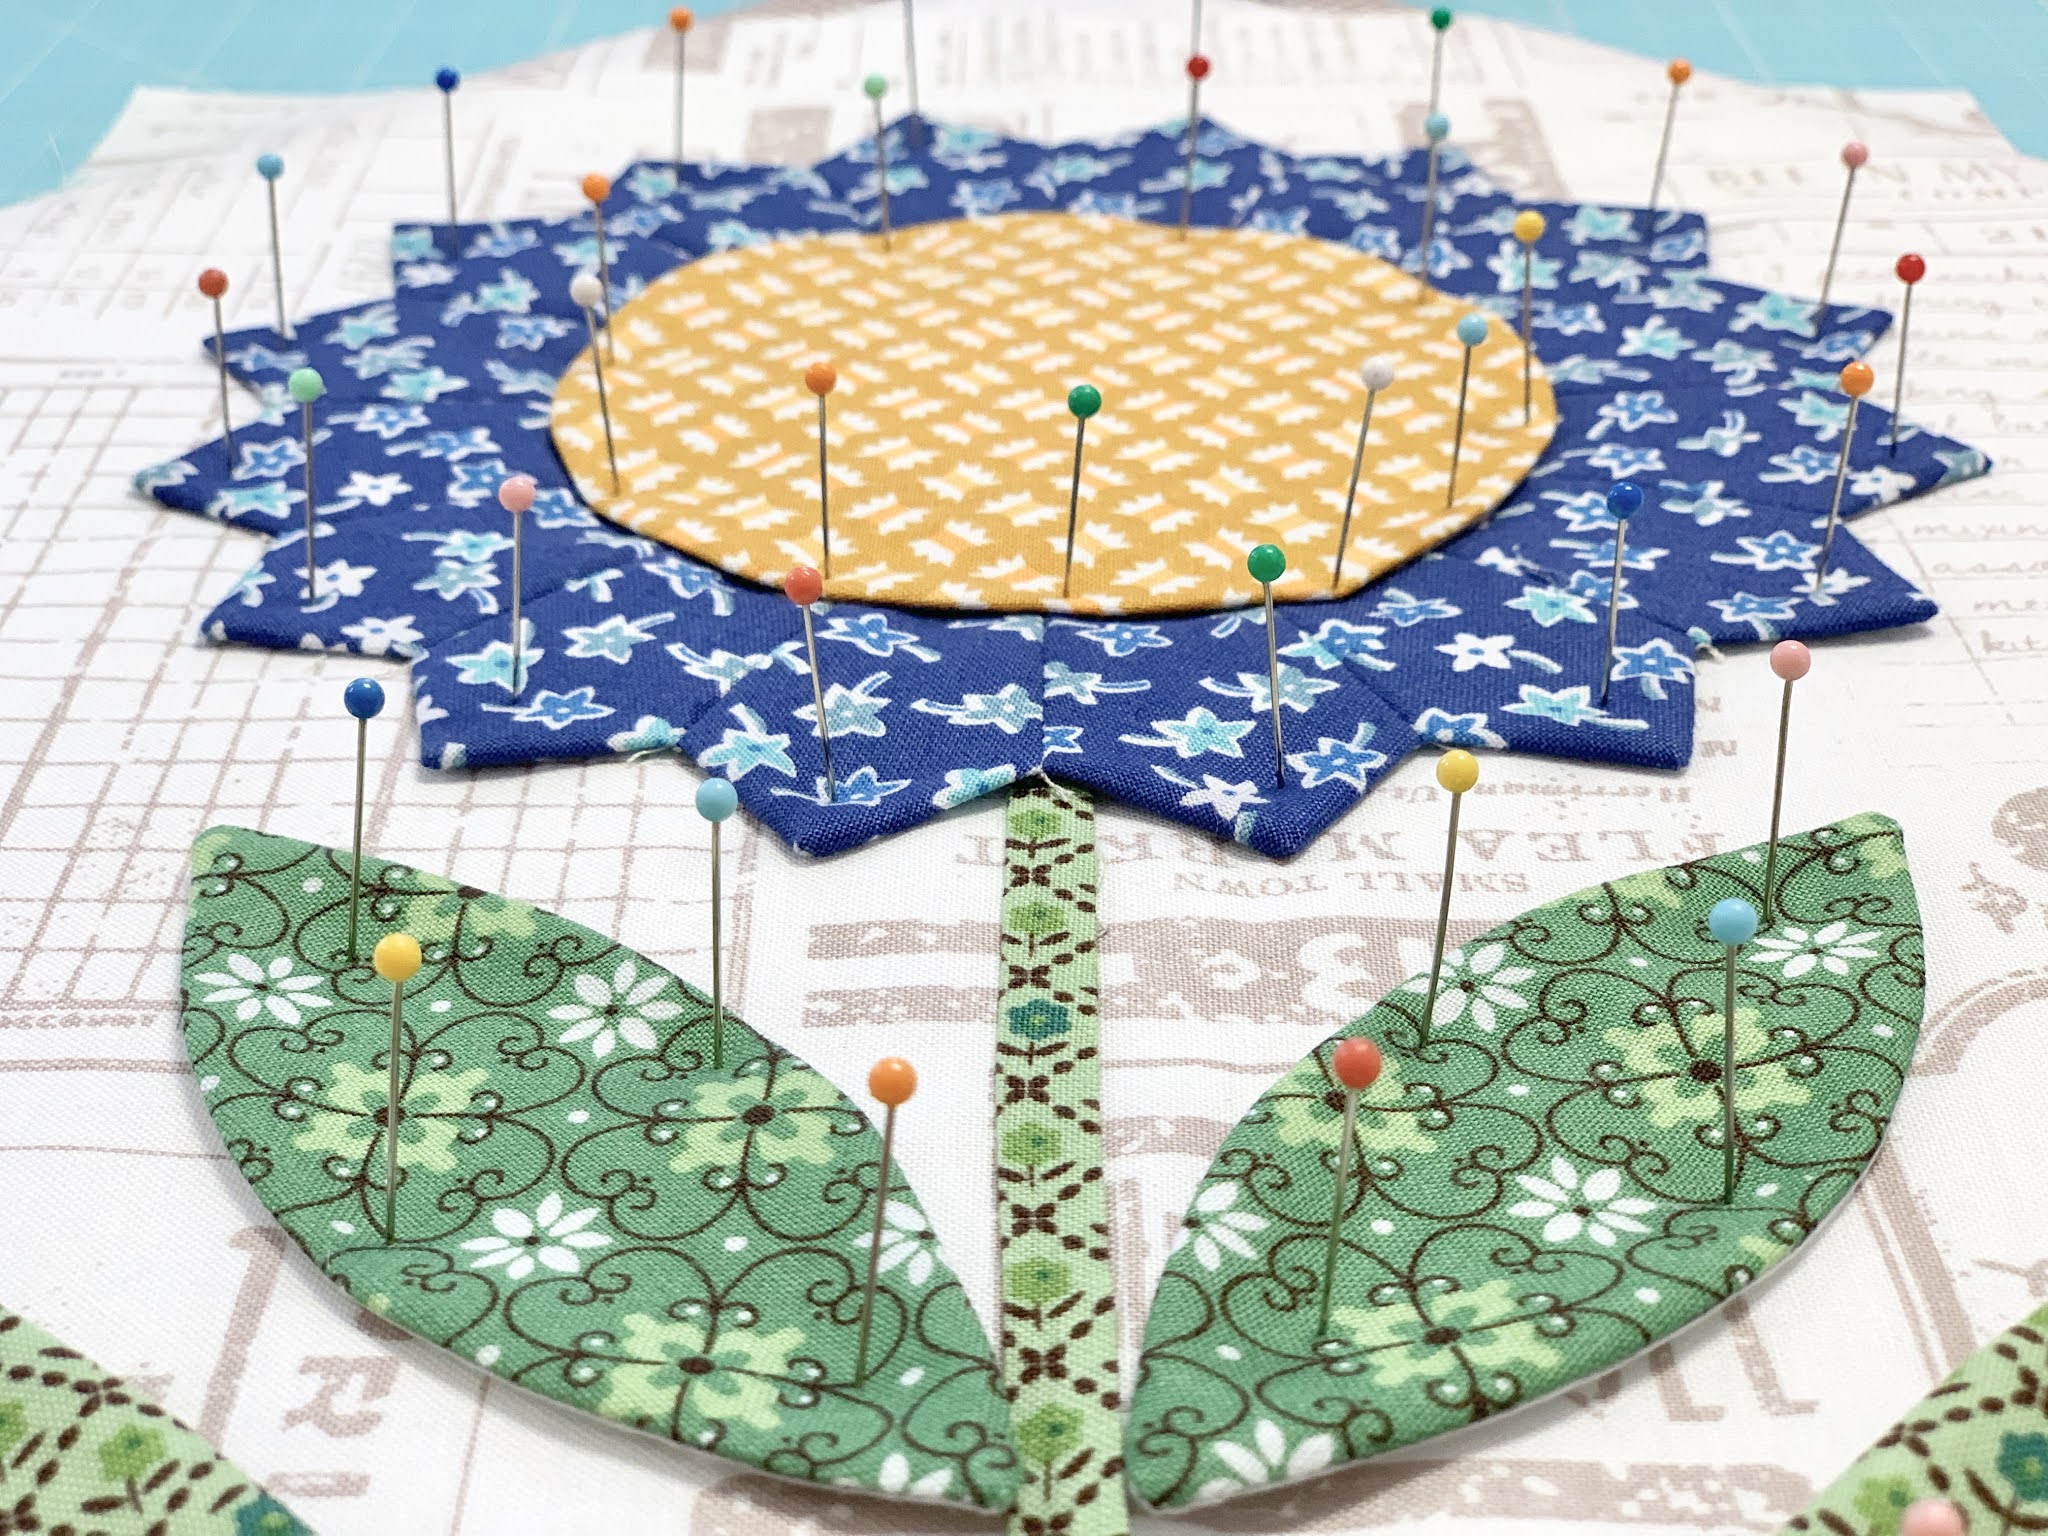
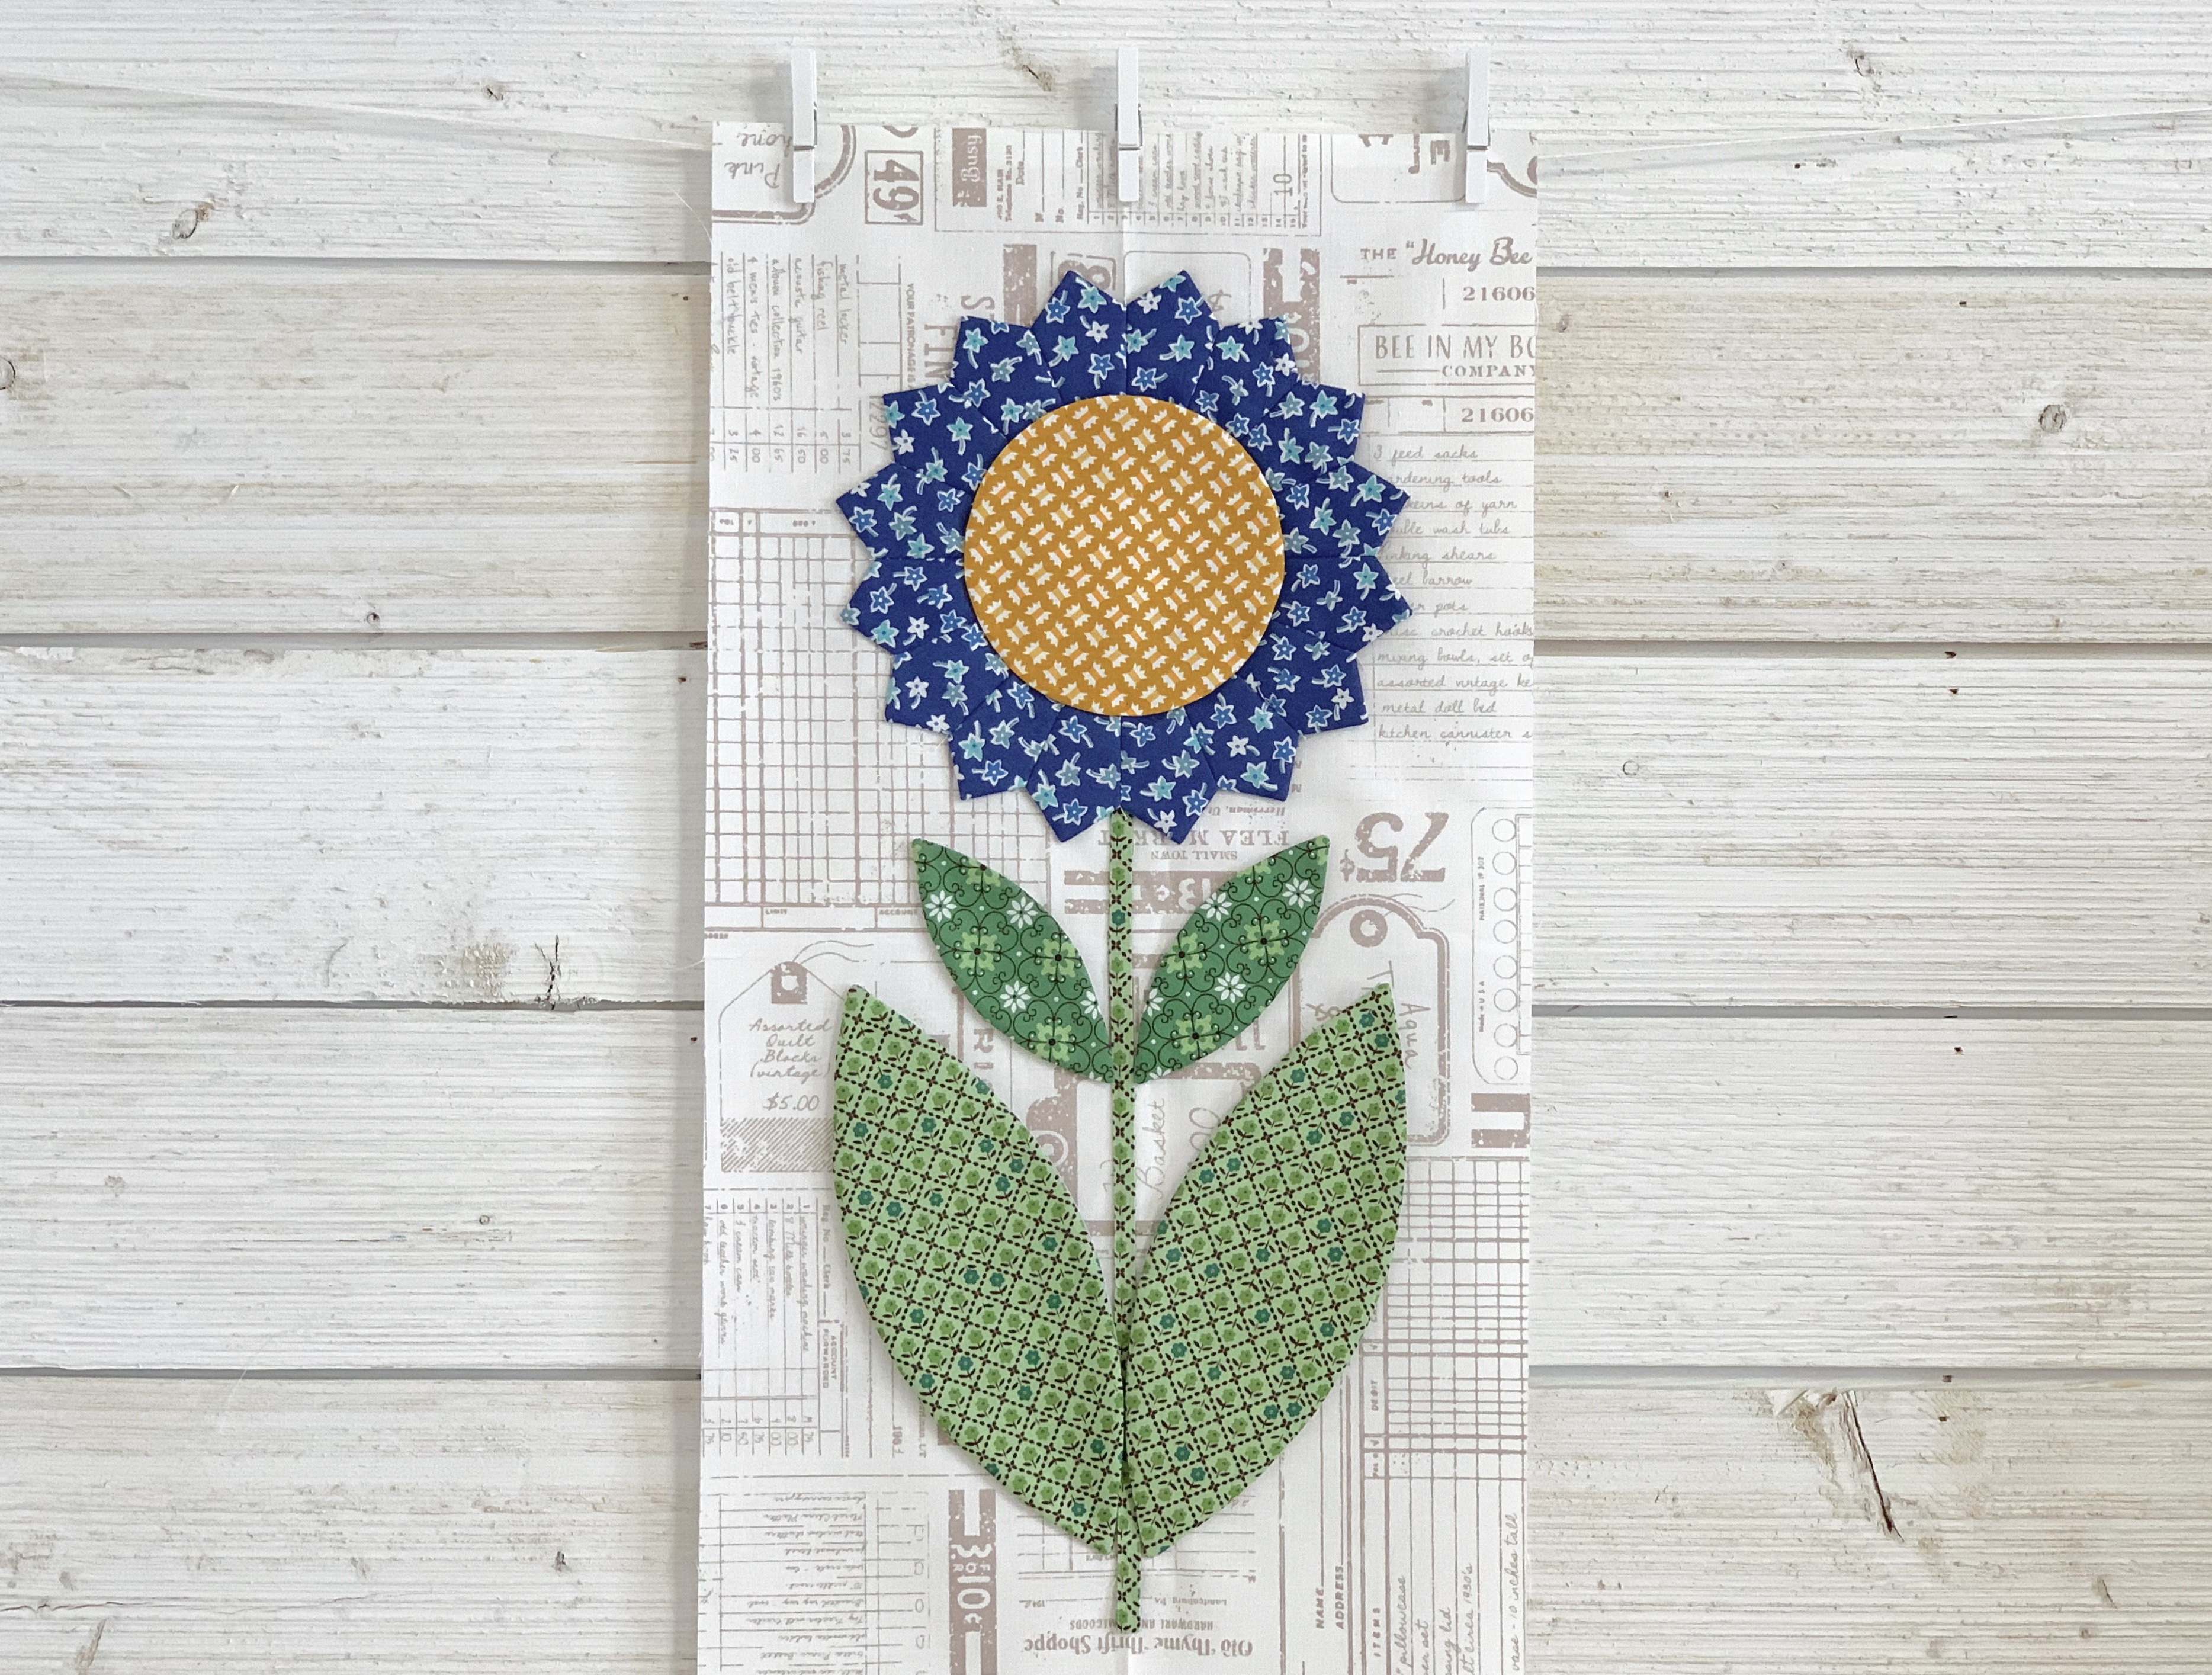
BLOCK "E"
You will need to make one -
9 1/2" Flea Market Flower
using 2 different prints.

To make Block "E" you will also need:
2 - small leaves
2 - large leaves
1 - 4" circle
1 - 1/2" stem cut 9 1/2" long
with one end pressed under
Background cut - 12" x 20"

***Please read carefully***
These are the
special cutting instructions
for the flower petals in Block "E"
that I told you about earlier:
You will need one 4" x 21"
strip from each print
to cut 8 flower petals from each
to make the flower.
***NOTE for special cutting***
For the other 9 1/2" flowers you would
normally cut your strips
3" tall
but for this flower you will
cut the strips 4" tall instead.
The reason is that because we are
using a 4" circle for the
flower center...
we need the make the center opening
in the flower itself smaller
so that size circle will cover it.
So cut the petals like this
using the 3" and 7"
line marks on the Pie Ruler.
Alternate the ruler after each cut.
***Take Note***
that you will be using the 7" line
instead of the 6" line
(as indicated in the guide)
for this 9 1/2" flower ONLY
so that the 4" circle will fit easily.

Here's a closer look:)
Repeat cutting for the other print
for a total of 16 flower petals.

Now I'm all cut and ready to
go over to the sewing machine:)

I sewed my leaves and the 4" circle...

And I also whipped up this 6" circle
using leftover fabric from the kit...
because I am thinking that
this is a good solution for you
if you just happened to
have been a "little overzealous"
LOL and did not wait for my
special cutting on this block
and already cut your strips 3" tall.
Simply put a larger circle
in the middle to cover the hole
after sewing your flower:)

Okay now time to sew the petals!!


After I pressed my background
fabric in half lengthwise so that I could easily center my flower...
I began pinning.

I made sure that it not
measure more than 17" tall
and the large leaves are no
wider than the flower.

Now to pin the 4" center circle.

Or the 6" center circle if you need to...
Or actually both if you want...
after all I always say that
"You are the boss of your own quilt!"

As for me...
I'm sticking with my plan on this one:)
But FYI sometimes I do change my mind
as you will see in
Block D a little later.
I'm the boss of my own quilt too!!
Haha

All pinned and glued and waiting
for a few minutes to let it dry
before removing the pins.

All ready to applique!!!

I love this cute and simple aqua flower!

FLEA MARKET FLOWER
BLOCK "E"
After applique trim it down to
10 1/2" x 18 1/2"
It will finish at
10" x 18"
after it's sewn into your quilt.
Okay...now it's time for
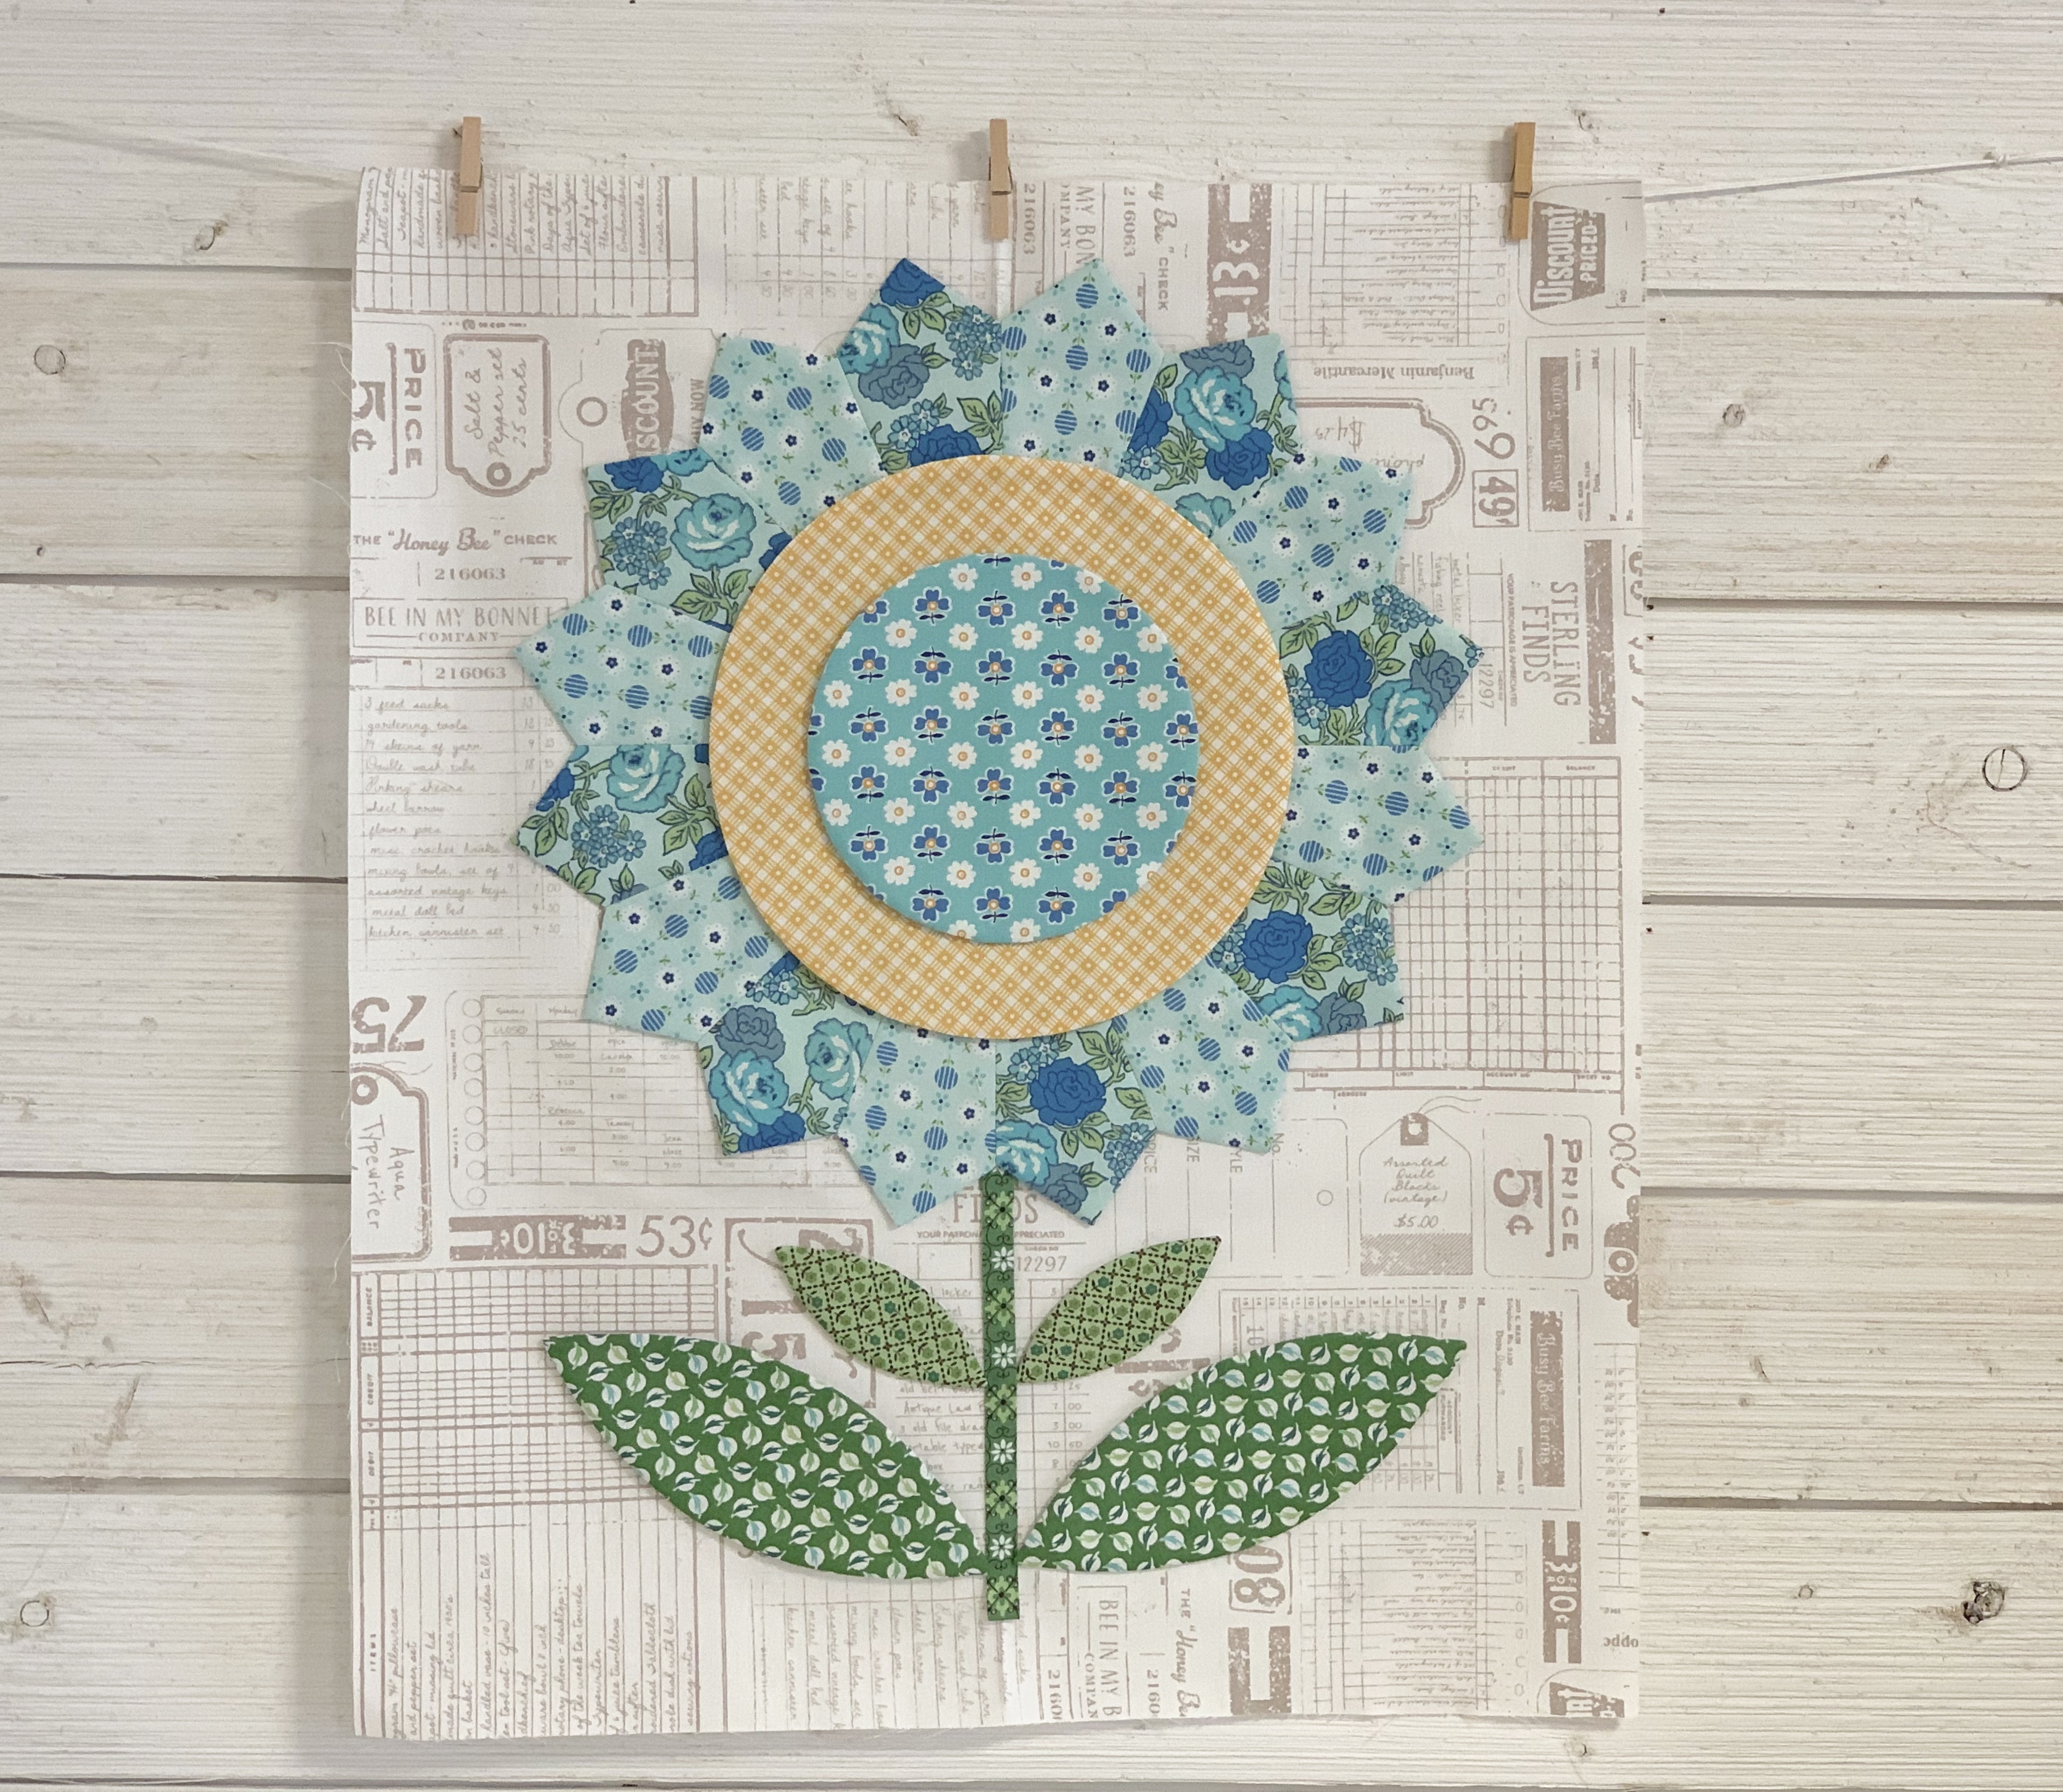
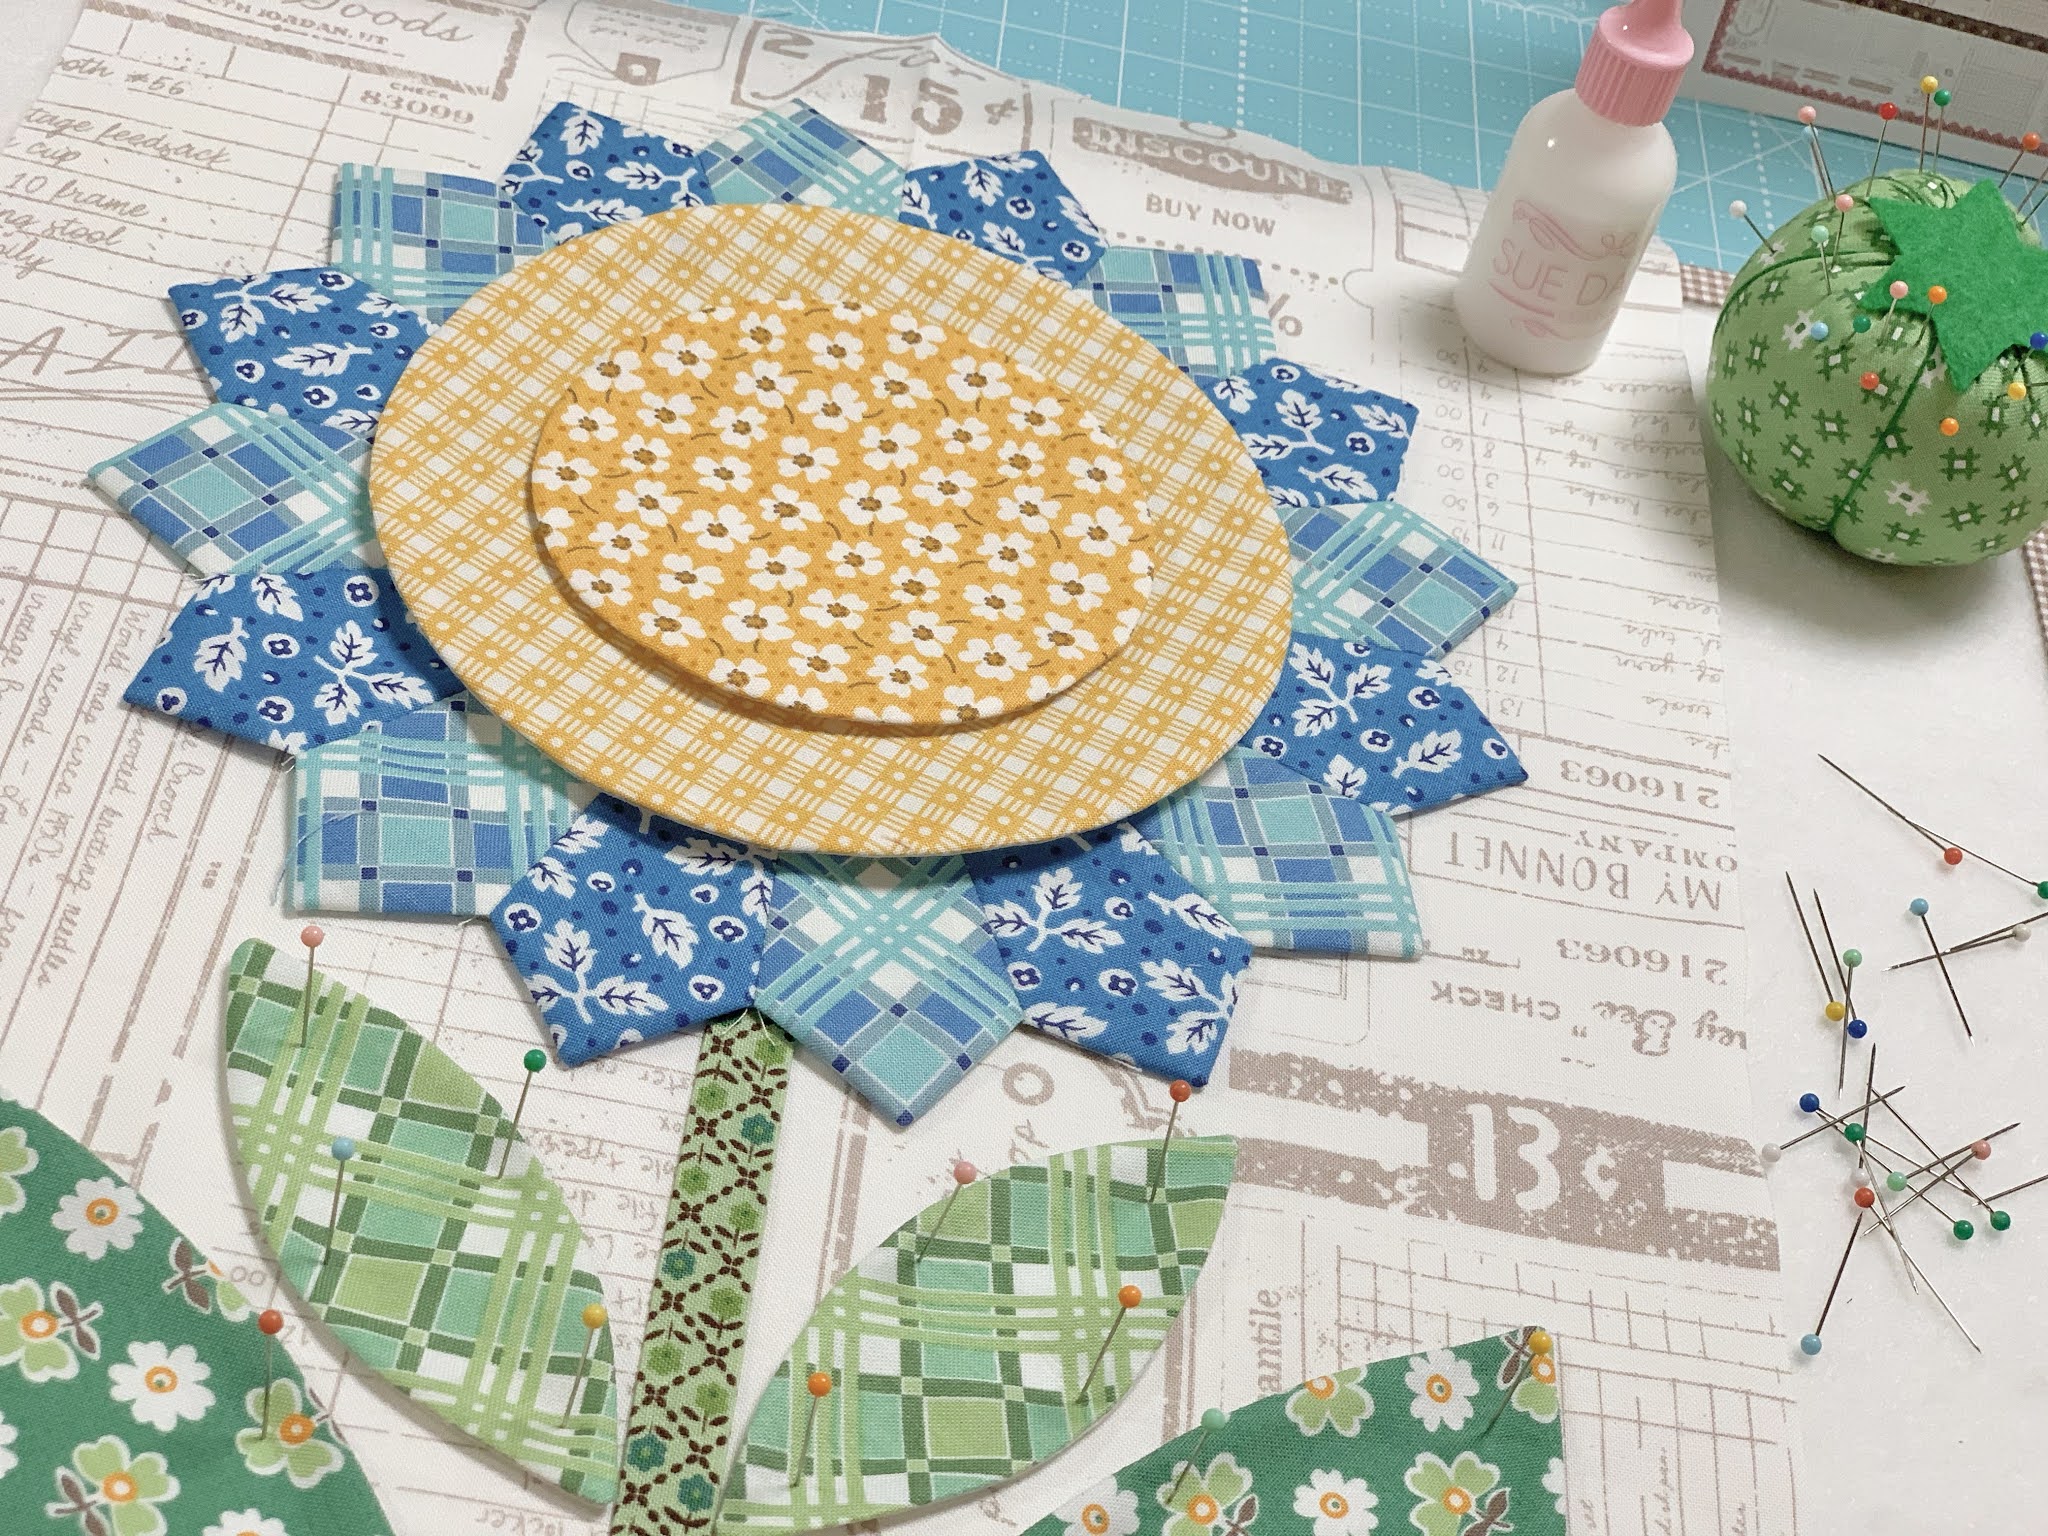
BLOCK "D"
For this block you will need to make one
15 1/2" Flea Market Flower
using two different prints
and also one
9 1/2" Flea Market Flower
using one print.

For BLOCK "D" cut your background fabric
18" x 20"
There are no stems or leaves
in this one but you will need
1 - 6" circle
and
1 - 4" circle
(I decided to save this circle
for a little later in the sew along)

You will need to cut 2 - 6" x 21"
from EACH of the prints for the
15 1/2" flower petals.
Cut 8 petals from each like this...
using the top of the Pie Ruler
and the 6" line just like
the diagram in the guide.
Make sure to alternate
the ruler with each cut.

You will need to cut
3 - 3" x 16" strips
for the 9 1/2" flower petals.
Your strips will be 16" long
instead of 21" long because
you will need to cut a
5" square from your fabric first.
This is for the flower center in
Block "B" so set it aside for that.
From these 3 strips...
Cut 16 petals to make one 9 1/2" flower
using the 3" and the 6" lines
on the Pie Ruler just like
the diagram in the guide.

I sewed both of my circles first...
And then both of my flowers:)

I pressed my background in half
both ways so that I could
use those creased lines
to center my largest flower first.
Take note that for this flower...
I placed my flower points
on those creased lines.

Then I pinned and glued!

Next I pinned and glued
the smaller flower on top.
I placed the points onto the seams
of the large flower and used a ruler
to make sure that
the top flower was centered.
After pinning I glued:)

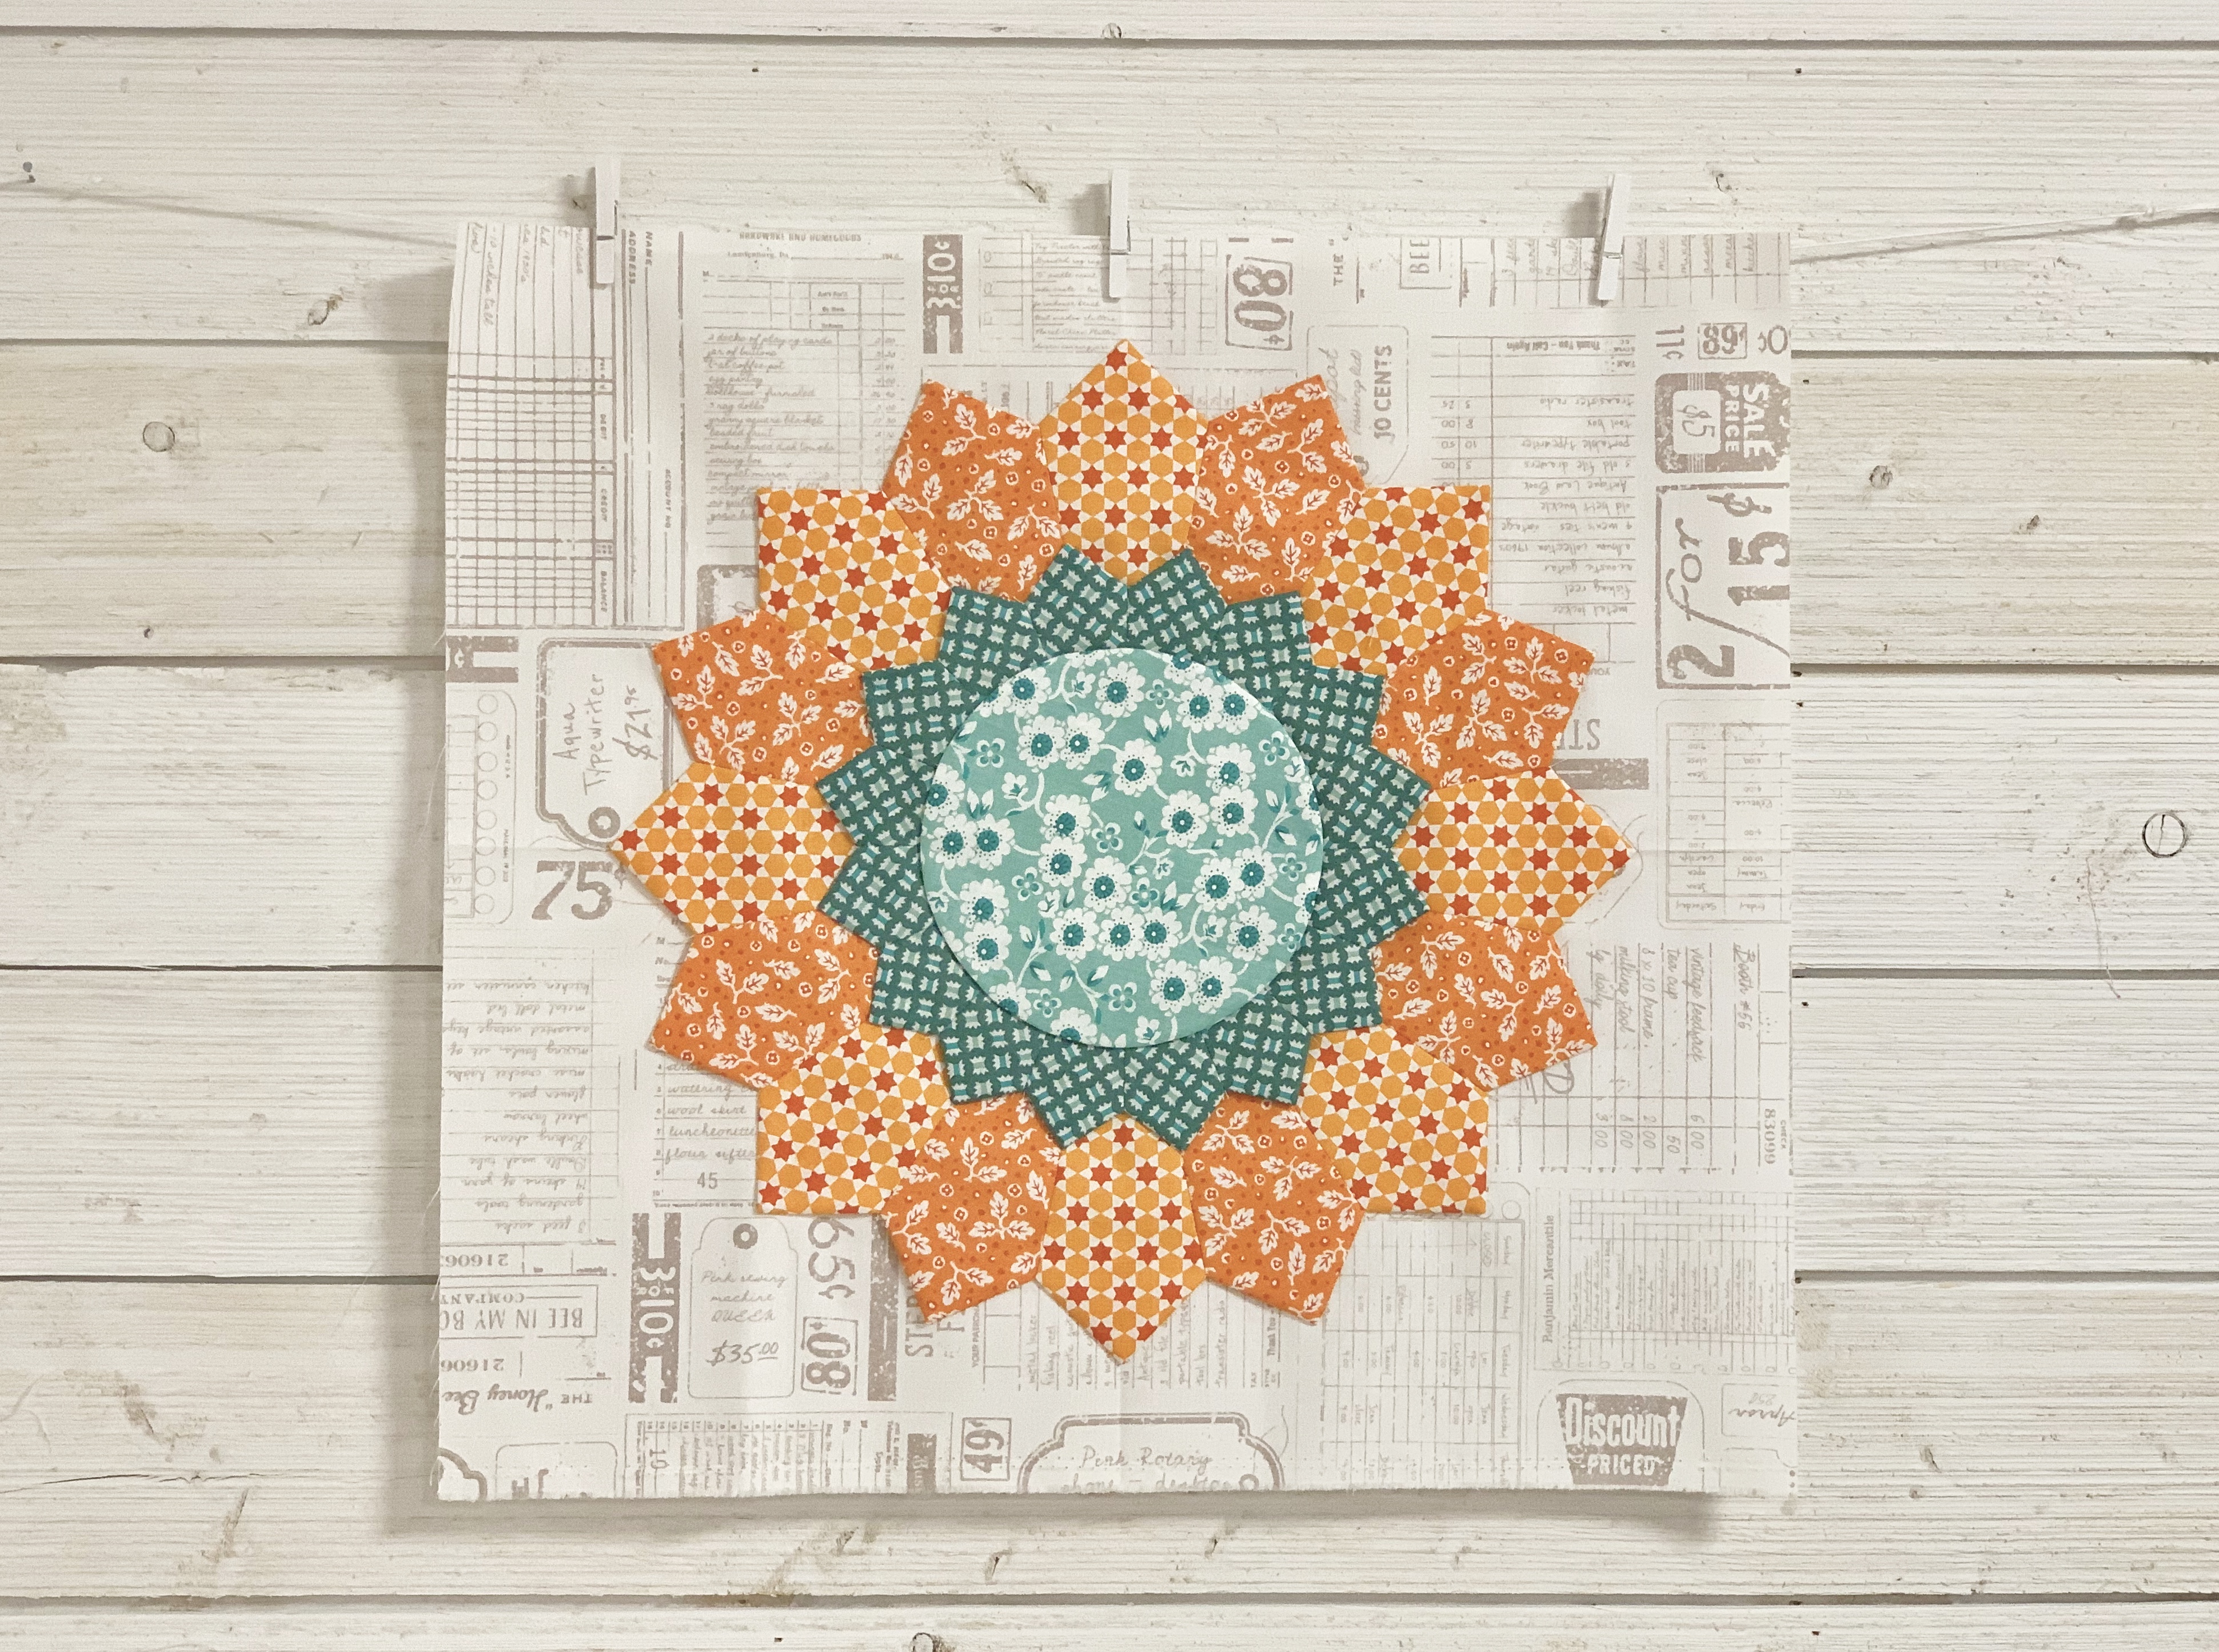
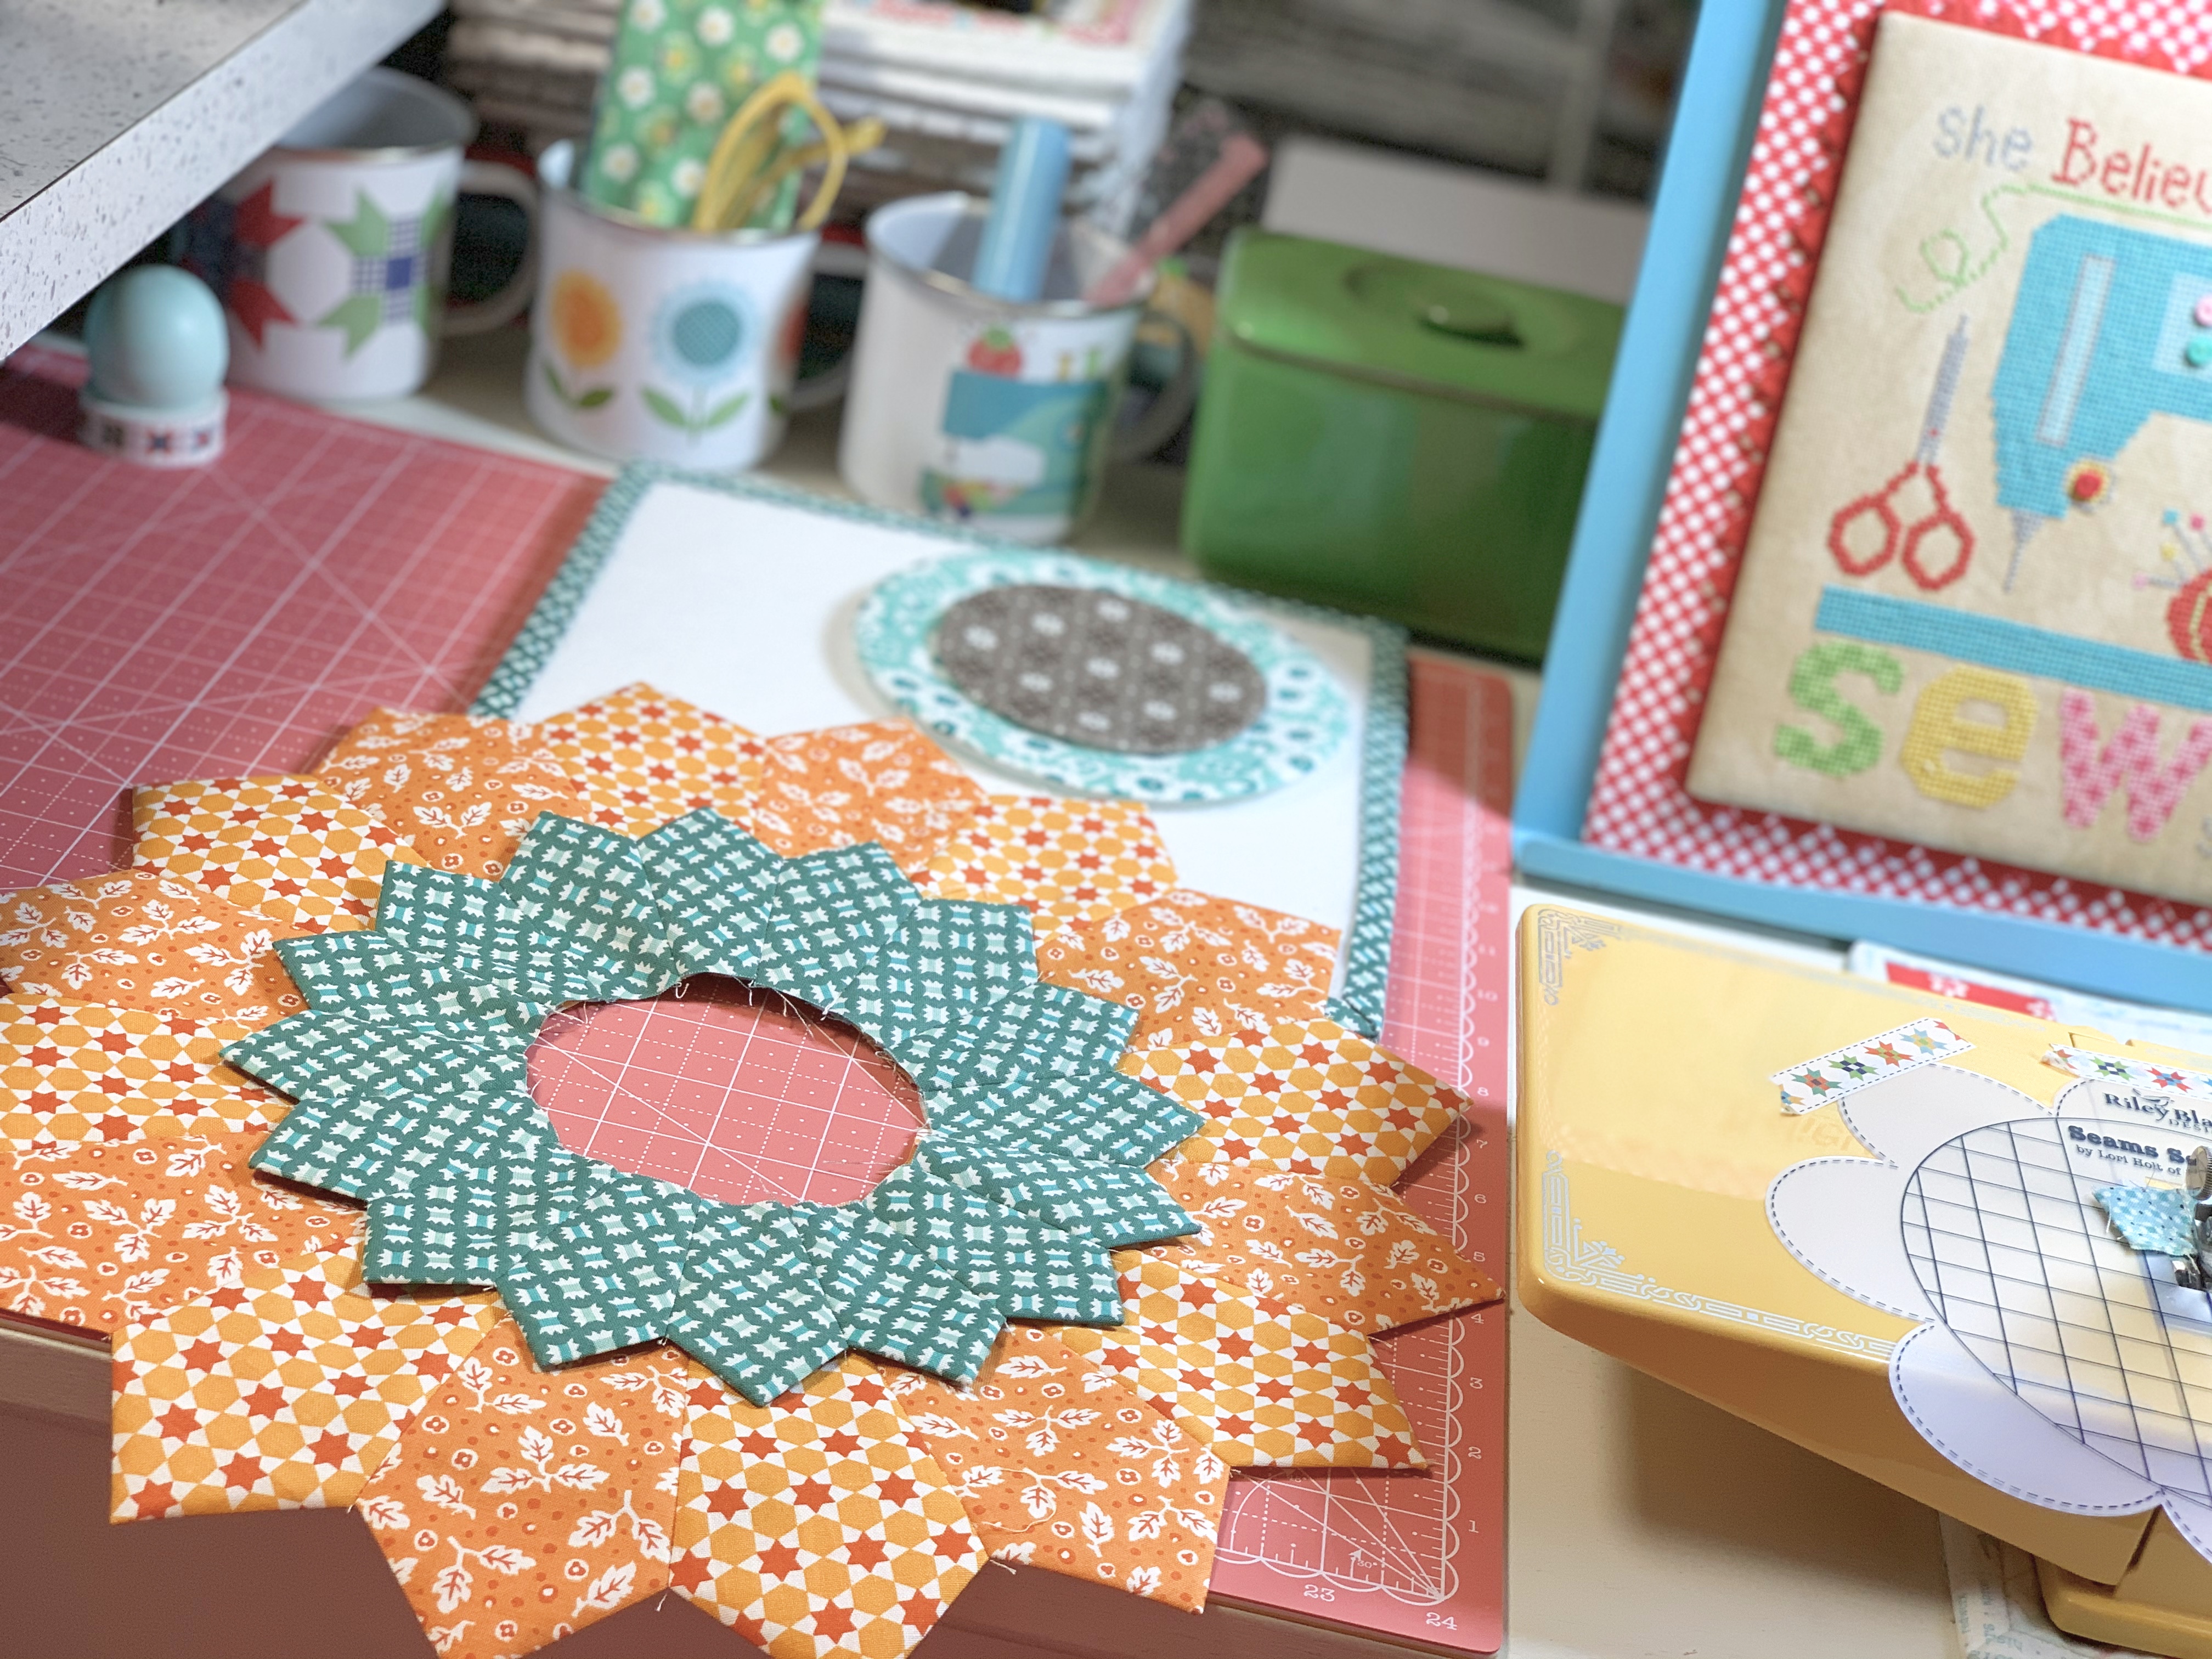
Then I centered and pinned the 6" circle:)

This is the point where I decided
to save this circle to use for later.
Because...
I'm going to use it as the center
for a special Flea Market Flower
that I am going to make
for the quilt label!
I'm excited about it and
I'll do a tutorial on that
during the last week of this sew along:)
Of course you can still put yours
in this block if you would like...
no worries!

I think the block looks cute either way!

FLEA MARKET FLOWER
BLOCK "D"
After your applique is complete
you will need to trim your block to
16 1/2" tall x 18 1/2" wide
It will finish at 16" x 18"
after it's sewn into your quilt.

Okay now onto Block "C"
You will need to make
one - 7 1/2" Flea Market Flower
using one print only

You will need to cut 2 - 3" x 21" strips
to get 16 flower petals.
Cut them like this using the
4" and the 7" lines on the Pie Ruler.
Alternate the ruler with each cut:)
To make Block "C" you will also need:
1 - 4" circle
2 - small leaves
2 - large leaves
1 - 1/4" stem cut 12" long
with one end pressed under.
Cut your background 10" x 20"


And your 7 1/2" flower.

Press your background in half lengthwise
so that you can
pin your flower in the center.
Because you do not want your leaves
to be wider than your flower...
place the bottom of the leaves
almost straight with the stem.
Here is a close up photo of mine:)
Pin everything else into place...

And make your flower to be
no more than 17" tall:)

After pinning...
glue into place and remove pins
when your Sue Glue is dry!

I love this tall skinny flower:)
FLEA MARKET FLOWER
BLOCK "C"
After applique trim it down to
8 1/2" x 18 1/2"
It will finish at 8" x 18"
after it's sewn into your quilt.

Whew!!
That was a lot of tutorials for this week!
***Just a reminder...
that you do not have to
make your blocks at the same time
that I am doing each tutorial.
We all have different amounts of time
that we can sew and of course
this is a no pressure sew along.
Some of you are able to stay
with my schedule and some are not.
NO WORRIES!
As always...
I will leave all of these tutorials
on my blog so that you can do
each block at your own convenience.
The most important thing is that you
enjoy planting and growing your flowers
each and every step of the way:)
I'll be right back here next week
with two more block tutorials.
xx
Lori

1 comment:
Well I was the overzealous one and did Block E ahead of time. After trying to line up the 4" circle, which of course was a slightly too small, I started remeasuring and asking myself, did I cut wrong - oh no! I giggled when I saw your comment Lori and I was going to recut the flower but... you always have a solution. Thanks so much. This has been my 1st sew-along and I am enjoying it. I won't jump ahead next time.
Theresa
Post a Comment