

Welcome to week three of the
Vintage Housewife Sew Along


if you need to download the
Sew Along Guide and
if you are just joining us and
need to read the Bee Prepared post
that tells you all about this sew along:)


We are using my new fabric
Vintage Happy 2

And my new Sew Simple Shapes

To make the
Vintage Housewife Quilt
74" x 82"
These are the blocks that
we have done so far:


And today we are making the
IRONING BLOCK

Tie on your apron and let's get started!

Your Ironing Block kit should be
all ready for you to sew
as per the cutting instructions
in the Sew Along Guide.
Sew Simple Shapes needed
for this block are:
J-1
J-2
J-3
J-4
J-5
J-12
J-18
You will also need
straight bias strips prepared
by running them through the
bias makers
(sizes are listed in the guide
with the cutting)
and then
cut and pressed to the
following measurements:
Hanger - Cut One - 9" long
No pressing ends needed
Spool - Cut Two
1 1/4" long after pressing each end under
Thread - Cut One 1 1/4" long
No pressing ends under needed
Jar Lid - Cut One
1 1/2" long after pressing each end under
Plug and Cord Bottom - Cut Two
Both about 5/8" long after
pressing both ends under
for plug and one end under
for the other one.
Iron Button - Cut One- 3" long
I pressed mine in half
and had plenty to tuck under:)
You will need to use the
small red vintage trim for the cord
and several buttons from the
bag of tiny Cute Little Buttons!
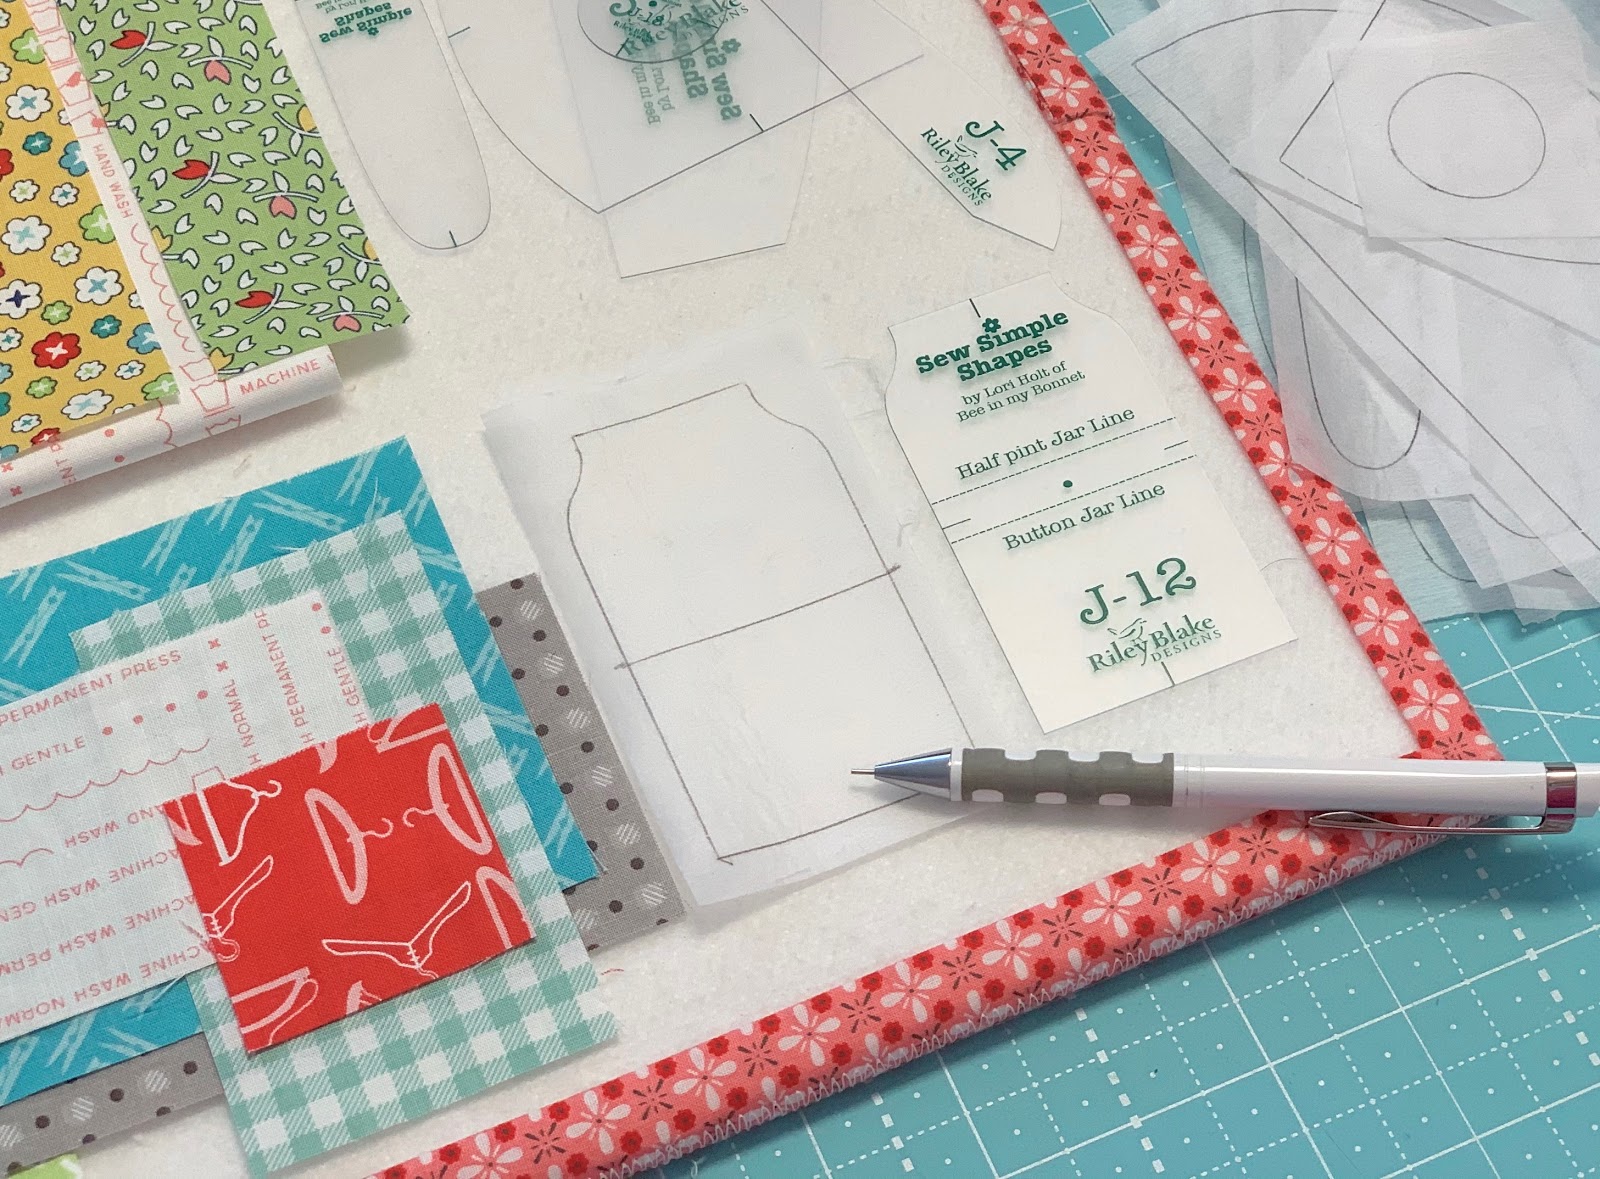
Before sewing the button jar
you will need to trace that line from J-12.
Sew all of your shapes
after they are traced:)

After trimming and before turning...
take note that you will need to
clip the cleavage and inner curves
on the hanger and the button jar.

Don't let the hanger scare you
just because it is long and skinny.
It looks strange after turning and shaping...

But just press one half at a time...

Like this!!
Totally do-able:)

Same goes for the folded laundry pieces.
I just cut straight instead
of making an x
in the back for turning these:)

Easy peasy!
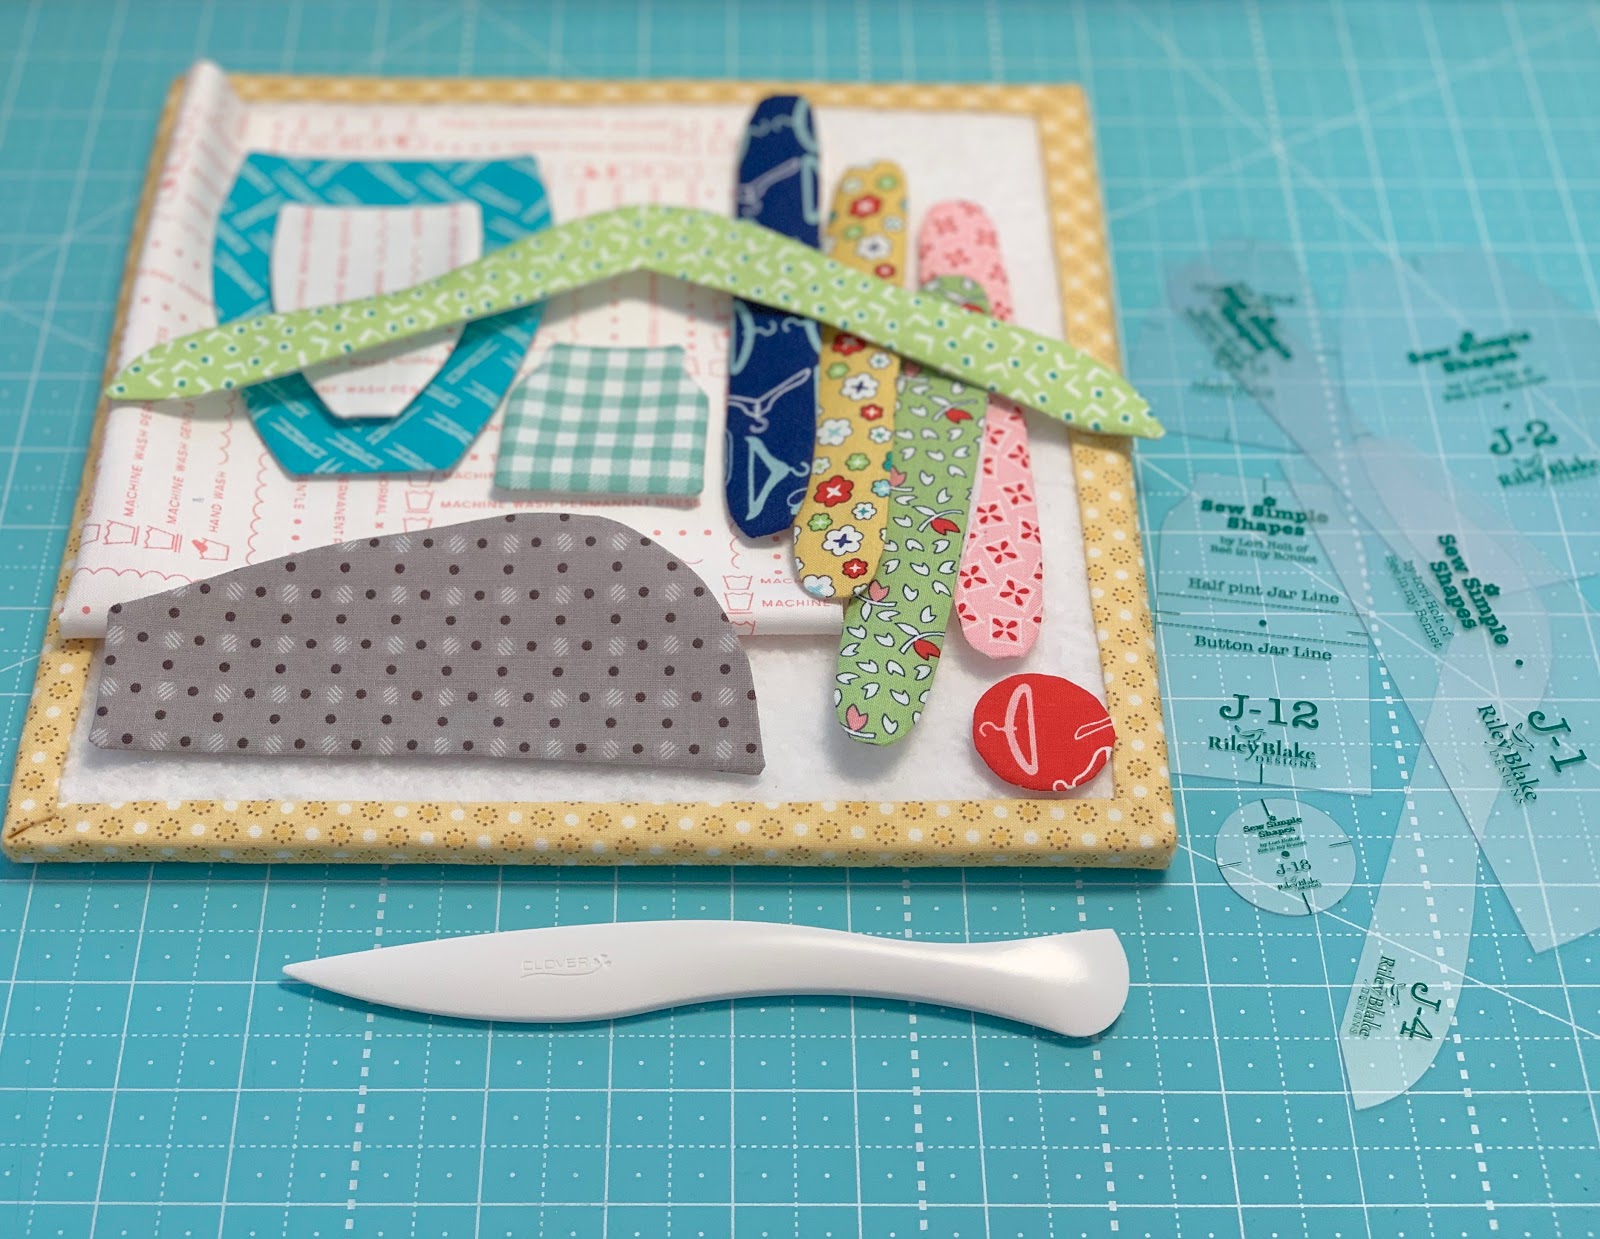
Now that your shapes are finished...
it's time to lay out your block!
This is what the two shapes
J-2 and J-3 looked like
as I prepared for basting.
Most of them are tucked under
and can be trimmed off afterwards...
but I left on quite a bit until
the very end because I didn't
want to trim off too much!
When drawing this block...
instead of making these 2
Sew Simple Shapes be
just for the iron handle...
I knew these shapes would be easier
to sew and shape if I made them this way
and they can also
double for other things later...
like cute little vases!

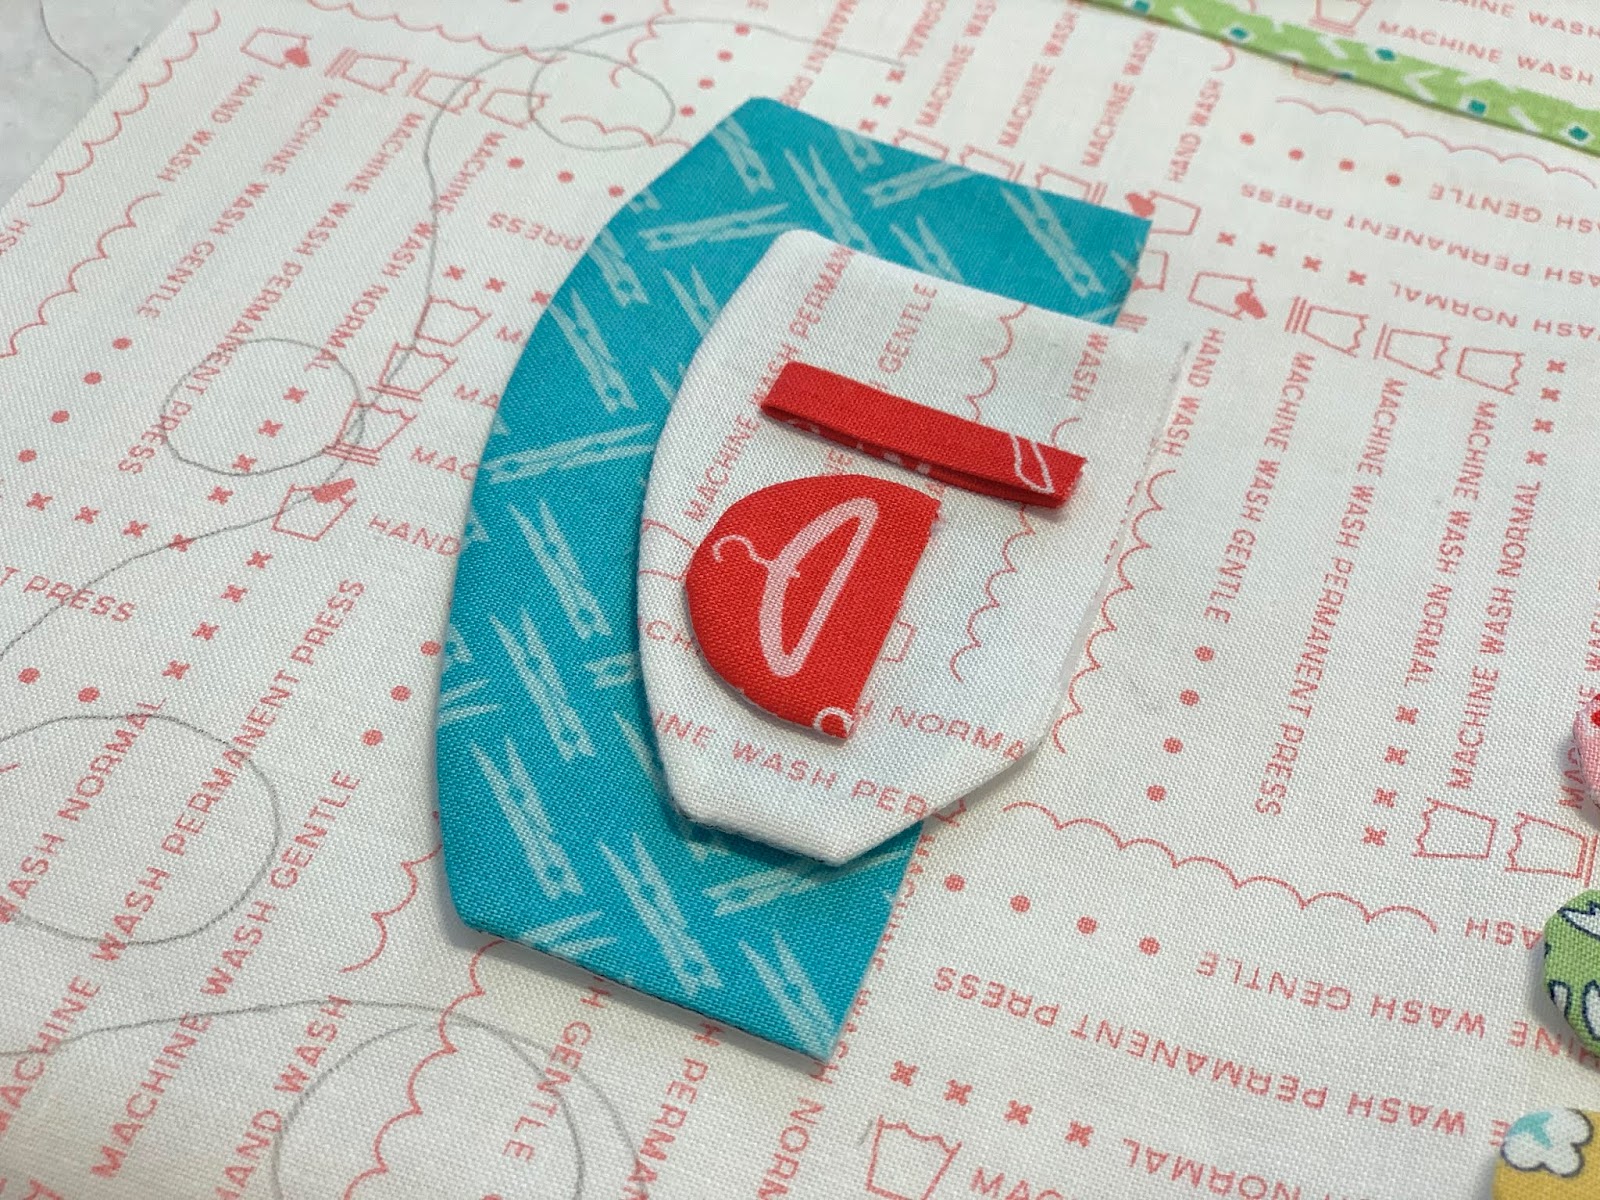
I layed out my iron piece on top
like this and adjusted until
it looked good!
You can pin at this point.

Don't forget to tuck this piece
under the iron bottom.
You can trace the embroidery pattern
on first or last...
whichever is easiest for you.
Those patterns are on page 15 of the guide.

Here is my plug all ready pressed under
and ready to pin or glue...
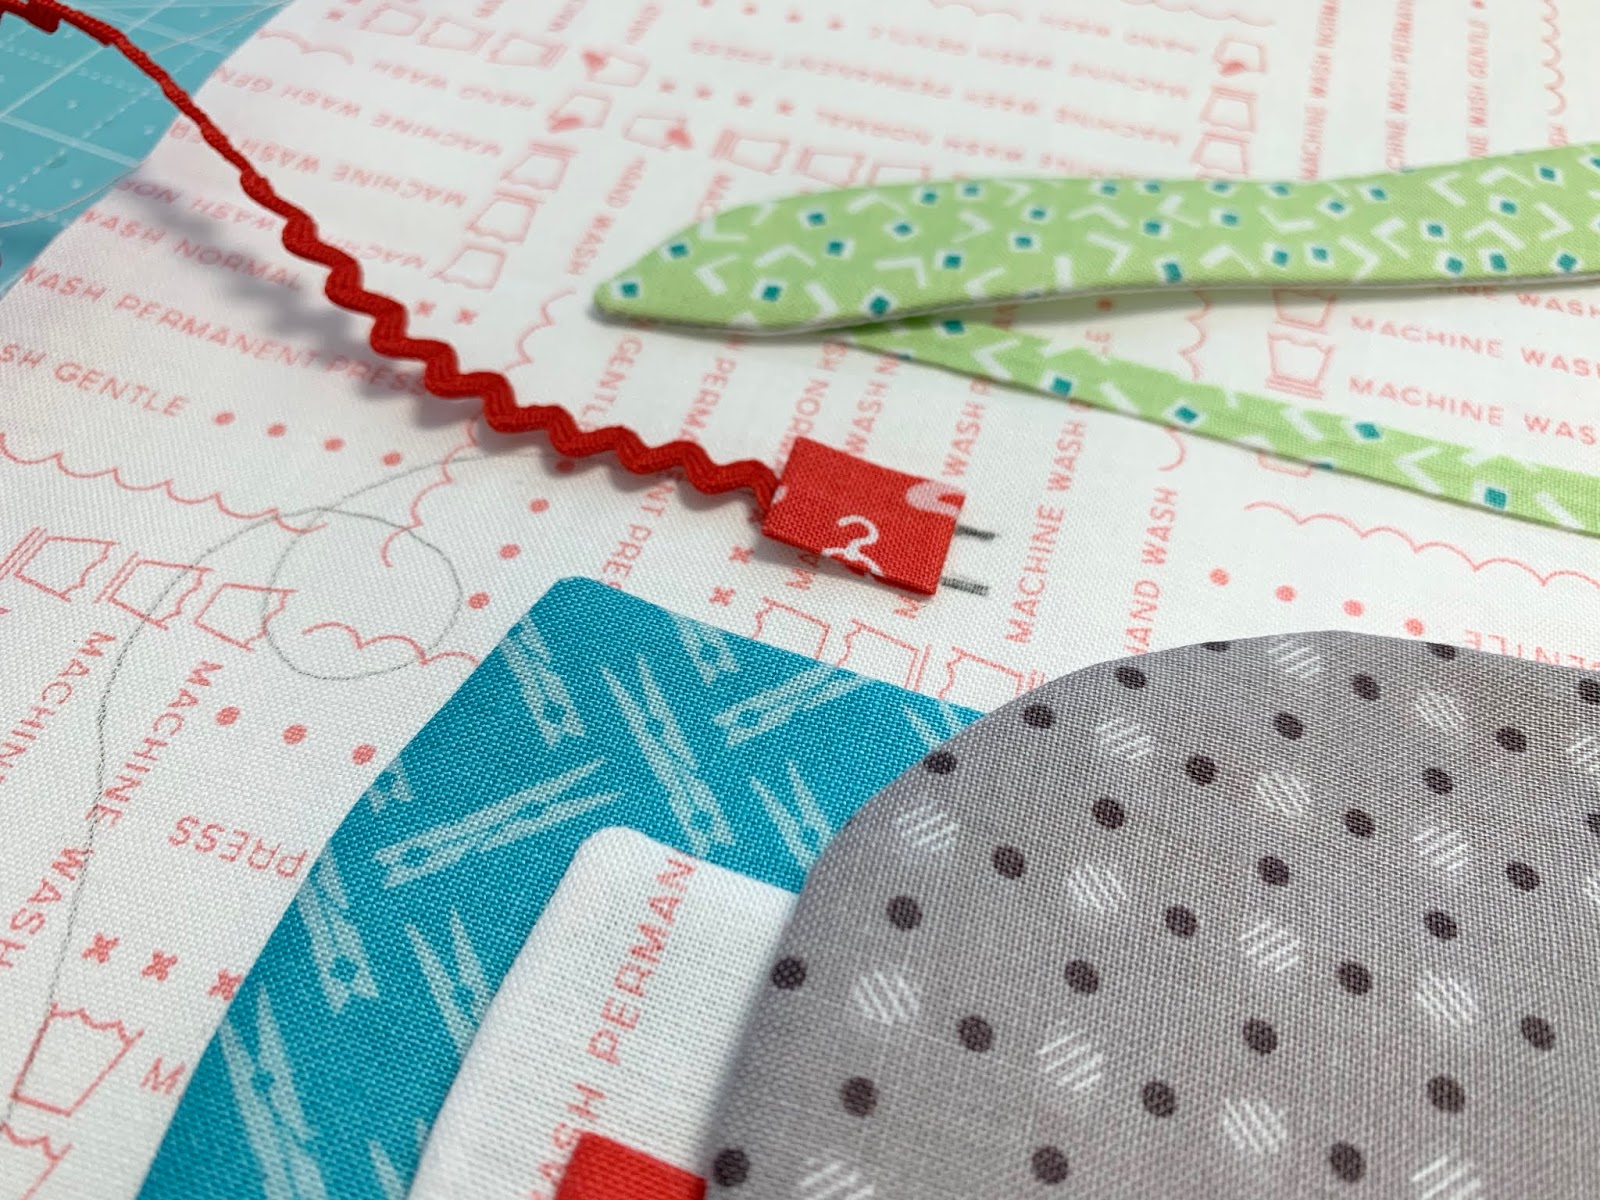
I glued mine down and tucked
the end of the cord under it first.

Pinning...pinning...pinning!

I glued down the cord at the
same time as I glued the shapes.
Use the glue sparingly on the cord...
I did and that helps a lot!
I used 3 strands of the white
in my Aurifloss set to sew down
the cord like this!
It's fun and easy to do and it
really ends up looking like
one of those vintage cloth cords:)

Use 3 strands of gray Aurifloss
and backstitch the hanger top.
I used a satin stitch and a
backstitch for the needle.
I also used the gray for the plug ends.
Use 3 strands of floss and
a backstitch for the thread:)

Everything is all embroidered
and ready for appliqué!

On this block you will have about
1/4" WITH-IN THE RULER WINDOW
around all sides when finished.
This picture will help you with the
layout and placement of your pieces:)

Use these buttons for the jar.

Randomly lay out your buttons
to fill your button jar and
sew them on with matching Aurifloss.

Cute as a Button Jar!
LOL

My grandma always had a jar
full of buttons for a
quick mending job on washdays:)
She kept it on the shelf next to the
washing machine along with a
spool of thread and a needle.

Back in her time...
and my Mom's time too...
Wash Day meant Ironing Day as well.
No permanent press back then
for the vintage housewife!
My mom still irons so many things
including her pillowcases
just because she likes things that way:)

This block brings back so many fond memories.
I took this photo right after
applique and before
trimming it up and
sewing on the buttons
and the borders:)

IRONING BLOCK should measure
14 1/2" square before
you sew it into your quilt.
LOVE IT!!

Are you ready for more
vintage housewife photos???
Scroll down and enjoy...
and I'll be back next Monday
with the Typewriter Block tutorial:)
xx
Lori


2 comments:
Love all the vintage ironing ads, thanks Lori
I love all the ads-makes me remember when I was a kid...carefree and happy. I loved watching Mom sprinkle clothes with the cola bottle with a sprinkler cork in it. Some she rolled up and put in the freezer for a bit (why? I don't know). Then hanging them out on the line.
Post a Comment