

"BUTTERFLY BLOCKS"
"SNAIL BLOCK"
"GARDEN BLOCK"

Welcome to Week Fourteen of the
"CALICO GARDEN"
Sew Along!
Join me here each week
when I will be doing tutorials
on the blocks for the quilt.
Of course because we are all sewing
from all around the world
we all have different time zones...
But I will be posting each Monday
right here on my blog
and you can follow my tutorials
any time each week that
is convenient for you.
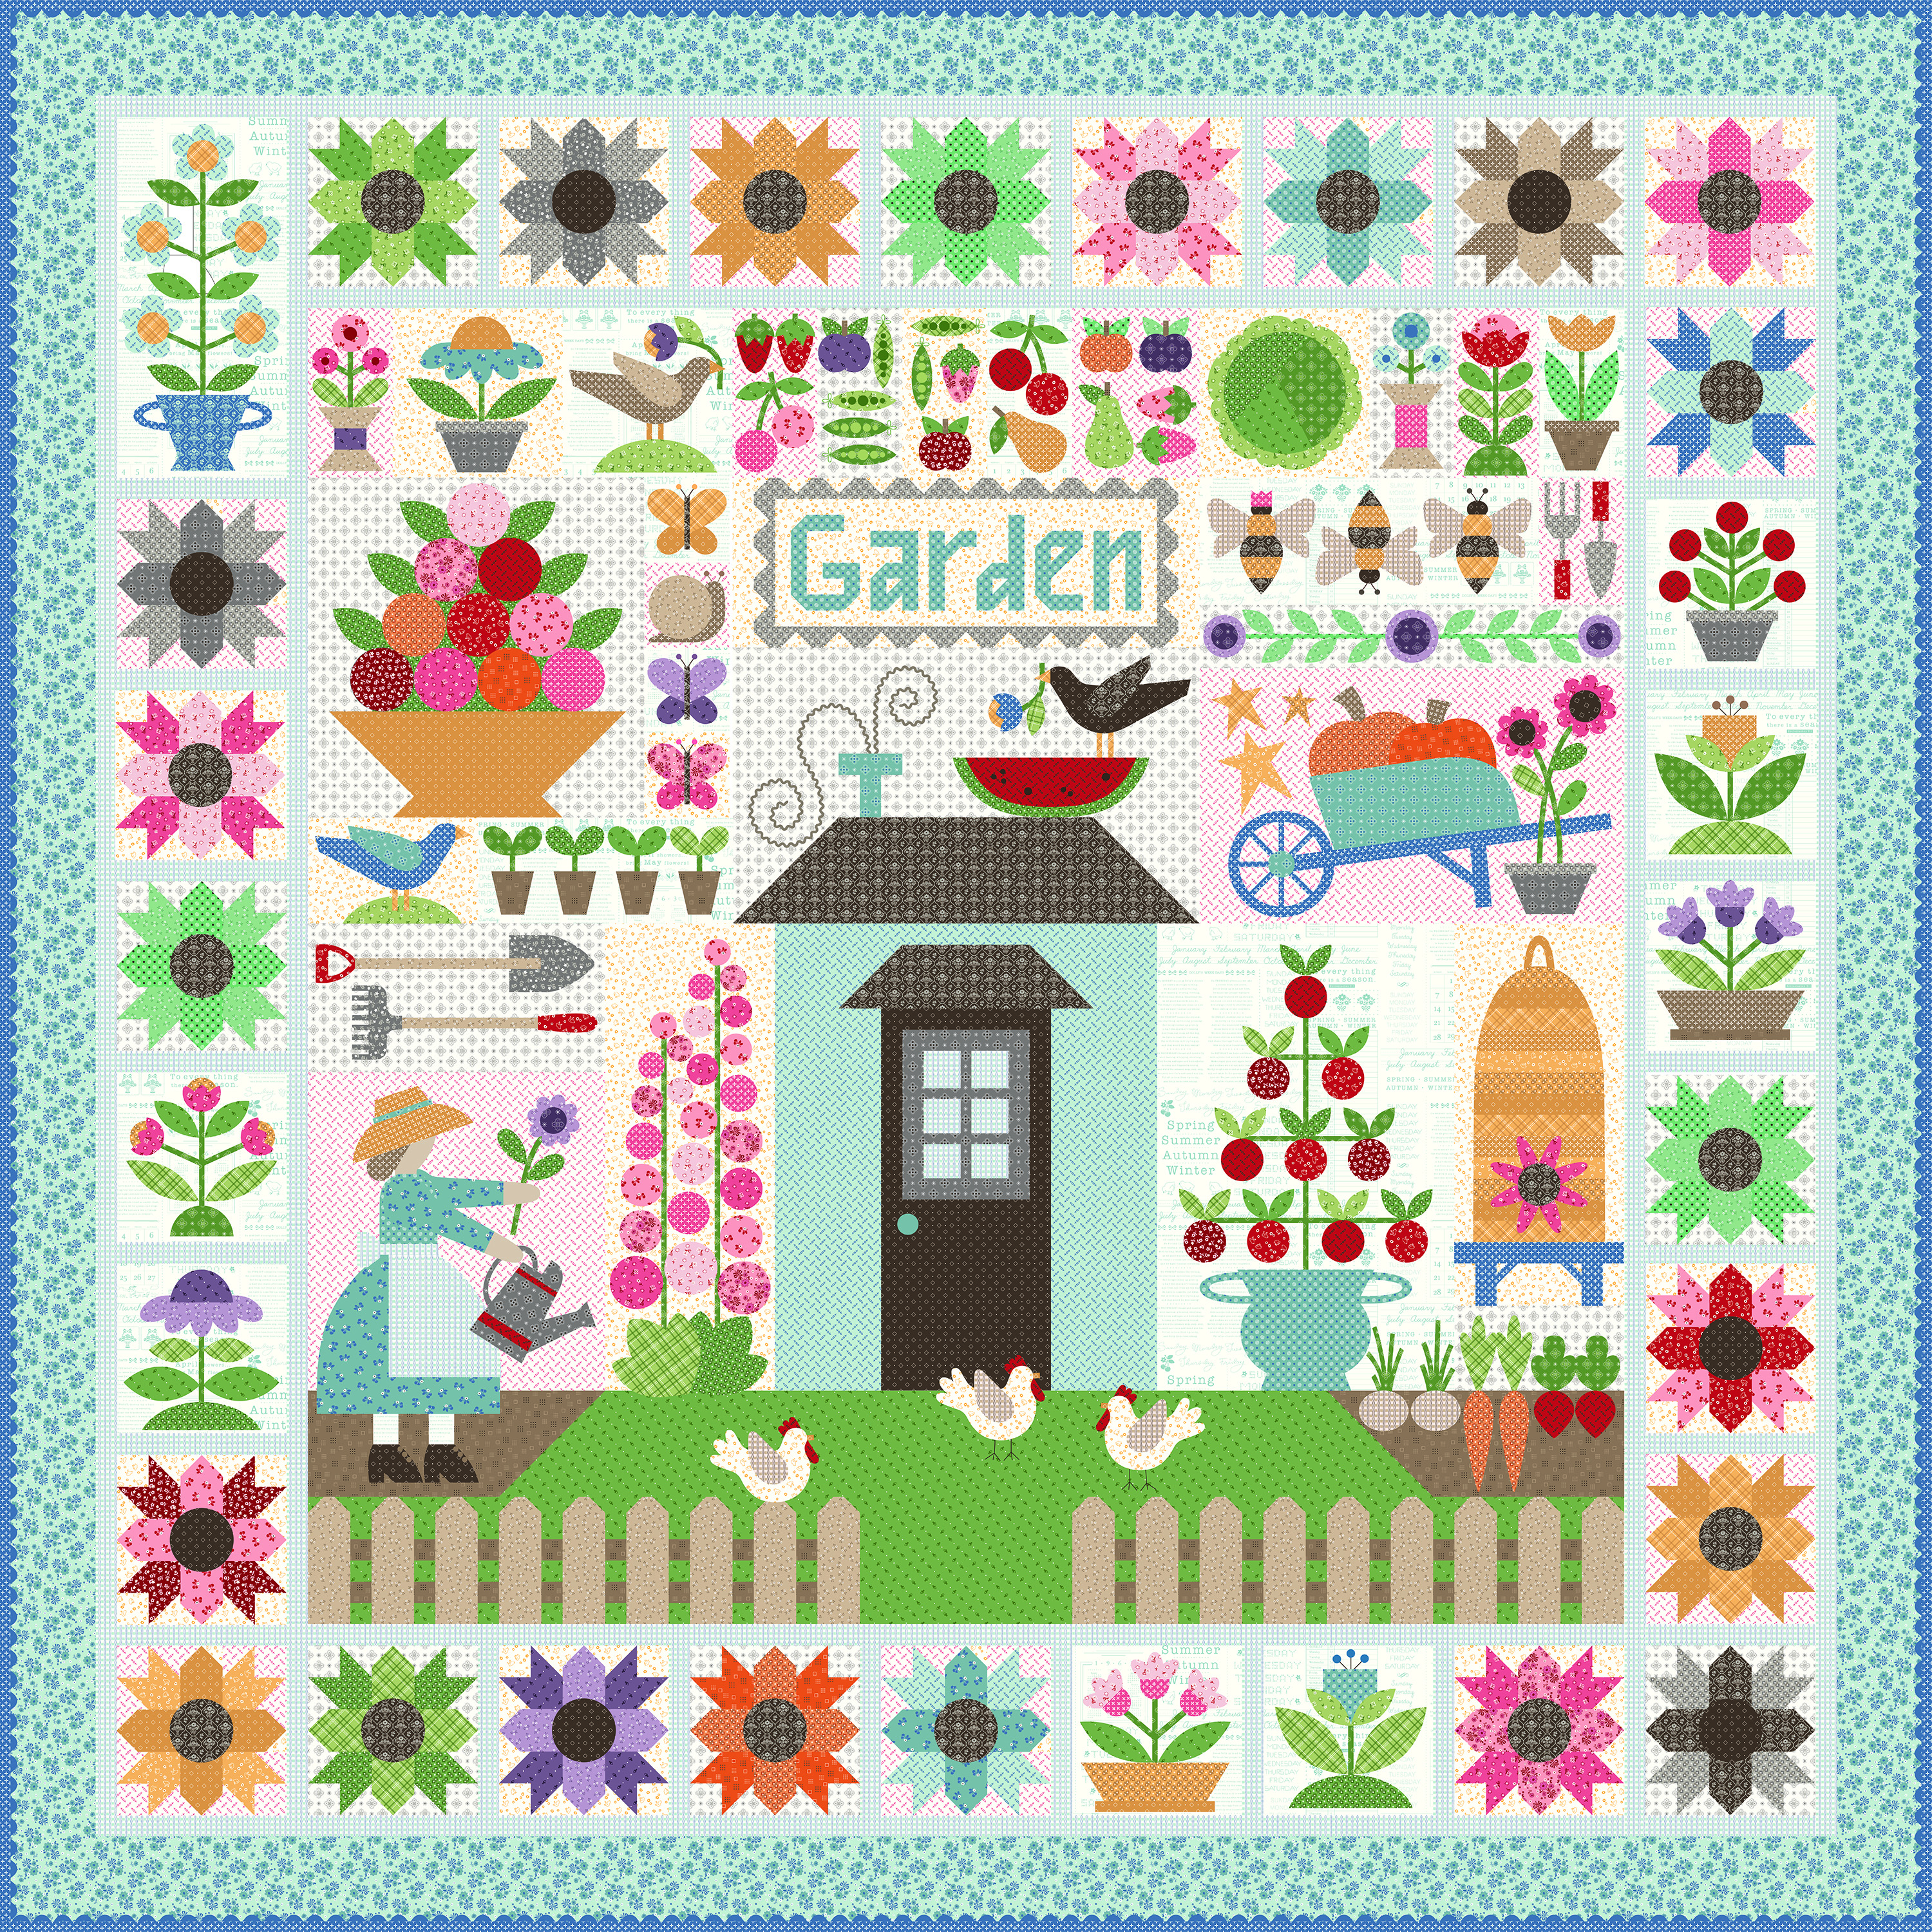
We are making the
Calico Garden Quilt
90" x 90"

The quilt is made with my latest fabric
collection called Calico...
I hope that you all have all
received your templates and
fabric kits by now...
and that we are all ready to begin!!
If you still need them ...
just do a quick google search for
"Calico Garden Quilt Kit"
to find shops who still have some left.

We are also using the
Calico Garden
Sew Simple Shapes
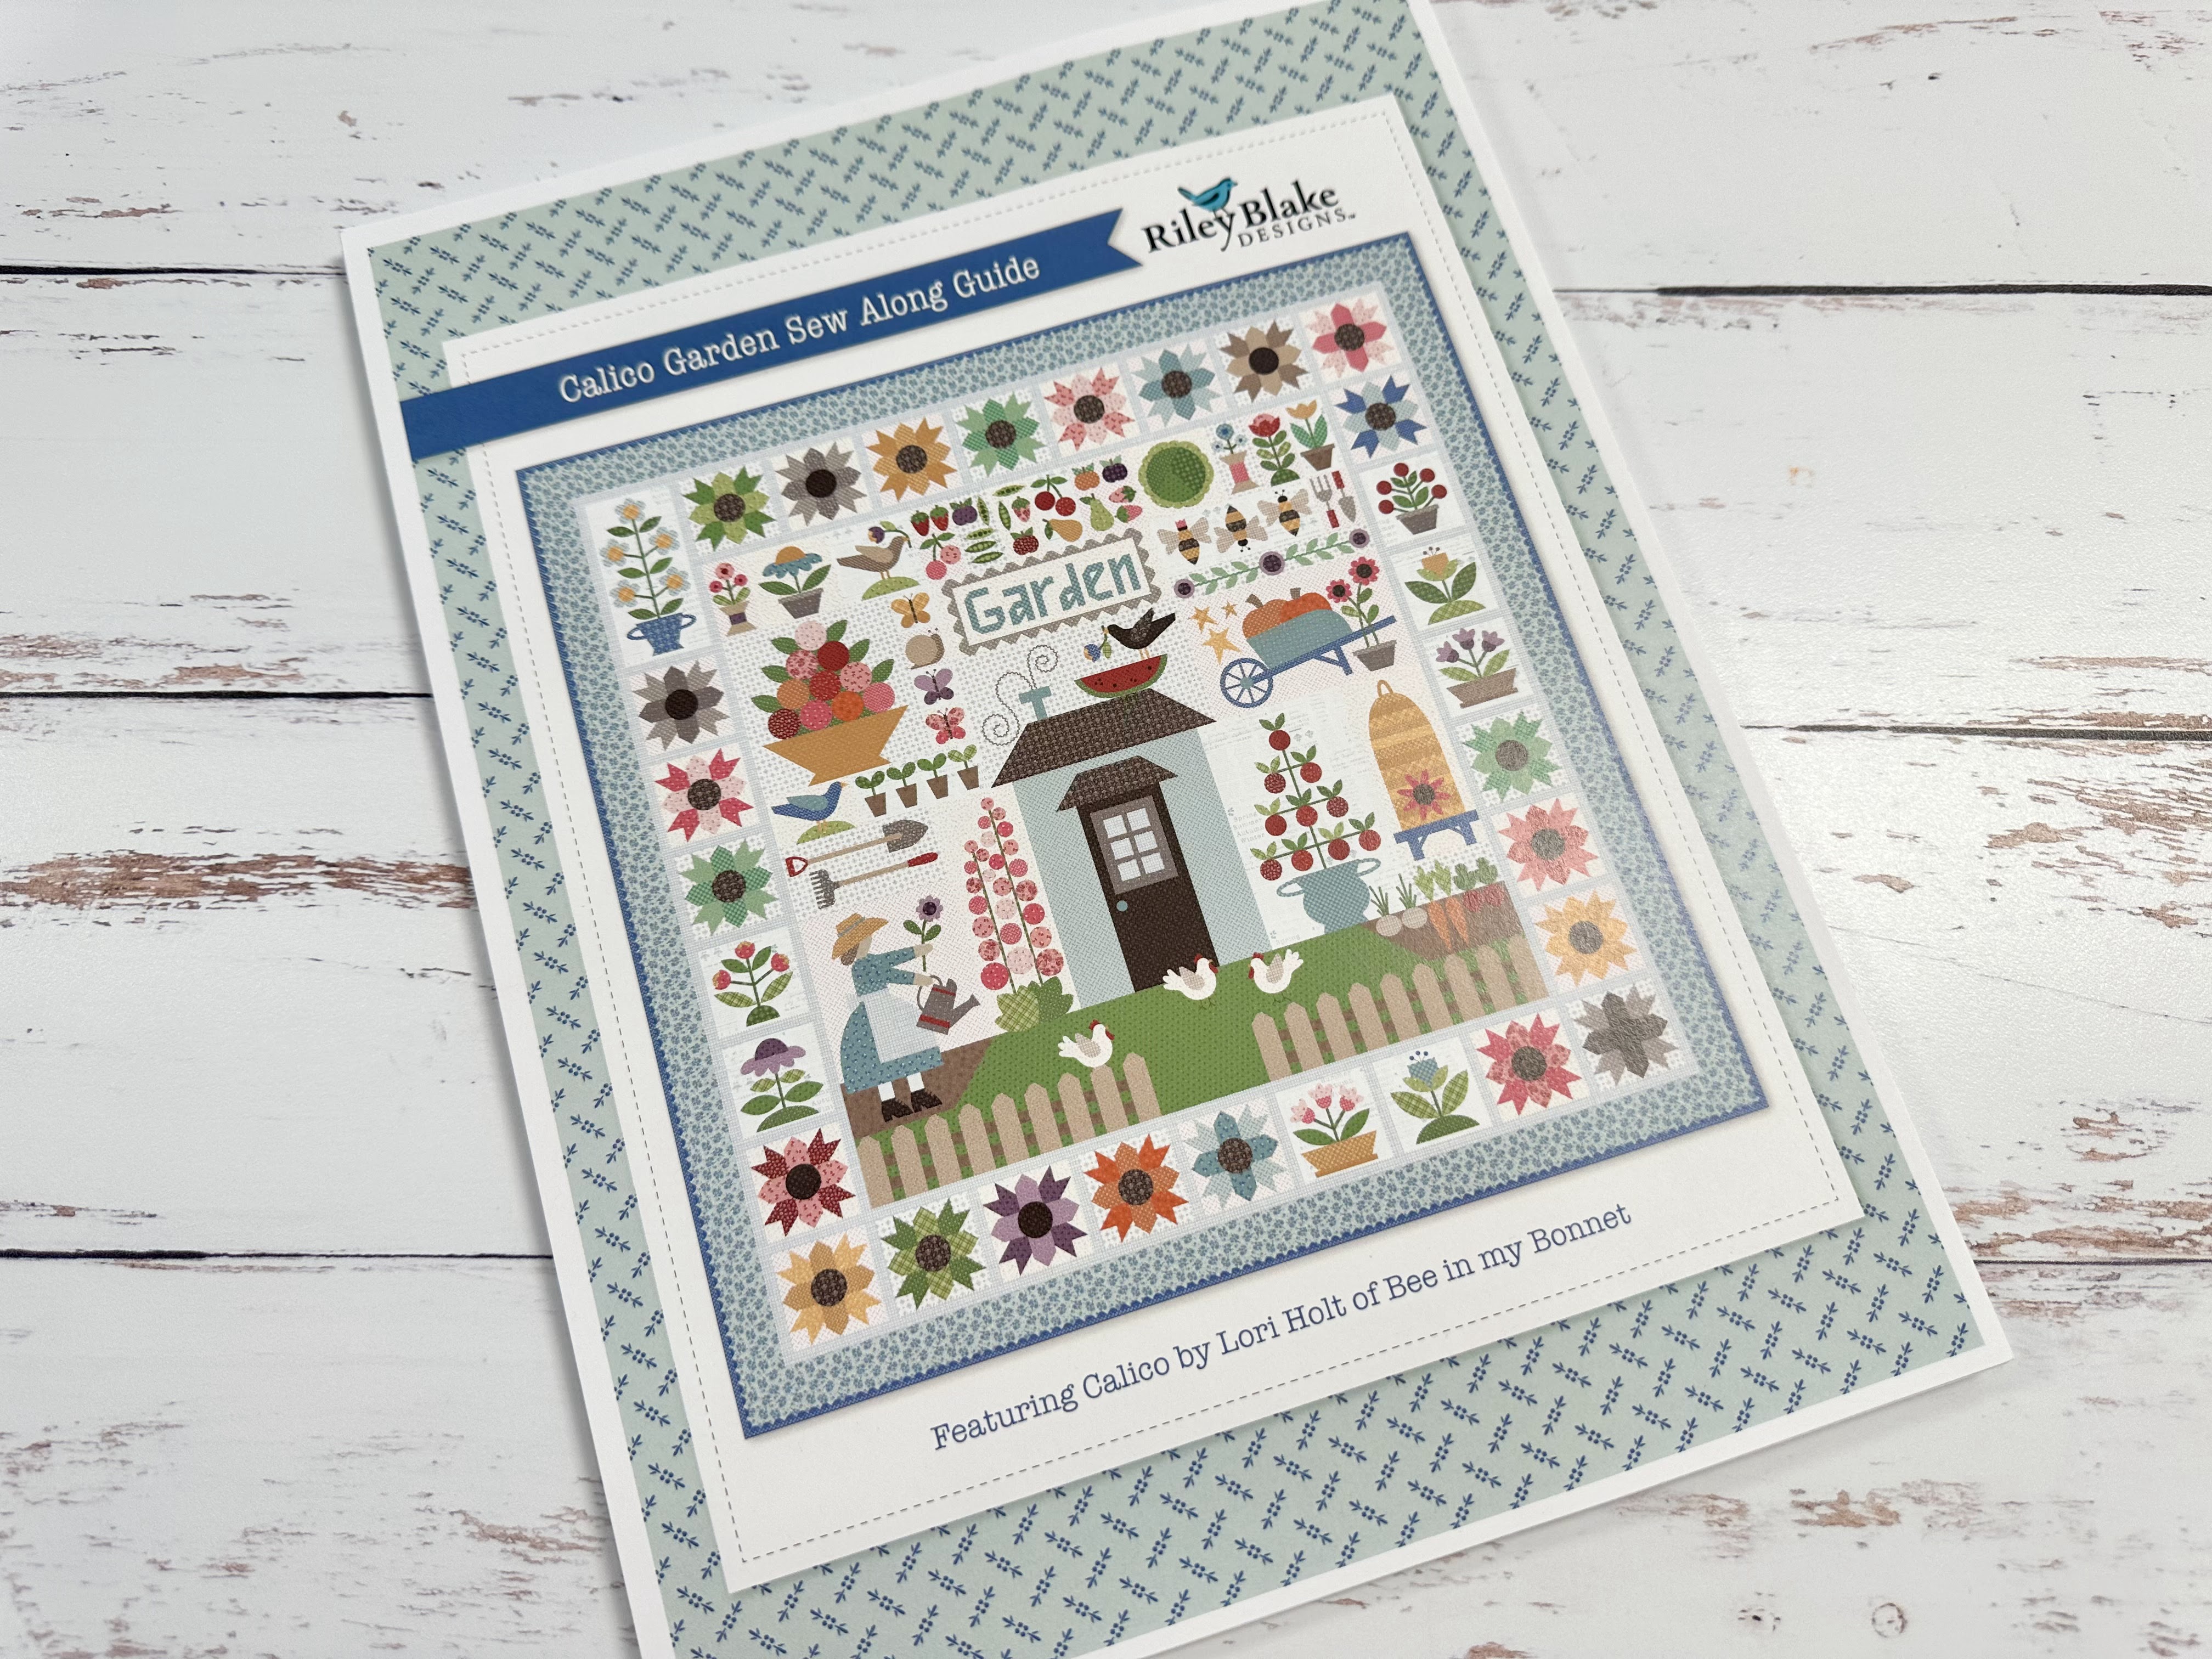
I have posted the
post which details all of the supplies
for the sew along and how it works.
I have also given the link there
for the free PDF Download
of the Sew Along Guide
to download the sew along guide.
As per the sew along guide
cutting instructions
you should have everything for
this weeks blocks
all cut and ready to go!
As per usual for week one in my
Sew Simple Shape Sew Alongs
the FIRST week tutorial is a video.
Because I now have my own
I have posted the
Blue Coneflower Block
Tutorial there.
to visit my channel and watch the
tutorial and I hope that you love it!
Pretty please leave me a comment
over there and let me know:)
If you like what you see
and my other videos there...
click on subscribe and click on the bell
to be notified whenever
I post another tutorial:)

that I showed you
how to make in my video:)

for the tutorial on my
PURPLE CONEFLOWER BLOCK

to go to my tutorial for the
CALICO STAR FLOWER BLOCK

to go to my tutorial for the
Morning Glory Blocks

to go to my tutorial for the
PRIMROSE BLOCKS

to go to my tutorial for the
RED ROSES and MUMS BLOCK

to go to my tutorial for the
Forget Me Not Block

to go to my tutorial for the
PICKET FENCE and GRASS BLOCKS

to go to my prepping tutorial for
HENS and ROOT VEGGIES

to go to my tutorial on the
HOLLYHOCKS and
RAKE and SHOVEL BLOCK

to go to my tutorial for the
GARDEN GIRL

to go to my tutorial for the
BEE SKEP BLOCK

to go to my tutorial for the
TOMATOES BLOCK

Last week we made the
Click on the name of the blocks
to go to these tutorials!

to go to my tutorial for the
WHEEL BARROW BLOCK

for my tutorial on the
GARDEN TOOLS BLOCK
CLIMBING VINE BLOCK
BEES BLOCK

This week we are making the
"BUTTERFLY BLOCKS"
"SNAIL BLOCK"
"GARDEN BLOCK"

Let's get started with the
Butterflies and Snails!

Here are my fabrics and Shapes
for the four blocks all cut...
all traced and ready to go!
Here is a list of the
Calico Garden
Sew Simple Shapes
needed for these blocks:
1 - O-6
3 - 0-49
3 - O-50
1 - 0-80
You will need 3 pieces of 4" long
prepared 1/4" straight bias.
Press each end under
so that they measure 2 1/2" long.
I used 2 - 1/4" Cute Little Buttons
for each of their antenna
Cut each of your four backgrounds
6" x 6"

My shapes are sewn...
and no clipping was needed for the circle
but clip the inner curve on top
of the snail body and the cleavage
in each butterfly wings.

Pressed, shaped and ready to play!
Now let's go lay out the block:)

I have everything that I need here
including the 4 1/2" Trim-It Ruler
and my cute little bowl of
Cute Little Buttons!

When laying out the butterflies I pressed
the background in half vertically
so that I could place both wings
directly onto the center.
I measured 1 1/2" from the top edge
and pinned the top wings...
then measured in 1 1/2" from the
bottom edge to pin the bottom wings.
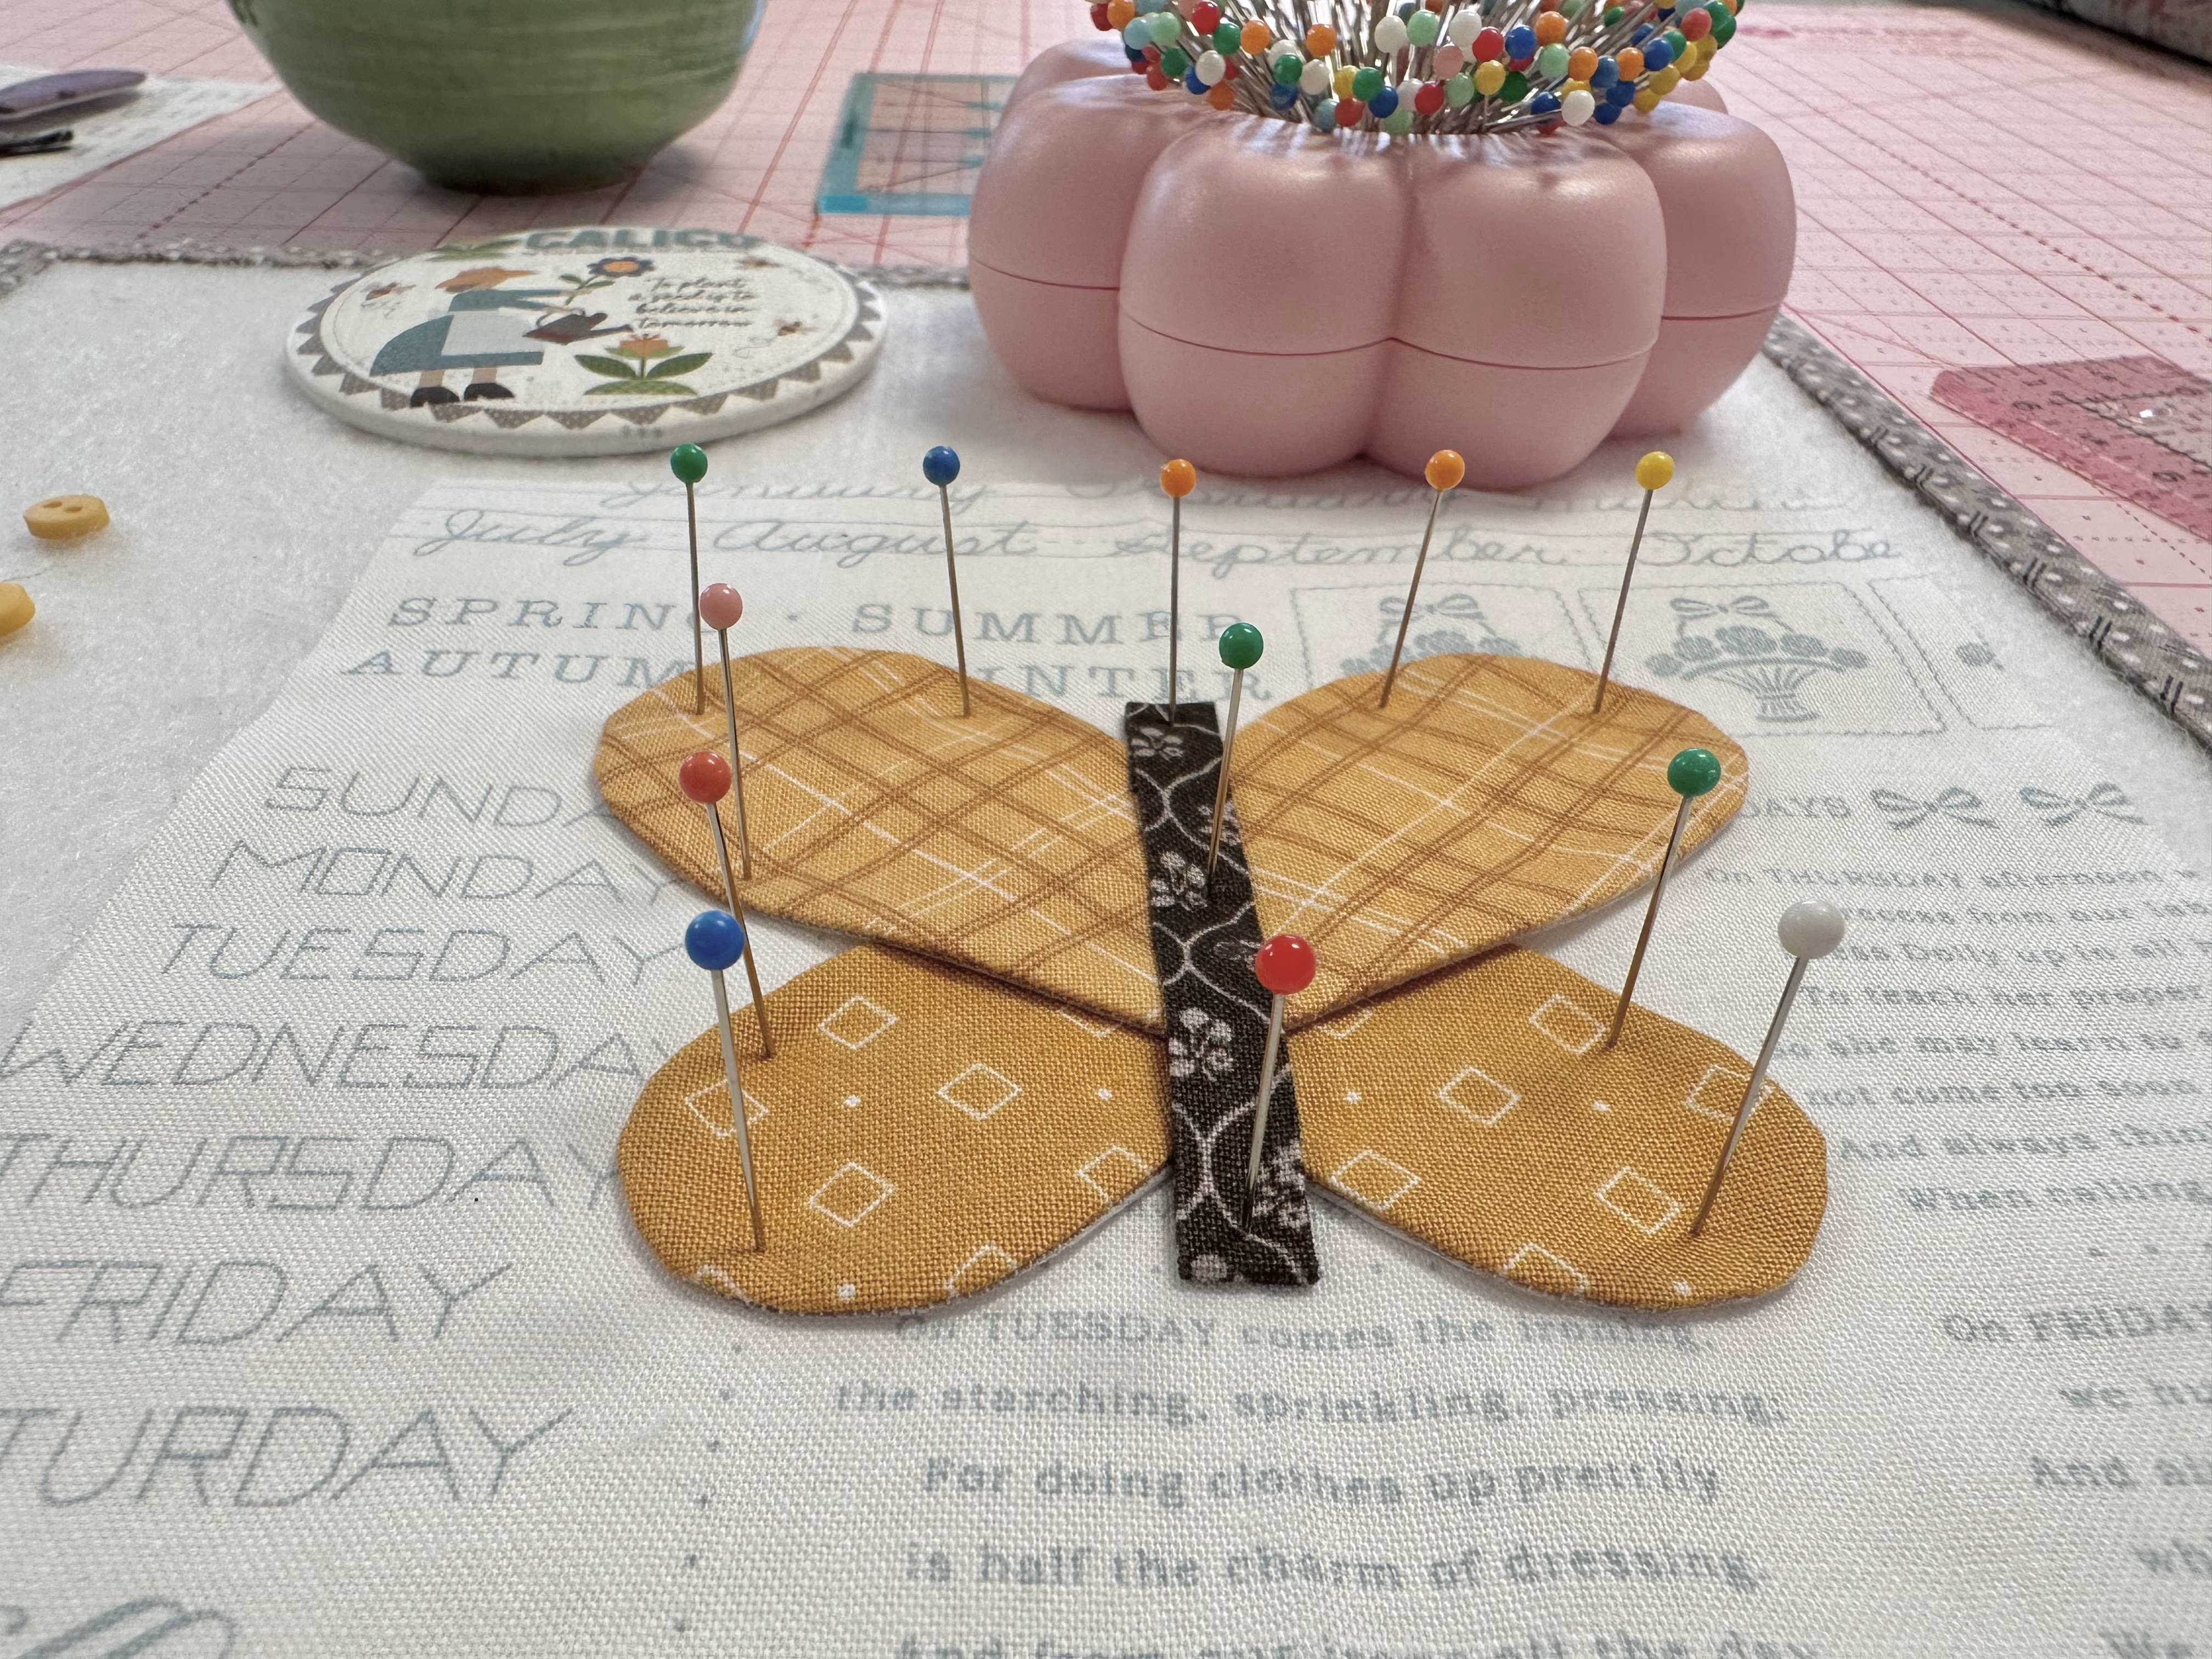
I placed the body in the center
and pinned and glued everything!
Now go ahead and do the remaining two butterflies in the same way.

For the snail I measured up 1 1/4"
from the bottom and placed the body.

Then I measured 1 1/2" down from
the top and placed his body:)
I pinned and glued and that was it!
Next I traced and embroidered antenna
from the guide and sewed on the buttons.

fun and super easy peasy!

After each block is appliquéd
press from the back and
trim them down to
4 1/2" x 4 1/2"


Okay!!
Now let's go to the machine and
piece each letter for the Garden Block:)

Here are my fabrics all ready
to sew together into the Garden Sign.
There is no applique in this block
it's all machine pieced.
All of the cutting for these three
fabrics you of course will find
in the sew along guide on
pages 5 and 8 and 11


I took a screen shot of these pages so
that there would not be any confusion:)
***NOTE***
I noticed that on the
Daisy Baby Chick background print
for letter "E" that the
piece b cutting in the guide is
1 1/4" x 2 1/4"
but we actually need it to measure
1 1/4" x 2 3/4"
and the 2 pieces a in the letter "N"
block should be 1 1/4" wide not 1 1/2"
Okay!
Let's go to the machine and
sew one letter at a time:)

We are all quilters so I'm sure it
goes without saying that it's
very necessary when piecing to use
an accurate 1/4" seam allowance
but I'm reminding you anyway!!
Here are all of my pieces for Block G.
Just for reference the squares
that you see that are
laid out on the diagonal...
those are the ones that you
will need to sew on as
Easy Corner Triangles.
On this block you will see that
I sewed all 3 of those on at the end
but that is not always
the case for every letter.

For each letter I took photos of my process.
These are all easy peasy letters to make
but I'm sure the photos will help!


Letter G should measure
3 3/4" x 5" at this point
which is the unfinished size.
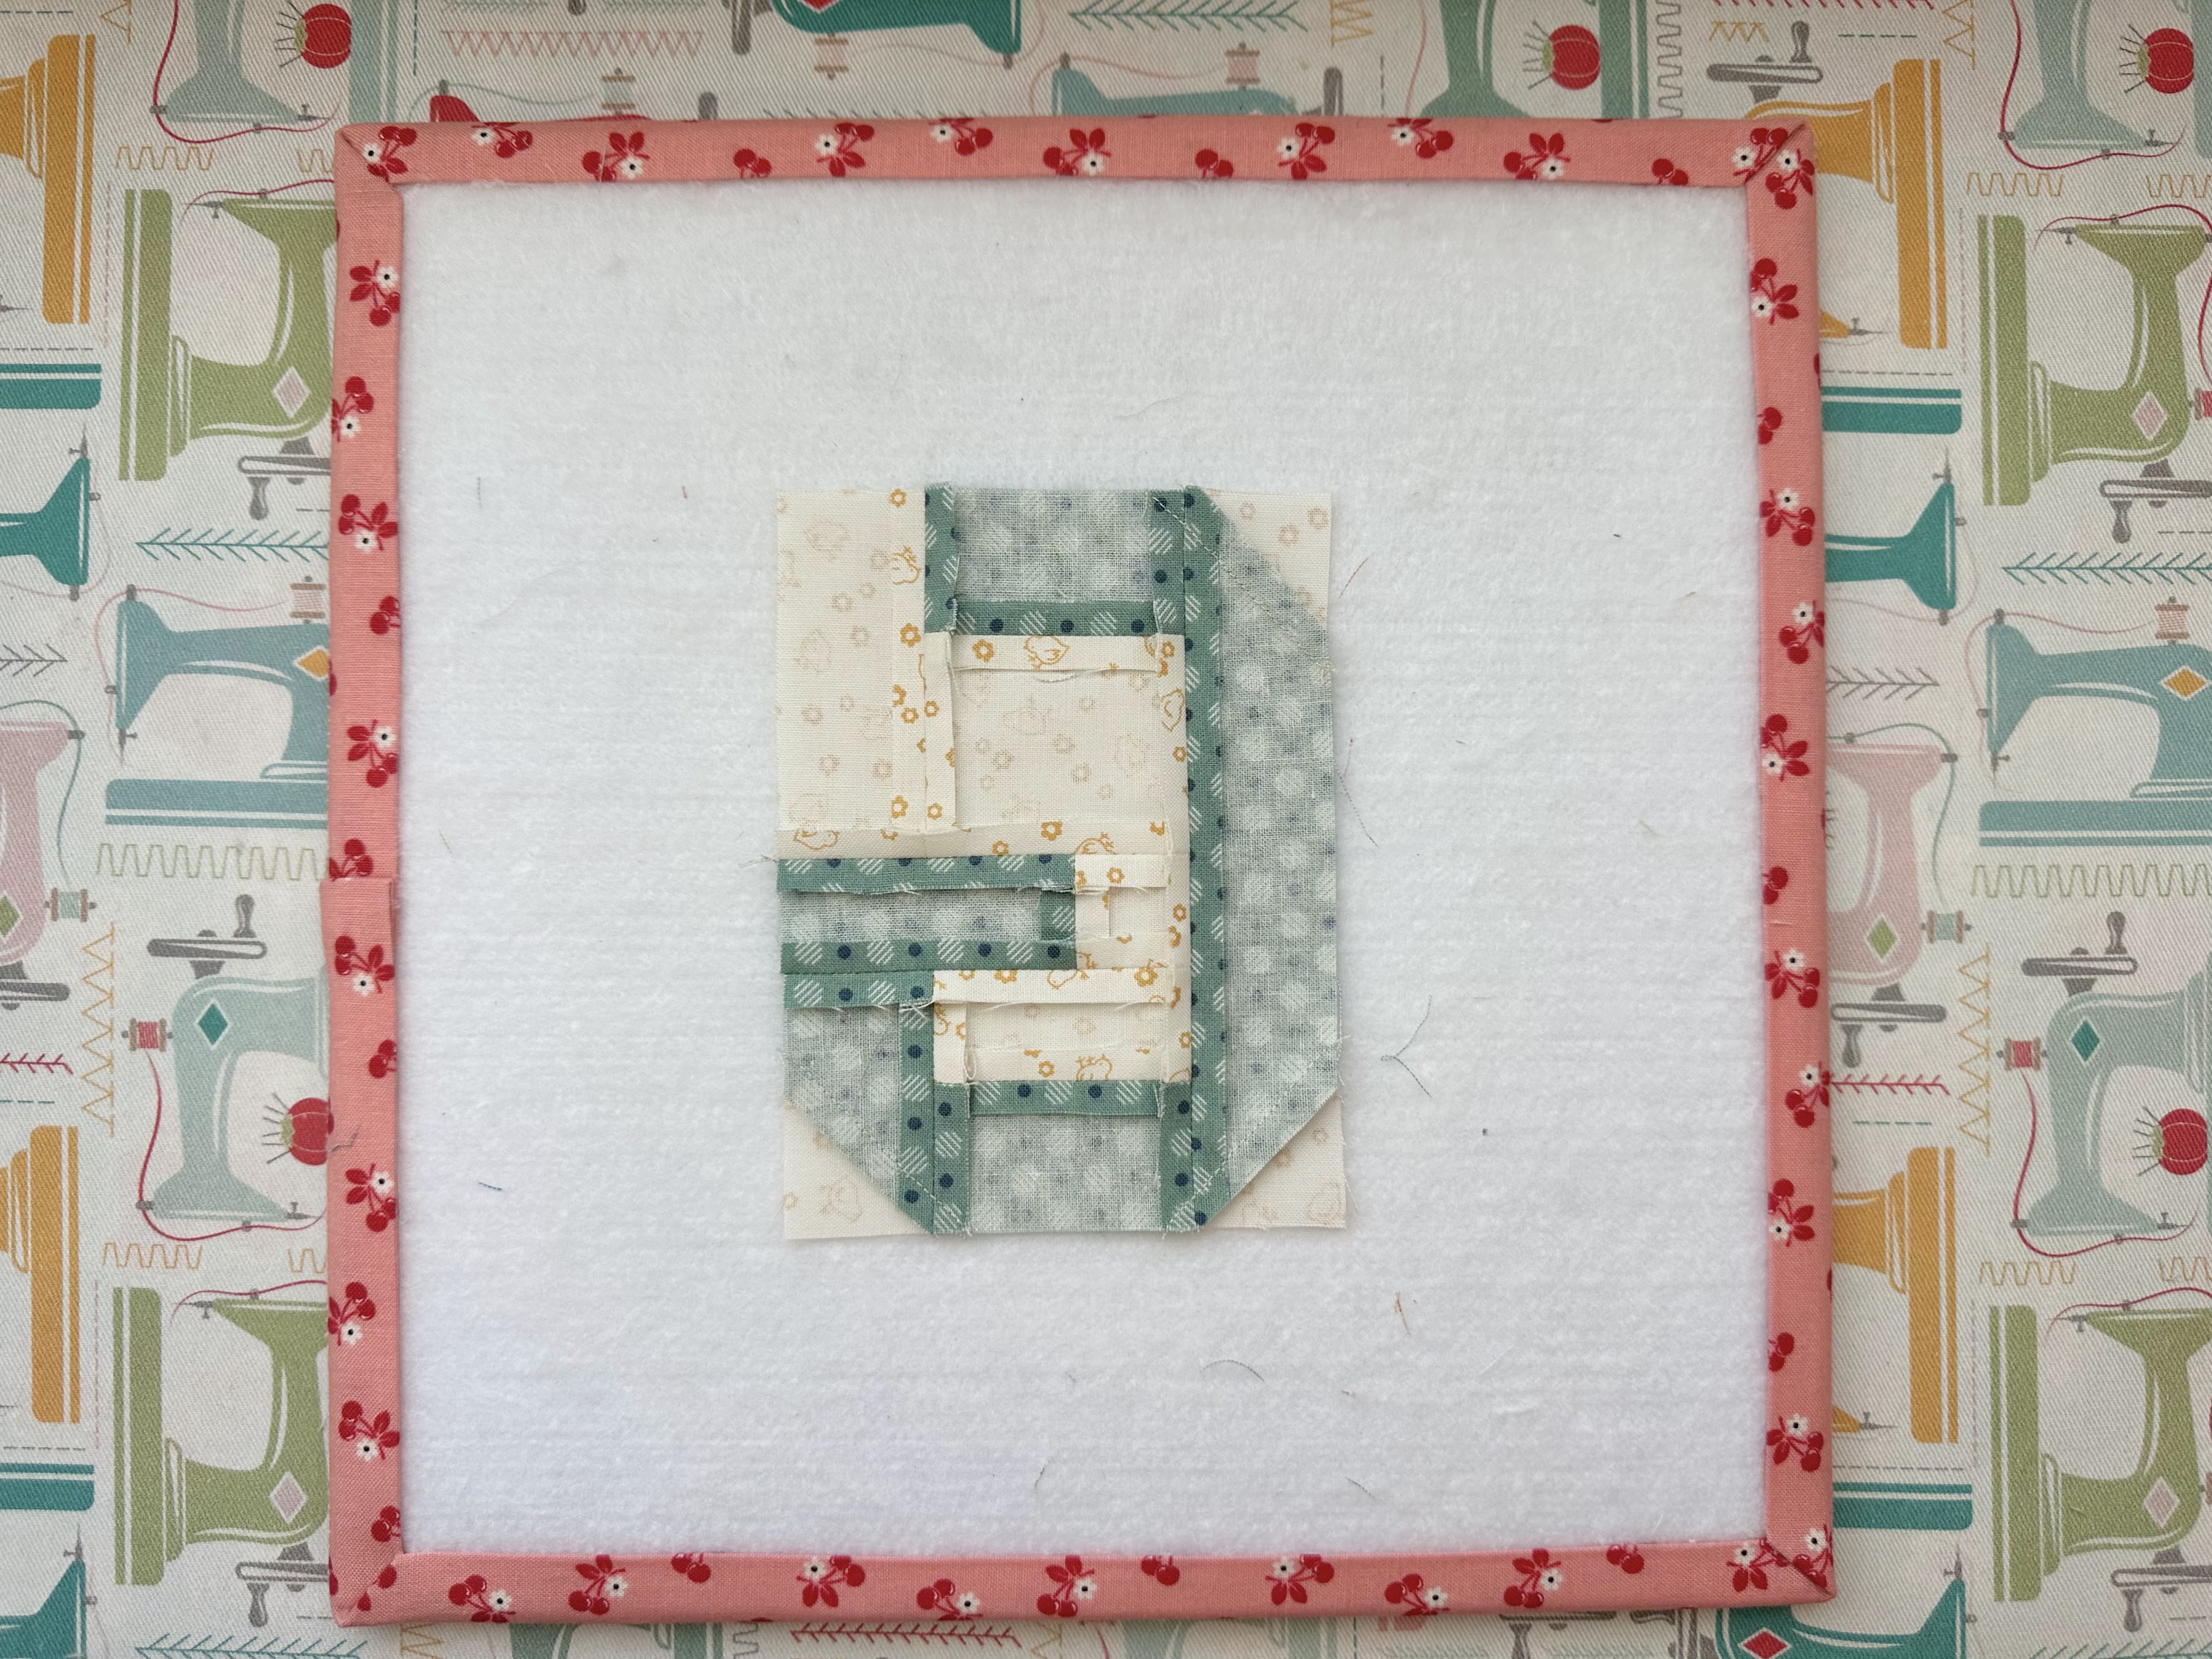
This is how I pressed my seams:)
I'll show you a pic of the back of
each block so you can see
how I pressed them as well.

Now onto letter A Block.


Letter A should measure
2 3/4" x 5" at this point
which is the unfinished size.

I added the Seam Roller in these
two photos to remind you how helpful
it is to use especially when
you are pressing seams open.

Letter R Block


Letter R should measure
2 3/4" x 5" at this point
which is the unfinished size.


Letter D Block

Letter D should measure
2 3/4" x 5" at this point
which is the unfinished size.


Letter E Block


Letter E should measure
2 3/4" x 5" at this point
which is the unfinished size.


Letter N


Letter N should measure
2 3/4" x 5" at this point
which is the unfinished size.


YaY!
Now that your letters are sewn
it's time to join them together
with the "F" strips.
Take note that there is no F strip
between the R and D letters...
just sew them together.
After joining it should measure
5" x 17" at this point.
(unfinished)

I pressed towards the strips.
Next I added the D borders to the top
and the bottom and lastly I added
the E borders onto each side.
I pressed towards the borders.
It should measure
6 1/2" x 18 1/2" at this point
(unfinished)
Okay let's do the scalloped border!!

Sew an Easy Corner Triangle (C)
onto the top corners of each
rectangle (A)
and press towards the triangles.

Make 24.
Each rectangle should measure
1 1/2" x 2 1/2" at this point.
I used my 2 1/2" Trim - It Ruler
to trim mine up if needed.

The four corners for the
scalloped border (B)
all have just one Easy Corner Triangle
sewn onto one corner.
Again press towards the triangles.

Make four!

For the sides borders sew 2 rectangles
together and then add one
of the corners onto each end.
Press all these seams open.
Add these to the garden block first
and press away from the scallops.
For each of the top and bottom scalloped
borders sew 10 rectangles together
and press all these seams open.
Now add to the top and bottom
and press away from the scallops.
At this point it should now measure
8 1/2" x 20 1/2"

Final step!
Add the side background "G" Borders
to each side and press towards
those "G" background borders.
!!Wowzers!!
That was a lot for this cute
garden sign and now it's completed
and I love it sew much!!

"GARDEN BLOCK"
should now measure
8 1/2" x 22 1/2"
at this point (unfinished)

What an accomplishment this week's blocks
are for all of us making our quilt!!!

Up to this point if your blocks
are all appliquéd and trimmed up
you have been able to sew sections
1 thru 7 together.
Yeeesss!!!
After next week you can
sew section 8 together as well.
I'm so proud of you all!!
Next week I'll be right back here
for three more block tutorials
Blue Bird - Seedlings and
Fruit Basket Block
In the meantime...
happy gardening!
xx
Lori

No comments:
Post a Comment