"THE BIG FINISH!"
Welcome to Week Nineteen of the
"CALICO GARDEN"
Sew Along!
YaY!!!
It's the big finish post:)
If you have been following along
you know that each week I have bee
doing step by step tutorials
on each and every block for the quilt.
We made the
Calico Garden Quilt
90" x 90"
We made the quilt with my latest fabric
collection called Calico...
I hope that you all have
enjoyed the process...
your templates and your fabric kit!!
If you are just starting up now
and you still need a kit ...
just do a quick google search for
"Calico Garden Quilt Kit"
to find shops who still have some left.
We used the
Calico Garden
Sew Simple Shapes
I posted the
post which details all of the supplies
for the sew along and how it worked.
I have also given the link there
for the free PDF Download
of the Sew Along Guide
to download the sew along guide
if you need it.
As per usual for week one in my
Sew Simple Shape Sew Alongs
the FIRST week tutorial is a video.
Because I have my own
I have posted the
Blue Coneflower Block
Tutorial there.
to visit my channel and watch the
tutorial and I hope that you love it!
Pretty please leave me a comment
over there and let me know:)
If you like what you see
and my other videos there...
click on subscribe and click on the bell
to be notified whenever
I post another tutorial:)
that I showed you
how to make in my video:)
for the tutorial on my
PURPLE CONEFLOWER BLOCK
to go to my tutorial for the
CALICO STAR FLOWER BLOCK
to go to my tutorial for the
Morning Glory Blocks
to go to my tutorial for the
PRIMROSE BLOCKS
to go to my tutorial for the
RED ROSES and MUMS BLOCK
to go to my tutorial for the
Forget Me Not Block
to go to my tutorial for the
PICKET FENCE and GRASS BLOCKS
to go to my prepping tutorial for
HENS and ROOT VEGGIES
to go to my tutorial on the
HOLLYHOCKS and
RAKE and SHOVEL BLOCK
to go to my tutorial for the
GARDEN GIRL
to go to my tutorial for the
BEE SKEP BLOCK
to go to my tutorial for the
TOMATOES BLOCK
Last week we made the
Click on the name of the blocks
to go to these tutorials!
to go to my tutorial for the
WHEEL BARROW BLOCK
for my tutorial on the
GARDEN TOOLS BLOCK
CLIMBING VINE BLOCK
BEES BLOCK
for my tutorial on the
"BUTTERFLY BLOCKS"
"SNAIL BLOCK"
"GARDEN BLOCK"
for my tutorial on making the
"SEEDLINGS BLOCK"
"BLUE BIRD BLOCK"
and the...
"FRUIT BASKET BLOCK"
for my tutorial on making the
"BROWN BIRD BLOCK"
"SPOOL AND FLOWER BLOCKS"
for my tutorial on the
"TULIP BLOCK"
"PINK PEONY BLOCK"
and
"CABBAGE BLOCK"
for the tutorials on these blocks!
"APPLE BLOCK"
"PEACH BLOCK"
"PLUM BLOCK"
"PEAR BLOCK"
"PINK CHERRIES BLOCK"
Before I show you all the pictures
of my finished quilt I thought that
I would show you what my quilt
looked like when I pinned and glue basted
the remaining appliqués after the
bottom sections were sewn together.
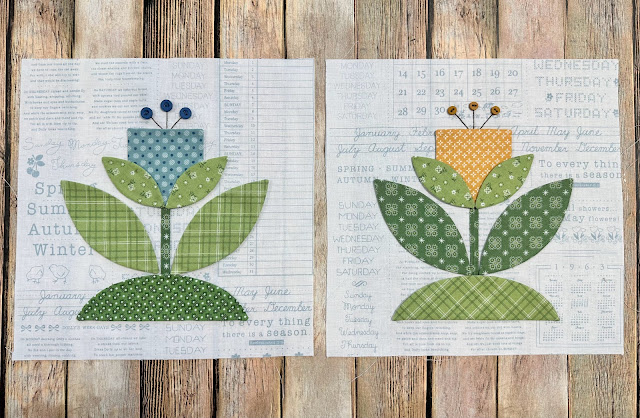
I just used my design wall
as a giant design board...haha
And the following are close ups
of what they looked like
right before applique...
in no particular order:)
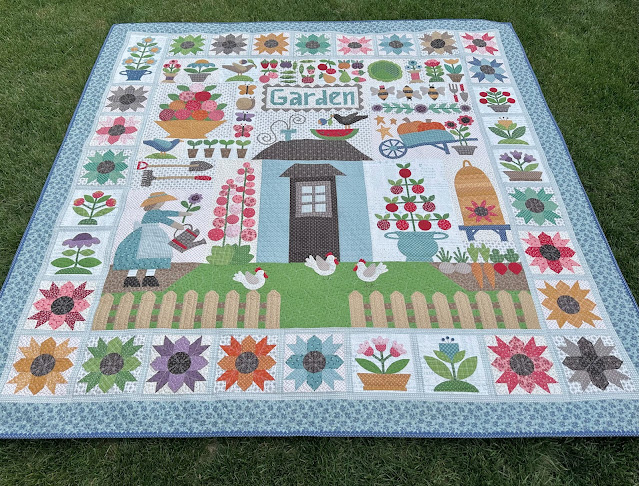
Now for the photos of my finished quilt:)
I'm sew happy with it and Juli did
an amazing job on the quilting!
I took my first photo
here at my garden gate...
and I think it goes perfectly
in my cottage garden!
The colors of the fabric reflect
the colors of the garden flowers:)
Then I laid my quilt out on the
grass for some top down shots
so that you could see the
beautiful quilting in each block.
I still need to add the door nob button
onto the door of the potting shed
and some buttons on her shoes!!
But as I've said several times
you can choose if you sew your buttons
on before or after the quilting.
It's all up to you because
"you are the boss of your own quilt"
Then right at dusk I carried my quilt
to the upstairs deck for even more photos:)
I have enjoyed making my
Calico Garden Quilt
so very much!!!
Thank you from the bottom of my heart
for sewing with me and for
making your quilt...
and for all of your many many
very kind words about this quilt
and my design
and especially my Calico fabric!
It just makes me so happy
to know how much you love it
and I really thank you kindly.
Bee Vintage fabric collection
and the set of
Bee Vintage Sew Simple Shapes
And making this
Bee Vintage Sampler Quilt
I will be doing the Bee Prepared
post for that sew along
here in a few short weeks
June 19th to bee exact!
Block One in my virtual
Spring Quilt Market video
last week and also told you more about it.
I did show and tell of Home Town fabric
pre yardage that comes in July
and told you all about
Bee Dots and introduced you to
MERCANTILE!!
to watch my video and to
get all the latest
Bee in my Bonnet news:)
I'll meet you back here in a few weeks...
xx
Lori


2 comments:
I love the way your quilt turned out. It is beautiful. I wish I knew who quilted this for you as I would love to use them for mine, if I ever get it finished. You are an awesome designer.
I love everything you create. Your fabrics and patterns take me back to sewing with my grandma. I love to watch your Sew Alongs. I've learned so much from you and I am grateful for your generous spirit. Thank you!
Post a Comment